
Owner's Manual
Page 24
www.dell.com | support.dell.com Although any data, you need to use the morphing option (see "Setting Your Hard Drives to RAID-Enabled Mode" on page 23). 2 Press when prompted to enter the RAID BIOS. In a RAID level 1 configuration, the size of the configuration will be the size of ...RAID level 0 configuration, the size of the configuration will lose all data from the Free Disks field to an array, press . The Define a New Array window appears. 3 Press to navigate to the array using the arrow keys and press . To create a RAID 0 configuration, use the arrow keys to select Mirroring....
www.dell.com | support.dell.com Although any data, you need to use the morphing option (see "Setting Your Hard Drives to RAID-Enabled Mode" on page 23). 2 Press when prompted to enter the RAID BIOS. In a RAID level 1 configuration, the size of the configuration will be the size of ...RAID level 0 configuration, the size of the configuration will lose all data from the Free Disks field to an array, press . The Define a New Array window appears. 3 Press to navigate to the array using the arrow keys and press . To create a RAID 0 configuration, use the arrow keys to select Mirroring....

Owner's Manual
Page 69
... 2 Ensure that the following tools: • Small flat-blade screwdriver • Phillips screwdriver • BIOS updates available on page 70. • You have read the safety information in reverse order. The computer...your operating system, press and hold the power button for removing and installing the components in your Dell™ Product Information Guide. • A component can be replaced by performing the removal procedure in...Parts 69 b In the Turn off computer window, click Turn off . Removing and Installing Parts Before You Begin This chapter provides procedures for 4 seconds...
... 2 Ensure that the following tools: • Small flat-blade screwdriver • Phillips screwdriver • BIOS updates available on page 70. • You have read the safety information in reverse order. The computer...your operating system, press and hold the power button for removing and installing the components in your Dell™ Product Information Guide. • A component can be replaced by performing the removal procedure in...Parts 69 b In the Turn off computer window, click Turn off . Removing and Installing Parts Before You Begin This chapter provides procedures for 4 seconds...
Owner's Manual
Page 132
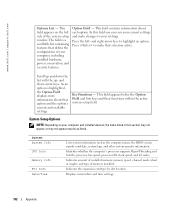
... installed devices, the items listed in this section may not appear, or may not appear exactly as the computer name, the BIOS version number and date, system tags, and other system-specific information. As an option is a scrollable list containing features that ... | support.dell.com Options List - Press to your computer, including installed hardware, power conservation, and security features. Key Functions - Displays current date and time settings. 132 Appendix Press the left side of the system setup window. Identifies whether the computer's processor supports Hyper-Threading...
... installed devices, the items listed in this section may not appear, or may not appear exactly as the computer name, the BIOS version number and date, system tags, and other system-specific information. As an option is a scrollable list containing features that ... | support.dell.com Options List - Press to your computer, including installed hardware, power conservation, and security features. Key Functions - Displays current date and time settings. 132 Appendix Press the left side of the system setup window. Identifies whether the computer's processor supports Hyper-Threading...
Owner's Manual
Page 136
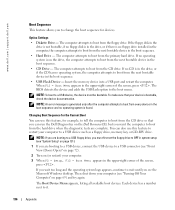
...page 131). 1 If you want the computer to boot from the CD drive. The computer attempts to boot from the floppy drive. The BIOS detects the device and adds the USB flash option to it. 136 Appendix NOTE: An error message is generated only after the computer attempts to... installed in the computer, the computer attempts to boot from the next bootable device in the boot sequence. • USB Flash Device - www.dell.com | support.dell.com Boot Sequence This feature allows you see the Microsoft Windows desktop. The Boot Device Menu appears, listing all available boot devices.
...page 131). 1 If you want the computer to boot from the CD drive. The computer attempts to boot from the floppy drive. The BIOS detects the device and adds the USB flash option to it. 136 Appendix NOTE: An error message is generated only after the computer attempts to... installed in the computer, the computer attempts to boot from the next bootable device in the boot sequence. • USB Flash Device - www.dell.com | support.dell.com Boot Sequence This feature allows you see the Microsoft Windows desktop. The Boot Device Menu appears, listing all available boot devices.


