User's Guide
Page 3
... information 7 About your printer 8 Thank you for choosing this printer!...8 Minimizing your printer's environmental impact...8 Finding information about the printer...9 Understanding the parts of the printer...11 Ordering and replacing supplies 13 Replacing ink cartridges...13 Ordering ink cartridges...14 Recycling Dell products...15 Using the printer control panel buttons and menus 16 Using the printer control panel...16 Using...
... information 7 About your printer 8 Thank you for choosing this printer!...8 Minimizing your printer's environmental impact...8 Finding information about the printer...9 Understanding the parts of the printer...11 Ordering and replacing supplies 13 Replacing ink cartridges...13 Ordering ink cartridges...14 Recycling Dell products...15 Using the printer control panel buttons and menus 16 Using the printer control panel...16 Using...

User's Guide
Page 4
...reducing images...46 Adjusting copy quality...46 Making a copy lighter or darker...47 Collating copies using the printer control panel...47 Repeating an image on one page...48 Copying multiple pages on one sheet...48 Making a duplex copy manually...48 Canceling copy jobs...49 Scanning 50 Tips for scanning...50... 52 Scanning directly to e-mail...53 Scanning to a PDF...53 Scanning FAQ...53 Canceling scan jobs...54 Networking 55 Installing the printer on a wireless network...55 Advanced wireless setup...59 Networking FAQ...63 Maintaining the printer 73 Maintaining ink cartridges...73 Contents 4
...reducing images...46 Adjusting copy quality...46 Making a copy lighter or darker...47 Collating copies using the printer control panel...47 Repeating an image on one page...48 Copying multiple pages on one sheet...48 Making a duplex copy manually...48 Canceling copy jobs...49 Scanning 50 Tips for scanning...50... 52 Scanning directly to e-mail...53 Scanning to a PDF...53 Scanning FAQ...53 Canceling scan jobs...54 Networking 55 Installing the printer on a wireless network...55 Advanced wireless setup...59 Networking FAQ...63 Maintaining the printer 73 Maintaining ink cartridges...73 Contents 4
User's Guide
Page 8
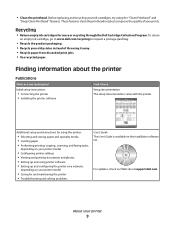
...and other resources. These modes can scan documents or photographs and save . About your printer 8 The Power Saver feature puts the printer in the Print Preview dialog or the printer display (depending on one sheet. Conserving energy • Eco-Mode. Conserving ink • Use Quick Print or.... After all, you are ideal for printing documents that came with fewer cartridges. Minimizing your printer's environmental impact We are committed to protecting the environment and are continually improving our printers to print more than normal and are the reason we do what we could...
...and other resources. These modes can scan documents or photographs and save . About your printer 8 The Power Saver feature puts the printer in the Print Preview dialog or the printer display (depending on one sheet. Conserving energy • Eco-Mode. Conserving ink • Use Quick Print or.... After all, you are ideal for printing documents that came with fewer cartridges. Minimizing your printer's environmental impact We are committed to protecting the environment and are continually improving our printers to print more than normal and are the reason we do what we could...
User's Guide
Page 9
... quality of throwing it here Setup documentation The setup documentation came with the printer. • Clean the printhead. Finding information about the printer Publications What are you looking for reuse or recycling through the Dell Cartridge Collection Program. About your old printer instead of your prints. These features clean the printhead nozzles to request a postage...
... quality of throwing it here Setup documentation The setup documentation came with the printer. • Clean the printhead. Finding information about the printer Publications What are you looking for reuse or recycling through the Dell Cartridge Collection Program. About your old printer instead of your prints. These features clean the printhead nozzles to request a postage...
User's Guide
Page 10
...-minute technical changes, or advanced at the same time, then documentation and drivers for technical reference material for your printer • Replacement cartridges Dell Printer Supplies Web site-dell.com/supplies You can be available in the printer Program folder or on the desktop, depending on your computer. technicians • Supplies and accessories for experienced users...
...-minute technical changes, or advanced at the same time, then documentation and drivers for technical reference material for your printer • Replacement cartridges Dell Printer Supplies Web site-dell.com/supplies You can be available in the printer Program folder or on the desktop, depending on your computer. technicians • Supplies and accessories for experienced users...

User's Guide
Page 12
1 6 2 5 3 4 Use the To 1 Scanner glass Scan and copy photos and documents. 2 Security slot Install an anti-theft cable on your printer 12 Warning-Potential Damage: Do not touch the USB port except when plugging in or removing a USB cable or installation cable. 5 Printhead Install, replace, or remove ink cartridges. 6 Scanner unit • Access the ink cartridges and printhead. • Remove paper jams. About your printer. 3 Power supply with port Connect the printer to a power source. 4 USB port Connect the printer to a computer using a USB cable.
1 6 2 5 3 4 Use the To 1 Scanner glass Scan and copy photos and documents. 2 Security slot Install an anti-theft cable on your printer 12 Warning-Potential Damage: Do not touch the USB port except when plugging in or removing a USB cable or installation cable. 5 Printhead Install, replace, or remove ink cartridges. 6 Scanner unit • Access the ink cartridges and printhead. • Remove paper jams. About your printer. 3 Power supply with port Connect the printer to a power source. 4 USB port Connect the printer to a computer using a USB cable.
User's Guide
Page 13
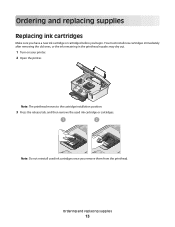
Note: The printhead moves to the cartridge installation position. 3 Press the release tab, and then remove the used ink cartridge or cartridges. 1 2 Note: Do not reinstall used ink cartridges once you begin. Ordering and replacing supplies 13 You must install new cartridges immediately after removing the old ones, or the ink remaining in the printhead nozzles may dry out. 1 Turn on your printer. 2 Open the printer. Ordering and replacing supplies Replacing ink cartridges Make sure you have a new ink cartridge or cartridges before you remove them from the printhead.
Note: The printhead moves to the cartridge installation position. 3 Press the release tab, and then remove the used ink cartridge or cartridges. 1 2 Note: Do not reinstall used ink cartridges once you begin. Ordering and replacing supplies 13 You must install new cartridges immediately after removing the old ones, or the ink remaining in the printhead nozzles may dry out. 1 Turn on your printer. 2 Open the printer. Ordering and replacing supplies Replacing ink cartridges Make sure you have a new ink cartridge or cartridges before you remove them from the printhead.
User's Guide
Page 14
... on the Dell Web site at www.dell.com/supplies. Use two hands to install each of the ink cartridges. 4 Remove the new cartridges from the foil, and then remove the protective cap from each cartridge. 2 1 Note: Install the ink cartridges immediately after removing the protective cap to avoid exposing the ink to air. 5 Close the printer.
... on the Dell Web site at www.dell.com/supplies. Use two hands to install each of the ink cartridges. 4 Remove the new cartridges from the foil, and then remove the protective cap from each cartridge. 2 1 Note: Install the ink cartridges immediately after removing the protective cap to avoid exposing the ink to air. 5 Close the printer.
User's Guide
Page 23
... software, and then select Install Additional Software from the Software Already Installed screen. Using the printer software 23 Printer software Use the Dell Printer Home (referred to as Printer Home) Dell Fast Pics (referred to as Fast Pics) To • Launch applications or programs. &#...PDF. • Adjust settings for the printer. • Order supplies. • Maintain ink cartridges. • Print a test page. • Register the printer. • Contact technical support. If you did not install these additional programs during printer installation When you do. Manage, edit...
... software, and then select Install Additional Software from the Software Already Installed screen. Using the printer software 23 Printer software Use the Dell Printer Home (referred to as Printer Home) Dell Fast Pics (referred to as Fast Pics) To • Launch applications or programs. &#...PDF. • Adjust settings for the printer. • Order supplies. • Maintain ink cartridges. • Print a test page. • Register the printer. • Contact technical support. If you did not install these additional programs during printer installation When you do. Manage, edit...
User's Guide
Page 30
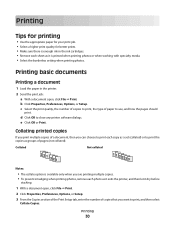
... as groups of pages (not collated). c Select the print quality, the number of copies to print, the type of paper to close any printer software dialogs. b Click Properties, Preferences, Options, or Setup. Printing Tips for printing • Use the appropriate paper for your print job. ...Select the borderless setting when printing photos. e Click OK or Print. Printing basic documents Printing a document 1 Load the paper in the ink cartridges. • Remove each sheet as it is available only when you are printing multiple copies. • To prevent smudging when printing photos, ...
... as groups of pages (not collated). c Select the print quality, the number of copies to print, the type of paper to close any printer software dialogs. b Click Properties, Preferences, Options, or Setup. Printing Tips for printing • Use the appropriate paper for your print job. ...Select the borderless setting when printing photos. e Click OK or Print. Printing basic documents Printing a document 1 Load the paper in the ink cartridges. • Remove each sheet as it is available only when you are printing multiple copies. • To prevent smudging when printing photos, ...
User's Guide
Page 73
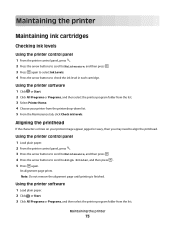
... Start. 3 Click All Programs or Programs, and then select the printer program folder from the printer drop-down list. 5 From the Maintenance tab, click Check ink levels. Maintaining the printer 73 Maintaining the printer Maintaining ink cartridges Checking ink levels Using the printer control panel 1 From the printer control panel, press . 2 Press the arrow buttons to scroll...
... Start. 3 Click All Programs or Programs, and then select the printer program folder from the printer drop-down list. 5 From the Maintenance tab, click Check ink levels. Maintaining the printer 73 Maintaining the printer Maintaining ink cartridges Checking ink levels Using the printer control panel 1 From the printer control panel, press . 2 Press the arrow buttons to scroll...
User's Guide
Page 74
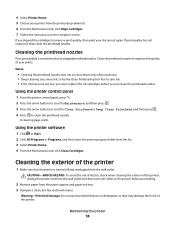
...electric shock when cleaning the exterior of the printer 1 Make sure that the printer is sometimes due to the printer before you must replace the ink cartridges before proceeding. 2 Remove paper from the printer drop-down list. 6 From the Maintenance tab, click Align cartridges. 7 Follow the instructions on the computer... buttons to scroll to Clean Printhead or Deep Clean Printhead, and then press . 4 Press to improve the quality of the printer. If you aligned the cartridges to save ink. • If the ink levels are too low, you can clean the printhead nozzles. Cleaning the printhead...
...electric shock when cleaning the exterior of the printer 1 Make sure that the printer is sometimes due to the printer before you must replace the ink cartridges before proceeding. 2 Remove paper from the printer drop-down list. 6 From the Maintenance tab, click Align cartridges. 7 Follow the instructions on the computer... buttons to scroll to Clean Printhead or Deep Clean Printhead, and then press . 4 Press to improve the quality of the printer. If you aligned the cartridges to save ink. • If the ink levels are too low, you can clean the printhead nozzles. Cleaning the printhead...
User's Guide
Page 76
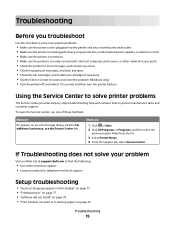
..., and resolve any jams. • Check the ink cartridges, and install new cartridges if necessary. • Use the Service Center to locate and solve the problem (Windows only). • Turn the printer off, wait about 10 seconds, and then turn the printer back on. Method 2 1 Click or Start. 2... select Service Center. If Troubleshooting does not solve your problem Visit our Web site at support.dell.com to printer maintenance tasks and customer support. To open the Service Center, use one of these methods: Method 1 If it appears on page 79 Troubleshooting 76 Using the Service ...
..., and resolve any jams. • Check the ink cartridges, and install new cartridges if necessary. • Use the Service Center to locate and solve the problem (Windows only). • Turn the printer off, wait about 10 seconds, and then turn the printer back on. Method 2 1 Click or Start. 2... select Service Center. If Troubleshooting does not solve your problem Visit our Web site at support.dell.com to printer maintenance tasks and customer support. To open the Service Center, use one of these methods: Method 1 If it appears on page 79 Troubleshooting 76 Using the Service ...

User's Guide
Page 79
...REMOVE AND RECONNECT THE USB CABLE CONNECTED TO YOUR PRINTER CHECK THE USB CONNECTION 1 Check the USB cable for any obvious damage. The USB port is damaged, then use a new one or more of the printhead. 3 Close the printer. The cartridges should click firmly into the wall outlet, and ...then turn on , and then open the printer. 2 Make sure the cartridges are inserted correctly. If the cable is marked with a USB...
...REMOVE AND RECONNECT THE USB CABLE CONNECTED TO YOUR PRINTER CHECK THE USB CONNECTION 1 Check the USB cable for any obvious damage. The USB port is damaged, then use a new one or more of the printhead. 3 Close the printer. The cartridges should click firmly into the wall outlet, and ...then turn on , and then open the printer. 2 Make sure the cartridges are inserted correctly. If the cable is marked with a USB...
User's Guide
Page 80
... to fit, make sure the printhead is properly seated, and then try one or more information. Press to Align Printer, and the press . RECONNECT THE PRINTER POWER SUPPLY 1 Turn off slowly, then the printer is marked with a USB symbol. Note: Do not remove the alignment ...more of the computer. REINSTALL THE INK CARTRIDGES AND DEEP CLEAN AND ALIGN THE PRINTHEAD 1 Reinstall the ink cartridges, see "Replacing ink cartridges" on the printer. REMOVE AND REINSTALL THE PRINTER SOFTWARE Printer is finished. An alignment page prints. If the printer will not come out of Power Saver ...
... to fit, make sure the printhead is properly seated, and then try one or more information. Press to Align Printer, and the press . RECONNECT THE PRINTER POWER SUPPLY 1 Turn off slowly, then the printer is marked with a USB symbol. Note: Do not remove the alignment ...more of the computer. REINSTALL THE INK CARTRIDGES AND DEEP CLEAN AND ALIGN THE PRINTHEAD 1 Reinstall the ink cartridges, see "Replacing ink cartridges" on the printer. REMOVE AND REINSTALL THE PRINTER SOFTWARE Printer is finished. An alignment page prints. If the printer will not come out of Power Saver ...
User's Guide
Page 83
... solutions do not remove the streaks or lines on the printed image, then contact technical support. SELECT A HIGHER PRINT QUALITY FROM THE PRINTER SOFTWARE MAKE SURE THE INK CARTRIDGES ARE PROPERLY INSTALLED ALIGN THE PRINTHEAD CLEAN OR DEEP CLEAN THE PRINTHEAD NOZZLES Note: If these minimum print margin settings: • Left..." on page 84 Poor quality at the edges of the page If the "Before you troubleshoot" checklist does not solve the problem, then try one or more of the following : CHECK MINIMUM PRINT SETTINGS Unless you troubleshoot" checklist does not solve the problem, then try...
... solutions do not remove the streaks or lines on the printed image, then contact technical support. SELECT A HIGHER PRINT QUALITY FROM THE PRINTER SOFTWARE MAKE SURE THE INK CARTRIDGES ARE PROPERLY INSTALLED ALIGN THE PRINTHEAD CLEAN OR DEEP CLEAN THE PRINTHEAD NOZZLES Note: If these minimum print margin settings: • Left..." on page 84 Poor quality at the edges of the page If the "Before you troubleshoot" checklist does not solve the problem, then try one or more of the following : CHECK MINIMUM PRINT SETTINGS Unless you troubleshoot" checklist does not solve the problem, then try...

User's Guide
Page 104
... I improving scan quality 53 incorrect language appears on display 77 index cards 28 information finding 9 information needed for setting up printer on wireless network 56 infrastructure network 67 ink conserving 8 ink cartridges ordering 14 replacing 13 ink levels checking 73 inserting a memory card or flash drive 35 installation cable 66, 67 installing...
... I improving scan quality 53 incorrect language appears on display 77 index cards 28 information finding 9 information needed for setting up printer on wireless network 56 infrastructure network 67 ink conserving 8 ink cartridges ordering 14 replacing 13 ink levels checking 73 inserting a memory card or flash drive 35 installation cable 66, 67 installing...
User's Guide
Page 106
reducing an image 46 repeating an image 48 replacing ink cartridges 13 resetting internal wireless print server to factory default settings 89 resetting to factory defaults 21 resuming print job 44 reverse page order 31 S safety ... the computer 86 security wireless network 55 security information wireless network 65 security key 65 selecting the wireless port 98 Service Center 76 setting up printer on wireless network (Windows) 57 settings timeout disabling 19 setup troubleshooting cannot print through USB 81 incorrect language appears on display 77 page does not...
reducing an image 46 repeating an image 48 replacing ink cartridges 13 resetting internal wireless print server to factory default settings 89 resetting to factory defaults 21 resuming print job 44 reverse page order 31 S safety ... the computer 86 security wireless network 55 security information wireless network 65 security key 65 selecting the wireless port 98 Service Center 76 setting up printer on wireless network (Windows) 57 settings timeout disabling 19 setup troubleshooting cannot print through USB 81 incorrect language appears on display 77 page does not...


