
Dell™ Technology Guide
Page 3
Contents 1 Finding Information 23 Start Button 23 Microsoft Windows Help and Support 24 Windows Vista 25 Windows® XP 25 Control Panel 26 Information About Installed Hardware 26 Device Manager 26 Hardware Devices Installed on Your Computer 27 Programs Installed on Your Computer 28 Wireless Networking 28 Dell Support Website 29 Technical Support 29 Customer Service 30 Warranty Information 30 Dell Forums 31 Contact Us 31 BIOS (System Setup Program) Settings 31 2 Microsoft Windows Desktop 33 Overview 33 Taskbar 34 Contents 3
Contents 1 Finding Information 23 Start Button 23 Microsoft Windows Help and Support 24 Windows Vista 25 Windows® XP 25 Control Panel 26 Information About Installed Hardware 26 Device Manager 26 Hardware Devices Installed on Your Computer 27 Programs Installed on Your Computer 28 Wireless Networking 28 Dell Support Website 29 Technical Support 29 Customer Service 30 Warranty Information 30 Dell Forums 31 Contact Us 31 BIOS (System Setup Program) Settings 31 2 Microsoft Windows Desktop 33 Overview 33 Taskbar 34 Contents 3
Dell™ Technology Guide
Page 21
Changing Boot Sequence to a USB Device . . . . 310 Changing the BIOS Settings 310 Viewing the BIOS Settings 311 Upgrading the BIOS (Flashing the BIOS 311 22 Ports 313 USB Port 313 IEEE 1394 Port 314 RS232 Serial Port 315 Parallel Port 316 eSATA Port 317 Modem 318 Ethernet Port 319 Keyboard and Mouse Port (PS2 320 VGA Port 321 DVI-I Port 322 S-Video TV-Out Port 323 Component Video 324 Composite Video 325 HDMI Port 326 DisplayPort 327 S/PDIF Port (Coaxial RCA 328 Contents 21
Changing Boot Sequence to a USB Device . . . . 310 Changing the BIOS Settings 310 Viewing the BIOS Settings 311 Upgrading the BIOS (Flashing the BIOS 311 22 Ports 313 USB Port 313 IEEE 1394 Port 314 RS232 Serial Port 315 Parallel Port 316 eSATA Port 317 Modem 318 Ethernet Port 319 Keyboard and Mouse Port (PS2 320 VGA Port 321 DVI-I Port 322 S-Video TV-Out Port 323 Component Video 324 Composite Video 325 HDMI Port 326 DisplayPort 327 S/PDIF Port (Coaxial RCA 328 Contents 21
Dell™ Technology Guide
Page 31
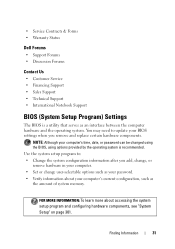
... operating system. FOR MORE INFORMATION: To learn more about your computer's time, date, or password can be changed using the BIOS, using options provided by the operating system is a utility that serves as your password. • Verify information about accessing the... system setup program and configuring hardware components, see "System Setup" on page 301. • Service Contracts & Forms • Warranty Status Dell Forums • Support Forums • Discussion Forums Contact Us • Customer Service • Financing Support • Sales Support • Technical Support...
... operating system. FOR MORE INFORMATION: To learn more about your computer's time, date, or password can be changed using the BIOS, using options provided by the operating system is a utility that serves as your password. • Verify information about accessing the... system setup program and configuring hardware components, see "System Setup" on page 301. • Service Contracts & Forms • Warranty Status Dell Forums • Support Forums • Discussion Forums Contact Us • Customer Service • Financing Support • Sales Support • Technical Support...
Dell™ Technology Guide
Page 89
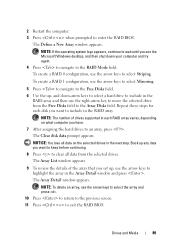
...Free Disks field. 6 Use the up- To create a RAID 1 configuration, use the arrow keys to select Mirroring. 5 Press to navigate to enter the RAID BIOS. NOTICE: You lose all data from the Free Disks field to an array, press . The Array Detail window appears. The Array List window appears. 9 To...The Clear disk data prompt appears. The Define a New Array window appears. NOTE: To delete an array, use the arrow keys to exit the RAID BIOS. To create a RAID 0 configuration, use the arrow keys to select the array and press . 10 Press to return to the previous screen. 11 Press...
...Free Disks field. 6 Use the up- To create a RAID 1 configuration, use the arrow keys to select Mirroring. 5 Press to navigate to enter the RAID BIOS. NOTICE: You lose all data from the Free Disks field to an array, press . The Array Detail window appears. The Array List window appears. 9 To...The Clear disk data prompt appears. The Define a New Array window appears. NOTE: To delete an array, use the arrow keys to exit the RAID BIOS. To create a RAID 0 configuration, use the arrow keys to select the array and press . 10 Press to return to the previous screen. 11 Press...
Dell™ Technology Guide
Page 130
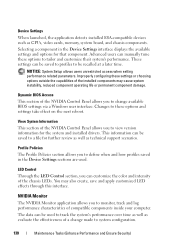
...outside the capabilities of compatible components inside your computer. This information can customize the color and intensity of a change available BIOS settings via a Windows user interface. Profile Policies The Profile Policies section allows you to monitor, track and log performance... a later time. Improperly configuring these options to system configuration. 130 Maintenance Tasks (Enhance Performance and Ensure Security) Dynamic BIOS Access This section of the NVIDIA Control Panel allows you to change made to tailor and customize their system's performance. ...
...outside the capabilities of compatible components inside your computer. This information can customize the color and intensity of a change available BIOS settings via a Windows user interface. Profile Policies The Profile Policies section allows you to monitor, track and log performance... a later time. Improperly configuring these options to system configuration. 130 Maintenance Tasks (Enhance Performance and Ensure Security) Dynamic BIOS Access This section of the NVIDIA Control Panel allows you to change made to tailor and customize their system's performance. ...
Dell™ Technology Guide
Page 141
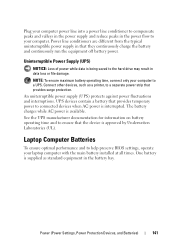
... being saved to connected devices when AC power is available. See the UPS manufacturer documentation for information on battery operating time and to help preserve BIOS settings, operate your laptop computer with the main battery installed at all times.
... being saved to connected devices when AC power is available. See the UPS manufacturer documentation for information on battery operating time and to help preserve BIOS settings, operate your laptop computer with the main battery installed at all times.
Dell™ Technology Guide
Page 167
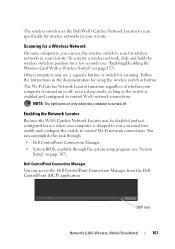
...Network Locator Because the Wi-Fi Catcher Network Locator may use the wireless switch to scan for scanning. The wireless switch uses the Dell Wi-Fi Catcher Network Locator to scan specifically for use when your computer is shipped to you, you can use a separate button ... must first enable and configure the switch to control Wi-Fi network connections. You can accomplish this task through: • Dell ControlPoint Connection Manager • System BIOS, available through the system setup program (see "Enabling/Disabling the Wireless Card With a Wireless Switch" on only when the computer...
...Network Locator Because the Wi-Fi Catcher Network Locator may use the wireless switch to scan for scanning. The wireless switch uses the Dell Wi-Fi Catcher Network Locator to scan specifically for use when your computer is shipped to you, you can use a separate button ... must first enable and configure the switch to control Wi-Fi network connections. You can accomplish this task through: • Dell ControlPoint Connection Manager • System BIOS, available through the system setup program (see "Enabling/Disabling the Wireless Card With a Wireless Switch" on only when the computer...
Dell™ Technology Guide
Page 276
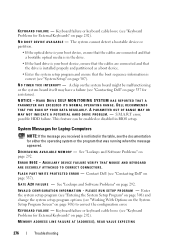
... "Keyboard Problems for either the operating system or the program that the boot sequence information is not listed in BIOS setup. K E Y B O A R D F A I N T E R R U P T - DELL RECOMMENDS THAT YOU BACK UP YOUR DATA REGULARLY. D E C R E A S I N G A V A I L A B L E - P L E A S E R U N S E T U P P R O G R A M - N O B O O T D E V I C E A V A I L A B L E M E M O R Y...Entering the System Setup Program" on page 308) and change the system setup program options (see "Contacting Dell" on page 308) to correct the configuration error. MEMORY ADDRESS LINE FAILURE AT (ADDRESS), READ VALUE EXPECTING...
... "Keyboard Problems for either the operating system or the program that the boot sequence information is not listed in BIOS setup. K E Y B O A R D F A I N T E R R U P T - DELL RECOMMENDS THAT YOU BACK UP YOUR DATA REGULARLY. D E C R E A S I N G A V A I L A B L E - P L E A S E R U N S E T U P P R O G R A M - N O B O O T D E V I C E A V A I L A B L E M E M O R Y...Entering the System Setup Program" on page 308) and change the system setup program options (see "Contacting Dell" on page 308) to correct the configuration error. MEMORY ADDRESS LINE FAILURE AT (ADDRESS), READ VALUE EXPECTING...
Dell™ Technology Guide
Page 310
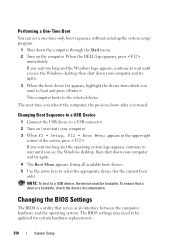
... to a USB Device 1 Connect the USB device to a USB connector. 2 Turn on the computer. Changing the BIOS Settings The BIOS is bootable, check the device documentation. The BIOS settings may need to be bootable. When the DELL logo appears, press immediately. The next time you see the Windows desktop, then shut down the computer...
... to a USB Device 1 Connect the USB device to a USB connector. 2 Turn on the computer. Changing the BIOS Settings The BIOS is bootable, check the device documentation. The BIOS settings may need to be bootable. When the DELL logo appears, press immediately. The next time you see the Windows desktop, then shut down the computer...
Dell™ Technology Guide
Page 311
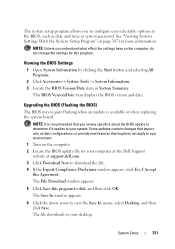
...the computer, do not change the settings for this program to disk, and then click OK. This BIOS Version/Date item displays the BIOS version and date. Upgrading the BIOS (Flashing the BIOS) The BIOS may not apply to your environment. 1 Turn on page 307 for your desktop. NOTE: It is...File Download window appears. 5 Click Save this program. The Save In window appears. 6 Click the down arrow to your computer at the Dell Support website at support.dell.com. 3 Click Download Now to download the file. 4 If the Export Compliance Disclaimer window appears, click Yes, I Accept this Agreement. ...
...the computer, do not change the settings for this program to disk, and then click OK. This BIOS Version/Date item displays the BIOS version and date. Upgrading the BIOS (Flashing the BIOS) The BIOS may not apply to your environment. 1 Turn on page 307 for your desktop. NOTE: It is...File Download window appears. 5 Click Save this program. The Save In window appears. 6 Click the down arrow to your computer at the Dell Support website at support.dell.com. 3 Click Download Now to download the file. 4 If the Export Compliance Disclaimer window appears, click Yes, I Accept this Agreement. ...
Dell™ Technology Guide
Page 312
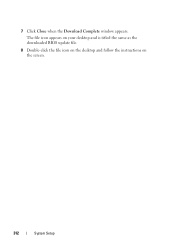
The file icon appears on your desktop and is titled the same as the downloaded BIOS update file. 8 Double-click the file icon on the desktop and follow the instructions on the screen. 312 System Setup 7 Click Close when the Download Complete window appears.
The file icon appears on your desktop and is titled the same as the downloaded BIOS update file. 8 Double-click the file icon on the desktop and follow the instructions on the screen. 312 System Setup 7 Click Close when the Download Complete window appears.
Dell™ Technology Guide
Page 339
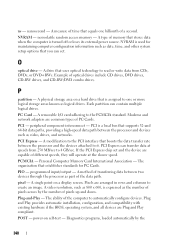
... utility) that helps to enable technologies such as Native Command Queuing (NCQ) and hot plug. A dedicated graphics port that powers your particular computer. antivirus software - BIOS - The form of electricity that allows system memory to be used for informational purposes only and may or may not describe features included with your...
... utility) that helps to enable technologies such as Native Command Queuing (NCQ) and hot plug. A dedicated graphics port that powers your particular computer. antivirus software - BIOS - The form of electricity that allows system memory to be used for informational purposes only and may or may not describe features included with your...
Dell™ Technology Guide
Page 348
... resolution, such as 800 x 600, is expressed as part of a second. Plug and Play provides automatic installation, configuration, and compatibility with existing hardware if the BIOS, operating system, and all devices are common types of optical drives include CD drives, DVD drives, CD-RW drives, and CD-RW/DVD combo drives...
... resolution, such as 800 x 600, is expressed as part of a second. Plug and Play provides automatic installation, configuration, and compatibility with existing hardware if the BIOS, operating system, and all devices are common types of optical drives include CD drives, DVD drives, CD-RW drives, and CD-RW/DVD combo drives...
Dell™ Technology Guide
Page 349
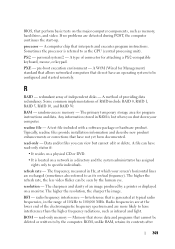
BIOS, that interprets and executes program instructions. If no problems are at typical radio frequencies, in RAM is referred to as infrared and light. A computer chip ...
BIOS, that interprets and executes program instructions. If no problems are at typical radio frequencies, in RAM is referred to as infrared and light. A computer chip ...
Dell™ Technology Guide
Page 351
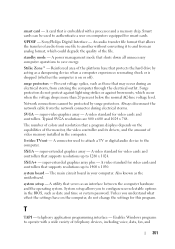
... - system board - Strike Zone™ - Reinforced area of telephony devices, including voice, data, fax, and 351 A connector used to configure user-selectable options in the BIOS, such as an interface between the computer hardware and the operating system. SXGA+ - A utility that may occur during electrical storms. SVGA - Sony/Philips Digital Interface...
... - system board - Strike Zone™ - Reinforced area of telephony devices, including voice, data, fax, and 351 A connector used to configure user-selectable options in the BIOS, such as an interface between the computer hardware and the operating system. SXGA+ - A utility that may occur during electrical storms. SVGA - Sony/Philips Digital Interface...
Setup Guide
Page 10
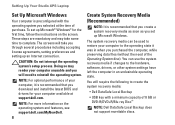
... available at the time of purchase. Setting Up Your Studio XPS Laptop Set Up Microsoft Windows Your computer is recommended that you download and install the latest BIOS and drivers for the first time, follow the instructions on the operating system and features, see support.dell.com/MyNewDell. 8 Create System Recovery Media (Recommended) NOTE...
... available at the time of purchase. Setting Up Your Studio XPS Laptop Set Up Microsoft Windows Your computer is recommended that you download and install the latest BIOS and drivers for the first time, follow the instructions on the operating system and features, see support.dell.com/MyNewDell. 8 Create System Recovery Media (Recommended) NOTE...

Setup Guide
Page 42
...over current error - Your USB device needs more power for assistance). To start the search. 3. Type hardware troubleshooter in the BIOS setup (see "Contacting Dell" on page 58 for it to resolve the incompatibility. Hard Drive SELF MONITORING SYSTEM has reported that best describes the problem and... follow the remaining troubleshooting steps. 40 Dell recommends that you can be enabled or disabled in the search field and press to connect the USB device, or if your data...
...over current error - Your USB device needs more power for assistance). To start the search. 3. Type hardware troubleshooter in the BIOS setup (see "Contacting Dell" on page 58 for it to resolve the incompatibility. Hard Drive SELF MONITORING SYSTEM has reported that best describes the problem and... follow the remaining troubleshooting steps. 40 Dell recommends that you can be enabled or disabled in the search field and press to connect the USB device, or if your data...
Setup Guide
Page 43
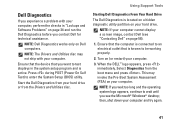
... and Software Problems" on your computer cannot display a screen image, contact Dell (see the Microsoft® Windows® desktop; Using Support Tools Starting Dell Diagnostics From Your Hard Drive The Dell Diagnostics is connected to enter the System Setup (BIOS) utility. When the DELL™ logo appears, press immediately. Select Diagnostics from the Drivers and...
... and Software Problems" on your computer cannot display a screen image, contact Dell (see the Microsoft® Windows® desktop; Using Support Tools Starting Dell Diagnostics From Your Hard Drive The Dell Diagnostics is connected to enter the System Setup (BIOS) utility. When the DELL™ logo appears, press immediately. Select Diagnostics from the Drivers and...


