Dell™ Technology Guide
Page 5
Features and Benefits 56 NVIDIA SLI and ATI Crossfire Technologies 56 4 Navigation Devices (Mouse, Keyboard, Touch Pad 57 Mouse 58 Controlling the Speed of the Mouse Buttons. . . . 58 Controlling the Speed of the Scroll Wheel . . . . . 59 Cleaning a Non-Optical ...Circular Scrolling 62 Single Finger Zoom 63 Cleaning the Touch Pad 63 Using a Touch Pointer (Track Stick or Tablet PC Pen 63 Contents 5 Windows® XP 49 Troubleshooting 50 Choosing the Best Display Settings 50 Setting the Display Resolution for External LCD Monitors 50 Setting the Display for Multiple Monitors 51...
Features and Benefits 56 NVIDIA SLI and ATI Crossfire Technologies 56 4 Navigation Devices (Mouse, Keyboard, Touch Pad 57 Mouse 58 Controlling the Speed of the Mouse Buttons. . . . 58 Controlling the Speed of the Scroll Wheel . . . . . 59 Cleaning a Non-Optical ...Circular Scrolling 62 Single Finger Zoom 63 Cleaning the Touch Pad 63 Using a Touch Pointer (Track Stick or Tablet PC Pen 63 Contents 5 Windows® XP 49 Troubleshooting 50 Choosing the Best Display Settings 50 Setting the Display Resolution for External LCD Monitors 50 Setting the Display for Multiple Monitors 51...
Dell™ Technology Guide
Page 6
...Pointing Device (Mouse 64 Troubleshooting a USB Pointing Device 64 Keyboard 65 Customizing Your Keyboard 66 Backlit Keyboard 66 Changing the Input Language of Your Keyboard 67 Using the Numeric Keypad on a Laptop Computer 68 General Keyboard Shortcuts 69 5 Printers-Settings and Drivers 71 Accessing Printer ...Information 71 Changing Printer Settings 72 For Windows Vista 72 For Windows® XP 72 Setting up Printers 73 Adding a Printer 73 Setting...
...Pointing Device (Mouse 64 Troubleshooting a USB Pointing Device 64 Keyboard 65 Customizing Your Keyboard 66 Backlit Keyboard 66 Changing the Input Language of Your Keyboard 67 Using the Numeric Keypad on a Laptop Computer 68 General Keyboard Shortcuts 69 5 Printers-Settings and Drivers 71 Accessing Printer ...Information 71 Changing Printer Settings 72 For Windows Vista 72 For Windows® XP 72 Setting up Printers 73 Adding a Printer 73 Setting...
Dell™ Technology Guide
Page 20
Dell Support Center 285 Solving Problems 287 Battery Problems 287 Drive Problems 287 Optical Drive Problems 288 E-Mail, Modem, and Internet Problems . . . . . 289 Error Messages 290 IEEE 1394 Device Problems 291 Keyboard Problems for External Keyboards . . . 292 Lockups and Software Problems 292 Memory Problems 294 Mouse Problems 295 Network Problems 296 Power Problems 296...
Dell Support Center 285 Solving Problems 287 Battery Problems 287 Drive Problems 287 Optical Drive Problems 288 E-Mail, Modem, and Internet Problems . . . . . 289 Error Messages 290 IEEE 1394 Device Problems 291 Keyboard Problems for External Keyboards . . . 292 Lockups and Software Problems 292 Memory Problems 294 Mouse Problems 295 Network Problems 296 Power Problems 296...
Dell™ Technology Guide
Page 21
Changing Boot Sequence to a USB Device . . . . 310 Changing the BIOS Settings 310 Viewing the BIOS Settings 311 Upgrading the BIOS (Flashing the BIOS 311 22 Ports 313 USB Port 313 IEEE 1394 Port 314 RS232 Serial Port 315 Parallel Port 316 eSATA Port 317 Modem 318 Ethernet Port 319 Keyboard and Mouse Port (PS2 320 VGA Port 321 DVI-I Port 322 S-Video TV-Out Port 323 Component Video 324 Composite Video 325 HDMI Port 326 DisplayPort 327 S/PDIF Port (Coaxial RCA 328 Contents 21
Changing Boot Sequence to a USB Device . . . . 310 Changing the BIOS Settings 310 Viewing the BIOS Settings 311 Upgrading the BIOS (Flashing the BIOS 311 22 Ports 313 USB Port 313 IEEE 1394 Port 314 RS232 Serial Port 315 Parallel Port 316 eSATA Port 317 Modem 318 Ethernet Port 319 Keyboard and Mouse Port (PS2 320 VGA Port 321 DVI-I Port 322 S-Video TV-Out Port 323 Component Video 324 Composite Video 325 HDMI Port 326 DisplayPort 327 S/PDIF Port (Coaxial RCA 328 Contents 21
Dell™ Technology Guide
Page 57
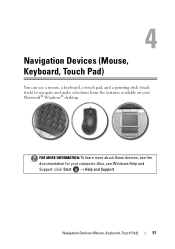
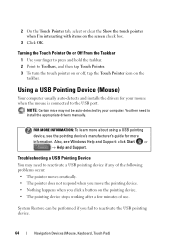
FOR MORE INFORMATION: To learn more about these devices, see Windows Help and Support: click Start → Help and Support. Navigation Devices (Mouse, Keyboard, Touch Pad) You can use a mouse, a keyboard, a touch pad, and a pointing stick (track stick) to navigate and make selections from the features available on your computer. Navigation Devices (Mouse, Keyboard, Touch Pad) 57 Also, see the documentation for your Microsoft® Windows® desktop.
FOR MORE INFORMATION: To learn more about these devices, see Windows Help and Support: click Start → Help and Support. Navigation Devices (Mouse, Keyboard, Touch Pad) You can use a mouse, a keyboard, a touch pad, and a pointing stick (track stick) to navigate and make selections from the features available on your computer. Navigation Devices (Mouse, Keyboard, Touch Pad) 57 Also, see the documentation for your Microsoft® Windows® desktop.
Dell™ Technology Guide
Page 58
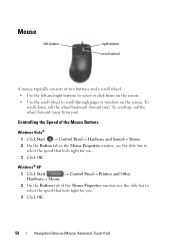
... on the screen. • Use the scroll wheel to select the speed that feels right for you. 3 Click OK. 58 Navigation Devices (Mouse, Keyboard, Touch Pad) Windows® XP 1 Click Start → Control Panel→ Printers and Other Hardware→ Mouse. 2 On the Buttons tab of the Mouse Properties window, use the...
... on the screen. • Use the scroll wheel to select the speed that feels right for you. 3 Click OK. 58 Navigation Devices (Mouse, Keyboard, Touch Pad) Windows® XP 1 Click Start → Control Panel→ Printers and Other Hardware→ Mouse. 2 On the Buttons tab of the Mouse Properties window, use the...
Dell™ Technology Guide
Page 59
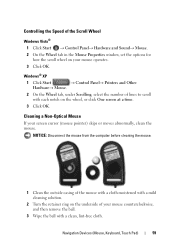
...2 Turn the retainer ring on the underside of your screen cursor (mouse pointer) skips or moves abnormally, clean the mouse. Navigation Devices (Mouse, Keyboard, Touch Pad) 59 Cleaning a Non-Optical Mouse If your mouse counterclockwise, and then remove the ball. 3 Wipe the ball with each notch on... your mouse operates. 3 Click OK. Windows® XP 1 Click Start → Control Panel→ Printers and Other Hardware→ Mouse. 2 On the Wheel tab, under Scrolling, select the number of...
...2 Turn the retainer ring on the underside of your screen cursor (mouse pointer) skips or moves abnormally, clean the mouse. Navigation Devices (Mouse, Keyboard, Touch Pad) 59 Cleaning a Non-Optical Mouse If your mouse counterclockwise, and then remove the ball. 3 Wipe the ball with each notch on... your mouse operates. 3 Click OK. Windows® XP 1 Click Start → Control Panel→ Printers and Other Hardware→ Mouse. 2 On the Wheel tab, under Scrolling, select the number of...
Dell™ Technology Guide
Page 60
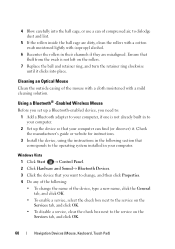
..., you need to: 1 Add a Bluetooth adapter to your computer, if one is not left on the Services tab, and click OK. 60 Navigation Devices (Mouse, Keyboard, Touch Pad) Cleaning an Optical Mouse Clean the outside casing of the following section that corresponds to the service on the rollers. 7 Replace the ball...
..., you need to: 1 Add a Bluetooth adapter to your computer, if one is not left on the Services tab, and click OK. 60 Navigation Devices (Mouse, Keyboard, Touch Pad) Cleaning an Optical Mouse Clean the outside casing of the following section that corresponds to the service on the rollers. 7 Replace the ball...
Dell™ Technology Guide
Page 61
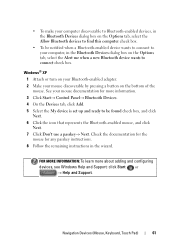
...Bluetooth Devices. 4 On the Devices tab, click Add. 5 Select the My device is set up and ready to connect check box. Windows® XP 1 Attach or turn on the bottom of the mouse. See your mouse discoverable by pressing a button on your Bluetooth-enabled adapter. 2 Make your.... 6 Click the icon that represents the Bluetooth-enabled mouse, and click Next. 7 Click Don't use a passkey→ Next. Navigation Devices (Mouse, Keyboard, Touch Pad) 61 Check the documentation for the mouse for more about adding and configuring devices, see Windows Help and Support: click Start or →...
...Bluetooth Devices. 4 On the Devices tab, click Add. 5 Select the My device is set up and ready to connect check box. Windows® XP 1 Attach or turn on the bottom of the mouse. See your mouse discoverable by pressing a button on your Bluetooth-enabled adapter. 2 Make your.... 6 Click the icon that represents the Bluetooth-enabled mouse, and click Next. 7 Click Don't use a passkey→ Next. Navigation Devices (Mouse, Keyboard, Touch Pad) 61 Check the documentation for the mouse for more about adding and configuring devices, see Windows Help and Support: click Start or →...
Dell™ Technology Guide
Page 62
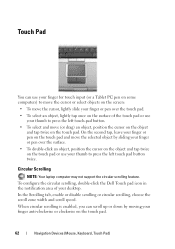
...To select an object, lightly tap once on the surface of your finger anti-clockwise or clockwise on the touch pad. 62 Navigation Devices (Mouse, Keyboard, Touch Pad) In the Scrolling tab, enable or disable scrolling or circular scrolling, choose the scroll zone width and scroll speed. To configure the ...circular scrolling, double-click the Dell Touch pad icon in the notification area of the touch pad or use your thumb to press the left touch pad button twice. On the...
...To select an object, lightly tap once on the surface of your finger anti-clockwise or clockwise on the touch pad. 62 Navigation Devices (Mouse, Keyboard, Touch Pad) In the Scrolling tab, enable or disable scrolling or circular scrolling, choose the scroll zone width and scroll speed. To configure the ...circular scrolling, double-click the Dell Touch pad icon in the notification area of the touch pad or use your thumb to press the left touch pad button twice. On the...
Dell™ Technology Guide
Page 63
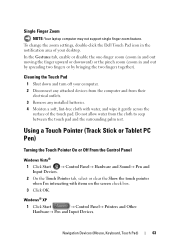
... screen check box. 3 Click OK. Cleaning the Touch Pad 1 Shut down and turn off your desktop. Navigation Devices (Mouse, Keyboard, Touch Pad) 63 To change the zoom settings, double-click the Dell Touch Pad icon in and out by spreading two fingers or by bringing the two fingers together). Using a Touch Pointer... (zoom in the notification area of the touch pad. Single Finger Zoom NOTE: Your laptop computer may not support single finger zoom feature. Windows® XP 1 Click Start → Control Panel→ Printers and Other Hardware→ Pen and Input Devices.
... screen check box. 3 Click OK. Cleaning the Touch Pad 1 Shut down and turn off your desktop. Navigation Devices (Mouse, Keyboard, Touch Pad) 63 To change the zoom settings, double-click the Dell Touch Pad icon in and out by spreading two fingers or by bringing the two fingers together). Using a Touch Pointer... (zoom in the notification area of the touch pad. Single Finger Zoom NOTE: Your laptop computer may not support single finger zoom feature. Windows® XP 1 Click Start → Control Panel→ Printers and Other Hardware→ Pen and Input Devices.
Dell™ Technology Guide
Page 64
... the pointing device's manufacturer's guide for your finger to press and hold the taskbar. 2 Point to reactivate the USB pointing device. 64 Navigation Devices (Mouse, Keyboard, Touch Pad) 2 On the Touch Pointer tab, select or clear the Show the touch pointer when I'm interacting with items on the pointing device. • The...
... the pointing device's manufacturer's guide for your finger to press and hold the taskbar. 2 Point to reactivate the USB pointing device. 64 Navigation Devices (Mouse, Keyboard, Touch Pad) 2 On the Touch Pointer tab, select or clear the Show the touch pointer when I'm interacting with items on the pointing device. • The...
Dell™ Technology Guide
Page 65
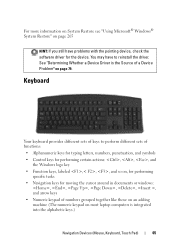
...cursor around in documents or windows: , , , , , , and arrow keys • Numeric keypad of a Device Problem" on page 79. Keyboard Your keyboard provides different sets of keys to reinstall the driver. See "Determining Whether a Device Driver is the Source of numbers grouped together like those on an... adding machine (The numeric keypad on most laptop computers is integrated into the alphabetic keys.) Navigation Devices (Mouse, Keyboard, Touch Pad) 65 For more information on System Restore see "Using Microsoft® Windows® System Restore" on page 265 HINT:...
...cursor around in documents or windows: , , , , , , and arrow keys • Numeric keypad of a Device Problem" on page 79. Keyboard Your keyboard provides different sets of keys to reinstall the driver. See "Determining Whether a Device Driver is the Source of numbers grouped together like those on an... adding machine (The numeric keypad on most laptop computers is integrated into the alphabetic keys.) Navigation Devices (Mouse, Keyboard, Touch Pad) 65 For more information on System Restore see "Using Microsoft® Windows® System Restore" on page 265 HINT:...
Dell™ Technology Guide
Page 66
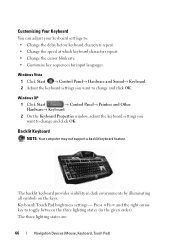
... key to change and click OK. The three lighting states are: 66 Navigation Devices (Mouse, Keyboard, Touch Pad) Backlit Keyboard NOTE: Your computer may not support a backlit keyboard feature. Customizing Your Keyboard You can adjust your keyboard settings to change and click OK. Windows XP 1 Click Start → Control Panel→ Printers and Other Hardware→...
... key to change and click OK. The three lighting states are: 66 Navigation Devices (Mouse, Keyboard, Touch Pad) Backlit Keyboard NOTE: Your computer may not support a backlit keyboard feature. Customizing Your Keyboard You can adjust your keyboard settings to change and click OK. Windows XP 1 Click Start → Control Panel→ Printers and Other Hardware→...
Dell™ Technology Guide
Page 67
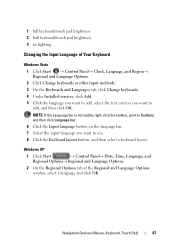
...XP 1 Click Start → Control Panel→ Date, Time, Language, and Regional Options→ Regional and Language Options. 2 On the Regional Options tab of Your Keyboard Windows Vista 1 Click Start → Control Panel→ Clock, Language, and Region→ Regional and Language Options. 2 Click Change keyboards or other input methods. 3 On the Keyboards... language you want to add, select the text services you want to use. 8 Click the Keyboard layout button, and then select a keyboard layout. NOTE: If the Language bar is not visible, right-click the taskbar, point to ...
...XP 1 Click Start → Control Panel→ Date, Time, Language, and Regional Options→ Regional and Language Options. 2 On the Regional Options tab of Your Keyboard Windows Vista 1 Click Start → Control Panel→ Clock, Language, and Region→ Regional and Language Options. 2 Click Change keyboards or other input methods. 3 On the Keyboards... language you want to add, select the text services you want to use. 8 Click the Keyboard layout button, and then select a keyboard layout. NOTE: If the Language bar is not visible, right-click the taskbar, point to ...

Dell™ Technology Guide
Page 68
Using the Numeric Keypad on a Laptop Computer numeric keypad Your laptop computer may have a numeric keypad integrated into the keyboard. The 9 light indicates that the keypad is active. • To disable the numeric keypad, press again. 68 Navigation Devices (Mouse, Keyboard, Touch Pad) The keypad corresponds to the keypad of an extended keyboard. • To type a number or symbol, press and hold and press the desired key. • To enable the numeric keypad, press .
Using the Numeric Keypad on a Laptop Computer numeric keypad Your laptop computer may have a numeric keypad integrated into the keyboard. The 9 light indicates that the keypad is active. • To disable the numeric keypad, press again. 68 Navigation Devices (Mouse, Keyboard, Touch Pad) The keypad corresponds to the keypad of an extended keyboard. • To type a number or symbol, press and hold and press the desired key. • To enable the numeric keypad, press .

Dell™ Technology Guide
Page 69
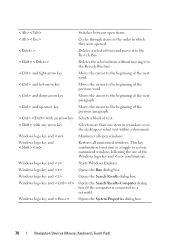
Highlight the desired icon to switch the display to that allow you to have multiple documents open items. Navigation Devices (Mouse, Keyboard, Touch Pad) 69 Renames the selected item. Cycles through screen elements in programs that option. Uses the arrow keys to activate a different... the Address bar list in the active program. Activates the menu bar in Windows Explorer. Copies a selected item. You can reprogram this keyboard shortcut to switch between open simultaneously). Undoes an action. Closes the active window (in a window or on an external monitor). General...
Highlight the desired icon to switch the display to that allow you to have multiple documents open items. Navigation Devices (Mouse, Keyboard, Touch Pad) 69 Renames the selected item. Cycles through screen elements in programs that option. Uses the arrow keys to activate a different... the Address bar list in the active program. Activates the menu bar in Windows Explorer. Copies a selected item. You can reprogram this keyboard shortcut to switch between open simultaneously). Undoes an action. Closes the active window (in a window or on an external monitor). General...
Dell™ Technology Guide
Page 70
... key Selects more than one item in which they were opened. Windows logo key and Opens the System Properties dialog box. 70 Navigation Devices (Mouse, Keyboard, Touch Pad) Windows logo key and Restores all open items. Cycles through items in the order in a window or on the desktop, or select text...
... key Selects more than one item in which they were opened. Windows logo key and Opens the System Properties dialog box. 70 Navigation Devices (Mouse, Keyboard, Touch Pad) Windows logo key and Restores all open items. Cycles through items in the order in a window or on the desktop, or select text...
Dell™ Technology Guide
Page 126
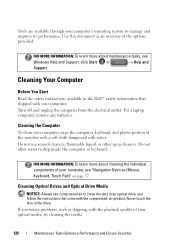
... → Help and Support. Cleaning the Computer To clean your computer, wipe the computer, keyboard, and plastic portion of the options provided. FOR MORE INFORMATION: To learn more about maintenance tasks, see "Navigation Devices ... 57. Tools are available through your computer's operating system to drip inside the computer or keyboard. Turn off and unplug the computer from the electrical outlet. Do not allow water to manage.... Cleaning Your Computer Before You Start Read the safety instructions available in the Dell™ safety information that come with water.
... → Help and Support. Cleaning the Computer To clean your computer, wipe the computer, keyboard, and plastic portion of the options provided. FOR MORE INFORMATION: To learn more about maintenance tasks, see "Navigation Devices ... 57. Tools are available through your computer's operating system to drip inside the computer or keyboard. Turn off and unplug the computer from the electrical outlet. Do not allow water to manage.... Cleaning Your Computer Before You Start Read the safety instructions available in the Dell™ safety information that come with water.
Dell™ Technology Guide
Page 268
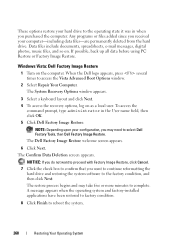
...was in the User name field, then click OK. 5 Click Dell Factory Image Restore. When the Dell logo appears, press several times to the factory condition, and then click Next. The System Recovery Options window appears. 3 Select a keyboard layout and click Next. 4 To access the recovery options, log... documents, spreadsheets, e-mail messages, digital photos, music files, and so on as a local user. Windows Vista: Dell Factory Image Restore 1 Turn on the computer. The Dell Factory Image Restore welcome screen appears. 6 Click Next. Any programs or files added since you may take five or ...
...was in the User name field, then click OK. 5 Click Dell Factory Image Restore. When the Dell logo appears, press several times to the factory condition, and then click Next. The System Recovery Options window appears. 3 Select a keyboard layout and click Next. 4 To access the recovery options, log... documents, spreadsheets, e-mail messages, digital photos, music files, and so on as a local user. Windows Vista: Dell Factory Image Restore 1 Turn on the computer. The Dell Factory Image Restore welcome screen appears. 6 Click Next. Any programs or files added since you may take five or ...


