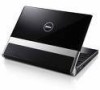
Setup Guide
Page 37
... back up your device has two USB cables, connect both of range may or may not indicate a potential hard drive problem - Dell recommends that a parameter has exceeded its normal operating range. Hardware Troubleshooter If a device is either not detected during the operating system setup...USB device needs more power for assistance). A chip on the system board might be enabled or disabled in the BIOS setup (see "Contacting Dell" on the Dell Support website at support.dell.com). No timer tick interrupt - A parameter out of them. Disconnect the USB device. This feature can ...
... back up your device has two USB cables, connect both of range may or may not indicate a potential hard drive problem - Dell recommends that a parameter has exceeded its normal operating range. Hardware Troubleshooter If a device is either not detected during the operating system setup...USB device needs more power for assistance). A chip on the system board might be enabled or disabled in the BIOS setup (see "Contacting Dell" on the Dell Support website at support.dell.com). No timer tick interrupt - A parameter out of them. Disconnect the USB device. This feature can ...
Service Manual
Page 1
... Vista start button logo are trademarks of your computer. Other trademarks and trade names may be used by Bluetooth SIG, Inc. Dell Inc. Dell™ Studio XPS™ 1640 Service Manual Before You Begin Base Cover Hard Drive Rear Caps Processor Heat Sink Processor Thermal Fan Memory Coin-Cell ...IEEE 1394 Module Subwoofer Audio Board System Board TV Tuner Card (Optional) eSATA Connector AC Adapter Connector Battery Latch Assembly Flashing the BIOS Notes, Notices, and Cautions NOTE: A NOTE indicates important information that helps you how to avoid the problem. and is ...
... Vista start button logo are trademarks of your computer. Other trademarks and trade names may be used by Bluetooth SIG, Inc. Dell Inc. Dell™ Studio XPS™ 1640 Service Manual Before You Begin Base Cover Hard Drive Rear Caps Processor Heat Sink Processor Thermal Fan Memory Coin-Cell ...IEEE 1394 Module Subwoofer Audio Board System Board TV Tuner Card (Optional) eSATA Connector AC Adapter Connector Battery Latch Assembly Flashing the BIOS Notes, Notices, and Cautions NOTE: A NOTE indicates important information that helps you how to avoid the problem. and is ...
Service Manual
Page 10
...pins. Hold a component such as a processor by its edges, not by its pins. Back to Contents Page Before You Begin Dell™ Studio XPS™ 1640 Service Manual Recommended Tools Turning Off Your Computer Before Working Inside Your Computer This section provides procedures for instructions. l ...with care. Ensure that the following tools: l Small flat-blade screwdriver l Phillips screwdriver l Hex nut driver l Processor extraction tool l BIOS upgrade CD Turning Off Your Computer NOTICE: To avoid losing data, save and close all open files and exit all open programs. 2. ...
...pins. Hold a component such as a processor by its edges, not by its pins. Back to Contents Page Before You Begin Dell™ Studio XPS™ 1640 Service Manual Recommended Tools Turning Off Your Computer Before Working Inside Your Computer This section provides procedures for instructions. l ...with care. Ensure that the following tools: l Small flat-blade screwdriver l Phillips screwdriver l Hex nut driver l Processor extraction tool l BIOS upgrade CD Turning Off Your Computer NOTICE: To avoid losing data, save and close all open files and exit all open programs. 2. ...
Service Manual
Page 12
... Download Now to boot and updates the new BIOS. The file icon appears on the computer. 3. Back to Contents Page Flashing the BIOS Dell™ Studio XPS™ 1640 Service Manual Flashing the BIOS From a CD Flashing the BIOS From the Hard Drive If a BIOS upgrade CD is provided with the new system... board, flash the BIOS from the hard drive. Select the Exit menu. 5....
... Download Now to boot and updates the new BIOS. The file icon appears on the computer. 3. Back to Contents Page Flashing the BIOS Dell™ Studio XPS™ 1640 Service Manual Flashing the BIOS From a CD Flashing the BIOS From the Hard Drive If a BIOS upgrade CD is provided with the new system... board, flash the BIOS from the hard drive. Select the Exit menu. 5....

Service Manual
Page 16
... turning the cam screw clockwise to secure the processor to Contents Page Replace the rear caps (see Replacing the Base Cover). 7. Update the BIOS using a BIOS upgrade CD (see Replacing the Processor Heat Sink). 5. NOTICE: To prevent intermittent contact between the ZIF-socket cam screw and the processor when...the pads to ensure that cover the central processor unit and the graphic processor unit. Replace the processor heat sink (see Flashing the BIOS). Slide the battery into the battery bay until it points to the triangle on the processor heat sink to the portions of the processor...
... turning the cam screw clockwise to secure the processor to Contents Page Replace the rear caps (see Replacing the Base Cover). 7. Update the BIOS using a BIOS upgrade CD (see Replacing the Processor Heat Sink). 5. NOTICE: To prevent intermittent contact between the ZIF-socket cam screw and the processor when...the pads to ensure that cover the central processor unit and the graphic processor unit. Replace the processor heat sink (see Flashing the BIOS). Slide the battery into the battery bay until it points to the triangle on the processor heat sink to the portions of the processor...
Service Manual
Page 43
...the system board includes a CD that provides a utility for transferring the Service Tag to Contents Page System Board Dell™ Studio XPS™ 1640 Service Manual Removing the System Board Replacing the System Board CAUTION: Before working inside your computer, ... IEEE 1394 Module). 13. Remove the IEEE 1394 module (see Removing the Mini-Card). 10. The system board's BIOS chip contains the Service Tag, which is not covered by your computer. Removing the System Board 1. Remove the base cover... board connectors. 18. Remove the palm rest (see Removing the Display Assembly). 16.
...the system board includes a CD that provides a utility for transferring the Service Tag to Contents Page System Board Dell™ Studio XPS™ 1640 Service Manual Removing the System Board Replacing the System Board CAUTION: Before working inside your computer, ... IEEE 1394 Module). 13. Remove the IEEE 1394 module (see Removing the Mini-Card). 10. The system board's BIOS chip contains the Service Tag, which is not covered by your computer. Removing the System Board 1. Remove the base cover... board connectors. 18. Remove the palm rest (see Removing the Display Assembly). 16.

Service Manual
Page 45
Follow the instructions that accompanied the replacement system board into the BIOS of the replacement system board. 20. Back to Contents Page Insert the BIOS upgrade CD that appear on the computer. Turn on the screen. NOTE: After you have replaced the system board, enter the computer Service Tag into the appropriate drive. 19.
Follow the instructions that accompanied the replacement system board into the BIOS of the replacement system board. 20. Back to Contents Page Insert the BIOS upgrade CD that appear on the computer. Turn on the screen. NOTE: After you have replaced the system board, enter the computer Service Tag into the appropriate drive. 19.


