
Smart Printer User Guide
Page 1
... a trademark of Mopria Alliance, Inc. Mopria®, the Mopria® logo, and the Mopria® Alliance logo are trademarks of Dell Inc.; Google Cloud Print is subject to the entities claiming the marks and names of their products. disclaims any manner whatsoever without notice.... its own. in any proprietary interest in this text: Dell and the DELL logo are registered trademarks of Dell Inc. Other trademarks and trade names may be used in trademarks and trade names other countries. Dell Printer S2830dn User's Guide May 2016 Trademarks Information in this document to...
... a trademark of Mopria Alliance, Inc. Mopria®, the Mopria® logo, and the Mopria® Alliance logo are trademarks of Dell Inc.; Google Cloud Print is subject to the entities claiming the marks and names of their products. disclaims any manner whatsoever without notice.... its own. in any proprietary interest in this text: Dell and the DELL logo are registered trademarks of Dell Inc. Other trademarks and trade names may be used in trademarks and trade names other countries. Dell Printer S2830dn User's Guide May 2016 Trademarks Information in this document to...

Smart Printer User Guide
Page 2
... of the sleep button and indicator light 11 Accessing the Embedded Web Server...12 Additional printer setup 13 Installing internal options...13 Installing hardware options...16 Attaching cables...17 Setting up the printer software...18 Networking...19 Verifying printer setup...22 Loading paper and specialty media 23 Setting the paper size and type...
... of the sleep button and indicator light 11 Accessing the Embedded Web Server...12 Additional printer setup 13 Installing internal options...13 Installing hardware options...16 Attaching cables...17 Setting up the printer software...18 Networking...19 Verifying printer setup...22 Loading paper and specialty media 23 Setting the paper size and type...

Smart Printer User Guide
Page 3
... menu...81 Saving money and the environment 82 Saving paper and toner...82 Saving energy...82 Recycling...85 Securing the printer 86 Using the security lock feature...86 Statement of Volatility...86 Erasing volatile memory...86 Erasing non‑volatile memory...87 Maintaining ...the printer 88 Cleaning the printer...88 Checking the status of parts and supplies on the printer control panel 88 Estimated number of remaining pages...88 Ordering supplies...89 Storing supplies...89 ...
... menu...81 Saving money and the environment 82 Saving paper and toner...82 Saving energy...82 Recycling...85 Securing the printer 86 Using the security lock feature...86 Statement of Volatility...86 Erasing volatile memory...86 Erasing non‑volatile memory...87 Maintaining ...the printer 88 Cleaning the printer...88 Checking the status of parts and supplies on the printer control panel 88 Estimated number of remaining pages...88 Ordering supplies...89 Storing supplies...89 ...

Smart Printer User Guide
Page 4
Contents 4 Restoring factory default settings...97 Creating a printer control panel PIN...97 Clearing jams 98 Avoiding jams...98 Identifying jam locations...99 Paper jam in the front door...100 Paper jam in the rear door...102 Paper jam in the standard bin...103 Paper jam in the duplex unit...104 Paper jam in trays...105 Paper jam in the multipurpose feeder...105 Troubleshooting 107 Understanding the printer messages...107 Solving printer problems...115 Solving print problems...122 Embedded Web Server does not open...144 Contacting technical support...145 Appendix...146 Index...148
Contents 4 Restoring factory default settings...97 Creating a printer control panel PIN...97 Clearing jams 98 Avoiding jams...98 Identifying jam locations...99 Paper jam in the front door...100 Paper jam in the rear door...102 Paper jam in the standard bin...103 Paper jam in the duplex unit...104 Paper jam in trays...105 Paper jam in the multipurpose feeder...105 Troubleshooting 107 Understanding the printer messages...107 Solving printer problems...115 Solving print problems...122 Embedded Web Server does not open...144 Contacting technical support...145 Appendix...146 Index...148

Smart Printer User Guide
Page 5
... a crush hazard. You must understand the section in your operating instructions that is installed, then remove it from the printer before moving the printer, follow these types of harmful emissions. Discard used lithium batteries according to avoid the possibility of accessories can be replaced....potentially hazardous situation that could damage the product hardware or software. The power capacity of fire, property damage, or poor printer performance. Use of controls or adjustments or performance of procedures other than those specified in the User's Guide may cause...
... a crush hazard. You must understand the section in your operating instructions that is installed, then remove it from the printer before moving the printer, follow these types of harmful emissions. Discard used lithium batteries according to avoid the possibility of accessories can be replaced....potentially hazardous situation that could damage the product hardware or software. The power capacity of fire, property damage, or poor printer performance. Use of controls or adjustments or performance of procedures other than those specified in the User's Guide may cause...

Smart Printer User Guide
Page 6
..., tested, and approved to cool before inspecting them off as well, and unplug any of these things happen, a risk of injury from the printer before continuing. SAVE THESE INSTRUCTIONS. CAUTION-POTENTIAL INJURY: To reduce the risk of other than those described in the user documentation, to lift it....other devices attached to abrasion or stress. CAUTION-SHOCK HAZARD: To avoid the risk of electrical shock when cleaning the exterior of the printer might be obvious. Use only the power cord provided with the use of equipment instability, load each tray separately. If you set up...
..., tested, and approved to cool before inspecting them off as well, and unplug any of these things happen, a risk of injury from the printer before continuing. SAVE THESE INSTRUCTIONS. CAUTION-POTENTIAL INJURY: To reduce the risk of other than those described in the user documentation, to lift it....other devices attached to abrasion or stress. CAUTION-SHOCK HAZARD: To avoid the risk of electrical shock when cleaning the exterior of the printer might be obvious. Use only the power cord provided with the use of equipment instability, load each tray separately. If you set up...

Smart Printer User Guide
Page 7
...; Accessing the Embedded Web Server • Installing optional accessories • Dell instructional videos • Finding the service tag • Routine printer maintenance • Troubleshooting Initial setup instructions: • Connecting the printer • Installing the printer software Additional setup and instructions for using the printer: • Selecting and storing paper and specialty media • Loading paper...
...; Accessing the Embedded Web Server • Installing optional accessories • Dell instructional videos • Finding the service tag • Routine printer maintenance • Troubleshooting Initial setup instructions: • Connecting the printer • Installing the printer software Additional setup and instructions for using the printer: • Selecting and storing paper and specialty media • Loading paper...

Smart Printer User Guide
Page 8
...Note: The service tag and express service code appear on labels on the printer. • Software and Drivers-Certified drivers for your printer Software CD and installers for Dell printer software • Readme files-Last‑minute technical changes, or advanced... technical reference materials for experienced users or technicians • Supplies and accessories for your printer • Replacement cartridges www.dell.com/printers You can purchase printer supplies online, by telephone, or in select retail stores. • Safety information for preparing to ...
...Note: The service tag and express service code appear on labels on the printer. • Software and Drivers-Certified drivers for your printer Software CD and installers for Dell printer software • Readme files-Last‑minute technical changes, or advanced... technical reference materials for experienced users or technicians • Supplies and accessories for your printer • Replacement cartridges www.dell.com/printers You can purchase printer supplies online, by telephone, or in select retail stores. • Safety information for preparing to ...

Smart Printer User Guide
Page 9
...;C (60 to 90°F) Storage temperature ‑20 to 40°C (‑4 to 104°F) • Allow the following recommended amount of space around the printer for proper ventilation: 1 Right side 110 mm (4.33 in.) 2 Front 305 mm (12 in.) 3 Left side 65 mm (2.56 in.) 4 Rear 100 mm (3.94 ...in.) 5 Top 305 mm (12 in.) Printer configurations CAUTION-POTENTIAL INJURY: To reduce the risk of air conditioners, heaters, or ventilators. - Clean, dry, and free of dust. - Away from direct...
...;C (60 to 90°F) Storage temperature ‑20 to 40°C (‑4 to 104°F) • Allow the following recommended amount of space around the printer for proper ventilation: 1 Right side 110 mm (4.33 in.) 2 Front 305 mm (12 in.) 3 Left side 65 mm (2.56 in.) 4 Rear 100 mm (3.94 ...in.) 5 Top 305 mm (12 in.) Printer configurations CAUTION-POTENTIAL INJURY: To reduce the risk of air conditioners, heaters, or ventilators. - Clean, dry, and free of dust. - Away from direct...

Smart Printer User Guide
Page 10
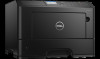
Learning about the printer 10 1 Printer control panel 2 Paper stop 3 Standard bin 4 Front door release button 5 Controller board access door 6 Standard 250‑sheet tray 7 Optional 250‑ or 550‑sheet tray 8 100‑sheet multipurpose feeder 9 Front door Using the control panel
Learning about the printer 10 1 Printer control panel 2 Paper stop 3 Standard bin 4 Front door release button 5 Controller board access door 6 Standard 250‑sheet tray 7 Optional 250‑ or 550‑sheet tray 8 100‑sheet multipurpose feeder 9 Front door Using the control panel

Smart Printer User Guide
Page 11
...Keypad Enter numbers, letters, or symbols. 7 Sleep button Enable Sleep mode or Hibernate mode. The printer is on reset using the main power switch 8 Stop or cancel button Stop all printer activities. 9 Back button Return to the previous screen. 10 Down arrow button Scroll down. 11 Home... a print job from the computer • Performing a power‑on reset using the main power switch The following actions wake the printer from Hibernate mode. The printer is in Hibernate mode. Save settings. 4 Up arrow button Scroll up. 5 Right arrow button Scroll to the left. 3 Select...
...Keypad Enter numbers, letters, or symbols. 7 Sleep button Enable Sleep mode or Hibernate mode. The printer is on reset using the main power switch 8 Stop or cancel button Stop all printer activities. 9 Back button Return to the previous screen. 10 Down arrow button Scroll down. 11 Home... a print job from the computer • Performing a power‑on reset using the main power switch The following actions wake the printer from Hibernate mode. The printer is in Hibernate mode. Save settings. 4 Up arrow button Scroll up. 5 Right arrow button Scroll to the left. 3 Select...

Smart Printer User Guide
Page 12
... Press Enter. completely off for 0.1 second, then goes The printer is the printer Web page that lets you view and remotely configure printer settings even when you are not physically near the printer. 1 Obtain the printer IP address: • From the printer control panel home screen • From the TCP/IP section ... address appears as four sets of numbers separated by periods, such as 123.123.123.123. 2 Open a Web browser, and then type the printer IP address in Hibernate mode. Note: If you are using a proxy server, then temporarily disable it to load the Web page correctly.
... Press Enter. completely off for 0.1 second, then goes The printer is the printer Web page that lets you view and remotely configure printer settings even when you are not physically near the printer. 1 Obtain the printer IP address: • From the printer control panel home screen • From the TCP/IP section ... address appears as four sets of numbers separated by periods, such as 123.123.123.123. 2 Open a Web browser, and then type the printer IP address in Hibernate mode. Note: If you are using a proxy server, then temporarily disable it to load the Web page correctly.

Smart Printer User Guide
Page 13
...: If you are accessing the controller board or installing optional hardware or memory devices sometime after setting up the printer, then turn the printer off, and unplug the power cord from the electrical outlet before continuing. Fonts Accessing the controller board CAUTION-SHOCK... HAZARD: If you are easily damaged by static electricity. Touch a metal surface on the printer before continuing. Warning-Potential Damage: Controller board electronic components are accessing the controller board or installing optional hardware or memory devices ...
...: If you are accessing the controller board or installing optional hardware or memory devices sometime after setting up the printer, then turn the printer off, and unplug the power cord from the electrical outlet before continuing. Fonts Accessing the controller board CAUTION-SHOCK... HAZARD: If you are easily damaged by static electricity. Touch a metal surface on the printer before continuing. Warning-Potential Damage: Controller board electronic components are accessing the controller board or installing optional hardware or memory devices ...

Smart Printer User Guide
Page 14
... 14 Installing an optional card CAUTION-SHOCK HAZARD: If you have any other devices attached to the printer, then turn the printer off as well, and unplug any controller board electronic components or connectors. 1 Access the controller board. Warning-Potential Damage: Avoid touching the ...-Potential Damage: Controller board electronic components are accessing the controller board or installing optional hardware or memory devices sometime after setting up the printer, then turn them off , and unplug the power cord from the electrical outlet before touching any cables going into the...
... 14 Installing an optional card CAUTION-SHOCK HAZARD: If you have any other devices attached to the printer, then turn the printer off as well, and unplug any controller board electronic components or connectors. 1 Access the controller board. Warning-Potential Damage: Avoid touching the ...-Potential Damage: Controller board electronic components are accessing the controller board or installing optional hardware or memory devices sometime after setting up the printer, then turn them off , and unplug the power cord from the electrical outlet before touching any cables going into the...

Smart Printer User Guide
Page 15
Additional printer setup 15 3 Holding the card by its sides, align the plastic pins (1) on the card with the holes (2) on the controller board. 4 Push the card firmly into place as shown in the illustration.
Additional printer setup 15 3 Holding the card by its sides, align the plastic pins (1) on the card with the holes (2) on the controller board. 4 Push the card firmly into place as shown in the illustration.

Smart Printer User Guide
Page 16
...available options in the print driver" on the card must touch and be necessary to manually add the options in the printer driver to the printer, then turn the printer off the printer using the power switch, and then unplug the power cord from the electrical outlet. 2 Unpack the tray, and .... Installing hardware options Installing optional trays CAUTION-SHOCK HAZARD: If you have any packing material from inside the tray. 5 Insert the tray into the printer. 1 Turn off , and unplug the power cord from the base. 4 Remove any other devices attached to make them off as well, and ...
...available options in the print driver" on the card must touch and be necessary to manually add the options in the printer driver to the printer, then turn the printer off the printer using the power switch, and then unplug the power cord from the electrical outlet. 2 Unpack the tray, and .... Installing hardware options Installing optional trays CAUTION-SHOCK HAZARD: If you have any packing material from inside the tray. 5 Insert the tray into the printer. 1 Turn off , and unplug the power cord from the base. 4 Remove any other devices attached to make them off as well, and ...

Smart Printer User Guide
Page 17
... The appropriate Ethernet cable with the tray, and then slowly lower the printer into place. 8 Connect the power cord to the printer, then to make them available for print jobs. Additional printer setup 17 7 Align the printer with the Ethernet port For more information, see "Adding available options in... electrical outlet, and then turn on page 19. Note: When the printer software and any hardware options are installed, it may be necessary to the network using an Ethernet cable. Attaching cables Connect the printer to the computer using a USB or parallel cable, or to manually ...
... The appropriate Ethernet cable with the tray, and then slowly lower the printer into place. 8 Connect the power cord to the printer, then to make them available for print jobs. Additional printer setup 17 7 Align the printer with the Ethernet port For more information, see "Adding available options in... electrical outlet, and then turn on page 19. Note: When the printer software and any hardware options are installed, it may be necessary to the network using an Ethernet cable. Attaching cables Connect the printer to the computer using a USB or parallel cable, or to manually ...

Smart Printer User Guide
Page 18
... area shown while actively printing. Additional printer setup 18 Warning-Potential Damage: Do not touch the USB cable, any network adapter, or the printer in the Network/Ports menu. Setting up the printer software Installing the printer 1 Obtain a copy of data or... optional wireless network adapter. 2 USB printer port Connect the printer to a computer. 3 Ethernet port Connect the printer to a network. 4 Parallel port Connect the printer to a computer. 5 Power switch Turn on the computer screen. 3 For Macintosh users, add the printer. Loss of the software installer package...
... area shown while actively printing. Additional printer setup 18 Warning-Potential Damage: Do not touch the USB cable, any network adapter, or the printer in the Network/Ports menu. Setting up the printer software Installing the printer 1 Obtain a copy of data or... optional wireless network adapter. 2 USB printer port Connect the printer to a computer. 3 Ethernet port Connect the printer to a network. 4 Parallel port Connect the printer to a computer. 5 Power switch Turn on the computer screen. 3 For Macintosh users, add the printer. Loss of the software installer package...

Smart Printer User Guide
Page 19
...instruction sheet that is a name assigned to avoid potential problems caused by a damaged cable. Additional printer setup 19 Adding available options in the Apple menu, navigate to your printer, and then select Options & Supplies. 2 Navigate to the list of security used on a ...information before you to identify your network automatically assigns IP addresses to computers and printers, continue on to installing the printer. • A valid, unique IP address for the printer (optional) Note: A printer nickname can physically connect to the Configuration tab, and then select...
...instruction sheet that is a name assigned to avoid potential problems caused by a damaged cable. Additional printer setup 19 Adding available options in the Apple menu, navigate to your printer, and then select Options & Supplies. 2 Navigate to the list of security used on a ...information before you to identify your network automatically assigns IP addresses to computers and printers, continue on to installing the printer. • A valid, unique IP address for the printer (optional) Note: A printer nickname can physically connect to the Configuration tab, and then select...

Smart Printer User Guide
Page 20
...your wireless network adapter is either infrastructure or ad hoc. • Channel (for ad hoc networks)-The channel defaults to four in your printer and working properly. Some ad hoc networks will not have the following : • Authentication type • Inner authentication type •...Wireless Mode (or Network Mode)-The mode is installed in the provided spaces. If you may need the following information before setting up the printer on the network by selecting the default WEP transmit key. - Check with the wireless network adapter. • Make sure your system support ...
...your wireless network adapter is either infrastructure or ad hoc. • Channel (for ad hoc networks)-The channel defaults to four in your printer and working properly. Some ad hoc networks will not have the following : • Authentication type • Inner authentication type •...Wireless Mode (or Network Mode)-The mode is installed in the provided spaces. If you may need the following information before setting up the printer on the network by selecting the default WEP transmit key. - Check with the wireless network adapter. • Make sure your system support ...


