Owner's Manual
Page 9
... 67 Attaching directly to the network (queue 76 9 Setting up for shared printing Point and print 83 Peer-to-peer 84 10 Configure paper trays Dell Workgroup Laser Printer S2500 86 Dell Workgroup Laser Printer S2500n 87 11 Verify printer setup Printing a menu settings page 90 Restoring factory defaults 92 Recommended method 92 Contents 9
... 67 Attaching directly to the network (queue 76 9 Setting up for shared printing Point and print 83 Peer-to-peer 84 10 Configure paper trays Dell Workgroup Laser Printer S2500 86 Dell Workgroup Laser Printer S2500n 87 11 Verify printer setup Printing a menu settings page 90 Restoring factory defaults 92 Recommended method 92 Contents 9
Owner's Manual
Page 39
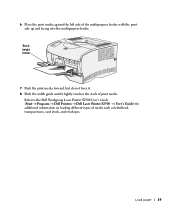
Refer to the Dell Workgroup Laser Printer S2500 User's Guide (Start → Programs → Dell Printers → Dell Laser Printer S2500 → User's Guide) for additional information on loading different types of print media. Load paper 39 Stack height limiter 7 Push the print media forward, but do not force it. 8 Slide the width guide until it lightly touches the stack of media such as letterhead, transparencies, card stock, and envelopes. 6 Place the print media against the left side of the multipurpose feeder, with the print side up and facing into the multipurpose feeder.
Refer to the Dell Workgroup Laser Printer S2500 User's Guide (Start → Programs → Dell Printers → Dell Laser Printer S2500 → User's Guide) for additional information on loading different types of print media. Load paper 39 Stack height limiter 7 Push the print media forward, but do not force it. 8 Slide the width guide until it lightly touches the stack of media such as letterhead, transparencies, card stock, and envelopes. 6 Place the print media against the left side of the multipurpose feeder, with the print side up and facing into the multipurpose feeder.
Owner's Manual
Page 85
10 SECTION 10 Configure paper trays Dell Workgroup Laser Printer S2500 Dell Workgroup Laser Printer S2500n
10 SECTION 10 Configure paper trays Dell Workgroup Laser Printer S2500 Dell Workgroup Laser Printer S2500n
Owner's Manual
Page 86
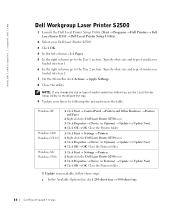
... → Device (or Options) → Update (or Update Now). 4 Click OK → OK. Close the Printers folder. www.dell.com/supplies | support.dell.com Dell Workgroup Laser Printer S2500 1 Launch the Dell Local Printer Setup Utility (Start → Programs → Dell Printers → Dell Laser Printer S2500 → Dell Local Printer Setup Utility). 2 Select your driver by following the instructions in the table. Windows XP Windows...
... → Device (or Options) → Update (or Update Now). 4 Click OK → OK. Close the Printers folder. www.dell.com/supplies | support.dell.com Dell Workgroup Laser Printer S2500 1 Launch the Dell Local Printer Setup Utility (Start → Programs → Dell Printers → Dell Laser Printer S2500 → Dell Local Printer Setup Utility). 2 Select your driver by following the instructions in the table. Windows XP Windows...
Owner's Manual
Page 87
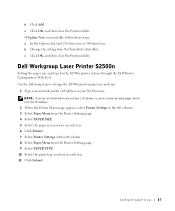
.... c Click OK, and then close the Printers folder. Dell Workgroup Laser Printer S2500n Setting the paper size and type for the S2500n printer is unavailable, follow these steps: a In the Options list, find 250-sheet tray or 500-sheet tray. Configure paper trays 87 Use the following steps to change the S2500n printer paper size and type: 1 Type your network...
.... c Click OK, and then close the Printers folder. Dell Workgroup Laser Printer S2500n Setting the paper size and type for the S2500n printer is unavailable, follow these steps: a In the Options list, find 250-sheet tray or 500-sheet tray. Configure paper trays 87 Use the following steps to change the S2500n printer paper size and type: 1 Type your network...
Owner's Manual
Page 90
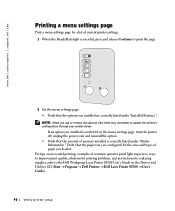
... page. 2 On the menu settings page: • Verify that the options you installed are configured for replacing supplies, refer to the Dell Workgroup Laser Printer S2500 User's Guide on the menu settings page, turn the printer off, unplug the power cord, and reinstall the option. • Verify that the paper trays are correctly listed under...
... page. 2 On the menu settings page: • Verify that the options you installed are configured for replacing supplies, refer to the Dell Workgroup Laser Printer S2500 User's Guide on the menu settings page, turn the printer off, unplug the power cord, and reinstall the option. • Verify that the paper trays are correctly listed under...


