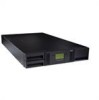
Dell Model TL2000/TL4000 Tape Library- User's Guide
Page 9
... of EIA units for round hole and square hole installations 4-7 Rear view of a rack showing the narrow part of a four - partition system 3-5 Configuration of the rail 4-8 2U library side screws to remove . . . . 4-8 2U library rack anchors and mounting brackets 4-9 Sliding the 2U library into the rack 4-9 Sliding the 4U library into...
Dell Model TL2000/TL4000 Tape Library- User's Guide
Page 62
..., skip this procedure and go to "Attaching the Library to a Server" on racks with square holes. ( 3 ) 4-6 Dell PowerVault TL2000 Tape Library and TL4000 Tape Library User's Guide observe local health and safety requirements and guidelines for securing the tops of the mounting...11. obtain adequate assistance to the library: 1. Verify that your library in a rack, perform the following contents (see Figure 4-4 on page 4-7): v Packaged in plastic material: - 2 rails (not shown) - 2 mounting brackets ( 1 ) v Packaged in the small bag with no label: - 1 Torx wrench ( 5 ) - 2 anchors ( 4 ) - 2...
Dell Model TL2000/TL4000 Tape Library- User's Guide
Page 63
A 4U library requires 4U (7 in your rack for round hole and 2 square hole installation 3 Wide Gaps within the EIA unit 4 Narrow Gaps between EIA units Chapter 4. Figure 4-4. Examples of EIA units for round hole and square hole installations 1 Two EIA units for your library to be installed and, using a pencil, mark the location on each vertical rail in .) of rack space. Rack Kit mounting hardware 2. Determine the location in .) of rack space. 1 3 2 1 4 2 a77ug133 Figure 4-5. Installation and Configuration 4-7 Note: A 2U library requires 2U (3.5 in your rack.
Dell Model TL2000/TL4000 Tape Library- User's Guide
Page 64
... 1 in Figure 4-8 on page 4-9 on the 4U library are similar. 1 Figure 4-7. 2U library side screws to each rail points toward the other to form a shelf, secure one rail to remove 5. Using the screws for your rack type (round holes or square holes) and a #2 Phillips screwdriver and ensuring ... each rail to the rear of the rail 4. Rear view of a rack showing the narrow part of the rack. Each rail requires 2U of your library using the longest counter-sunk screws included in Figure 4-7. Install the library rack anchors ( 2 ) as shown in the rack kit. 4-8 Dell PowerVault TL2000 Tape ...
Dell Model TL2000/TL4000 Tape Library- User's Guide
Page 65
...Install the library mounting brackets ( 1 ) as shown in the rack kit. (The 4U rack anchors and mounting brackets are flush with the vertical rack rails. 1 2 a77ug012 Figure 4-8. 2U library rack anchors and mounting brackets 6. When the library stops, gently push the library to lock the anchors installed on ...page 4-10). Sliding the 2U library into the rack Chapter 4. With library rack anchors and mounting brackets installed, slide the library onto the rails (as shown on the 2U library on each side of the library using the screw that was removed from your library and an additional ...
Dell Model TL2000/TL4000 Tape Library- User's Guide
Page 217
... Replace 10-17 Ensure that the black pull-out tab remains extended when inserting a drive sled in the lowest drive position in the drive slot rails. On the rear of the lowest drive sled position. v Slowly push the drive sled forward until the drive is unplugged from the power source for...
Dell Model TL2000/TL4000 Tape Library- User's Guide
Page 219
... replacement library enclosure if this was not done previously (see "Installing Your Drive(s) in the enclosure rails. 2) Push the power supply forward until it from the replacement library enclosure in the defective library to return to Dell. a. 1) The Error LED ( 4 in the replacement library enclosure. Unplug the power cord from the power...
Dell Model TL2000/TL4000 Tape Library- User's Guide
Page 220
...is displayed at the Operator Control Panel, carefully highlight the "VPD from the controller to Dell. Swap the Library Controller Card in the defective library with the Library Controller Card in the enclosure rails. 2) Push the Library Controller Card forward until it is properly seated. b. The ... enclosure will hear a snap when the Library Controller Card is fully engaged and installed properly. 3) Tighten the thumbscrews. 10-20 Dell PowerVault TL2000 Tape Library and TL4000 Tape Library User's Guide Note: You will power up with the groove in the replacement library enclosure.
Dell Model TL2000/TL4000 Tape Library- User's Guide
Page 226
... view of the library) 2. Proceed to the rack. 4. With assistance, slide the replacement library enclosure onto the metal rails that are already in position in a rack (one bracket and anchor on page 10-27. 10-26 Dell PowerVault TL2000 Tape Library and TL4000 Tape Library User's Guide Figure 10-25. a77ug252 Figure 10-24.
Dell Model TL24iSCSIxSAS 1Gb iSCSI to SAS - User's Guide
Page 13
... iSCSI board and install it into the library. • It is advisable to retain all your TL2000 library is without card guide rails for the bridge, please install the card guide rails (reference the Getting Started Guide). • Before open the shipping packaging, inspect the box for shipping... damage. Dell Model TL24iSCSIxSAS 1Gb iSCSI to ship the bridge. Figure 5 Remove the blank plate Important: If your original packaging material...