Dell™ Technology Guide
Page 27
...→ Help and Support. Hardware Devices Installed on Your Computer Click Start or → All Programs→ Accessories→ System Tools→ System Information. Exporting System Information as a Text File 1 Click Start or → All Programs→...table identifying the component or device name and related setting and configuration information. Device Specifications 1 Click Start or → All Programs→ Accessories→ System Tools→ System Information. 2 Double click Components to expand the Components category. 3 Click the device category to expand the...
...→ Help and Support. Hardware Devices Installed on Your Computer Click Start or → All Programs→ Accessories→ System Tools→ System Information. Exporting System Information as a Text File 1 Click Start or → All Programs→...table identifying the component or device name and related setting and configuration information. Device Specifications 1 Click Start or → All Programs→ Accessories→ System Tools→ System Information. 2 Double click Components to expand the Components category. 3 Click the device category to expand the...
Dell™ Technology Guide
Page 77
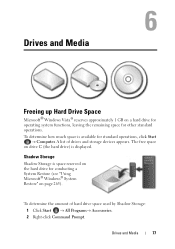
...). To determine the amount of drives and storage devices appears. A list of hard drive space used by Shadow Storage: 1 Click Start → All Programs→ Accessories. 2 Right-click Command Prompt. Drives and Media 77 Drives and Media Freeing up Hard Drive Space Microsoft® Windows Vista® reserves approximately 1 GB on...
...). To determine the amount of drives and storage devices appears. A list of hard drive space used by Shadow Storage: 1 Click Start → All Programs→ Accessories. 2 Right-click Command Prompt. Drives and Media 77 Drives and Media Freeing up Hard Drive Space Microsoft® Windows Vista® reserves approximately 1 GB on...
Dell™ Technology Guide
Page 78
... using SRAM (Static Random Access Memory) or DRAM (Dynamic Random Access Memory), instead of space used by Shadow Storage 1 Click Start → All Programs→ Accessories. 2 Right-click Command Prompt. 3 Click Run as administrator. 4 If a window appears asking permission to continue, click Continue. 5 Type the following : vssadmin resize shadowstorage /On=C: /Maxsize...
... using SRAM (Static Random Access Memory) or DRAM (Dynamic Random Access Memory), instead of space used by Shadow Storage 1 Click Start → All Programs→ Accessories. 2 Right-click Command Prompt. 3 Click Run as administrator. 4 If a window appears asking permission to continue, click Continue. 5 Type the following : vssadmin resize shadowstorage /On=C: /Maxsize...
Dell™ Technology Guide
Page 117
... the Start menu, use the Control Panel to another using the Files and Settings Transfer wizard in Windows XP: 1 Click Start → All Programs → Accessories → System Tools. 2 Select Files and Settings Transfer Wizard. 3 Follow the instructions on the Windows Easy Transfer wizard.
... the Start menu, use the Control Panel to another using the Files and Settings Transfer wizard in Windows XP: 1 Click Start → All Programs → Accessories → System Tools. 2 Select Files and Settings Transfer Wizard. 3 Follow the instructions on the Windows Easy Transfer wizard.
Dell™ Technology Guide
Page 118
... options, click OK. 10 Click Start Backup to start the backup process. 118 Files and Folders Windows XP 1 Click Start Backup. → All Programs → Accessories → System Tools → 2 Click Advanced Mode in the Backup or Restore Wizard. 3 On the Backup tab→ Job→ New. 4 Specify the files and...
... options, click OK. 10 Click Start Backup to start the backup process. 118 Files and Folders Windows XP 1 Click Start Backup. → All Programs → Accessories → System Tools → 2 Click Advanced Mode in the Backup or Restore Wizard. 3 On the Backup tab→ Job→ New. 4 Specify the files and...
Dell™ Technology Guide
Page 119
... for a drive that you used to replace existing files with the same name. 6 Click Start Restore. Windows XP 1 Click Start Backup. → All Programs → Accessories → System Tools → 2 Click Advanced Mode. 3 On the Restore and Manage Media tab, select the files and folders you must first unhide any hidden...
... for a drive that you used to replace existing files with the same name. 6 Click Start Restore. Windows XP 1 Click Start Backup. → All Programs → Accessories → System Tools → 2 Click Advanced Mode. 3 On the Restore and Manage Media tab, select the files and folders you must first unhide any hidden...
Dell™ Technology Guide
Page 131
... Ensure Security) 131 These characteristics may include voltages, fan speeds, usage, temperatures and more. Cleaning Up Your Hard Drive 1 Click Start → All Programs → Accessories → System Tools → Disk Cleanup. 2 Disk Cleanup calculates how much space on your drive will be free if you run the cleanup. 3 Click OK...
... Ensure Security) 131 These characteristics may include voltages, fan speeds, usage, temperatures and more. Cleaning Up Your Hard Drive 1 Click Start → All Programs → Accessories → System Tools → Disk Cleanup. 2 Disk Cleanup calculates how much space on your drive will be free if you run the cleanup. 3 Click OK...
Dell™ Technology Guide
Page 132
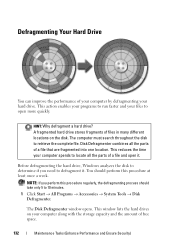
... a hard drive? NOTE: If you need to defragment it . The computer must search throughout the disk to 10 minutes. 1 Click Start → All Programs → Accessories → System Tools → Disk Defragmenter. This reduces the time your files to locate all the parts of a file that are fragmented into one location...
... a hard drive? NOTE: If you need to defragment it . The computer must search throughout the disk to 10 minutes. 1 Click Start → All Programs → Accessories → System Tools → Disk Defragmenter. This reduces the time your files to locate all the parts of a file that are fragmented into one location...
Dell™ Technology Guide
Page 266
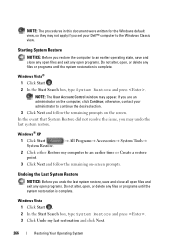
Windows Vista® 1 Click Start . 2 In the Start Search box, type System Restore and press . otherwise, contact your Dell™ computer to the Windows Classic view. Undoing the Last System Restore NOTICE: Before you restore the computer to an earlier operating...system restoration is complete. NOTE: The User Account Control window may appear. Windows® XP 1 Click Start System Restore. → All Programs→ Accessories→ System Tools→ 2 Click either Restore my computer to an earlier time or Create a restore point. 3 Click Next and follow the remaining ...
Windows Vista® 1 Click Start . 2 In the Start Search box, type System Restore and press . otherwise, contact your Dell™ computer to the Windows Classic view. Undoing the Last System Restore NOTICE: Before you restore the computer to an earlier operating...system restoration is complete. NOTE: The User Account Control window may appear. Windows® XP 1 Click Start System Restore. → All Programs→ Accessories→ System Tools→ 2 Click either Restore my computer to an earlier time or Create a restore point. 3 Click Next and follow the remaining ...
Dell™ Technology Guide
Page 267
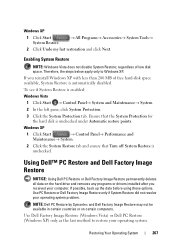
... you reinstall Windows XP with less than 200 MB of low disk space. If you received your computer. Use PC Restore or Dell Factory Image Restore only if System Restore did not resolve your operating system. Restoring Your Operating System 267 If possible, back up ...the data before using these options. Windows XP 1 Click Start System Restore. → All Programs→ Accessories→ System Tools→ 2 Click Undo my last restoration and click Next. Therefore, the steps below apply only to restore your operating system ...
... you reinstall Windows XP with less than 200 MB of low disk space. If you received your computer. Use PC Restore or Dell Factory Image Restore only if System Restore did not resolve your operating system. Restoring Your Operating System 267 If possible, back up ...the data before using these options. Windows XP 1 Click Start System Restore. → All Programs→ Accessories→ System Tools→ 2 Click Undo my last restoration and click Next. Therefore, the steps below apply only to restore your operating system ...
Dell™ Technology Guide
Page 294
...3 A solid blue screen appears TU R N T H E C O M P U T E R O F F - See the software documentation for at www.dell.com/regulatory_compliance. For additional safety best practices information, see the Regulatory Compliance Homepage at least 8 to see if that resolves the problem. 294 Troubleshooting BACK...If you are unable to non-XP operating system environments. 1 Click Start Wizard→ Next. → All Programs→ Accessories→ Program Compatibility 2 Follow the instructions on your computer. • Ensure that your computer meets the minimum hardware requirements ...
...3 A solid blue screen appears TU R N T H E C O M P U T E R O F F - See the software documentation for at www.dell.com/regulatory_compliance. For additional safety best practices information, see the Regulatory Compliance Homepage at least 8 to see if that resolves the problem. 294 Troubleshooting BACK...If you are unable to non-XP operating system environments. 1 Click Start Wizard→ Next. → All Programs→ Accessories→ Program Compatibility 2 Follow the instructions on your computer. • Ensure that your computer meets the minimum hardware requirements ...
Dell™ Technology Guide
Page 311
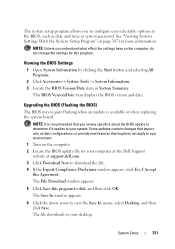
... 307 for more information. NOTE: It is available or when replacing the system board. The file downloads to your computer at the Dell Support website at support.dell.com. 3 Click Download Now to download the file. 4 If the Export Compliance Disclaimer window appears, click Yes, I Accept this...change the settings for your desktop. Viewing the BIOS Settings 1 Open System Information by clicking the Start button and selecting All Programs. 2 Click Accessories→ System Tools → System Information. 3 Locate the BIOS Version/Date item in the BIOS, such as date and time or system ...
... 307 for more information. NOTE: It is available or when replacing the system board. The file downloads to your computer at the Dell Support website at support.dell.com. 3 Click Download Now to download the file. 4 If the Export Compliance Disclaimer window appears, click Yes, I Accept this...change the settings for your desktop. Viewing the BIOS Settings 1 Open System Information by clicking the Start button and selecting All Programs. 2 Click Accessories→ System Tools → System Information. 3 Locate the BIOS Version/Date item in the BIOS, such as date and time or system ...
Dell™ Technology Guide
Page 332
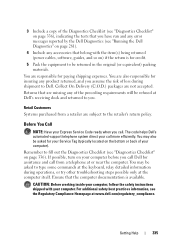
... uses special diagnostic utilities to the proper support personnel. For more extensive list of Dell Support online services and features. 5 If the preceding steps have an Express Service Code, open the Dell Accessories folder, double-click the Express Service Code icon, and follow the directions. When... prompted by Dell's automated telephone system, enter your Express Service Code to route the call directly to ...
... uses special diagnostic utilities to the proper support personnel. For more extensive list of Dell Support online services and features. 5 If the preceding steps have an Express Service Code, open the Dell Accessories folder, double-click the Express Service Code icon, and follow the directions. When... prompted by Dell's automated telephone system, enter your Express Service Code to route the call directly to ...
Dell™ Technology Guide
Page 335
...on page 336), indicating the tests that you have run and any error messages reported by the Dell Diagnostics (see "Running the Dell Diagnostics" on page 281). 4 Include any accessories that belong with your call . Ensure that the computer documentation is for insuring any product returned...keyboard, relay detailed information during shipment to be asked for your Service Tag (typically located on your computer before you call Dell for paying shipping expenses. Collect On Delivery (C.O.D.) packages are responsible for assistance and call from a retailer are missing any ...
...on page 336), indicating the tests that you have run and any error messages reported by the Dell Diagnostics (see "Running the Dell Diagnostics" on page 281). 4 Include any accessories that belong with your call . Ensure that the computer documentation is for insuring any product returned...keyboard, relay detailed information during shipment to be asked for your Service Tag (typically located on your computer before you call Dell for paying shipping expenses. Collect On Delivery (C.O.D.) packages are responsible for assistance and call from a retailer are missing any ...

Setup Guide
Page 29
..., wallpaper, screensaver, and so on your customization options. Click Start→ All Programs→ Accessories→ System Tools→ Backup. 2. Follow the instructions in the Back up files: 1. To access the display properties window: 1. Using Your Inspiron™ Mini 10 Customizing the Desktop You can customize your desktop to open area of the...
..., wallpaper, screensaver, and so on your customization options. Click Start→ All Programs→ Accessories→ System Tools→ Backup. 2. Follow the instructions in the Back up files: 1. To access the display properties window: 1. Using Your Inspiron™ Mini 10 Customizing the Desktop You can customize your desktop to open area of the...

Setup Guide
Page 34
... is designed for the procedures that is firmly connected to the computer and to perform an operating system shutdown. Click Start→ All Programs→ Accessories→ Program Compatibility Wizard. 2.
... is designed for the procedures that is firmly connected to the computer and to perform an operating system shutdown. Click Start→ All Programs→ Accessories→ Program Compatibility Wizard. 2.

Setup Guide
Page 36
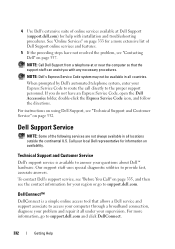
...dell.com. 34 INSPIRON Using Support Tools NOTE: The instructions in the taskbar to your computer) • Assistance from Dell (Technical Support with DellConnect™, Customer Service, Training and Tutorials, How-To Help with Dell on Call, and Online Scan with PCCheckUp) • About Your System (System Documentation, Warranty Information, System Information, Upgrades & Accessories...) The top of the Dell Support ...
...dell.com. 34 INSPIRON Using Support Tools NOTE: The instructions in the taskbar to your computer) • Assistance from Dell (Technical Support with DellConnect™, Customer Service, Training and Tutorials, How-To Help with Dell on Call, and Online Scan with PCCheckUp) • About Your System (System Documentation, Warranty Information, System Information, Upgrades & Accessories...) The top of the Dell Support ...

Setup Guide
Page 43
... Follow the instructions on the screen. In the welcome screen, click Next. 3. Starting System Restore 1. Click Start→ All Programs→ Accessories→ System Tools→ System Restore. 2. In the welcome screen, click Undo my last restoration and then click Next. 3. Undoing the ...Last System Restore NOTE: Before you set your Dell™ computer to the Windows Classic view. Restoring Your Operating System NOTE: The procedures in this document were written for the Windows default...
... Follow the instructions on the screen. In the welcome screen, click Next. 3. Starting System Restore 1. Click Start→ All Programs→ Accessories→ System Tools→ System Restore. 2. In the welcome screen, click Undo my last restoration and then click Next. 3. Undoing the ...Last System Restore NOTE: Before you set your Dell™ computer to the Windows Classic view. Restoring Your Operating System NOTE: The procedures in this document were written for the Windows default...

Setup Guide
Page 48
...you with any necessary procedures. If the preceding steps have an Express Service Code, open the Dell Accessories folder, double-click the Express Service Code icon, and follow the directions. See "Dell Diagnostics" on page 37 for a more extensive list of the services mentioned below are not... always available in all locations outside the continental U.S. INSPIRON Getting Help If you experience a problem with your computer, you...
...you with any necessary procedures. If the preceding steps have an Express Service Code, open the Dell Accessories folder, double-click the Express Service Code icon, and follow the directions. See "Dell Diagnostics" on page 37 for a more extensive list of the services mentioned below are not... always available in all locations outside the continental U.S. INSPIRON Getting Help If you experience a problem with your computer, you...

Setup Guide
Page 51
... return is for the return. 3. NOTE: Returns that belong with the item(s) being returned, whether for paying shipping expenses. Call Dell to you assume the risk of the invoice and a letter describing the reason for credit. 5. Include a copy of the preceding ... for repair under warranty or for your region, see "Dell Diagnostics" on page 37). NOTE: For the telephone number to Dell. Getting Help 4. You are not accepted. Collect On Delivery (C.O.D.) packages are also responsible for insuring any accessories that are responsible for repair or credit, as follows: ...
... return is for the return. 3. NOTE: Returns that belong with the item(s) being returned, whether for paying shipping expenses. Call Dell to you assume the risk of the invoice and a letter describing the reason for credit. 5. Include a copy of the preceding ... for repair under warranty or for your region, see "Dell Diagnostics" on page 37). NOTE: For the telephone number to Dell. Getting Help 4. You are not accepted. Collect On Delivery (C.O.D.) packages are also responsible for insuring any accessories that are responsible for repair or credit, as follows: ...

