Dell™ Technology Guide
Page 11
... Uninterruptible Power Supply (UPS 141 Laptop Computer Batteries 141 Using Your Laptop Computer for the First Time 142 Preserving the Life of a Battery 142 Replacing a Battery 143 Checking the Battery Charge 143 Conserving Battery Power 145 Charging the Battery 145 Storing a Battery 146 US Department of Transportation (DOT) Notebook Battery Restrictions 146 Dell™ ControlPoint Power...
... Uninterruptible Power Supply (UPS 141 Laptop Computer Batteries 141 Using Your Laptop Computer for the First Time 142 Preserving the Life of a Battery 142 Replacing a Battery 143 Checking the Battery Charge 143 Conserving Battery Power 145 Charging the Battery 145 Storing a Battery 146 US Department of Transportation (DOT) Notebook Battery Restrictions 146 Dell™ ControlPoint Power...

Dell™ Technology Guide
Page 279
...BATTERY CANNOT BE IDENTIFIED. IT IS ADVISABLE TO IMMEDIATELY BACK UP YOUR DATA AND REPLACE YOUR HARD DRIVE BY CALLING YOUR SUPPORT DESK OR D E L L. - ...SUPPLY ENOUGH POWER TO RUN THE ATTACHED DOCKING STATION. WARNING: THE PRIMARY BATTERY CANNOT BE IDENTIFIED. THIS SYSTEM WILL BE U N A B L E T O C H A R G E B A T T E R I E S U N T I L T H I S B A T T E R Y I S R E M O V E D . - THIS WILL INCREASE THE TIME TO CHARGE THE BATTERY. WARNING: THE BATTERIES CANNOT BE IDENTIFIED. THIS SYSTEM WILL BE UNABLE TO CHARGE THIS BATTERY. - System board failure may be defective. Contact Dell...
...BATTERY CANNOT BE IDENTIFIED. IT IS ADVISABLE TO IMMEDIATELY BACK UP YOUR DATA AND REPLACE YOUR HARD DRIVE BY CALLING YOUR SUPPORT DESK OR D E L L. - ...SUPPLY ENOUGH POWER TO RUN THE ATTACHED DOCKING STATION. WARNING: THE PRIMARY BATTERY CANNOT BE IDENTIFIED. THIS SYSTEM WILL BE U N A B L E T O C H A R G E B A T T E R I E S U N T I L T H I S B A T T E R Y I S R E M O V E D . - THIS WILL INCREASE THE TIME TO CHARGE THE BATTERY. WARNING: THE BATTERIES CANNOT BE IDENTIFIED. THIS SYSTEM WILL BE UNABLE TO CHARGE THIS BATTERY. - System board failure may be defective. Contact Dell...
Owner's Manual
Page 8
Power Supply DC Connector Pin Assignments . . . . 120 Memory 123 Memory Installation Guidelines 124 Installing Memory 126 Removing Memory 128 Cards 129 PCI and PCI Express Cards 129 Bezel 136 Removing the Bezel 136 Replacing the Bezel 137 Drives 138 Recommended Drive Cable Connections. . . . . 139 Connecting Drive Cables... 140 Hard Drives 140 Floppy Drive (Optional 145 Media Card Reader 151 CD/DVD Drive 154 Battery 160 Replacing the Battery 160 Power Supply 161 Replacing the Power Supply 162 I/O Panel 163 Removing the I/O Panel 164 Installing the I/O Panel 165 8 Contents
Power Supply DC Connector Pin Assignments . . . . 120 Memory 123 Memory Installation Guidelines 124 Installing Memory 126 Removing Memory 128 Cards 129 PCI and PCI Express Cards 129 Bezel 136 Removing the Bezel 136 Replacing the Bezel 137 Drives 138 Recommended Drive Cable Connections. . . . . 139 Connecting Drive Cables... 140 Hard Drives 140 Floppy Drive (Optional 145 Media Card Reader 151 CD/DVD Drive 154 Battery 160 Replacing the Battery 160 Power Supply 161 Replacing the Power Supply 162 I/O Panel 163 Removing the I/O Panel 164 Installing the I/O Panel 165 8 Contents

Owner's Manual
Page 161
...cable, first plug the cable into the network device and then plug it into place. 2 1 1 battery release lever 2 battery (positive side) 7 Replace the computer cover (see "System Setup" on page 187) and restore the settings you recorded in the Product Information Guide. NOTICE: To prevent static ... electricity from your body before you begin any of the procedures in this section, follow the safety instructions located in Step 1. Power Supply CAUTION: Before you touch any of your computer and devices to the Maintenance section and clear the low battery and other errors associated...
...cable, first plug the cable into the network device and then plug it into place. 2 1 1 battery release lever 2 battery (positive side) 7 Replace the computer cover (see "System Setup" on page 187) and restore the settings you recorded in the Product Information Guide. NOTICE: To prevent static ... electricity from your body before you begin any of the procedures in this section, follow the safety instructions located in Step 1. Power Supply CAUTION: Before you touch any of your computer and devices to the Maintenance section and clear the low battery and other errors associated...

Owner's Manual
Page 162
... route these cables properly when you replace them to the back of the DC power cables underneath the tabs in "Before You Begin" on page 105. 2 Remove the computer cover (see "Removing the Computer Cover" on the side of the power supply. 5 Remove the four screws that attach the power supply to prevent them from the...
... route these cables properly when you replace them to the back of the DC power cables underneath the tabs in "Before You Begin" on page 105. 2 Remove the computer cover (see "Removing the Computer Cover" on the side of the power supply. 5 Remove the four screws that attach the power supply to prevent them from the...

Owner's Manual
Page 163
... you touch any of the power supply. 6 Slide out the power supply and lift it out. 7 Slide the replacement power supply towards the back of the computer. 8 Replace and tighten all screws that secure the power supply to the back of the system... grounding. CAUTION: Failure to cool before you touch them on. 13 Verify that the computer works correctly by running the Dell Diagnostics (see "Replacing...
... you touch any of the power supply. 6 Slide out the power supply and lift it out. 7 Slide the replacement power supply towards the back of the computer. 8 Replace and tighten all screws that secure the power supply to the back of the system... grounding. CAUTION: Failure to cool before you touch them on. 13 Verify that the computer works correctly by running the Dell Diagnostics (see "Replacing...

Owner's Manual
Page 165
... system board. 5 Replace the bezel (see "Replacing the Bezel" on page 137). 6 Replace the computer cover (see "Dell Diagnostics" on page 90). Do not try to remove the fan separately. CAUTION: The heat sink assembly, power supply, and other unexpected... injuries, always unplug your computer from your body before you touch them on. 8 Verify that the computer works correctly by touching an unpainted metal surface on the computer chassis. Processor...
... system board. 5 Replace the bezel (see "Replacing the Bezel" on page 137). 6 Replace the computer cover (see "Dell Diagnostics" on page 90). Do not try to remove the fan separately. CAUTION: The heat sink assembly, power supply, and other unexpected... injuries, always unplug your computer from your body before you touch them on. 8 Verify that the computer works correctly by touching an unpainted metal surface on the computer chassis. Processor...
Owner's Manual
Page 174
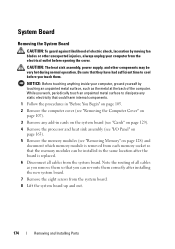
.... CAUTION: The heat sink assembly, power supply, and other unexpected injuries, always unplug your computer, ground yourself by moving fan blades or other components may be installed in cards on the system board (see "Cards" on page 129). 4 Remove the processor and heat sink assembly (see "I/O Panel..." on page 163). 5 Remove the memory modules (see "Removing the Computer Cover" on page 128) and document which memory module is replaced. 6 Disconnect all cables as the metal at the back...
.... CAUTION: The heat sink assembly, power supply, and other unexpected injuries, always unplug your computer, ground yourself by moving fan blades or other components may be installed in cards on the system board (see "Cards" on page 129). 4 Remove the processor and heat sink assembly (see "I/O Panel..." on page 163). 5 Remove the memory modules (see "Removing the Computer Cover" on page 128) and document which memory module is replaced. 6 Disconnect all cables as the metal at the back...


