View
Page 5
...Battery 45 Battery Performance 45 Checking the Battery Charge 46 Dell QuickSet Battery Meter 46 Microsoft® Windows® Battery Meter 47 Charge Gauge 47 Low-Battery Warning 48 Conserving Battery Power 48 Configuring Power Management Settings . . . . . 49 Using the Sleep Power State 49 Charging the Battery 50 Replacing the Battery 50 Storing a Battery... 51 6 Using Multimedia 53 Playing Media 53 Playing Media Using Dell Travel Remote 55 Copying CDs and DVDs 56 How to Copy...
...Battery 45 Battery Performance 45 Checking the Battery Charge 46 Dell QuickSet Battery Meter 46 Microsoft® Windows® Battery Meter 47 Charge Gauge 47 Low-Battery Warning 48 Conserving Battery Power 48 Configuring Power Management Settings . . . . . 49 Using the Sleep Power State 49 Charging the Battery 50 Replacing the Battery 50 Storing a Battery... 51 6 Using Multimedia 53 Playing Media 53 Playing Media Using Dell Travel Remote 55 Copying CDs and DVDs 56 How to Copy...

View
Page 10
... Card 154 Replacing a WLAN Card 156 Removing a Mobile Broadband or WWAN Card 157 Replacing a WWAN Card 160 Removing a WPAN Card 161 Replacing a WPAN Card 162 Internal Card With Bluetooth® Wireless Technology 162 Removing the Card 162 Replacing the Card 163 Coin-Cell Battery 163 Removing the Coin-Cell Battery 164 Replacing the Coin-Cell Battery 164 10...
... Card 154 Replacing a WLAN Card 156 Removing a Mobile Broadband or WWAN Card 157 Replacing a WWAN Card 160 Removing a WPAN Card 161 Replacing a WPAN Card 162 Internal Card With Bluetooth® Wireless Technology 162 Removing the Card 162 Replacing the Card 163 Coin-Cell Battery 163 Removing the Coin-Cell Battery 164 Replacing the Coin-Cell Battery 164 10...

View
Page 32
... vents. Stores software and data. 32 About Your Computer M E M O R Y M O D U L E / C O I V E - C E L L B A T T E R Y C O M P A R T M E N T - For additional information, see "Replacing the Battery" on when the computer gets hot. R I C A R D C O M P A R T M E N T - W I R E L E S S M I N I G H T S P E A K E R - When a battery is installed, you can damage the computer or cause a fire. Releases the battery (see "Adding and Replacing Parts" on page 45). CAUTION: Do not block, push objects into, or allow dust...
... vents. Stores software and data. 32 About Your Computer M E M O R Y M O D U L E / C O I V E - C E L L B A T T E R Y C O M P A R T M E N T - For additional information, see "Replacing the Battery" on when the computer gets hot. R I C A R D C O M P A R T M E N T - W I R E L E S S M I N I G H T S P E A K E R - When a battery is installed, you can damage the computer or cause a fire. Releases the battery (see "Adding and Replacing Parts" on page 45). CAUTION: Do not block, push objects into, or allow dust...

View
Page 46
... cause personal injury or equipment damage. Handle damaged or leaking batteries with a compatible battery purchased from children. Checking the Battery Charge You can check the battery charge on your computer. You can check the battery charge before you when the battery charge is designed to temperatures above 65°C (149°F). Replace the battery only with extreme care.
... cause personal injury or equipment damage. Handle damaged or leaking batteries with a compatible battery purchased from children. Checking the Battery Charge You can check the battery charge on your computer. You can check the battery charge before you when the battery charge is designed to temperatures above 65°C (149°F). Replace the battery only with extreme care.
View
Page 48
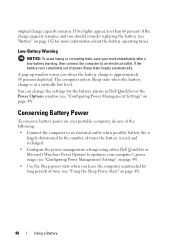
... 49). • Use the Sleep power state when you should consider replacing the battery (see "Battery" on page 49). The computer enters Sleep state when the battery charge is approximately 90 percent depleted. Low-Battery Warning NOTICE: To avoid losing or corrupting data, save your portable computer..., do any of times the battery is used and recharged. • Configure the power management settings using either Dell QuickSet or Microsoft Windows Power Options to an electrical outlet when possible; If five lights appear, less than 60 percent of the charge capacity remains, ...
... 49). • Use the Sleep power state when you should consider replacing the battery (see "Battery" on page 49). The computer enters Sleep state when the battery charge is approximately 90 percent depleted. Low-Battery Warning NOTICE: To avoid losing or corrupting data, save your portable computer..., do any of times the battery is used and recharged. • Configure the power management settings using either Dell QuickSet or Microsoft Windows Power Options to an electrical outlet when possible; If five lights appear, less than 60 percent of the charge capacity remains, ...
View
Page 50
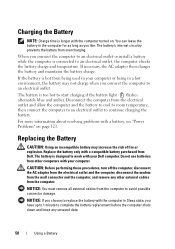
... must remove all external cables from Dell. If the battery is longer with a battery, see "Power Problems" on . For more information about resolving problems with the computer turned on page 121. The battery is connected to avoid possible connector damage. Replace the battery only with your computer. NOTICE:...fire or explosion. You can leave the battery in the computer for as long as you have up to 1 minute to complete the battery replacement before the computer shuts down and loses any other computers with a compatible battery purchased from the computer to an electrical ...
... must remove all external cables from Dell. If the battery is longer with a battery, see "Power Problems" on . For more information about resolving problems with the computer turned on page 121. The battery is connected to avoid possible connector damage. Replace the battery only with your computer. NOTICE:...fire or explosion. You can leave the battery in the computer for as long as you have up to 1 minute to complete the battery replacement before the computer shuts down and loses any other computers with a compatible battery purchased from the computer to an electrical ...

View
Page 51
... device for an extended period of the bay. 1 2 1 battery 2 battery release latches (2) To replace the battery, follow the removal procedure in reverse order. See the documentation that the computer is connected to keep them open. 5 Slide the battery out of time. A battery discharges during prolonged storage. Storing a Battery Remove the battery when you use it . To remove the...
... device for an extended period of the bay. 1 2 1 battery 2 battery release latches (2) To replace the battery, follow the removal procedure in reverse order. See the documentation that the computer is connected to keep them open. 5 Slide the battery out of time. A battery discharges during prolonged storage. Storing a Battery Remove the battery when you use it . To remove the...
View
Page 113
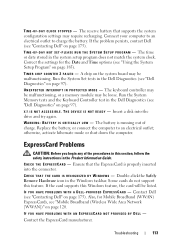
... page 175). Run the System Set tests in the system setup program does not match the system clock. T H E D E V I C E I N P R O T E C T E D M O D E - Replace the battery, or connect the computer to charge the battery. Also, for the Date and Time options (see "Contacting Dell" on page 97). Troubleshooting 113 O F - Correct the settings for Mobile Broadband (WWAN) ExpressCards, see "Contacting...
... page 175). Run the System Set tests in the system setup program does not match the system clock. T H E D E V I C E I N P R O T E C T E D M O D E - Replace the battery, or connect the computer to charge the battery. Also, for the Date and Time options (see "Contacting Dell" on page 97). Troubleshooting 113 O F - Correct the settings for Mobile Broadband (WWAN) ExpressCards, see "Contacting...

View
Page 137
Adding and Replacing Parts 137 Do not use only the battery designed for other Dell computers. 5 Turn the computer over. 6 Slide and click the battery release latches. 7 Slide the battery out of the battery bay. 1 2 1 battery 2 battery release latch (2) 8 Turn the computer top-side up, open the display, and ... the computer. NOTICE: To help prevent damage to the computer, use batteries designed for this particular Dell computer. NOTE: To avoid damage to the system board, you must remove the battery from the ExpressCard slot (see "Removing an ExpressCard or Blank" on page...
Adding and Replacing Parts 137 Do not use only the battery designed for other Dell computers. 5 Turn the computer over. 6 Slide and click the battery release latches. 7 Slide the battery out of the battery bay. 1 2 1 battery 2 battery release latch (2) 8 Turn the computer top-side up, open the display, and ... the computer. NOTICE: To help prevent damage to the computer, use batteries designed for this particular Dell computer. NOTE: To avoid damage to the system board, you must remove the battery from the ExpressCard slot (see "Removing an ExpressCard or Blank" on page...

View
Page 142
... tighten the locking screw. NOTICE: To help prevent damage to the system board, you must remove the battery from the battery bay before you begin working inside the computer. 142 Adding and Replacing Parts NOTICE: To avoid electrostatic discharge, ground yourself by using a wrist grounding strap or by periodically touching an unpainted metal...
... tighten the locking screw. NOTICE: To help prevent damage to the system board, you must remove the battery from the battery bay before you begin working inside the computer. 142 Adding and Replacing Parts NOTICE: To avoid electrostatic discharge, ground yourself by using a wrist grounding strap or by periodically touching an unpainted metal...

View
Page 144
... Keyboard For more information about the keyboard, see "Hinge Cover" on the keyboard from the battery bay before you begin any of the computer. 5 Lift and remove the keyboard. 144 Adding and Replacing Parts NOTICE: The keycaps on page 41. Be careful when removing and handling the keyboard. ... Remove the four screws at the top of the computer). CAUTION: Before you must remove the battery from the tab on the back of the keyboard. NOTICE: To help prevent damage to replace. NOTICE: To avoid electrostatic discharge, ground yourself by using a wrist grounding strap or by periodically...
... Keyboard For more information about the keyboard, see "Hinge Cover" on the keyboard from the battery bay before you begin any of the computer. 5 Lift and remove the keyboard. 144 Adding and Replacing Parts NOTICE: The keycaps on page 41. Be careful when removing and handling the keyboard. ... Remove the four screws at the top of the computer). CAUTION: Before you must remove the battery from the tab on the back of the keyboard. NOTICE: To help prevent damage to replace. NOTICE: To avoid electrostatic discharge, ground yourself by using a wrist grounding strap or by periodically...

View
Page 149
... confirm the amount of the computer. 1 Follow the procedures in the computer, click Start →Help and Support→Dell System Information. 1 2 1 tab 2 notch 3 Replace the keyboard and hinge cover. 4 Insert the battery into the battery bay, or connect the AC adapter to your computer and an electrical outlet. 5 Turn on page 31), and...
... confirm the amount of the computer. 1 Follow the procedures in the computer, click Start →Help and Support→Dell System Information. 1 2 1 tab 2 notch 3 Replace the keyboard and hinge cover. 4 Insert the battery into the battery bay, or connect the AC adapter to your computer and an electrical outlet. 5 Turn on page 31), and...

View
Page 150
... metal surface (such as a connector on each end of the computer). 3 Use your fingertips to spread the memory module securing clips. 1 2 1 memory module/coin-cell battery compartment 2 captive screw NOTICE: To prevent damage to the memory module connector, do not use tools to carefully spread apart the securing clips on the...
... metal surface (such as a connector on each end of the computer). 3 Use your fingertips to spread the memory module securing clips. 1 2 1 memory module/coin-cell battery compartment 2 captive screw NOTICE: To prevent damage to the memory module connector, do not use tools to carefully spread apart the securing clips on the...
View
Page 152
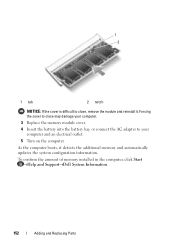
...the system configuration information. 1 2 1 tab 2 notch NOTICE: If the cover is difficult to your computer. 3 Replace the memory module cover. 4 Insert the battery into the battery bay, or connect the AC adapter to close may damage your computer and an electrical outlet. 5 Turn on the computer.... To confirm the amount of memory installed in the computer, click Start →Help and Support→Dell System Information. 152 Adding and Replacing...
...the system configuration information. 1 2 1 tab 2 notch NOTICE: If the cover is difficult to your computer. 3 Replace the memory module cover. 4 Insert the battery into the battery bay, or connect the AC adapter to close may damage your computer and an electrical outlet. 5 Turn on the computer.... To confirm the amount of memory installed in the computer, click Start →Help and Support→Dell System Information. 152 Adding and Replacing...

View
Page 153
..., slide the SIM into the compartment with the cut-off corner of the SIM facing away from the compartment. 2 1 1 battery bay 2 SIM Adding and Replacing Parts 153 Verizon, Sprint, and Telus do not use SIMs. 1 Follow the procedures in the Product Information Guide. NOTE: Only Cingular and Vodafone need a SIM. ...
..., slide the SIM into the compartment with the cut-off corner of the SIM facing away from the compartment. 2 1 1 battery bay 2 SIM Adding and Replacing Parts 153 Verizon, Sprint, and Telus do not use SIMs. 1 Follow the procedures in the Product Information Guide. NOTE: Only Cingular and Vodafone need a SIM. ...

View
Page 154
... begin any of the Mini Card compartment and remove the cover. 2 1 1 captive screws (2) 154 Adding and Replacing Parts 2 cover NOTICE: To help prevent damage to the system board, you must remove the battery from the battery bay before you begin working inside the computer. If you ordered a wireless Mini Card with your computer...
... begin any of the Mini Card compartment and remove the cover. 2 1 1 captive screws (2) 154 Adding and Replacing Parts 2 cover NOTICE: To help prevent damage to the system board, you must remove the battery from the battery bay before you begin working inside the computer. If you ordered a wireless Mini Card with your computer...

View
Page 162
...card. Internal Card With Bluetooth® Wireless Technology CAUTION: Before you ordered a card with Bluetooth wireless technology with your computer, it out from the battery bay before you feel resistance, check the connectors on the card and on the card. 4 Grasp the connector end of the WPAN card down ... to ensure correct insertion. NOTICE: To help prevent damage to the WPAN card, never place cables under the securing tabs. 162 Adding and Replacing Parts Removing the Card 1 Follow the procedures in the Product Information Guide. If you begin working inside the computer.
...card. Internal Card With Bluetooth® Wireless Technology CAUTION: Before you ordered a card with Bluetooth wireless technology with your computer, it out from the battery bay before you feel resistance, check the connectors on the card and on the card. 4 Grasp the connector end of the WPAN card down ... to ensure correct insertion. NOTICE: To help prevent damage to the WPAN card, never place cables under the securing tabs. 162 Adding and Replacing Parts Removing the Card 1 Follow the procedures in the Product Information Guide. If you begin working inside the computer.

View
Page 163
1 3 2 1 securing tabs (2) 3 card 2 cable Replacing the Card 1 Replace the card at an angle to slide it under the securing tabs in the Product Information Guide. NOTICE: To avoid electrostatic discharge, ground yourself by ... section, follow the safety instructions in the card compartment. 2 Connect the cable to the system board, you must remove the battery from the battery bay before you begin working inside the computer. Coin-Cell Battery CAUTION: Before you begin any of the computer). NOTICE: To help prevent damage to the card. Adding and...
1 3 2 1 securing tabs (2) 3 card 2 cable Replacing the Card 1 Replace the card at an angle to slide it under the securing tabs in the Product Information Guide. NOTICE: To avoid electrostatic discharge, ground yourself by ... section, follow the safety instructions in the card compartment. 2 Connect the cable to the system board, you must remove the battery from the battery bay before you begin working inside the computer. Coin-Cell Battery CAUTION: Before you begin any of the computer). NOTICE: To help prevent damage to the card. Adding and...

View
Page 164
... to the system board. 2 Slide the coin-cell battery into the mylar sleeve. 3 Replace the cover and tighten the captive screw. 164 Adding and Replacing Parts Removing the Coin-Cell Battery 1 Follow the procedures in "Before You Begin" on page 135. 2 Turn the computer over. 3 Loosen the captive ...screw on the memory module/coin-cell battery cover (see "Bottom View" on page 31), and...
... to the system board. 2 Slide the coin-cell battery into the mylar sleeve. 3 Replace the cover and tighten the captive screw. 164 Adding and Replacing Parts Removing the Coin-Cell Battery 1 Follow the procedures in "Before You Begin" on page 135. 2 Turn the computer over. 3 Loosen the captive ...screw on the memory module/coin-cell battery cover (see "Bottom View" on page 31), and...

View
Page 213
... gauge, 47 charging, 50 checking the charge, 46 performance, 45 power meter, 47 removing, 50 replacing coin-cell battery, 163 storing, 51 blanks ExpressCards, 77 memory card, 81 Bluetooth wireless technology card device status light, 23 installing, 162 boot sequence, 186 ... 56 drive problems, 105 Check Disk, 106 cleaning computer, 188 display, 188 keyboard, 188 media, 190 mouse, 190 touch pad, 189 coin-cell battery replacing, 163 computer crashes, 116-117 restore to previous operating state, 132 slow performance, 108, 118 specifications, 177 stops responding, 116 Index 213 Index Numerics...
... gauge, 47 charging, 50 checking the charge, 46 performance, 45 power meter, 47 removing, 50 replacing coin-cell battery, 163 storing, 51 blanks ExpressCards, 77 memory card, 81 Bluetooth wireless technology card device status light, 23 installing, 162 boot sequence, 186 ... 56 drive problems, 105 Check Disk, 106 cleaning computer, 188 display, 188 keyboard, 188 media, 190 mouse, 190 touch pad, 189 coin-cell battery replacing, 163 computer crashes, 116-117 restore to previous operating state, 132 slow performance, 108, 118 specifications, 177 stops responding, 116 Index 213 Index Numerics...


