Dell Dimension 4100 System Solutions Guide
Page 23
... Windows 2000, click the Search tab. 3 For Windows 98 and Windows 2000, type standby and then click List Topics. See the monitor documentation for instructions. Restore the original resolution and refresh rate settings. S olving Pr oblems 23 See Windows Help. RO T A T E T H E M O N I T O R T O F A C E A D I F F E R E N T D I R E C T I G H T N E S S - See the monitor documentation...
... Windows 2000, click the Search tab. 3 For Windows 98 and Windows 2000, type standby and then click List Topics. See the monitor documentation for instructions. Restore the original resolution and refresh rate settings. S olving Pr oblems 23 See Windows Help. RO T A T E T H E M O N I T O R T O F A C E A D I F F E R E N T D I R E C T I G H T N E S S - See the monitor documentation...

Dell Dimension 4100 System Solutions Guide
Page 80
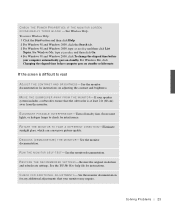
NOTICE: The following procedure resets all current settings so that you can restore them when you finish this procedure. 1 Remove the computer cover (see page 42). 2 Locate jumper BIOS CONF on the system board (see page 44) and ... Passwords If you forget your computer. Options identified by pressing ) all standard settings for your user or setup password, you clear the forgotten password(s). www.dell.com | support.dell.com 80 Appendix • The left side lists configuration options and their functions for the displayed screen.
NOTICE: The following procedure resets all current settings so that you can restore them when you finish this procedure. 1 Remove the computer cover (see page 42). 2 Locate jumper BIOS CONF on the system board (see page 44) and ... Passwords If you forget your computer. Options identified by pressing ) all standard settings for your user or setup password, you clear the forgotten password(s). www.dell.com | support.dell.com 80 Appendix • The left side lists configuration options and their functions for the displayed screen.
Dell Dimension 4100 System Solutions Guide
Page 81
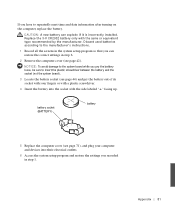
... the computer, replace the battery. Appendix 81 Replace the 3-V CR2032 battery only with the side labeled "+" facing up. CAUTION: A new battery can restore the correct settings in step 6. 2 Remove the computer cover (see page 44) and pry the battery out of its socket with your fingers or... 5 Replace the computer cover (see page 71), and plug your computer and devices into their electrical outlets. 6 Access the system setup program and restore the settings you have to insert the plastic screwdriver between the battery and the socket (not the system board). 3 Locate the battery socket (see...
... the computer, replace the battery. Appendix 81 Replace the 3-V CR2032 battery only with the side labeled "+" facing up. CAUTION: A new battery can restore the correct settings in step 6. 2 Remove the computer cover (see page 44) and pry the battery out of its socket with your fingers or... 5 Replace the computer cover (see page 71), and plug your computer and devices into their electrical outlets. 6 Access the system setup program and restore the settings you have to insert the plastic screwdriver between the battery and the socket (not the system board). 3 Locate the battery socket (see...


