
Owner's Manual
Page 3
Contents CAUTION: Safety Instructions 11 SAFETY: General 11 SAFETY: Power 12 SAFETY: Battery 12 SAFETY: Air Travel 13 SAFETY: Electromagnetic Compatibility Instructions 13 When Using Your Device 13 SAFETY: Ergonomic Computing Habits 14 SAFETY: Protecting Against Electrostatic Discharge 14 SAFETY: Battery Disposal 15 Finding Information 15 1 About Your Device Front, Side, and Back Views 17 Front and Side Views 17 Back View 19 Using the Battery 20 Installing and Removing the Battery 20 Charging the Battery 22 Contents 3
Contents CAUTION: Safety Instructions 11 SAFETY: General 11 SAFETY: Power 12 SAFETY: Battery 12 SAFETY: Air Travel 13 SAFETY: Electromagnetic Compatibility Instructions 13 When Using Your Device 13 SAFETY: Ergonomic Computing Habits 14 SAFETY: Protecting Against Electrostatic Discharge 14 SAFETY: Battery Disposal 15 Finding Information 15 1 About Your Device Front, Side, and Back Views 17 Front and Side Views 17 Back View 19 Using the Battery 20 Installing and Removing the Battery 20 Charging the Battery 22 Contents 3

Owner's Manual
Page 6
5 Using the Microsoft® ActiveSync® Program About ActiveSync 55 Installing and Using ActiveSync 56 6 Scheduling and Communicating About Microsoft® Pocket Outlook 57 Calendar 57 Using the Summary Screen 59 Creating Meeting Requests 59 Contacts 60 Finding a Contact 61 Using the Summary Screen 61 Tasks 61 Notes 63 Messaging 64 Synchronizing E-Mail Messages 64 Connecting Directly to an E-Mail Server . . . . . 64 Using the Message List 65 Composing Messages 67 Managing E-Mail Messages and Folders . . . . . 68 Notifications 69 6 Contents
5 Using the Microsoft® ActiveSync® Program About ActiveSync 55 Installing and Using ActiveSync 56 6 Scheduling and Communicating About Microsoft® Pocket Outlook 57 Calendar 57 Using the Summary Screen 59 Creating Meeting Requests 59 Contacts 60 Finding a Contact 61 Using the Summary Screen 61 Tasks 61 Notes 63 Messaging 64 Synchronizing E-Mail Messages 64 Connecting Directly to an E-Mail Server . . . . . 64 Using the Message List 65 Composing Messages 67 Managing E-Mail Messages and Folders . . . . . 68 Notifications 69 6 Contents
Owner's Manual
Page 7
... Internet 72 Adding a Program to the Start Menu 73 Using File Explorer on the Device 73 Using ActiveSync on the Computer 73 Error Message When Installing Software 74 Changing the Display Mode on Your Device . . . . 74 File Download Security Warning 75 Removing Programs 75 8 Using Companion Programs Microsoft® Pocket Word...
... Internet 72 Adding a Program to the Start Menu 73 Using File Explorer on the Device 73 Using ActiveSync on the Computer 73 Error Message When Installing Software 74 Changing the Display Mode on Your Device . . . . 74 File Download Security Warning 75 Removing Programs 75 8 Using Companion Programs Microsoft® Pocket Word...
Owner's Manual
Page 11
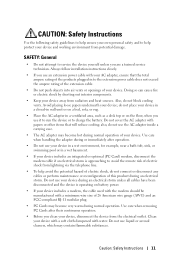
Always follow installation instructions closely. • If you use it to run the device or to charge the battery. Avoid placing loose papers underneath your device includes an ...
Always follow installation instructions closely. • If you use it to run the device or to charge the battery. Avoid placing loose papers underneath your device includes an ...
Owner's Manual
Page 12
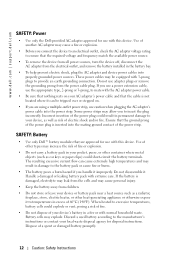
... could explode or vent, posing a risk of fire. • Do not dispose of 60ºC (140ºF). SAFETY: Battery • Use only Dell™ battery modules that the cable is damaged, electrolyte may leak from the cells and may cause personal injury. • Keep the battery away from...and that are using a multiple-outlet power strip, use adapter plugs or remove the grounding prong from the electrical outlet, and remove the battery installed in a fire or with extreme care. The resulting excessive current flow can be tripped over or stepped on your pocket, purse, or other heat...
... could explode or vent, posing a risk of fire. • Do not dispose of 60ºC (140ºF). SAFETY: Battery • Use only Dell™ battery modules that the cable is damaged, electrolyte may leak from the cells and may cause personal injury. • Keep the battery away from...and that are using a multiple-outlet power strip, use adapter plugs or remove the grounding prong from the electrical outlet, and remove the battery installed in a fire or with extreme care. The resulting excessive current flow can be tripped over or stepped on your pocket, purse, or other heat...
Owner's Manual
Page 14
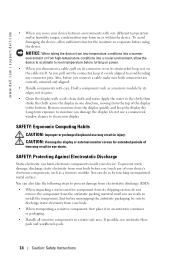
www.dell.com | support.dell.com • When you move your device between environments with very different temperature and/or humidity ranges, condensation may form on the cable itself. NOTICE: ... also take the following steps to prevent damage from electrostatic discharge (ESD): • When unpacking a static-sensitive component from the top of the display to install the component. Also, before unwrapping the antistatic packaging, be sure to discharge static electricity from the display quickly and keep it in an antistatic container...
www.dell.com | support.dell.com • When you move your device between environments with very different temperature and/or humidity ranges, condensation may form on the cable itself. NOTICE: ... also take the following steps to prevent damage from electrostatic discharge (ESD): • When unpacking a static-sensitive component from the top of the display to install the component. Also, before unwrapping the antistatic packaging, be sure to discharge static electricity from the display quickly and keep it in an antistatic container...
Owner's Manual
Page 15
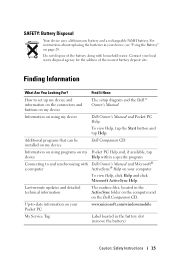
Additional programs that can be installed on my device Dell Companion CD Information on using my device Dell Owner's Manual and Pocket PC Help To view Help, tap the Start button and tap Help. SAFETY: Battery Disposal Your device uses a lithium-ion battery ... synchronizing with household waste. Up-to set up my device and information on the connectors and buttons on my device The setup diagram and the Dell™ Owner's Manual Information on your computer To view Help, click Help and click Microsoft ActiveSync Help. Find It Here: How to -date information on...
Additional programs that can be installed on my device Dell Companion CD Information on using my device Dell Owner's Manual and Pocket PC Help To view Help, tap the Start button and tap Help. SAFETY: Battery Disposal Your device uses a lithium-ion battery ... synchronizing with household waste. Up-to set up my device and information on the connectors and buttons on my device The setup diagram and the Dell™ Owner's Manual Information on your computer To view Help, click Help and click Microsoft ActiveSync Help. Find It Here: How to -date information on...

Owner's Manual
Page 19
... replace it in the holder when you are not using the reset button. Use the reset stylus to release and remove the main battery. See "Installing and Removing the Battery" on page 20. Back View reset stylus (extended) battery battery lock reset button cradle/sync cable connector (bottom) BATTERY LOCK...
... replace it in the holder when you are not using the reset button. Use the reset stylus to release and remove the main battery. See "Installing and Removing the Battery" on page 20. Back View reset stylus (extended) battery battery lock reset button cradle/sync cable connector (bottom) BATTERY LOCK...
Owner's Manual
Page 20
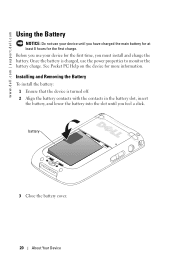
... Pocket PC Help on the device for the first charge. Before you use your device for the first time, you must install and charge the battery. Installing and Removing the Battery To install the battery: 1 Ensure that the device is charged, use the power properties to monitor the battery charge. Once the battery..., insert the battery, and lower the battery into the slot until you have charged the main battery for at least 8 hours for more information. www.dell.com | support.dell.com Using the Battery NOTICE: Do not use your device until you feel a click.
... Pocket PC Help on the device for the first charge. Before you use your device for the first time, you must install and charge the battery. Installing and Removing the Battery To install the battery: 1 Ensure that the device is charged, use the power properties to monitor the battery charge. Once the battery..., insert the battery, and lower the battery into the slot until you have charged the main battery for at least 8 hours for more information. www.dell.com | support.dell.com Using the Battery NOTICE: Do not use your device until you feel a click.
Owner's Manual
Page 23
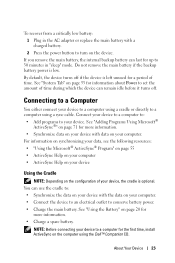
See "System Tab" on page 53 for information about Power to set the amount of ... device with data on your computer. • Connect the device to an electrical outlet to turn on the computer using the Dell™ Companion CD. Connect your device to a computer to: • Add programs to your device to a computer using .... • Charge a spare battery. See "Adding Programs Using Microsoft® ActiveSync®" on page 71 for the first time, install ActiveSync on the device. See "Using the Battery" on your device with a charged battery. 2 Press the power button to conserve battery...
See "System Tab" on page 53 for information about Power to set the amount of ... device with data on your computer. • Connect the device to an electrical outlet to turn on the computer using the Dell™ Companion CD. Connect your device to a computer to: • Add programs to your device to a computer using .... • Charge a spare battery. See "Adding Programs Using Microsoft® ActiveSync®" on page 71 for the first time, install ActiveSync on the device. See "Using the Battery" on your device with a charged battery. 2 Press the power button to conserve battery...
Owner's Manual
Page 28
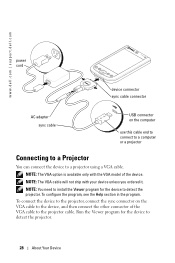
NOTE: You need to install the Viewer program for the device to detect the projector. 28 About Your Device NOTE: The VGA option is available only with your device unless ... with the VGA model of the VGA cable to the projector cable. To configure the program, see the Help section in the program. www.dell.com | support.dell.com power cord device connector sync cable connector AC adapter sync cable USB connector on the VGA cable to the device, and then connect...
NOTE: You need to install the Viewer program for the device to detect the projector. 28 About Your Device NOTE: The VGA option is available only with your device unless ... with the VGA model of the VGA cable to the projector cable. To configure the program, see the Help section in the program. www.dell.com | support.dell.com power cord device connector sync cable connector AC adapter sync cable USB connector on the VGA cable to the device, and then connect...
Owner's Manual
Page 29
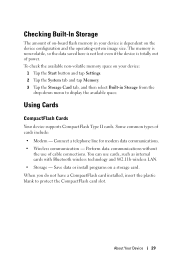
...Storage from the drop-down menu to protect the CompactFlash card slot. You can use of power. When you do not have a CompactFlash card installed, insert the plastic blank to display the available space. To check the available non-volatile memory space on your device: 1 Tap the Start ... and 802.11b wireless LAN. • Storage - About Your Device 29 Some common types of cards include: • Modem - Save data or install programs on the device configuration and the operating-system image size. Using Cards CompactFlash Cards Your device supports CompactFlash Type II cards.
...Storage from the drop-down menu to protect the CompactFlash card slot. You can use of power. When you do not have a CompactFlash card installed, insert the plastic blank to display the available space. To check the available non-volatile memory space on your device: 1 Tap the Start ... and 802.11b wireless LAN. • Storage - About Your Device 29 Some common types of cards include: • Modem - Save data or install programs on the device configuration and the operating-system image size. Using Cards CompactFlash Cards Your device supports CompactFlash Type II cards.

Owner's Manual
Page 30
NOTICE: Do not force the card. If you feel resistance, remove the card, check the orientation, and reinsert it . blank tab notch in the CompactFlash card slot, and slide the card into the slot. www.dell.com | support.dell.com To install a CompactFlash card: 1 If a blank is installed, remove it . See the documentation that came with the card for information on the back of the CompactFlash card with the notch in CompactFlash card slot 2 Align the tab on using the card. 30 About Your Device
NOTICE: Do not force the card. If you feel resistance, remove the card, check the orientation, and reinsert it . blank tab notch in the CompactFlash card slot, and slide the card into the slot. www.dell.com | support.dell.com To install a CompactFlash card: 1 If a blank is installed, remove it . See the documentation that came with the card for information on the back of the CompactFlash card with the notch in CompactFlash card slot 2 Align the tab on using the card. 30 About Your Device

Owner's Manual
Page 31
To install a Secure Digital memory card: 1 If a card is oriented correctly, and slide it into the slot until you feel a click. NOTICE: Do not force the card. If you feel resistance, remove the card, check the orientation, and reinsert it . Secure Digital Memory Cards Use Secure Digital memory cards to release it, and then remove it . blank 2 Ensure that came with the card for information on using the card. About Your Device 31 See the documentation that the card is already installed, press in the card to save or back up data.
To install a Secure Digital memory card: 1 If a card is oriented correctly, and slide it into the slot until you feel a click. NOTICE: Do not force the card. If you feel resistance, remove the card, check the orientation, and reinsert it . Secure Digital Memory Cards Use Secure Digital memory cards to release it, and then remove it . blank 2 Ensure that came with the card for information on using the card. About Your Device 31 See the documentation that the card is already installed, press in the card to save or back up data.

Owner's Manual
Page 33
..., hold the reset button for more information. Perform a hard reset if: • You want to clear it. • Your device is strongly recommended that you installed on your device. About Your Device 33 NOTICE: It is experiencing severe operational problems and you have already attempted a soft reset. Hard Reset NOTICE: When...
..., hold the reset button for more information. Perform a hard reset if: • You want to clear it. • Your device is strongly recommended that you installed on your device. About Your Device 33 NOTICE: It is experiencing severe operational problems and you have already attempted a soft reset. Hard Reset NOTICE: When...
Owner's Manual
Page 38
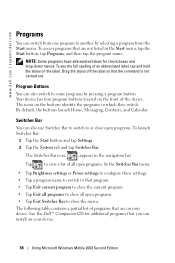
...NOTE: Some programs have abbreviated labels for additional programs that are not listed in the navigation bar. To access programs that the command is not carried out. Program Buttons You...device. See the Dell™ Companion CD for check boxes and drop-down menus. The following table contains a partial list of programs that you can install on the front ...of an abbreviated label, tap and hold the stylus on the buttons identify the programs to close all open programs. To launch Switcher Bar: 1 Tap the Start button and tap Settings. 2 Tap the System...
...NOTE: Some programs have abbreviated labels for additional programs that are not listed in the navigation bar. To access programs that the command is not carried out. Program Buttons You...device. See the Dell™ Companion CD for check boxes and drop-down menus. The following table contains a partial list of programs that you can install on the front ...of an abbreviated label, tap and hold the stylus on the buttons identify the programs to close all open programs. To launch Switcher Bar: 1 Tap the Start button and tap Settings. 2 Tap the System...

Owner's Manual
Page 55
...8226; Select which information types are automatically converted to a computer for the first time, ensure that you install ActiveSync on the computer using the Dell™ Companion CD. The Pocket PC version is synchronized. Synchronization compares the data on your device with ... synchronization mode to synchronize specific types of information. Your files are synchronized and control how much data is already installed on your computer using the Dell™ Companion CD. You can change ActiveSync options to control when synchronization occurs. NOTE: Before connecting your device...
...8226; Select which information types are automatically converted to a computer for the first time, ensure that you install ActiveSync on the computer using the Dell™ Companion CD. The Pocket PC version is synchronized. Synchronization compares the data on your device with ... synchronization mode to synchronize specific types of information. Your files are synchronized and control how much data is already installed on your computer using the Dell™ Companion CD. You can change ActiveSync options to control when synchronization occurs. NOTE: Before connecting your device...

Owner's Manual
Page 56
... and Tasks on your device. Your first synchronization process automatically begins when you to connect your synchronization settings. After the installation is copied to ActiveSync on your device. To find information on using ActiveSync on your computer, open ActiveSync on your ...device must be powered on the screen. www.dell.com | support.dell.com Installing and Using ActiveSync To install ActiveSync: 1 Insert the Dell Companion CD. 2 Click Getting Started to access the main menu. 3 Click Start Here. 4 Click Install ActiveSync and follow the instructions on for the ...
... and Tasks on your device. Your first synchronization process automatically begins when you to connect your synchronization settings. After the installation is copied to ActiveSync on your device. To find information on using ActiveSync on your computer, open ActiveSync on your ...device must be powered on the screen. www.dell.com | support.dell.com Installing and Using ActiveSync To install ActiveSync: 1 Insert the Dell Companion CD. 2 Click Getting Started to access the main menu. 3 Click Start Here. 4 Click Install ActiveSync and follow the instructions on for the ...
Owner's Manual
Page 71
.... Adding Programs Using Microsoft® ActiveSync® You need to your computer (or insert the CD or floppy that were already installed when you never accidentally lose ROM contents. b On the System tab, tap About. Adding and Removing Programs Programs that contains the software into your computer). You cannot remove these programs...
.... Adding Programs Using Microsoft® ActiveSync® You need to your computer (or insert the CD or floppy that were already installed when you never accidentally lose ROM contents. b On the System tab, tap About. Adding and Removing Programs Programs that contains the software into your computer). You cannot remove these programs...

Owner's Manual
Page 72
... of the software to the Program Files folder on your device. www.dell.com | support.dell.com 4 Connect your device to your device. Once the software has been installed on the screen. b On the System tab, tap About. Many programs provide special installation instructions. 4 Tap the file, such as a *.xip or *.exe file. Follow the...
... of the software to the Program Files folder on your device. www.dell.com | support.dell.com 4 Connect your device to your device. Once the software has been installed on the screen. b On the System tab, tap About. Many programs provide special installation instructions. 4 Tap the file, such as a *.xip or *.exe file. Follow the...
