User Guide
Page 3
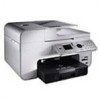
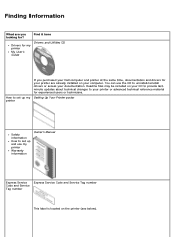
Finding Information What are you purchased your Dell computer and printer at the same time, documentation and drivers for your printer are already installed on your computer. You can use my printer Warranty information Owner's Manual Express Service Code and Service Tag number Express Service Code and Service Tag number This label is...
Finding Information What are you purchased your Dell computer and printer at the same time, documentation and drivers for your printer are already installed on your computer. You can use my printer Warranty information Owner's Manual Express Service Code and Service Tag number Express Service Code and Service Tag number This label is...
User Guide
Page 11
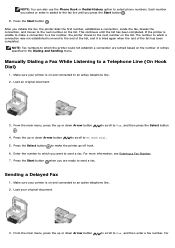
... connection, and moves to the fax list until the list has been completed. to scroll to select phone numbers. Make sure your original document. 3. For Manually Dialing a Fax While Listening to make a connection to a fax number, the printer moves to which you are retried based on the list. Sending a Delayed Fax...
... connection, and moves to the fax list until the list has been completed. to scroll to select phone numbers. Make sure your original document. 3. For Manually Dialing a Fax While Listening to make a connection to a fax number, the printer moves to which you are retried based on the list. Sending a Delayed Fax...
User Guide
Page 14
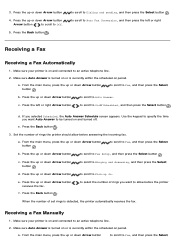
... or down Arrow button button . Press the up or down Arrow button to scroll to an active telephone line. 2. Press the up On. Receiving a Fax Manually 1. Make sure Auto Answer is turned on or is on and connected to Fax Setup, and then press the Select button . a. Make sure your printer...
... or down Arrow button button . Press the up or down Arrow button to scroll to an active telephone line. 2. Press the up On. Receiving a Fax Manually 1. Make sure Auto Answer is turned on or is on and connected to Fax Setup, and then press the Select button . a. Make sure your printer...
User Guide
Page 15
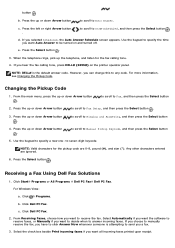
... is the default answer code. Press the up or down Arrow button . to scroll to Manual Pickup Keycode, and then press the Select button 5. Click Dell PC Fax. c. Click Dell PC Fax. 2. to scroll to Ringing and Answering, and then press the Select button 4.... If you choose to manually receive the fax, you can change this to specify a new one- button . Press the up or down Arrow button . Receiving a Fax Using Dell Fax Solutions 1. c. Any other characters entered are 0-9, pound (#), and star...
... is the default answer code. Press the up or down Arrow button . to scroll to Manual Pickup Keycode, and then press the Select button 5. Click Dell PC Fax. c. Click Dell PC Fax. 2. to scroll to Ringing and Answering, and then press the Select button 4.... If you choose to manually receive the fax, you can change this to specify a new one- button . Press the up or down Arrow button . Receiving a Fax Using Dell Fax Solutions 1. c. Any other characters entered are 0-9, pound (#), and star...

User Guide
Page 17
...number) on two pages. On this tab: Dialing and Sending You can hold up to answer incoming faxes automatically or at a scheduled time. Specify a manual answer code. Using Speed Dial To make sending faxes easier, you selected during initial setup. Specify a maximum send speed and a print quality for your... the ring volume. Specify when to Phone Book, and then press the Select button . Set the dial volume. The Caller ID detection pattern is DELL# (3355#). Press the up or down Arrow button to scroll to print a fax activity report. If an optional second paper tray is installed, ...
...number) on two pages. On this tab: Dialing and Sending You can hold up to answer incoming faxes automatically or at a scheduled time. Specify a manual answer code. Using Speed Dial To make sending faxes easier, you selected during initial setup. Specify a maximum send speed and a print quality for your... the ring volume. Specify when to Phone Book, and then press the Select button . Set the dial volume. The Caller ID detection pattern is DELL# (3355#). Press the up or down Arrow button to scroll to print a fax activity report. If an optional second paper tray is installed, ...

User Guide
Page 29
...the printer detects. Layout - Select Normal, Banner, Mirror, N-up, Poster, Booklet, or Borderless. Dell Customer Experience Improvement Program - Allows you want to save photos from Automatic, Manual, or Print Duplex. Draft is arranged on both sides of the paper. NOTE: You cannot select... this to print an envelope. Orientation - Select the check box if you to set the paper type manually, or have the printer detect the paper type automatically. Copies - Select this setting if you have a photo cartridge installed. Envelope - ...
...the printer detects. Layout - Select Normal, Banner, Mirror, N-up, Poster, Booklet, or Borderless. Dell Customer Experience Improvement Program - Allows you want to save photos from Automatic, Manual, or Print Duplex. Draft is arranged on both sides of the paper. NOTE: You cannot select... this to print an envelope. Orientation - Select the check box if you to set the paper type manually, or have the printer detect the paper type automatically. Copies - Select this setting if you have a photo cartridge installed. Envelope - ...

User Guide
Page 39
... time when you would like to specify a darkness setting (middle setting is turned off . The settings changed on the screen. They will only be answered manually. Press the Select button Search Menu. You cannot modify the speed dial number. When Auto Answer is automatically assigned. The last five numbers dialed are...
... time when you would like to specify a darkness setting (middle setting is turned off . The settings changed on the screen. They will only be answered manually. Press the Select button Search Menu. You cannot modify the speed dial number. When Auto Answer is automatically assigned. The last five numbers dialed are...
User Guide
Page 41
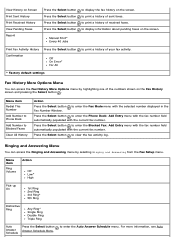
... default settings Fax History More Options Menu You can access the Ringing and Answering menu by highlighting one of the numbers shown on the screen. Manual Print* Every 40 Jobs Print Fax Activity History Confirmation Press the Select button Off On Error* For All to print a history of sent faxes. to...
... default settings Fax History More Options Menu You can access the Ringing and Answering menu by highlighting one of the numbers shown on the screen. Manual Print* Every 40 Jobs Print Fax Activity History Confirmation Press the Select button Off On Error* For All to print a history of sent faxes. to...
User Guide
Page 42
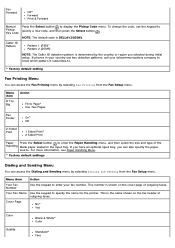
... Menu You can also specify the paper source. NOTE: The default code is the name shown on the cover page of outgoing faxes. This is DELL# (3355#). Menu item If Too Big Action Fit to Page* Use Two Pages Fax Footer On* Off 2-Sided Print 1 Sided Print* 2 Sided Print Paper ... or region you can access the Dialing and Sending menu by selecting Fax Printing from the Fax Setup menu. Fax Forward Off* Forward Print & Forward Manual Pickup Key Code Press the Select button to specify a new code, and then press the Select button . Cover Page No* Yes Color Black & White* Color...
... Menu You can also specify the paper source. NOTE: The default code is the name shown on the cover page of outgoing faxes. This is DELL# (3355#). Menu item If Too Big Action Fit to Page* Use Two Pages Fax Footer On* Off 2-Sided Print 1 Sided Print* 2 Sided Print Paper ... or region you can access the Dialing and Sending menu by selecting Fax Printing from the Fax Setup menu. Fax Forward Off* Forward Print & Forward Manual Pickup Key Code Press the Select button to specify a new code, and then press the Select button . Cover Page No* Yes Color Black & White* Color...
User Guide
Page 59
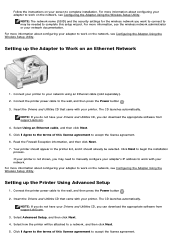
...on the network, see Configuring the Adapter Using the Wireless Setup Utility. Setting up the Adapter to Work on your adapter to manually configure your network. NOTE: The network name (SSID) and the security settings for the wireless network you can download the appropriate ...software from support.dell.com . 4. Select Using an Ethernet cable, and then click Next. 5. Connect the printer power cable to the wall, and then press ...
...on the network, see Configuring the Adapter Using the Wireless Setup Utility. Setting up the Adapter to Work on your adapter to manually configure your network. NOTE: The network name (SSID) and the security settings for the wireless network you can download the appropriate ...software from support.dell.com . 4. Select Using an Ethernet cable, and then click Next. 5. Connect the printer power cable to the wall, and then press ...

User Guide
Page 60
... want to be installed. Paper has been loaded into the printer. c. The ink cartridges are correct, and then click Next to manually enter the network configuration settings. Using an Available Wireless Network Configuration 1. NOTE: Clicking Next prompts the setup utility to a computer by ...cable, and launching the Documents and Utilities CD. Verify that the adapter can automatically detect wireless network settings or allow you selected Dell Wireless Adapter 3300: Follow the instructions on your screen to enter a different network name, and then click Next. b. If you...
... want to be installed. Paper has been loaded into the printer. c. The ink cartridges are correct, and then click Next to manually enter the network configuration settings. Using an Available Wireless Network Configuration 1. NOTE: Clicking Next prompts the setup utility to a computer by ...cable, and launching the Documents and Utilities CD. Verify that the adapter can automatically detect wireless network settings or allow you selected Dell Wireless Adapter 3300: Follow the instructions on your screen to enter a different network name, and then click Next. b. If you...

User Guide
Page 61
...(Infrastructure Mode) - If no security was detected, go to verify wireless communication with the printer. For more information, see Manually Configuring the Adapter in Infrastructure Mode. Verify that the adapter can communicate over the network. From the Wireless Security Settings screen,... Network Communication. From the Wireless Security Settings screen, select No Security, and then click Next. 2. d. For more information, see Manually Configuring the Adapter in Ad-Hoc Mode. 3. For Ad-Hoc Mode, select Access other computers directly without using a wireless router (...
...(Infrastructure Mode) - If no security was detected, go to verify wireless communication with the printer. For more information, see Manually Configuring the Adapter in Infrastructure Mode. Verify that the adapter can communicate over the network. From the Wireless Security Settings screen,... Network Communication. From the Wireless Security Settings screen, select No Security, and then click Next. 2. d. For more information, see Manually Configuring the Adapter in Ad-Hoc Mode. 3. For Ad-Hoc Mode, select Access other computers directly without using a wireless router (...

User Guide
Page 62
... are correct, and then click Next to apply the settings. 3. Click Next. 5. You are correct, and then click Next to the Wireless Security Settings screen. 3. Manually Configuring the Adapter in Ad-Hoc Mode To set up the adapter in Infrastructure Mode. 3. From the Wireless Security Settings screen, select Wired Equivalent Privacy...
... are correct, and then click Next to apply the settings. 3. Click Next. 5. You are correct, and then click Next to the Wireless Security Settings screen. 3. Manually Configuring the Adapter in Ad-Hoc Mode To set up the adapter in Infrastructure Mode. 3. From the Wireless Security Settings screen, select Wired Equivalent Privacy...
User Guide
Page 73
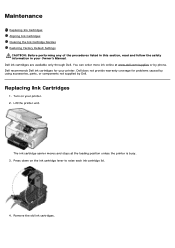
You can order more ink online at the loading position unless the printer is busy. 3. Dell does not provide warranty coverage for your Owner's Manual. The ink cartridge carrier moves and stops at www.dell.com/supplies or by Dell. Press down on your printer. 2. Turn on the ink cartridge lever to raise each ink...
You can order more ink online at the loading position unless the printer is busy. 3. Dell does not provide warranty coverage for your Owner's Manual. The ink cartridge carrier moves and stops at www.dell.com/supplies or by Dell. Press down on your printer. 2. Turn on the ink cartridge lever to raise each ink...

User Guide
Page 83
... one sheet. 7. 8. Duplexing a Print Job (Two-Sided Printing) Automatic Duplex Automatic duplex allows you are finished customizing your document on both sides of pages to manually re-orient the sheets. Click the Advanced tab, and then select the 2-sided printing check box. 6.
... one sheet. 7. 8. Duplexing a Print Job (Two-Sided Printing) Automatic Duplex Automatic duplex allows you are finished customizing your document on both sides of pages to manually re-orient the sheets. Click the Advanced tab, and then select the 2-sided printing check box. 6.

User Guide
Page 84
... your pages. 8. Click OK or Print. The Printing Preferences dialog box closes. 9. When you want to bind your settings, click OK. Manual Duplex Manual duplex allows you want to print your pages. 8. Click the Advanced tab, and then select the 2-sided printing check box. 6. On the... customizing your settings, click OK. 7. For more information, see Loading Paper. 3. With your document. 8. From the drop-down list, select Manual. 7. Select how you to bind your document on the back sides of the paper. Select the size of the paper. The printer prints the...
... your pages. 8. Click OK or Print. The Printing Preferences dialog box closes. 9. When you want to bind your settings, click OK. Manual Duplex Manual duplex allows you want to print your pages. 8. Click the Advanced tab, and then select the 2-sided printing check box. 6. On the... customizing your settings, click OK. 7. For more information, see Loading Paper. 3. With your document. 8. From the drop-down list, select Manual. 7. Select how you to bind your document on the back sides of the paper. Select the size of the paper. The printer prints the...
User Guide
Page 86
... Start® My Computer. Double-click the CD-ROM drive icon, and then double-click setup.exe. 4. Click Start® Programs or All Programs® Dell Printers. In Windows Vista, click ® Computer. 3. When the printer software installation screen appears, click Personal Installation or Network Installation. 5. Determine if the printer software..., ensure that the printer is firmly connected to your printer and your computer. If the software installation screen does not appear automatically, install the software manually. 1.
... Start® My Computer. Double-click the CD-ROM drive icon, and then double-click setup.exe. 4. Click Start® Programs or All Programs® Dell Printers. In Windows Vista, click ® Computer. 3. When the printer software installation screen appears, click Personal Installation or Network Installation. 5. Determine if the printer software..., ensure that the printer is firmly connected to your printer and your computer. If the software installation screen does not appear automatically, install the software manually. 1.

User Guide
Page 97
...Ink Cartridges. The memory card or the USB key does Make sure that is the Mass Storage Device. Please disconnect and refer to user manual. Choose a photo size that your print job to print any missing pages. Insert Attach a USB Bluetooth adapter into the PictBridge port. ..., choose a paper size that the memory card or USB key is smaller than the paper size set. Please disconnect and refer to user manual. The memory card is the same size as filename extensions. No valid photo image files detected. from the ink cartridges. Unplug device to...
...Ink Cartridges. The memory card or the USB key does Make sure that is the Mass Storage Device. Please disconnect and refer to user manual. Choose a photo size that your print job to print any missing pages. Insert Attach a USB Bluetooth adapter into the PictBridge port. ..., choose a paper size that the memory card or USB key is smaller than the paper size set. Please disconnect and refer to user manual. The memory card is the same size as filename extensions. No valid photo image files detected. from the ink cartridges. Unplug device to...
User Guide
Page 114
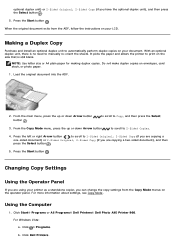
... and then press the Select button . 5. For Windows Vista: a. Click Dell Printers. Load the original document into the ADF. 2. Click Start® Programs or All Programs® Dell Printers® Dell Photo AIO Printer 966. Click ® Programs. b. Making a Duplex Copy Purchase and install an ...optional duplex unit to 2-Sided Copies. 4. Press the left or right Arrow button to scroll to manually re-orient the sheets. Using the...
... and then press the Select button . 5. For Windows Vista: a. Click Dell Printers. Load the original document into the ADF. 2. Click Start® Programs or All Programs® Dell Printers® Dell Photo AIO Printer 966. Click ® Programs. b. Making a Duplex Copy Purchase and install an ...optional duplex unit to 2-Sided Copies. 4. Press the left or right Arrow button to scroll to manually re-orient the sheets. Using the...

User Guide
Page 117
For information about the Dell warranty for your printer, refer to new in accordance with industry-standard practices. apmarketing@dell.com (Asian/Pacific countries only) sales_canada@dell.com (Canada only) Warranty and Return Policy Dell Inc. ("Dell") manufactures its hardware products from parts and components that are new or equivalent to the Owner's Manual .
For information about the Dell warranty for your printer, refer to new in accordance with industry-standard practices. apmarketing@dell.com (Asian/Pacific countries only) sales_canada@dell.com (Canada only) Warranty and Return Policy Dell Inc. ("Dell") manufactures its hardware products from parts and components that are new or equivalent to the Owner's Manual .


