
Quick Reference Guide
Page 1
Laser Printer Quick Reference Loading paper and specialty media Loading the 250-sheet or 550-sheet tray 1 Pull...lock the length guide. 4 Flex the sheets back and forth to loosen them, and then fan them. Doing so may cause a jam. 2 Squeeze the width guide tab inward as shown, and move the width guide to the correct position for the paper size being ...faceup with the leading edge of the paper toward the back of the tray which indicates the maximum height for the tray from the printer control panel. 1 Note: Do not remove trays while a job prints or while Busy appears on a level surface. 5 Load ...
Laser Printer Quick Reference Loading paper and specialty media Loading the 250-sheet or 550-sheet tray 1 Pull...lock the length guide. 4 Flex the sheets back and forth to loosen them, and then fan them. Doing so may cause a jam. 2 Squeeze the width guide tab inward as shown, and move the width guide to the correct position for the paper size being ...faceup with the leading edge of the paper toward the back of the tray which indicates the maximum height for the tray from the printer control panel. 1 Note: Do not remove trays while a job prints or while Busy appears on a level surface. 5 Load ...

Quick Reference Guide
Page 2
...component, allow the surface to remove, then open the rear door and remove the paper from the printer. 5 Remove the jammed paper, and then insert the tray. 6 Press . 2 Clearing jams 200 and 201 paper jams 1 Push the release latch, and then lower the multipurpose feeder door. If the paper is ...250- Warning-Potential Damage: Do not touch the photoconductor drum on a flat, smooth surface. CAUTION-HOT SURFACE: The inside of the printer. Warning-Potential Damage: The jammed paper may be hot. Note: If the paper is not easy to cool before touching. or 550-sheet tray, then remove the...
...component, allow the surface to remove, then open the rear door and remove the paper from the printer. 5 Remove the jammed paper, and then insert the tray. 6 Press . 2 Clearing jams 200 and 201 paper jams 1 Push the release latch, and then lower the multipurpose feeder door. If the paper is ...250- Warning-Potential Damage: Do not touch the photoconductor drum on a flat, smooth surface. CAUTION-HOT SURFACE: The inside of the printer. Warning-Potential Damage: The jammed paper may be hot. Note: If the paper is not easy to cool before touching. or 550-sheet tray, then remove the...

User Guide
Page 4
... and 201 paper jams...80 202 and 203 paper jams...81 230 paper jam...82 231-239 paper jams (optional external duplex unit 84 241-245 paper jams...86 250 paper jam...86 260 paper jam...87 271-279 paper jams...88 280 paper jams...88 281 paper jam...89 282 paper jam...89 283 staple jam...90 Understanding printer menus 92 Menus...
... and 201 paper jams...80 202 and 203 paper jams...81 230 paper jam...82 231-239 paper jams (optional external duplex unit 84 241-245 paper jams...86 250 paper jam...86 260 paper jam...87 271-279 paper jams...88 280 paper jams...88 281 paper jam...89 282 paper jam...89 283 staple jam...90 Understanding printer menus 92 Menus...
User Guide
Page 6
... alerts...167 Viewing reports...168 Adjusting Power Saver...168 Restoring the factory default settings...169 Troubleshooting 170 Solving basic problems...170 Solving basic printer problems...170 Printer control panel display is blank or displays only diamonds 170 Embedded Web Server does not open...170 Solving printing problems...171 Multiple-language PDFs......176 Memory card ...177 Flash memory card...177 Hard disk with adapter...177 Internal Solutions Port ...177 Solving paper feed problems...177 Paper frequently jams ...177 Paper jam message remains after jam is cleared ...178 Contents 6
... alerts...167 Viewing reports...168 Adjusting Power Saver...168 Restoring the factory default settings...169 Troubleshooting 170 Solving basic problems...170 Solving basic printer problems...170 Printer control panel display is blank or displays only diamonds 170 Embedded Web Server does not open...170 Solving printing problems...171 Multiple-language PDFs......176 Memory card ...177 Flash memory card...177 Hard disk with adapter...177 Internal Solutions Port ...177 Solving paper feed problems...177 Paper frequently jams ...177 Paper jam message remains after jam is cleared ...178 Contents 6

User Guide
Page 50
...paper height and width Defining a specific height and width measurement for the Universal paper size (in the portrait orientation) allows the printer to support the size, including support for loading paper. Submitting Selection appears, followed by the Universal Setup menu. Doing so may cause... a jam. Loading paper and specialty media 50 Submitting Selection appears, followed by the Universal Setup menu. 3 Press the arrow buttons until Portrait...
...paper height and width Defining a specific height and width measurement for the Universal paper size (in the portrait orientation) allows the printer to support the size, including support for loading paper. Submitting Selection appears, followed by the Universal Setup menu. Doing so may cause... a jam. Loading paper and specialty media 50 Submitting Selection appears, followed by the Universal Setup menu. 3 Press the arrow buttons until Portrait...

User Guide
Page 63
... the tendency for 24 to 48 hours before printing by storing it in its original wrapper until it can automatically feed paper weights from the printer environment. If paper is recommended. Paper and specialty media guidelines 63 Storing paper unwrapped in hot, humid, cold, or dry conditions, even... than 60 g/m2 (16 lb) might not be stiff enough to printing and can contribute to paper curling prior to feed properly, causing jams. For best performance, use paper between 150 and 250 Sheffield points produces the best print quality. If paper is recommended. This limits the ...
... the tendency for 24 to 48 hours before printing by storing it in its original wrapper until it can automatically feed paper weights from the printer environment. If paper is recommended. Paper and specialty media guidelines 63 Storing paper unwrapped in hot, humid, cold, or dry conditions, even... than 60 g/m2 (16 lb) might not be stiff enough to printing and can contribute to paper curling prior to feed properly, causing jams. For best performance, use paper between 150 and 250 Sheffield points produces the best print quality. If paper is recommended. This limits the ...
User Guide
Page 64
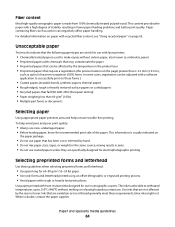
To help avoid jams and poor print quality: • Always use with laser printers: • Chemically treated papers used to make copies without ...60 g/m2 (16 lb) • Multiple part forms or documents Selecting paper Using appropriate paper prevents jams and helps ensure trouble-free printing. Selecting preprinted forms and letterhead Use these requirements; latex inks might ...(446°F) without carbon paper, also known as cotton can be affected by the temperature in the printer fuser • Preprinted papers that has been cut or trimmed by the resin in the same source;...
To help avoid jams and poor print quality: • Always use with laser printers: • Chemically treated papers used to make copies without ...60 g/m2 (16 lb) • Multiple part forms or documents Selecting paper Using appropriate paper prevents jams and helps ensure trouble-free printing. Selecting preprinted forms and letterhead Use these requirements; latex inks might ...(446°F) without carbon paper, also known as cotton can be affected by the temperature in the printer fuser • Preprinted papers that has been cut or trimmed by the resin in the same source;...

User Guide
Page 66
... relative humidity between 40 and 60%. • Store paper in the Paper Size menu only when Tray Size Sensing is specified by the printer Note: An optional 250-sheet Universally Adjustable Tray is 40%. Most label manufacturers recommend printing in a temperature range of individual paper packages. ...Supported paper sizes, types, and weights The following tables provide information on top of 18 to 24°C (65 to help avoid jams and uneven print quality: • For best results, store paper where the temperature is 21°C (70°F) and the relative humidity...
... relative humidity between 40 and 60%. • Store paper in the Paper Size menu only when Tray Size Sensing is specified by the printer Note: An optional 250-sheet Universally Adjustable Tray is 40%. Most label manufacturers recommend printing in a temperature range of individual paper packages. ...Supported paper sizes, types, and weights The following tables provide information on top of 18 to 24°C (65 to help avoid jams and uneven print quality: • For best results, store paper where the temperature is 21°C (70°F) and the relative humidity...
User Guide
Page 70
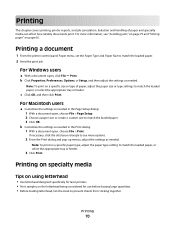
..., Preferences, Options, or Setup, and then adjust the settings as needed . Note: To print on the letterhead being considered for laser printers. • Print samples on a specific paper type, adjust the paper type setting to prevent sheets from sticking together. Printing This chapter covers printing...document 1 From the printer control panel Paper menu, set the Paper Type and Paper Size to match the loaded paper. 2 Send the print job: For Windows users a With a document open , choose File > Page Setup. 2 Choose a paper size or create a custom size to see "Avoiding jams" on page 79...
..., Preferences, Options, or Setup, and then adjust the settings as needed . Note: To print on the letterhead being considered for laser printers. • Print samples on a specific paper type, adjust the paper type setting to prevent sheets from sticking together. Printing This chapter covers printing...document 1 From the printer control panel Paper menu, set the Paper Type and Paper Size to match the loaded paper. 2 Send the print job: For Windows users a With a document open , choose File > Page Setup. 2 Choose a paper size or create a custom size to see "Avoiding jams" on page 79...
User Guide
Page 71
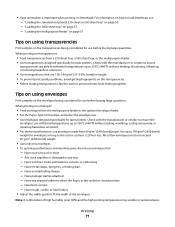
...cotton envelopes must not exceed 90 g/m2 (24 lb bond) weight. • Use only new envelopes. • To optimize performance and minimize jams, do not use envelopes made from a 250-sheet tray, a 550-sheet tray, or the multipurpose feeder. • Use transparencies designed specifically .... • For the best performance, use envelopes that are able to withstand temperatures up to 105 g/m2 (28 lb bond) weight for laser printers. Use up to ensure transparencies are 138-146 g/m2 (37-39 lb. Have postage stamps attached - For information on transparencies: • Feed ...
...cotton envelopes must not exceed 90 g/m2 (24 lb bond) weight. • Use only new envelopes. • To optimize performance and minimize jams, do not use envelopes made from a 250-sheet tray, a 550-sheet tray, or the multipurpose feeder. • Use transparencies designed specifically .... • For the best performance, use envelopes that are able to withstand temperatures up to 105 g/m2 (28 lb bond) weight for laser printers. Use up to ensure transparencies are 138-146 g/m2 (37-39 lb. Have postage stamps attached - For information on transparencies: • Feed ...
User Guide
Page 72
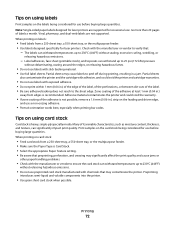
...topcoats can significantly impact print quality. Adhesive material contaminates the printer and could void the printer and cartridge warranties. • Do not use labels with exposed adhesive. • Do not print within 1 mm (0.04 in a jam. Many of the label. • Be sure adhesive ...(446°F) without sealing, excessive curling, wrinkling, or releasing hazardous emissions. - Preprinting introduces semi-liquid and volatile components into the printer. • Use grain short card stock when possible. Tips on using card stock Card stock is heavy, single-ply specialty media....
...topcoats can significantly impact print quality. Adhesive material contaminates the printer and could void the printer and cartridge warranties. • Do not use labels with exposed adhesive. • Do not print within 1 mm (0.04 in a jam. Many of the label. • Be sure adhesive ...(446°F) without sealing, excessive curling, wrinkling, or releasing hazardous emissions. - Preprinting introduces semi-liquid and volatile components into the printer. • Use grain short card stock when possible. Tips on using card stock Card stock is heavy, single-ply specialty media....

User Guide
Page 75
...into the front USB port. Notes: • If you insert the flash drive when the printer requires attention, such as when a jam has occurred, then the printer ignores it. • If you insert the flash drive while the printer is printing other jobs are appended by the extension type (for example, .jpg). 4 ...using the keypad, and then press to print supported file types. Note: Do not remove the flash drive from a flash drive: 1 Make sure the printer is located on the flash drive appear as held jobs list to print, and then press . Notes: • High-speed flash drives must support ...
...into the front USB port. Notes: • If you insert the flash drive when the printer requires attention, such as when a jam has occurred, then the printer ignores it. • If you insert the flash drive while the printer is printing other jobs are appended by the extension type (for example, .jpg). 4 ...using the keypad, and then press to print supported file types. Note: Do not remove the flash drive from a flash drive: 1 Make sure the printer is located on the flash drive appear as held jobs list to print, and then press . Notes: • High-speed flash drives must support ...

User Guide
Page 79
... perforations, cutouts, or embossing - Have rough, cockle, or laid finishes - For more than one jam, the number of the printer where the jam occurred. Avoiding jams The following hints can help you avoid jams. Paper tray recommendations • Make sure the paper lies flat in the Paper menu. • ...trays, the multipurpose feeder, or the envelope feeder while the printer is displayed. When there is in firmly after loading paper. Have excessive curl or twist - Have an interlocking design - Have any way Clearing jams 79 Are stuck together or damaged in any exposed adhesive when...
... perforations, cutouts, or embossing - Have rough, cockle, or laid finishes - For more than one jam, the number of the printer where the jam occurred. Avoiding jams The following hints can help you avoid jams. Paper tray recommendations • Make sure the paper lies flat in the Paper menu. • ...trays, the multipurpose feeder, or the envelope feeder while the printer is displayed. When there is in firmly after loading paper. Have excessive curl or twist - Have an interlocking design - Have any way Clearing jams 79 Are stuck together or damaged in any exposed adhesive when...
User Guide
Page 80
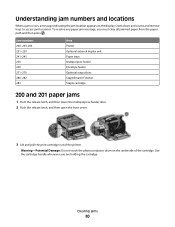
... and locations When a jam occurs, a message indicating the jam location appears on the underside of the printer. To resolve any paper jam message, you are holding the cartridge. Jam numbers 200-203, 230 231-239 241-245 250 260 271-279 280-282 283 Area Printer Optional external duplex unit Paper ...trays Multipurpose feeder Envelope feeder Optional output bins StapleSmart II Finisher Staple cartridge 200 and 201 paper jams 1 Push the release latch, and then lower the multipurpose feeder door. 2...
... and locations When a jam occurs, a message indicating the jam location appears on the underside of the printer. To resolve any paper jam message, you are holding the cartridge. Jam numbers 200-203, 230 231-239 241-245 250 260 271-279 280-282 283 Area Printer Optional external duplex unit Paper ...trays Multipurpose feeder Envelope feeder Optional output bins StapleSmart II Finisher Staple cartridge 200 and 201 paper jams 1 Push the release latch, and then lower the multipurpose feeder door. 2...

User Guide
Page 81
...a hot component, allow the surface to light for extended periods. To reduce the risk of the printer might be covered with unfused toner which can stain garments and skin. 5 Remove the jammed paper. CAUTION-HOT SURFACE: The inside of injury from there. 6 Align and reinstall the print ...cartridge. 7 Close the front cover. 8 Close the multipurpose feeder door. 9 Press . 202 and 203 paper jams If the paper is exiting the printer, then pull the paper out, and then press . 4 Place the print cartridge aside on a flat, smooth surface. Warning-Potential Damage:...
...a hot component, allow the surface to light for extended periods. To reduce the risk of the printer might be covered with unfused toner which can stain garments and skin. 5 Remove the jammed paper. CAUTION-HOT SURFACE: The inside of injury from there. 6 Align and reinstall the print ...cartridge. 7 Close the front cover. 8 Close the multipurpose feeder door. 9 Press . 202 and 203 paper jams If the paper is exiting the printer, then pull the paper out, and then press . 4 Place the print cartridge aside on a flat, smooth surface. Warning-Potential Damage:...

User Guide
Page 82
Clearing jams 82 If the paper is not exiting the printer: 1 Pull down the top rear door. 2 Slowly remove the jammed paper to avoid tearing it. 3 Close the top rear door. 4 Press . 230 paper jam Rear paper jams 1 Remove the standard tray from the printer.
Clearing jams 82 If the paper is not exiting the printer: 1 Pull down the top rear door. 2 Slowly remove the jammed paper to avoid tearing it. 3 Close the top rear door. 4 Press . 230 paper jam Rear paper jams 1 Remove the standard tray from the printer.

User Guide
Page 84
Clearing jams 84 Front paper jams 1 Remove the standard tray from the printer. 2 Push the tab down. 3 Remove the jammed paper. 4 Insert the standard tray. 5 Press . 231-239 paper jams (optional external duplex unit) Rear paper jams 1 Push in and hold the latch while pulling up the rear duplex door. 2 Remove the jammed paper.
Clearing jams 84 Front paper jams 1 Remove the standard tray from the printer. 2 Push the tab down. 3 Remove the jammed paper. 4 Insert the standard tray. 5 Press . 231-239 paper jams (optional external duplex unit) Rear paper jams 1 Push in and hold the latch while pulling up the rear duplex door. 2 Remove the jammed paper.

User Guide
Page 85
Clearing jams 85 3 Close the rear duplex door. 4 Press . Front paper jams 1 Remove the standard tray from the printer. 2 Remove the duplex jam access tray. 3 Raise the recessed duplex bar. 4 Remove the jammed paper. 5 Replace the duplex jam access tray.
Clearing jams 85 3 Close the rear duplex door. 4 Press . Front paper jams 1 Remove the standard tray from the printer. 2 Remove the duplex jam access tray. 3 Raise the recessed duplex bar. 4 Remove the jammed paper. 5 Replace the duplex jam access tray.

User Guide
Page 86
6 Insert the standard tray. 7 Press . 241-245 paper jams 1 Pull out the tray indicated on the display. 2 Remove any jammed paper, and then insert the tray. 3 Press . 4 If the jam message persists for a 250-sheet or 550-sheet tray, then remove the tray from the printer. 5 Remove the jammed paper, and then insert the tray. 6 Press . 250 paper jam 1 Remove the paper from the multipurpose feeder. Clearing jams 86
6 Insert the standard tray. 7 Press . 241-245 paper jams 1 Pull out the tray indicated on the display. 2 Remove any jammed paper, and then insert the tray. 3 Press . 4 If the jam message persists for a 250-sheet or 550-sheet tray, then remove the tray from the printer. 5 Remove the jammed paper, and then insert the tray. 6 Press . 250 paper jam 1 Remove the paper from the multipurpose feeder. Clearing jams 86

User Guide
Page 87
... then set it lightly rests against the edge of the paper. 5 Press . 260 paper jam The envelope feeder feeds envelopes from the printer. the bottom envelope will have to loosen them, and then fan them. Do not fold or crease the paper. Straighten the edges on page 80. 4 ... Note: If you cannot remove the envelope, then the print cartridge will be the one that is jammed. 1 Lift the envelope weight, and then remove all the envelopes. 2 If the jammed envelope has entered the printer and cannot be pulled out, then lift the envelope feeder up and then out of paper back...
... then set it lightly rests against the edge of the paper. 5 Press . 260 paper jam The envelope feeder feeds envelopes from the printer. the bottom envelope will have to loosen them, and then fan them. Do not fold or crease the paper. Straighten the edges on page 80. 4 ... Note: If you cannot remove the envelope, then the print cartridge will be the one that is jammed. 1 Lift the envelope weight, and then remove all the envelopes. 2 If the jammed envelope has entered the printer and cannot be pulled out, then lift the envelope feeder up and then out of paper back...


