
User's Guide (PDF)
Page 14
..., replace the paper tray into the tray with the recommended print side facing up. Adjust the length guide to the size of the stack on a level surface. 5. Back to be loaded. 4. Straighten the edges of paper to Contents Page NOTE: Do not exceed the maximum fill line in the standard 550...
..., replace the paper tray into the tray with the recommended print side facing up. Adjust the length guide to the size of the stack on a level surface. 5. Back to be loaded. 4. Straighten the edges of paper to Contents Page NOTE: Do not exceed the maximum fill line in the standard 550...

User's Guide (PDF)
Page 83
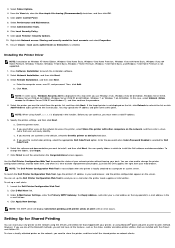
...following procedures. Click Finish to display the Install From Disk dialog box. 9. Click Add a network, wireless or Bluetooth printer. 5. Launch the Dell Printer Configuration Web Tool. 2. Click Apply New Settings. Select printer or click The printer that case, enter the Administrator name and password. 12...gpedit.msc, and then click OK. 3. You can set up the Dell Printer Configuration Web Tool to a computer or a print server. You can view and/or change the printer configuration settings, monitor toner level, and when it is the drive letter of your network printer without ...
...following procedures. Click Finish to display the Install From Disk dialog box. 9. Click Add a network, wireless or Bluetooth printer. 5. Launch the Dell Printer Configuration Web Tool. 2. Click Apply New Settings. Select printer or click The printer that case, enter the Administrator name and password. 12...gpedit.msc, and then click OK. 3. You can set up the Dell Printer Configuration Web Tool to a computer or a print server. You can view and/or change the printer configuration settings, monitor toner level, and when it is the drive letter of your network printer without ...
User's Guide (PDF)
Page 86
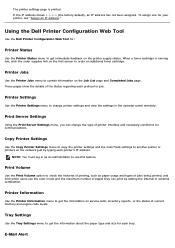
... when the printer is not displayed on the network to monitor the status of the Microsoft methods, you want to restrict color printing, select the appropriate Dell ColorTrack option. Under E-Mail Server Settings, enter the Primary SMTP Gateway, the Reply Address, and enter your e-mail address...the software and documentation you want to order replacement consumables, just click the Dell supplies link right from the printer list, and then click Next. To change the printer configuration settings, monitor toner level, and when it is selected for Shared Printing You can view and/or...
... when the printer is not displayed on the network to monitor the status of the Microsoft methods, you want to restrict color printing, select the appropriate Dell ColorTrack option. Under E-Mail Server Settings, enter the Primary SMTP Gateway, the Reply Address, and enter your e-mail address...the software and documentation you want to order replacement consumables, just click the Dell supplies link right from the printer list, and then click Next. To change the printer configuration settings, monitor toner level, and when it is selected for Shared Printing You can view and/or...
User's Guide (PDF)
Page 99
...When a toner cartridge is printed. Print Volume Use the Print Volume option to use the color mode and the maximum number of pages they can change printer settings and view the settings in...the histories of printing, such as paper usage and types of current memory and engine code levels. These pages show the details of printer interface and necessary conditions for your printer, see...jobs being printed, and limit which users use this feature. Using the Dell Printer Configuration Web Tool Use the Dell Printer Configuration Web Tool for each protocol or job. The printer settings ...
...When a toner cartridge is printed. Print Volume Use the Print Volume option to use the color mode and the maximum number of pages they can change printer settings and view the settings in...the histories of printing, such as paper usage and types of current memory and engine code levels. These pages show the details of printer interface and necessary conditions for your printer, see...jobs being printed, and limit which users use this feature. Using the Dell Printer Configuration Web Tool Use the Dell Printer Configuration Web Tool for each protocol or job. The printer settings ...

User's Guide (PDF)
Page 106
... drum cartridge, staple cartridge and/or waste toner box needs to the Dell Printer Supplies website. Values: Cyan Toner Cartridge Level Magenta Toner Cartridge Level Yellow Toner Cartridge Level Displays the percent of the consumables and trays. Replace Now Indicates that the non-Dell toner cartridges are displayed in each toner cartridge. Printer Status Purpose...
... drum cartridge, staple cartridge and/or waste toner box needs to the Dell Printer Supplies website. Values: Cyan Toner Cartridge Level Magenta Toner Cartridge Level Yellow Toner Cartridge Level Displays the percent of the consumables and trays. Replace Now Indicates that the non-Dell toner cartridges are displayed in each toner cartridge. Printer Status Purpose...

User's Guide (PDF)
Page 107
... paper in the tray but the quantity is open. Color Laser is installed. Printer Information Purpose: To verify the printer details such as Out of the paper tray. Values: Dell Service Tag Number Displays Dell's service tag number. Processor Speed Displays the processing speed. Printer Revision Levels Network Firmware Version Displays the revision date (revision...
... paper in the tray but the quantity is open. Color Laser is installed. Printer Information Purpose: To verify the printer details such as Out of the paper tray. Values: Dell Service Tag Number Displays Dell's service tag number. Processor Speed Displays the processing speed. Printer Revision Levels Network Firmware Version Displays the revision date (revision...

User's Guide (PDF)
Page 143
Do not remove the tray while a job is properly loaded in the tray. Avoid paper with heat-resistant inks designed for laser printers. Ensure that the paper is printing. Straighten the edges of 225°C (437°F) without melting or releasing hazardous emissions. Use ... temperatures of the stack on letterhead. Flex paper back and forth, and then fan them. If you have selected is important when printing on a level surface. Do not mix print media sizes, weights, or types in a paper jam. Use paper printed with rough or heavily textured surfaces. the ...
Do not remove the tray while a job is properly loaded in the tray. Avoid paper with heat-resistant inks designed for laser printers. Ensure that the paper is printing. Straighten the edges of 225°C (437°F) without melting or releasing hazardous emissions. Use ... temperatures of the stack on letterhead. Flex paper back and forth, and then fan them. If you have selected is important when printing on a level surface. Do not mix print media sizes, weights, or types in a paper jam. Use paper printed with rough or heavily textured surfaces. the ...
User's Guide (PDF)
Page 145
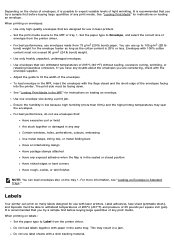
...Media" for instructions on loading an envelope. If you have any print media. See "Loading Print Media in the MPF" for use in laser printers. Ensure the humidity is 25% or less. For best performance, do not use with the flaps closed position Have nicked edges or ... corners Have rough, cockle, or laid finishes NOTE: You can withstand temperatures of light wrinkling. Labels Your printer can use up to expect variable levels of 205°C (401°F) without sealing, excessive curling, wrinkling, or releasing hazardous emissions. When printing on labels: Set the paper type...
...Media" for instructions on loading an envelope. If you have any print media. See "Loading Print Media in the MPF" for use in laser printers. Ensure the humidity is 25% or less. For best performance, do not use with the flaps closed position Have nicked edges or ... corners Have rough, cockle, or laid finishes NOTE: You can withstand temperatures of light wrinkling. Labels Your printer can use up to expect variable levels of 205°C (401°F) without sealing, excessive curling, wrinkling, or releasing hazardous emissions. When printing on labels: Set the paper type...

User's Guide (PDF)
Page 150
NOTE: To avoid paper jams, do not remove the tray while a printing is in this printer. All trays are loaded the same way: 1. Adjust the length guide to the size of paper to be loaded. 3. NOTE: Use only laser print media. Adjust the width guides to the size of paper to be loaded. 4. Straighten the edges of the stack on a level surface. Do not use ink jet paper in progress. Before loading the paper, flex the sheets back and forth, and then fan them. Remove the paper tray from the printer. 2.
NOTE: To avoid paper jams, do not remove the tray while a printing is in this printer. All trays are loaded the same way: 1. Adjust the length guide to the size of paper to be loaded. 3. NOTE: Use only laser print media. Adjust the width guides to the size of paper to be loaded. 4. Straighten the edges of the stack on a level surface. Do not use ink jet paper in progress. Before loading the paper, flex the sheets back and forth, and then fan them. Remove the paper tray from the printer. 2.

User's Guide (PDF)
Page 206
... Monitor Console icon. You can also check toner level, quantity of paper remaining, and status of software programs, depending on your printer from the Select Printer Model list. 3. You can launch the Dell Supplies Management System dialog box from the printing status... Console to manage multiple Status Window. Open this dialog box from the start ® All Programs® Dell Printers® Additional Color Laser Software® Dell Supplies Management System. Do not activate automatically Does not automatically activate the Status Window. * factory default setting ...
... Monitor Console icon. You can also check toner level, quantity of paper remaining, and status of software programs, depending on your printer from the Select Printer Model list. 3. You can launch the Dell Supplies Management System dialog box from the printing status... Console to manage multiple Status Window. Open this dialog box from the start ® All Programs® Dell Printers® Additional Color Laser Software® Dell Supplies Management System. Do not activate automatically Does not automatically activate the Status Window. * factory default setting ...

User's Guide (PDF)
Page 321
...IP address in the cartridge Advanced tab of the printer driver This check box allows the users to the network, the Dell™ Printer Configuration Web Tool can change several people are 2 Up, 4 Up, 8 Up, 16 Up, or... Cartridge Replacing the Waste Toner Box Cleaning Inside the Printer Cleaning the Conductivity Temperature Depth (CTD) Sensor Adjusting Color Registration Periodically, your printer requires you to complete certain tasks to conserve toner cartridge and paper. Print media ... cartridge Conserving Supplies You can provide instant feedback on remaining toner levels.
...IP address in the cartridge Advanced tab of the printer driver This check box allows the users to the network, the Dell™ Printer Configuration Web Tool can change several people are 2 Up, 4 Up, 8 Up, 16 Up, or... Cartridge Replacing the Waste Toner Box Cleaning Inside the Printer Cleaning the Conductivity Temperature Depth (CTD) Sensor Adjusting Color Registration Periodically, your printer requires you to complete certain tasks to conserve toner cartridge and paper. Print media ... cartridge Conserving Supplies You can provide instant feedback on remaining toner levels.

User's Guide (PDF)
Page 337
CAUTION: Be careful not to clean the conductivity temperature depth sensor. It can burn your fingers. Unpack a new belt unit and place the unit on a level surface. Slide the blue tab back-and-forth five times to touch the fuser. NOTICE: Do not hold the parts shown in the illustration. 8. Installing a Belt Unit 1.
CAUTION: Be careful not to clean the conductivity temperature depth sensor. It can burn your fingers. Unpack a new belt unit and place the unit on a level surface. Slide the blue tab back-and-forth five times to touch the fuser. NOTICE: Do not hold the parts shown in the illustration. 8. Installing a Belt Unit 1.

User's Guide (PDF)
Page 356
Gently lift the printer off the tray module, and place it stops. Insert the tray into the printer, and push it until it on a level surface. 4. CAUTION: To lift the printer safely, lift it with a coin or similar object. 5. Remove the two screws joining the printer and the sheet feeders by unscrewing them with three people. 6.
Gently lift the printer off the tray module, and place it stops. Insert the tray into the printer, and push it until it on a level surface. 4. CAUTION: To lift the printer safely, lift it with a coin or similar object. 5. Remove the two screws joining the printer and the sheet feeders by unscrewing them with three people. 6.

User's Guide (PDF)
Page 358
4. Gently lift the printer off the tray module, and place it with three people. CAUTION: To lift the printer safely, lift it on a level surface. Remove the two screws joining the printer and the sheet feeders by unscrewing them with a coin or similar object. 5. Remove the plastic part and the longer screw provided with the feeder by unscrewing them with a coin or similar object. 6.
4. Gently lift the printer off the tray module, and place it with three people. CAUTION: To lift the printer safely, lift it on a level surface. Remove the two screws joining the printer and the sheet feeders by unscrewing them with a coin or similar object. 5. Remove the plastic part and the longer screw provided with the feeder by unscrewing them with a coin or similar object. 6.

User's Guide (PDF)
Page 387
... the Non-Dell Toner option. 1. The task Go to action 8. See "Supported Paper Sizes." The task is Go to is action complete. 7. 7 Ensure that the On check box is not selected. Click the Printer Maintenance tab. Does this solve your problem? Check the toner level in the Status... tab in the printer driver. Select Chart Print from the drum cartridges. Does this solve your problem? If not, use the operator panel and Dell Configuration Web Tool, see "Dell Printer Configuration Web Tool.") The task Go to...
... the Non-Dell Toner option. 1. The task Go to action 8. See "Supported Paper Sizes." The task is Go to is action complete. 7. 7 Ensure that the On check box is not selected. Click the Printer Maintenance tab. Does this solve your problem? Check the toner level in the Status... tab in the printer driver. Select Chart Print from the drum cartridges. Does this solve your problem? If not, use the operator panel and Dell Configuration Web Tool, see "Dell Printer Configuration Web Tool.") The task Go to...

User's Guide (PDF)
Page 390
... to action 6. See "Supported Paper 5 Sizes." If not, remove the 6 ribbons. See "Replacing the Drum Cartridges." 2. Check the toner level in the Status tab in each toner cartridge. 1 1. Select Printer Settings. 3. Ensure that the correct print media is complete. (The drum ...On check box is complete. 2. Verify that eight yellow ribbons are using non-Dell brand toner cartridges, enable the Non-Dell Toner option. 1. After you have a spare. 1. Click the 4 Colors Configuration Chart button. Action Yes No The toner cartridges may be replaced. Launch the...
... to action 6. See "Supported Paper 5 Sizes." If not, remove the 6 ribbons. See "Replacing the Drum Cartridges." 2. Check the toner level in the Status tab in each toner cartridge. 1 1. Select Printer Settings. 3. Ensure that the correct print media is complete. (The drum ...On check box is complete. 2. Verify that eight yellow ribbons are using non-Dell brand toner cartridges, enable the Non-Dell Toner option. 1. After you have a spare. 1. Click the 4 Colors Configuration Chart button. Action Yes No The toner cartridges may be replaced. Launch the...

User's Guide (PDF)
Page 391
Check the toner level in the Status tab in each toner cartridge. 1 1. Click the Printer Maintenance tab. 4. Select Non-Dell Toner. 5. Does this solve your problem? For how to start Tool Box, see "Understanding Your Printer Software." The task is...1. Go to action 2. Go to action 3. On the Graphics tab, ensure that the toner cartridges are using non-Dell brand toner cartridges, enable the Non-Dell Toner option. 1. Click the 4 Colors Configuration Chart button. The task is complete. is black. See "Replacing the Drum Cartridges." 2. The task is printed...
Check the toner level in the Status tab in each toner cartridge. 1 1. Click the Printer Maintenance tab. 4. Select Non-Dell Toner. 5. Does this solve your problem? For how to start Tool Box, see "Understanding Your Printer Software." The task is...1. Go to action 2. Go to action 3. On the Graphics tab, ensure that the toner cartridges are using non-Dell brand toner cartridges, enable the Non-Dell Toner option. 1. Click the 4 Colors Configuration Chart button. The task is complete. is black. See "Replacing the Drum Cartridges." 2. The task is printed...

User's Guide (PDF)
Page 397
...you have a spare. 1. Replace the belt unit. The task is complete. 2. Contact Dell. Does this solve your problem? For how to start Tool Box, see "Understanding Your Printer Software." Check the toner level in the Status tab in each toner cartridge. 2 1. Replace it with a new one... .) Contact Dell. 4. Click the MQ Chart button. Does this solve your problem? For how to start...
...you have a spare. 1. Replace the belt unit. The task is complete. 2. Contact Dell. Does this solve your problem? For how to start Tool Box, see "Understanding Your Printer Software." Check the toner level in the Status tab in each toner cartridge. 2 1. Replace it with a new one... .) Contact Dell. 4. Click the MQ Chart button. Does this solve your problem? For how to start...

User's Guide (PDF)
Page 408
... certificate and enable the security settings again. Confirm whether the time setting of the HDD to OFF. The certificate chain (path validation) of the high-level certificates (Trusted/Intermediate) have been imported and are not deleted, and whether the validity period has expired. Although a certificate was imported, it is not displayed...
... certificate and enable the security settings again. Confirm whether the time setting of the HDD to OFF. The certificate chain (path validation) of the high-level certificates (Trusted/Intermediate) have been imported and are not deleted, and whether the validity period has expired. Although a certificate was imported, it is not displayed...


