User Guide
Page 121
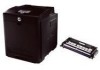
Order a maintenance kit, which contains a fuser and a transfer roller. Replace the toner cartridge, and then press to clear the message and continue printing. 88.yy Replace cartridge The toner cartridge is exhausted. 1 Replace the ... message and continue printing. 58 Too many flash options installed Try one or more of the following: • The printer discards any data received through the USB port. Install a new photoconductor kit. 88.yy Cartridge is low Replace the toner cartridge, and then press to clear the message and continue printing. 88...
Order a maintenance kit, which contains a fuser and a transfer roller. Replace the toner cartridge, and then press to clear the message and continue printing. 88.yy Replace cartridge The toner cartridge is exhausted. 1 Replace the ... message and continue printing. 58 Too many flash options installed Try one or more of the following: • The printer discards any data received through the USB port. Install a new photoconductor kit. 88.yy Cartridge is low Replace the toner cartridge, and then press to clear the message and continue printing. 88...
User Guide
Page 129
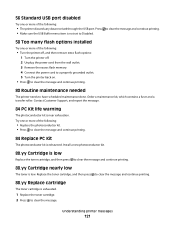
... the toner cartridge handle. While the printer may continue to function properly after the photoconductor kit has reached its official end-of the photoconductor kit. When 84 PC Kit life warning or 84 Replace PC Kit first appears, you before the photoconductor kit reaches a page maximum by aligning the rollers on the toner cartridge with the arrows...
... the toner cartridge handle. While the printer may continue to function properly after the photoconductor kit has reached its official end-of the photoconductor kit. When 84 PC Kit life warning or 84 Replace PC Kit first appears, you before the photoconductor kit reaches a page maximum by aligning the rollers on the toner cartridge with the arrows...
User Guide
Page 131
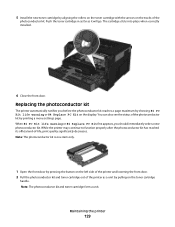
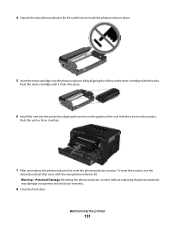
...clicks into place. 6 Install the unit into the photoconductor kit by aligning the arrows on the toner cartridge with the tracks. Warning-Potential Damage: Resetting the photoconductor counter without replacing the photoconductor may damage your printer and void your warranty. 8 Close the front door....the arrows in the printer. Push the toner cartridge until it will go. 7 After you replace the photoconductor kit, reset the photoconductor counter. Be careful not to touch the photoconductor drum. 5 Insert the toner cartridge into the printer by aligning the rollers on the guides ...
...clicks into place. 6 Install the unit into the photoconductor kit by aligning the arrows on the toner cartridge with the tracks. Warning-Potential Damage: Resetting the photoconductor counter without replacing the photoconductor may damage your printer and void your warranty. 8 Close the front door....the arrows in the printer. Push the toner cartridge until it will go. 7 After you replace the photoconductor kit, reset the photoconductor counter. Be careful not to touch the photoconductor drum. 5 Insert the toner cartridge into the printer by aligning the rollers on the guides ...


