
User's Guide
Page 7
Printing the Printer setting 41 Printing the Op-panel Menu setting 41 Setting the Machine ID 41 Changing the Display Language 42 Selecting Country 42 Power Save Mode 42 Setting the Sound/Volume 44 Setting Daylight Savings Time (Only for USA 44 Scanner Lamp Power Save Mode...47 Ignoring the Toner Low Message (Only for Fax 47 Software Overview 48 Dell Printer Configuration Web Tool 49 Printer Status 50 Printer Settings 50 Printer Server Settings 50 Fax Settings 50 Email Settings 51 Copy Printer Settings 55 Printing Statistics 55 Set Password 55 Wireless 55 Online Help 55 ...
Printing the Printer setting 41 Printing the Op-panel Menu setting 41 Setting the Machine ID 41 Changing the Display Language 42 Selecting Country 42 Power Save Mode 42 Setting the Sound/Volume 44 Setting Daylight Savings Time (Only for USA 44 Scanner Lamp Power Save Mode...47 Ignoring the Toner Low Message (Only for Fax 47 Software Overview 48 Dell Printer Configuration Web Tool 49 Printer Status 50 Printer Settings 50 Printer Server Settings 50 Fax Settings 50 Email Settings 51 Copy Printer Settings 55 Printing Statistics 55 Set Password 55 Wireless 55 Online Help 55 ...
User's Guide
Page 14
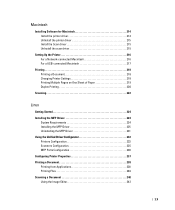
... a Network-connected Macintosh 216 For a USB-connected Macintosh 217 Printing 218 Printing a Document 218 Changing Printer Settings 218 Printing Multiple Pages on One Sheet of Paper 219 Duplex Printing 220 Scanning 222 Linux Getting ...Requirements 224 Installing the MFP Driver 225 Uninstalling the MFP Driver 231 Using the Unified Driver Configurator 232 Printers Configuration 233 Scanners Configuration 235 MFP Ports Configuration 236 Configuring Printer Properties 237 Printing a Document 238 Printing from Applications 238 Printing Files 240 Scanning a Document 240 Using...
... a Network-connected Macintosh 216 For a USB-connected Macintosh 217 Printing 218 Printing a Document 218 Changing Printer Settings 218 Printing Multiple Pages on One Sheet of Paper 219 Duplex Printing 220 Scanning 222 Linux Getting ...Requirements 224 Installing the MFP Driver 225 Uninstalling the MFP Driver 231 Using the Unified Driver Configurator 232 Printers Configuration 233 Scanners Configuration 235 MFP Ports Configuration 236 Configuring Printer Properties 237 Printing a Document 238 Printing from Applications 238 Printing Files 240 Scanning a Document 240 Using...
User's Guide
Page 15
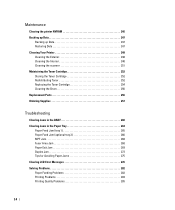
... 246 Backing up Data 247 Backing up Data 247 Restoring Data 247 Cleaning Your Printer 248 Cleaning the Exterior 248 Cleaning the Interior 248 Cleaning the scanner 251 Maintaining the Toner Cartridge 252 Storing the Toner Cartridge 252 Redistributing Toner 252 Replacing the Toner Cartridge 254 Cleaning the Drum 256 Replacement Parts...
... 246 Backing up Data 247 Backing up Data 247 Restoring Data 247 Cleaning Your Printer 248 Cleaning the Exterior 248 Cleaning the Interior 248 Cleaning the scanner 251 Maintaining the Toner Cartridge 252 Storing the Toner Cartridge 252 Redistributing Toner 252 Replacing the Toner Cartridge 254 Cleaning the Drum 256 Replacement Parts...

User's Guide
Page 16
... Macintosh Problems 297 Troubleshooting PostScript (PS) Errors 298 Installing Accessories Precautions When Installing Printer Accessories 300 Installing Printer Memory 300 Installing an Optional Tray 2 302 Installing Wireless Network interface card 304 Specifications General Specifications 306 Scanner and Copier Specifications 307 Printer Specifications 309 Facsimile Specifications 311 Paper Specifications 312 Overview 312 Guidelines for Using...
... Macintosh Problems 297 Troubleshooting PostScript (PS) Errors 298 Installing Accessories Precautions When Installing Printer Accessories 300 Installing Printer Memory 300 Installing an Optional Tray 2 302 Installing Wireless Network interface card 304 Specifications General Specifications 306 Scanner and Copier Specifications 307 Printer Specifications 309 Facsimile Specifications 311 Paper Specifications 312 Overview 312 Guidelines for Using...

User's Guide
Page 19
If you choose to be repacked. 4 Remove the packing tape from the front, back, and sides of the printer. 5 Remove the label completely from the scanner module by gently pulling it. NOTE: The power cord must be plugged into a grounded power socket. 3 Save the carton and packing material in length. c Quick ...
If you choose to be repacked. 4 Remove the packing tape from the front, back, and sides of the printer. 5 Remove the label completely from the scanner module by gently pulling it. NOTE: The power cord must be plugged into a grounded power socket. 3 Save the carton and packing material in length. c Quick ...

User's Guide
Page 20
To scan or copy a document, the switch must be unlocked. 19 If the scan switch is locked, you are moving the printer or do not intend to the lock position, as shown. NOTE: When you cannot copy or scan. If the latch is not in the unlocked ( ) position. NOTE: To confirm the scanner is unlocked, open the scanner cover and ensure that the blue latch is in the unlocked position, reach under the operator panel and pull it for a long period of time, move the switch BACKWARD to use it forward.
To scan or copy a document, the switch must be unlocked. 19 If the scan switch is locked, you are moving the printer or do not intend to the lock position, as shown. NOTE: When you cannot copy or scan. If the latch is not in the unlocked ( ) position. NOTE: To confirm the scanner is unlocked, open the scanner cover and ensure that the blue latch is in the unlocked position, reach under the operator panel and pull it for a long period of time, move the switch BACKWARD to use it forward.

User's Guide
Page 46
Setting the Time Out Option You can set the time the printer waits before it restores the default copy or fax settings if you do not start copying or faxing after changing the settings on and the ... any key is pressed or the DADF cover is opened or a document is detected in actual use after a scan job is not in the DADF. Scanner Lamp Power Save Mode The scan lamp under the document glass automatically turns off when it is completed before it switches to the Power Save...
Setting the Time Out Option You can set the time the printer waits before it restores the default copy or fax settings if you do not start copying or faxing after changing the settings on and the ... any key is pressed or the DADF cover is opened or a document is detected in actual use after a scan job is not in the DADF. Scanner Lamp Power Save Mode The scan lamp under the document glass automatically turns off when it is completed before it switches to the Power Save...

User's Guide
Page 132
... document glass may affect the copy quality and toner consumption. For details about loading a document, see "Preparing a Document". 3 Close the document cover. See "Cleaning the scanner". 1 Load the document(s) face up copy referring to "Using Special Copy Features". 4 Press Start ( ). (on the touch screen or the operator panel) NOTE: You can...
... document glass may affect the copy quality and toner consumption. For details about loading a document, see "Preparing a Document". 3 Close the document cover. See "Cleaning the scanner". 1 Load the document(s) face up copy referring to "Using Special Copy Features". 4 Press Start ( ). (on the touch screen or the operator panel) NOTE: You can...

User's Guide
Page 136
... to copy a book. Press , and the copying will stop. If the book or magazine is too thick, lift the scanner lid until its hinges are engaged by the stopper and then close the scanner lid. If a document is detected in the DADF, the book copying feature does not work. 1 Place a single document... an Original Document". 2 Press Copy from the home screen. 3 Press the left/right arrows to select ECO Copy. 4 Press Options. 5 Press the up with the scanner lid open. To make the ECO copying: 1 Load the document(s) face up /down on the document glass. If the book is thicker than 30 mm...
... to copy a book. Press , and the copying will stop. If the book or magazine is too thick, lift the scanner lid until its hinges are engaged by the stopper and then close the scanner lid. If a document is detected in the DADF, the book copying feature does not work. 1 Place a single document... an Original Document". 2 Press Copy from the home screen. 3 Press the left/right arrows to select ECO Copy. 4 Press Options. 5 Press the up with the scanner lid open. To make the ECO copying: 1 Load the document(s) face up /down on the document glass. If the book is thicker than 30 mm...

User's Guide
Page 139
..., such as a name card. If a document is larger than the printable area, some portions may not be applied when you copy using this feature, the printer prints one side on the upper half of copies, contrast, original type, and original size by pressing Options. See "Setting Copy Options". 5 Press Start ( ... from the home screen. 2 Place the front side of an original facing down on the document glass where arrows indicate as shown then, close the scanner lid. 3 Press the Next ( ) button. 4 If necessary, customize the copy settings including number of the paper and the other side on the lower...
..., such as a name card. If a document is larger than the printable area, some portions may not be applied when you copy using this feature, the printer prints one side on the upper half of copies, contrast, original type, and original size by pressing Options. See "Setting Copy Options". 5 Press Start ( ... from the home screen. 2 Place the front side of an original facing down on the document glass where arrows indicate as shown then, close the scanner lid. 3 Press the Next ( ) button. 4 If necessary, customize the copy settings including number of the paper and the other side on the lower...

User's Guide
Page 145
3 Scan Setting window opens. ➊ ➋ ➌ ➍ Property Description ➊ Select Scanner Allows you to select the scanner. ➋ Select Profile Allows you to save the setting. ➌ Scan Settings Allows you to customize settings for Scan Size and Paper Source. ❹ Scan ...
3 Scan Setting window opens. ➊ ➋ ➌ ➍ Property Description ➊ Select Scanner Allows you to select the scanner. ➋ Select Profile Allows you to save the setting. ➌ Scan Settings Allows you to customize settings for Scan Size and Paper Source. ❹ Scan ...

User's Guide
Page 155
For details about loading a document, see how your computer. Printers and Other Hardware Scanners and Control Panel Hardware and Sound Scanners 3 Double click your scanning preferences and click Preview to scan an image and easily manipulate those images without using ...Vista/7. 1 Load the document(s) face up with digital cameras and scanners. Scanning Using the Windows Image Acquisition (WIA) Driver Your printer also supports the WIA driver for graphics. 154 New Scan application appears. 4 Choose your scanner icon. For Windows Vista, click Start and Cameras. WIA is ...
For details about loading a document, see how your computer. Printers and Other Hardware Scanners and Control Panel Hardware and Sound Scanners 3 Double click your scanning preferences and click Preview to scan an image and easily manipulate those images without using ...Vista/7. 1 Load the document(s) face up with digital cameras and scanners. Scanning Using the Windows Image Acquisition (WIA) Driver Your printer also supports the WIA driver for graphics. 154 New Scan application appears. 4 Choose your scanner icon. For Windows Vista, click Start and Cameras. WIA is ...

User's Guide
Page 225
...(IntelCore2) • RAM 512 MB or higher • Free HDD space required: 1 GB or higher 224 After the driver is installed on your printer and further processing of the scanned documents. The MFP driver package is possible on the same local MFP or network... configuring your Linux system, the driver package enables you with Dell's MFP driver package for the MFP software: all required packages will be edited, printed on a wide set of MFP devices via USB port. Dell's MFP driver package contains printer and scanner drivers, providing the ability to an external OCR system. this...
...(IntelCore2) • RAM 512 MB or higher • Free HDD space required: 1 GB or higher 224 After the driver is installed on your printer and further processing of the scanned documents. The MFP driver package is possible on the same local MFP or network... configuring your Linux system, the driver package enables you with Dell's MFP driver package for the MFP software: all required packages will be edited, printed on a wide set of MFP devices via USB port. Dell's MFP driver package contains printer and scanner drivers, providing the ability to an external OCR system. this...

User's Guide
Page 226
..., ask your system administrator. 1 Insert the Software and Documentation CD. If you connect your computer. NOTE: It is also necessary to install the printer software. NOTE: You must log in sequence: [root@localhost root]#umount/dev/hdc [root@localhost root]#mount -t iso9660 /dev/hdc /mnt/cdrom ... an autorun software package installed and configured. 2 Click Install. 3 When the welcome screen appears, click Next. 225 NOTE: The Linux scanner driver supports the optical resolution at the bottom of 300 MB or larger for working with large scanned images. When the Terminal screen appears,...
..., ask your system administrator. 1 Insert the Software and Documentation CD. If you connect your computer. NOTE: It is also necessary to install the printer software. NOTE: You must log in sequence: [root@localhost root]#umount/dev/hdc [root@localhost root]#mount -t iso9660 /dev/hdc /mnt/cdrom ... an autorun software package installed and configured. 2 Click Install. 3 When the welcome screen appears, click Next. 225 NOTE: The Linux scanner driver supports the optical resolution at the bottom of 300 MB or larger for working with large scanned images. When the Terminal screen appears,...

User's Guide
Page 233
... Unified driver Configurator 1 Double-click Unified Driver Configurator on your desktop. Printers Configuration button Scanners Configuration button MFP Ports Configuration button You can also click the Startup Menu icon and select Dell MFP and then Unified Driver Configurator. 2 Press each button on the ...Unified Driver Configurator Unified Driver Configurator is also a special MFP port option responsible for the regulation of access to an MFP printer and scanner via a single I/O channel. You can use the onscreen help by clicking Help. 3 After changing the configurations, click Exit...
... Unified driver Configurator 1 Double-click Unified Driver Configurator on your desktop. Printers Configuration button Scanners Configuration button MFP Ports Configuration button You can also click the Startup Menu icon and select Dell MFP and then Unified Driver Configurator. 2 Press each button on the ...Unified Driver Configurator Unified Driver Configurator is also a special MFP port option responsible for the regulation of access to an MFP printer and scanner via a single I/O channel. You can use the onscreen help by clicking Help. 3 After changing the configurations, click Exit...

User's Guide
Page 236
See "Scanning a Document". 235 Shows all of installed Dell MFP devices, change the scan properties and scan a document. Shows the vendor, model name and type of your scanner. • Properties...: Allows you can monitor the activity of scanner devices, view a list of the installed scanners. Switches to change device properties, and scan images. Scanners Configuration In this window, you to Scanners configuration.
See "Scanning a Document". 235 Shows all of installed Dell MFP devices, change the scan properties and scan a document. Shows the vendor, model name and type of your scanner. • Properties...: Allows you can monitor the activity of scanner devices, view a list of the installed scanners. Switches to change device properties, and scan images. Scanners Configuration In this window, you to Scanners configuration.

User's Guide
Page 237
The drivers address their devices via the single I /O ports are being chosen by scanner drivers automatically, so proper settings are applied by Dell printer and scanner drivers. Switches to the port and status. • Refresh: Renews the available ports list. • Release port: Releases the selected port. Shows all of any ...
The drivers address their devices via the single I /O ports are being chosen by scanner drivers automatically, so proper settings are applied by Dell printer and scanner drivers. Switches to the port and status. • Refresh: Renews the available ports list. • Release port: Releases the selected port. Shows all of any ...

User's Guide
Page 241
...about the properties window, see "Printing a Document". 3 Click OK to Scanners Configuration. 3 Select the scanner on the Dell MFP device using the Unified Driver Configurator window. 1 Double-click the Unified Driver Configurator on your scanner. 240 Printing Files You can scan a document using the standard CUPS way ... and press Enter, the Select file(s) to print and click Open. 2 In the LPR GUI window, select your printer from the list, and change the printer and print job properties. Just select any document file: 1 Type lpr from the command line interface. Click your desktop...
...about the properties window, see "Printing a Document". 3 Click OK to Scanners Configuration. 3 Select the scanner on the Dell MFP device using the Unified Driver Configurator window. 1 Double-click the Unified Driver Configurator on your scanner. 240 Printing Files You can scan a document using the standard CUPS way ... and press Enter, the Select file(s) to print and click Open. 2 In the LPR GUI window, select your printer from the list, and change the printer and print job properties. Just select any document file: 1 Type lpr from the command line interface. Click your desktop...

User's Guide
Page 242
.... 4 Click Properties. 5 Load the document to be scanned face up into the DADF or face down on the document glass. 6 Click Preview in Scanners configuration can select any scanner to work at any time. If you have only one MFP device and it is connected to the computer and turned on, your... computer, you to select the page size. The Advanced button enables you may select the second scanner, set the page size manually. 241 The document is scanned and the image preview appears in progress on the first...
.... 4 Click Properties. 5 Load the document to be scanned face up into the DADF or face down on the document glass. 6 Click Preview in Scanners configuration can select any scanner to work at any time. If you have only one MFP device and it is connected to the computer and turned on, your... computer, you to select the page size. The Advanced button enables you may select the second scanner, set the page size manually. 241 The document is scanned and the image preview appears in progress on the first...

User's Guide
Page 243
... toolbar. 11 Select the file directory where you want to edit the scanned image, use one of the preset scan option settings, select from the Scanner Properties window. 2 Click Save As. 3 Enter the name for your scan option settings to use the toolbar. To save your setting. 242 You can save...
... toolbar. 11 Select the file directory where you want to edit the scanned image, use one of the preset scan option settings, select from the Scanner Properties window. 2 Click Save As. 3 Enter the name for your scan option settings to use the toolbar. To save your setting. 242 You can save...


