Owners Manual
Page 1
Dell™ Laser Multi-Function Printer 1815dn Owner's Manual Look Inside For: • Preparing Your Multi-Function Printer • Understanding the Printer Software • Loading Print Media • Using Your Multi-Function Printer • Maintenance • Troubleshooting • Installing Options • Contacting Dell Temporary www.dell.com | support.dell.com
Dell™ Laser Multi-Function Printer 1815dn Owner's Manual Look Inside For: • Preparing Your Multi-Function Printer • Understanding the Printer Software • Loading Print Media • Using Your Multi-Function Printer • Maintenance • Troubleshooting • Installing Options • Contacting Dell Temporary www.dell.com | support.dell.com
Owners Manual
Page 10
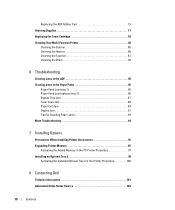
... Supplies 77 Replacing the Toner Cartridge 78 Cleaning Your Multi-Function Printer 80 Cleaning the Exterior 80 Cleaning the Interior 80 Cleaning the Scanner 81 Cleaning the Drum 82 6 Troubleshooting Clearing Jams in the ADF 83 Clearing Jams in the Paper ... 94 More Troubleshooting 94 7 Installing Options Precautions When Installing Printer Accessories 95 Expanding Printer Memory 95 Activating the Added Memory in the PS Printer Properties 97 Installing an Optional Tray 2 98 Activating the Installed Optional Tray 2 in the Printer Properties 100 8 Contacting Dell Technical Assistance...
... Supplies 77 Replacing the Toner Cartridge 78 Cleaning Your Multi-Function Printer 80 Cleaning the Exterior 80 Cleaning the Interior 80 Cleaning the Scanner 81 Cleaning the Drum 82 6 Troubleshooting Clearing Jams in the ADF 83 Clearing Jams in the Paper ... 94 More Troubleshooting 94 7 Installing Options Precautions When Installing Printer Accessories 95 Expanding Printer Memory 95 Activating the Added Memory in the PS Printer Properties 97 Installing an Optional Tray 2 98 Activating the Installed Optional Tray 2 in the Printer Properties 100 8 Contacting Dell Technical Assistance...

Owners Manual
Page 83
Troubleshooting 83 b Remove the document by gently pulling it passes through the ADF, Document Jam appears on the display. If the document is jammed in the ADF When a document jams while it out. NOTE: To prevent document jams, use the document glass for thick, thin or mixed documents. 1 Remove the remaining documents from the ADF. c Close the ADF cover. Then reload the document into the ADF. 6 Troubleshooting Clearing Jams in the paper feed area: a Open the ADF cover.
Troubleshooting 83 b Remove the document by gently pulling it passes through the ADF, Document Jam appears on the display. If the document is jammed in the ADF When a document jams while it out. NOTE: To prevent document jams, use the document glass for thick, thin or mixed documents. 1 Remove the remaining documents from the ADF. c Close the ADF cover. Then reload the document into the ADF. 6 Troubleshooting Clearing Jams in the paper feed area: a Open the ADF cover.

Owners Manual
Page 84
... or the feed area by carefully pulling it gently to the right. 4 Close the document cover. Then load the documents back into the ADF. 84 Troubleshooting Then load the documents back into the ADF. 2 If you cannot see the paper or the paper does not move when you pulled, open the...
... or the feed area by carefully pulling it gently to the right. 4 Close the document cover. Then load the documents back into the ADF. 84 Troubleshooting Then load the documents back into the ADF. 2 If you cannot see the paper or the paper does not move when you pulled, open the...

Owners Manual
Page 85
.... 2 Pull the paper tray open. page 88. To avoid tearing the paper, pull the jammed paper out gently and slowly. page 89. Troubleshooting 85 The jammed paper automatically exits the printer. Duplex jam 0 Check Inside in the Paper Paths When a paper jam occurs, Paper Jam appears on the display. Paper Feed Jam...
.... 2 Pull the paper tray open. page 88. To avoid tearing the paper, pull the jammed paper out gently and slowly. page 89. Troubleshooting 85 The jammed paper automatically exits the printer. Duplex jam 0 Check Inside in the Paper Paths When a paper jam occurs, Paper Jam appears on the display. Paper Feed Jam...

Owners Manual
Page 86
For more information, see the paper in this area or the paper does not move when pulled, check the fuser area. Paper Feed Jam (optional tray 2) 1 Pull the optional tray 2 open. 2 Remove the jammed paper from the printer. If you cannot see the paper or the paper does not move when pulled, go to the next step. 3 Pull the tray 1 half way out. 86 Troubleshooting If you cannot see "Fuser Area Jam" on page 88. 4 Insert the paper tray into the printer until it straight out. Printing automatically resumes. 3 Remove the jammed paper by gently pulling it snaps into place.
For more information, see the paper in this area or the paper does not move when pulled, check the fuser area. Paper Feed Jam (optional tray 2) 1 Pull the optional tray 2 open. 2 Remove the jammed paper from the printer. If you cannot see the paper or the paper does not move when pulled, go to the next step. 3 Pull the tray 1 half way out. 86 Troubleshooting If you cannot see "Fuser Area Jam" on page 88. 4 Insert the paper tray into the printer until it straight out. Printing automatically resumes. 3 Remove the jammed paper by gently pulling it snaps into place.

Owners Manual
Page 87
4 Pull the jammed paper straight up and out. 5 Insert the trays back into the printer. Bypass Tray Jam 1 If the paper is not feeding properly, pull the jammed paper out of the printer. 2 Open and close the front cover to resume printing. Printing automatically resumes. Troubleshooting 87
4 Pull the jammed paper straight up and out. 5 Insert the trays back into the printer. Bypass Tray Jam 1 If the paper is not feeding properly, pull the jammed paper out of the printer. 2 Open and close the front cover to resume printing. Printing automatically resumes. Troubleshooting 87

Owners Manual
Page 88
Take care when removing paper from the printer. 1 Open the front cover and lightly pull the toner cartridge straight out. 2 Remove the jammed paper by gently pulling it straight out. 3 Replace the toner cartridge and close the front cover. Printing automatically resumes. 88 Troubleshooting Fuser Area Jam NOTICE: The fuser area is hot.
Take care when removing paper from the printer. 1 Open the front cover and lightly pull the toner cartridge straight out. 2 Remove the jammed paper by gently pulling it straight out. 3 Replace the toner cartridge and close the front cover. Printing automatically resumes. 88 Troubleshooting Fuser Area Jam NOTICE: The fuser area is hot.

Owners Manual
Page 89
Push the levers down and skip to the next step. 2 Gently pull the jammed paper out of the output tray. 3 If you do not see the jammed paper in the output tray or the jammed paper does not move when pulled, open the rear cover. 4 If you do not see the jammed paper, push the two blue pressure levers up and remove the paper. Troubleshooting 89 Paper Exit Jam 1 Open and close the front cover. If the paper does not exit, go to the next step. If you see the jammed paper, go to step 10. The jammed paper automatically exits the printer.
Push the levers down and skip to the next step. 2 Gently pull the jammed paper out of the output tray. 3 If you do not see the jammed paper in the output tray or the jammed paper does not move when pulled, open the rear cover. 4 If you do not see the jammed paper, push the two blue pressure levers up and remove the paper. Troubleshooting 89 Paper Exit Jam 1 Open and close the front cover. If the paper does not exit, go to the next step. If you see the jammed paper, go to step 10. The jammed paper automatically exits the printer.

Owners Manual
Page 90
NOTICE: Make sure to the right, open the rear cover, as shown. 6 Unfold the duplex guide fully. 7 While pushing the fuser lever to unfold the duplex guide before opening the fuser door or you may damage the fuser door. 90 Troubleshooting 5 Release the blue strap, the rear cover stopper, and fully open the fuser door.
NOTICE: Make sure to the right, open the rear cover, as shown. 6 Unfold the duplex guide fully. 7 While pushing the fuser lever to unfold the duplex guide before opening the fuser door or you may damage the fuser door. 90 Troubleshooting 5 Release the blue strap, the rear cover stopper, and fully open the fuser door.

Owners Manual
Page 91
Duplex Jam Duplex Jam 0 1 Pull the duplex unit out of the printer. Troubleshooting 91 If the jammed paper does not move when you pull, push the two blue pressure levers up to loosen the paper, and then remove the jammed paper. 9 Return the levers, fuser door, duplex guide, and rear cover stopper to their original position. 10 Close the rear cover. 11 Open and close the front cover. Printing automatically resumes. 8 Pull the jammed paper out.
Duplex Jam Duplex Jam 0 1 Pull the duplex unit out of the printer. Troubleshooting 91 If the jammed paper does not move when you pull, push the two blue pressure levers up to loosen the paper, and then remove the jammed paper. 9 Return the levers, fuser door, duplex guide, and rear cover stopper to their original position. 10 Close the rear cover. 11 Open and close the front cover. Printing automatically resumes. 8 Pull the jammed paper out.

Owners Manual
Page 92
CAUTION: If you do not push the duplex unit in correctly, a paper jam may occur. 92 Troubleshooting 2 Remove the jammed paper from the bottom of the printer. 3 Push the duplex unit to the printer. If the paper does not come out with the duplex unit, remove the paper from the duplex unit.
CAUTION: If you do not push the duplex unit in correctly, a paper jam may occur. 92 Troubleshooting 2 Remove the jammed paper from the bottom of the printer. 3 Push the duplex unit to the printer. If the paper does not come out with the duplex unit, remove the paper from the duplex unit.

Owners Manual
Page 93
Duplex Jam 1 1 Open the rear cover. 2 Unfold the duplex guide fully. 3 Pull the jammed paper out. 4 Return the duplex guide and close the rear cover. 5 Open and close the front cover. Troubleshooting 93 Printing automatically resumes.
Duplex Jam 1 1 Open the rear cover. 2 Unfold the duplex guide fully. 3 Pull the jammed paper out. 4 Return the duplex guide and close the rear cover. 5 Open and close the front cover. Troubleshooting 93 Printing automatically resumes.

Owners Manual
Page 94
... Avoiding Paper Jams By selecting the correct paper types, most paper jams can be avoided. More Troubleshooting For more information about error messages or printing problems, see the User's Guide. 94 Troubleshooting Ensure that the paper is below the paper capacity mark on the inside wall of the paper ...tray. • Do not remove the paper from the tray while your printer is printing. • Flex, fan and straighten the paper...
... Avoiding Paper Jams By selecting the correct paper types, most paper jams can be avoided. More Troubleshooting For more information about error messages or printing problems, see the User's Guide. 94 Troubleshooting Ensure that the paper is below the paper capacity mark on the inside wall of the paper ...tray. • Do not remove the paper from the tray while your printer is printing. • Flex, fan and straighten the paper...
Owners Manual
Page 150
... setting, 47 paper type, setting, 47, 54 paper, loading in the bypass tray, 43 in the tray, 40 parts of your printer, 15 pause, inserting, 24 printer ID,setting, 22 printing, 51 R replacement parts, 75 report, printing, 70 S safety information, 13 scanner cleaning, 81 unlocking, 19... driver, 63 software installing local, 32 network, 35 overview, 31 speed dial, setting, 25 supplies, ordering, 77 support contacting Dell, 101-102 T time and date setting, 24 toner cartridge ordering, 3, 77 replacing, 78 troubleshooting, 83 U uninstalling, software, 36 USB memory key plugging, 61 scanning, 61 150
... setting, 47 paper type, setting, 47, 54 paper, loading in the bypass tray, 43 in the tray, 40 parts of your printer, 15 pause, inserting, 24 printer ID,setting, 22 printing, 51 R replacement parts, 75 report, printing, 70 S safety information, 13 scanner cleaning, 81 unlocking, 19... driver, 63 software installing local, 32 network, 35 overview, 31 speed dial, setting, 25 supplies, ordering, 77 support contacting Dell, 101-102 T time and date setting, 24 toner cartridge ordering, 3, 77 replacing, 78 troubleshooting, 83 U uninstalling, software, 36 USB memory key plugging, 61 scanning, 61 150

User's Guide
Page 42
Setup diagram Express Service Code Express Service Code Identify your printer when you use the Drivers and Utilities CD to install/uninstall/reinstall drivers and utilities or access your User's Guide. For details, see "Software Overview". Troubleshooting hints and tips, articles from technicians, and online courses ... • Solutions- Readme files may be included on the WELCOME TO DELL SUPPORT page, and fill in your Owner's Manual prior to setting up my printer You can access Dell Support at support.dell.com. Select your region on your Drivers and Utilities CD to provide last...
Setup diagram Express Service Code Express Service Code Identify your printer when you use the Drivers and Utilities CD to install/uninstall/reinstall drivers and utilities or access your User's Guide. For details, see "Software Overview". Troubleshooting hints and tips, articles from technicians, and online courses ... • Solutions- Readme files may be included on the WELCOME TO DELL SUPPORT page, and fill in your Owner's Manual prior to setting up my printer You can access Dell Support at support.dell.com. Select your region on your Drivers and Utilities CD to provide last...

User's Guide
Page 120
...the No Printer Found screen appears. If your printer is a printer attached to your computer when you attach a USB printer cable while your printer. NOTE: For more information about the All-In-One Main page, View Saved Images page, or the Maintain/Troubleshoot page, ... III 933 MHZ or higher l Required software: Internet Explorer 5.0 Installing Dell Software for Local Printing A local printer is attached to "Installing Dell Software for printer troubleshooting. Follow the instructions to install the Dell software. 1. Installing Software in Windows Before you begin, ensure that lets...
...the No Printer Found screen appears. If your printer is a printer attached to your computer when you attach a USB printer cable while your printer. NOTE: For more information about the All-In-One Main page, View Saved Images page, or the Maintain/Troubleshoot page, ... III 933 MHZ or higher l Required software: Internet Explorer 5.0 Installing Dell Software for Local Printing A local printer is attached to "Installing Dell Software for printer troubleshooting. Follow the instructions to install the Dell software. 1. Installing Software in Windows Before you begin, ensure that lets...

User's Guide
Page 133
Troubleshooting Clearing Jams in the ADF Clearing Jams in the Paper Paths Clearing LCD Error Messages Solving Problems Clearing Jams in the paper exit area: a. Open ...
Troubleshooting Clearing Jams in the ADF Clearing Jams in the Paper Paths Clearing LCD Error Messages Solving Problems Clearing Jams in the paper exit area: a. Open ...
User's Guide
Page 148
Can't scan via SLPR utility, for example) while a print job is in the chooser Condition The printer does not print a document from the spooler in for application. Update your computer. Troubleshooting Postscript (PS) Errors The following situations are PS language specific and may be PS. Problem PostScript file can 't print when I installed both...
Can't scan via SLPR utility, for example) while a print job is in the chooser Condition The printer does not print a document from the spooler in for application. Update your computer. Troubleshooting Postscript (PS) Errors The following situations are PS language specific and may be PS. Problem PostScript file can 't print when I installed both...

Service Manual
Page 8
..., and a guide to the location space required when installing the printer . Reference Information This chapter contains the tools list, list of tests pages and Wireless Network information definition is also included. 2.1 Tool for Troubleshooting The following tools are recommended safe and easy troubleshooting as described in this service manual. • DVM(Digital Volt...
..., and a guide to the location space required when installing the printer . Reference Information This chapter contains the tools list, list of tests pages and Wireless Network information definition is also included. 2.1 Tool for Troubleshooting The following tools are recommended safe and easy troubleshooting as described in this service manual. • DVM(Digital Volt...


