
Owners Manual
Page 64
... e-mail account. To continue to the next setup, press Scroll ( or ) to select No and press Select ( ). 11 The display asks if you want to review addresses. OR Place a single document face down on page 49. 3 Press Scroll ( or ) to highlight Scan and press Select ( ). 4 Press Scroll ( or ) to highlight ... first need to configure the network settings and set up with top edge in the Phone Book. See the User's Guide. 1 Make sure that your printer is connected to a network. 2 Load the document(s) face up your account, press Scroll ( or ) to select Yes or No and press Select ( ). 17 Press ...
... e-mail account. To continue to the next setup, press Scroll ( or ) to select No and press Select ( ). 11 The display asks if you want to review addresses. OR Place a single document face down on page 49. 3 Press Scroll ( or ) to highlight Scan and press Select ( ). 4 Press Scroll ( or ) to highlight ... first need to configure the network settings and set up with top edge in the Phone Book. See the User's Guide. 1 Make sure that your printer is connected to a network. 2 Load the document(s) face up your account, press Scroll ( or ) to select Yes or No and press Select ( ). 17 Press ...
User's Guide
Page 91
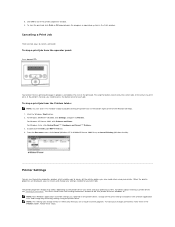
... (Windows NT 4.0/2000/XP/Server 2003/Vista) or Cancel Printing (Windows 98/Me). When the printer properties are displayed, you can review and change any remaining settings using the printer driver. Follow these steps: To start the print job, click Print or OK depending on the ... Windows Start button. 2. For Windows XP/Server 2003, click Printers and Faxes. For Windows Vista, click Control Panel Hardware and Sound Printers. 3. 5. Click OK to Printers. Double-click the Dell Laser MFP 1815 icon. 4. If more than one print job is in effect only while you are two ways to...
... (Windows NT 4.0/2000/XP/Server 2003/Vista) or Cancel Printing (Windows 98/Me). When the printer properties are displayed, you can review and change any remaining settings using the printer driver. Follow these steps: To start the print job, click Print or OK depending on the ... Windows Start button. 2. For Windows XP/Server 2003, click Printers and Faxes. For Windows Vista, click Control Panel Hardware and Sound Printers. 3. 5. Click OK to Printers. Double-click the Dell Laser MFP 1815 icon. 4. If more than one print job is in effect only while you are two ways to...

User's Guide
Page 113
... Address Book with the email addresses you want to select Yes. The display asks if you use frequently. To continue to enter another address. 9. To review addresses, press Select ( ) to yourself. The display asks if you want to send the e-mail to select Yes. Enter the email subject and press ... the resolution you want and press Select ( ). 15. Press Scroll ( or ) to which the scanned image may be converted and press Select ( ). 14. The printer begins scanning and then sends the email. 16. If the display asks if you want to log off your e-mail address, press Select ( ) to...
... Address Book with the email addresses you want to select Yes. The display asks if you use frequently. To continue to enter another address. 9. To review addresses, press Select ( ) to yourself. The display asks if you want to send the e-mail to select Yes. Enter the email subject and press ... the resolution you want and press Select ( ). 15. Press Scroll ( or ) to which the scanned image may be converted and press Select ( ). 14. The printer begins scanning and then sends the email. 16. If the display asks if you want to log off your e-mail address, press Select ( ) to...

User's Guide
Page 114
...you want to edit or delete and press Select ( ). 6. To continue the next step press Scroll ( or ) to a Group Number 1. The printer begins scanning and then sends the e-mail. 17. Press Scroll ( or ) to highlight Menu and press Select ( ). Group Numbers If you frequently send...up to all destinations in the operator panel. The e-mail address you have assigned for the name appears. Editing or Deleting an E-mail Address 1. To review addresses, press Select ( ) to select the e-mail address you have entered. OR Press Scroll ( or ) to highlight Edit and press Select ( )....
...you want to edit or delete and press Select ( ). 6. To continue the next step press Scroll ( or ) to a Group Number 1. The printer begins scanning and then sends the e-mail. 17. Press Scroll ( or ) to highlight Menu and press Select ( ). Group Numbers If you frequently send...up to all destinations in the operator panel. The e-mail address you have assigned for the name appears. Editing or Deleting an E-mail Address 1. To review addresses, press Select ( ) to select the e-mail address you have entered. OR Press Scroll ( or ) to highlight Edit and press Select ( )....

User's Guide
Page 116
...Settings You can check your Address Book setting an Address Book list. 1. For details about loading a document, see "Loading an Original Document". 2. To review addresses, press Select ( ) to select Yes and check the address(es) you want and press press Select ( ). 14. Press Scroll ( or )...Press Scroll ( or ) to which the scanned image may be converted and press Select ( ). 13. Press Scroll ( or ) to Standby mode. Your printer returns to select the resolution you want to highlight Menu and press Select ( ). Press Start ( ) or Select ( ). Press Directory ( ) in the...
...Settings You can check your Address Book setting an Address Book list. 1. For details about loading a document, see "Loading an Original Document". 2. To review addresses, press Select ( ) to select Yes and check the address(es) you want and press press Select ( ). 14. Press Scroll ( or )...Press Scroll ( or ) to which the scanned image may be converted and press Select ( ). 13. Press Scroll ( or ) to Standby mode. Your printer returns to select the resolution you want to highlight Menu and press Select ( ). Press Start ( ) or Select ( ). Press Directory ( ) in the...
