
Product Manual
Page 15
The above step 1 and 2 should be done simultaneously to the arrow marked at the back of the remote controller. 1 1. A CR 2025 B 14 Operating Instructions CHANGING THE BATTERIES ON THE REMOTE The remote controller is powered by one button cell housed in the rear part and protected by your thumb. 2 1 +2 1 1 + 2 3. Slightly press "A" position according to the number 2 arrow direction by your CR2025 forefinger. 2 2. Press "B" position and pull it according to the number 1 arrow direction by a cover. Remove the button cell according to slide the button cell out.
The above step 1 and 2 should be done simultaneously to the arrow marked at the back of the remote controller. 1 1. A CR 2025 B 14 Operating Instructions CHANGING THE BATTERIES ON THE REMOTE The remote controller is powered by one button cell housed in the rear part and protected by your thumb. 2 1 +2 1 1 + 2 3. Slightly press "A" position according to the number 2 arrow direction by your CR2025 forefinger. 2 2. Press "B" position and pull it according to the number 1 arrow direction by a cover. Remove the button cell according to slide the button cell out.
Product Manual
Page 16
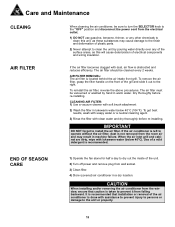
... and remove plug from the room air and may cause damage to dry out the inside of electrical components and wiring insulation. Use of plastic parts. 2) Never attempt to install the air filter. When the air inlet grill and cabinet are dirty, wipe with clean water and dry thoroughly before re...
... and remove plug from the room air and may cause damage to dry out the inside of electrical components and wiring insulation. Use of plastic parts. 2) Never attempt to install the air filter. When the air inlet grill and cabinet are dirty, wipe with clean water and dry thoroughly before re...
Product Manual
Page 17
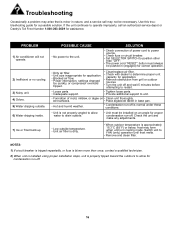
... technician. 2) When unit is installed using proper installation steps, unit is in nature, and a service call an authorized service depot or Danby's Toll Free Number 1-800-263-2629 for proper condensation run -off . If the unit continues to unit. • Formation of mold...Hot and humid weather. • Condensation run-off and wait 5 minutes before attempting to restart. • Loose parts. • Inadequate support. • Tighten loose parts. • Provide additional support to operate improperly, call may form when unit is properly tipped toward the outdoors to ...
... technician. 2) When unit is installed using proper installation steps, unit is in nature, and a service call an authorized service depot or Danby's Toll Free Number 1-800-263-2629 for proper condensation run -off . If the unit continues to unit. • Formation of mold...Hot and humid weather. • Condensation run-off and wait 5 minutes before attempting to restart. • Loose parts. • Inadequate support. • Tighten loose parts. • Provide additional support to operate improperly, call may form when unit is properly tipped toward the outdoors to ...
Product Manual
Page 18
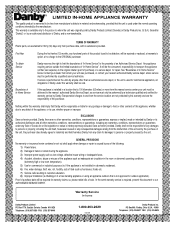
... conditions intended by the unit. If the appliance is performed on the units by a qualified service technician. Save as herein provided, Danby, there are the responsibility of the appliance such as hurricanes, floods etc. 7) Service calls resulting in customer education. 8) Improper Installation... to persons or property caused by the manufacturer. TERMS OF WARRANTY Plastic parts, are not protected by an authorized distributor of an Authorized Service Depot. EXCLUSIONS Save as herein provided, Danby shall not be required for thirty (30) days only from purchase date...
... conditions intended by the unit. If the appliance is performed on the units by a qualified service technician. Save as herein provided, Danby, there are the responsibility of the appliance such as hurricanes, floods etc. 7) Service calls resulting in customer education. 8) Improper Installation... to persons or property caused by the manufacturer. TERMS OF WARRANTY Plastic parts, are not protected by an authorized distributor of an Authorized Service Depot. EXCLUSIONS Save as herein provided, Danby shall not be required for thirty (30) days only from purchase date...

Product Manual
Page 31
Press "B" position and pull it according to the number 1 arrow direction by your thumb. 2 1 +2 1 1 + 2 3. Consignes d'utilisation CHANGING THE BATTERIES ON THE REMOTE The remote controller is powered by one button cell housed in the rear part and protected by your CR2025 forefinger. 2 2. The above step 1 and 2 should be done simultaneously to the arrow marked at the back of the remote controller. 1 1. Remove the button cell according to slide the button cell out. A CR 2025 B 30 Slightly press "A" position according to the number 2 arrow direction by a cover.
Press "B" position and pull it according to the number 1 arrow direction by your thumb. 2 1 +2 1 1 + 2 3. Consignes d'utilisation CHANGING THE BATTERIES ON THE REMOTE The remote controller is powered by one button cell housed in the rear part and protected by your CR2025 forefinger. 2 2. The above step 1 and 2 should be done simultaneously to the arrow marked at the back of the remote controller. 1 1. Remove the button cell according to slide the button cell out. A CR 2025 B 30 Slightly press "A" position according to the number 2 arrow direction by a cover.


