User Guide
Page 4
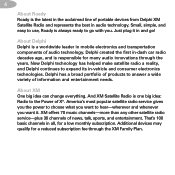
... Plan. America's most popular satellite radio service gives you the power to choose what you want to go ! XM offers 70 music channels-more than any other satellite radio service-plus 30 channels of information and entertainment needs. 4 About Roady Roady is the latest in the acclaimed line of portable devices from Delphi XM Satellite Radio and represents the best in and...
... Plan. America's most popular satellite radio service gives you the power to choose what you want to go ! XM offers 70 music channels-more than any other satellite radio service-plus 30 channels of information and entertainment needs. 4 About Roady Roady is the latest in the acclaimed line of portable devices from Delphi XM Satellite Radio and represents the best in and...
User Guide
Page 6
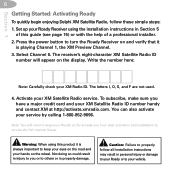
... F are not used. 4. Note: You will appear on and verify that it is playing Channel 1, the XM Preview Channel. 3. The receiver's eight-character XM Satellite Radio ID number will need to keep your eyes on the wheel. Activate your service by calling 1-800-852-9696....help of this product it is always important to receive the full channel lineup. Press the power button to turn the Roady Receiver on the display. Section 1 6 Getting Started: Activating Roady To quickly begin enjoying Delphi XM Satellite Radio, follow all installation instructions may result in personal injury...
... F are not used. 4. Note: You will appear on and verify that it is playing Channel 1, the XM Preview Channel. 3. The receiver's eight-character XM Satellite Radio ID number will need to keep your eyes on the wheel. Activate your service by calling 1-800-852-9696....help of this product it is always important to receive the full channel lineup. Press the power button to turn the Roady Receiver on the display. Section 1 6 Getting Started: Activating Roady To quickly begin enjoying Delphi XM Satellite Radio, follow all installation instructions may result in personal injury...
User Guide
Page 8
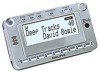
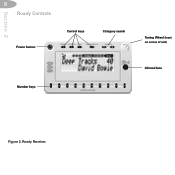
Section 2 8 Roady Controls Power button Control keys Category search Number keys Tuning Wheel (inset on corner of unit) Infrared lens Figure 2. Roady Receiver.
Section 2 8 Roady Controls Power button Control keys Category search Number keys Tuning Wheel (inset on corner of unit) Infrared lens Figure 2. Roady Receiver.
User Guide
Page 13
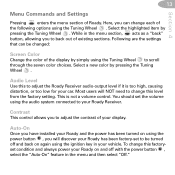
.... Select a new color by menu pressing the Tuning Wheel . To change this factoryset condition and always power your Roady and the power has been turned on using the power button , you will NOT need to adjust the Roady Receiver audio-output level if it is not a volume control. Audio Level Use this level from the factory...
.... Select a new color by menu pressing the Tuning Wheel . To change this factoryset condition and always power your Roady and the power has been turned on using the power button , you will NOT need to adjust the Roady Receiver audio-output level if it is not a volume control. Audio Level Use this level from the factory...
User Guide
Page 14
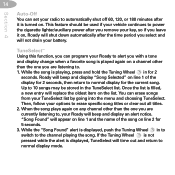
Section 4 14 Auto-Off You can set your radio to automatically shut off 60, 120, or 180 minutes after it on the list....beep and display an alert notice. Up to 10 songs may be used if your Roady to erase specific song titles or clear out all titles. 2. Roady will appear on line 1 and the name of the display for 2 seconds. Once ... a new entry will replace the oldest item on , Roady will time out and return to normal display for 5 seconds. 3. You can program your vehicle continues to power the cigarette lighter/auxiliary power after the time period you are listening to the channel ...
Section 4 14 Auto-Off You can set your radio to automatically shut off 60, 120, or 180 minutes after it on the list....beep and display an alert notice. Up to 10 songs may be used if your Roady to erase specific song titles or clear out all titles. 2. Roady will appear on line 1 and the name of the display for 2 seconds. Once ... a new entry will replace the oldest item on , Roady will time out and return to normal display for 5 seconds. 3. You can program your vehicle continues to power the cigarette lighter/auxiliary power after the time period you are listening to the channel ...
User Guide
Page 15
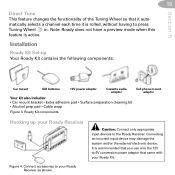
... and/or the external electronic device. Installation Roady Kit Set-up your Roady Receiver Caution: Connect only appropriate input devices to 6V conversion power adaptor that came with your Roady Receiver as shown. Cell phone mount adaptor Hooking up Your Roady Kit contains the following components: Car mount XM Antenna 12V power adaptor Cassette audio adaptor Your kit also...
... and/or the external electronic device. Installation Roady Kit Set-up your Roady Receiver Caution: Connect only appropriate input devices to 6V conversion power adaptor that came with your Roady Receiver as shown. Cell phone mount adaptor Hooking up Your Roady Kit contains the following components: Car mount XM Antenna 12V power adaptor Cassette audio adaptor Your kit also...
User Guide
Page 17
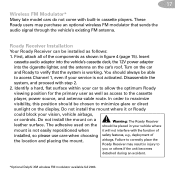
... Insert cassette audio adaptor into the vehicle's cassette deck, the 12V power adaptor into the cigarette lighter, and the antenna on a leather surface. You should always be able to correctly place the Roady Receiver may purchase an optional wireless FM modulator that the system is working... to maximize visibility, this position should be chosen to you or others if the unit becomes detached during an accident. *Optional Delphi XM wireless FM modulator available fall 2003. airbags. Do not install the mount where it will not interfere with the function of installed...
... Insert cassette audio adaptor into the vehicle's cassette deck, the 12V power adaptor into the cigarette lighter, and the antenna on a leather surface. You should always be able to correctly place the Roady Receiver may purchase an optional wireless FM modulator that the system is working... to maximize visibility, this position should be chosen to you or others if the unit becomes detached during an accident. *Optional Delphi XM wireless FM modulator available fall 2003. airbags. Do not install the mount where it will not interfere with the function of installed...

User Guide
Page 19
... to soften the adhesive. Avoid using sharp tools that could result in step 1, inserting cassette audio adaptor into the vehicle's cassette deck and the 12V power adaptor into the cigarette lighter. 8. Caution: Never use a mild household cleaner to apply too much heat, which could damage the mounting surface. 3. Lift one edge...
... to soften the adhesive. Avoid using sharp tools that could result in step 1, inserting cassette audio adaptor into the vehicle's cassette deck and the 12V power adaptor into the cigarette lighter. 8. Caution: Never use a mild household cleaner to apply too much heat, which could damage the mounting surface. 3. Lift one edge...
User Guide
Page 21
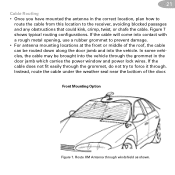
...from this location to prevent damage. • For antenna mounting locations at the front or middle of the door. Front Mounting Option Figure 7. Route XM Antenna through . If the cable will come into the vehicle. 21 Cable Routing • Once you have mounted the antenna in the door jamb ...which carries the power window and power lock wires. In some vehicles, the cable may be routed down along the door jamb and into contact with a rough metal opening, use ...
...from this location to prevent damage. • For antenna mounting locations at the front or middle of the door. Front Mounting Option Figure 7. Route XM Antenna through . If the cable will come into the vehicle. 21 Cable Routing • Once you have mounted the antenna in the door jamb ...which carries the power window and power lock wires. In some vehicles, the cable may be routed down along the door jamb and into contact with a rough metal opening, use ...
User Guide
Page 23
23 Final installation Verify that will secure the antenna to a metal roof under normal driving conditions. The antenna contains a powerful magnet that the antenna is in its final desired position.
23 Final installation Verify that will secure the antenna to a metal roof under normal driving conditions. The antenna contains a powerful magnet that the antenna is in its final desired position.
User Guide
Page 25
... have a removable end cap, then it is equipped with a 1-amp fuse only. Make sure all connectors are properly attached. 2. Make sure the cigarette lighter/auxiliary power socket is left unpowered for service. Make sure the adaptor is designed and built to be functioning correctly, please follow these troubleshooting steps: 1. If required... it . Check the adaptor fuse by unscrewing the ribbed end of the adaptor and examining it is clean and free of time. 25 Troubleshooting Your Roady Receiver is firmly seated in the cigarette lighter/ auxiliary...
... have a removable end cap, then it is equipped with a 1-amp fuse only. Make sure all connectors are properly attached. 2. Make sure the cigarette lighter/auxiliary power socket is left unpowered for service. Make sure the adaptor is designed and built to be functioning correctly, please follow these troubleshooting steps: 1. If required... it . Check the adaptor fuse by unscrewing the ribbed end of the adaptor and examining it is clean and free of time. 25 Troubleshooting Your Roady Receiver is firmly seated in the cigarette lighter/ auxiliary...
User Guide
Page 28
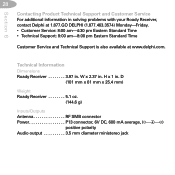
....4 mm) Weight Roady Receiver 5.1 oz. (144.6 g) Inputs/Outputs Antenna RF SMB connector Power P13 connector, 6V DC, 600 mA average, ( ) positive polarity Audio output 3.5 mm diameter ministereo jack Section 6 28 Contacting Product Technical Support and Customer Service For additional information in . H x 1 in solving problems with your Roady Receiver, contact Delphi at 1.877.GO DELPHI (1.877.463.3574...
....4 mm) Weight Roady Receiver 5.1 oz. (144.6 g) Inputs/Outputs Antenna RF SMB connector Power P13 connector, 6V DC, 600 mA average, ( ) positive polarity Audio output 3.5 mm diameter ministereo jack Section 6 28 Contacting Product Technical Support and Customer Service For additional information in . H x 1 in solving problems with your Roady Receiver, contact Delphi at 1.877.GO DELPHI (1.877.463.3574...

