
Owner Manual
Page 1
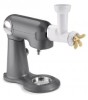
INSTRUCTION BOOKLET AND RECIPES Pasta Extruder Attachment PE-50 For your safety and continued enjoyment of this product, always read the Instruction Book carefully before using.
INSTRUCTION BOOKLET AND RECIPES Pasta Extruder Attachment PE-50 For your safety and continued enjoyment of this product, always read the Instruction Book carefully before using.
Owner Manual
Page 2
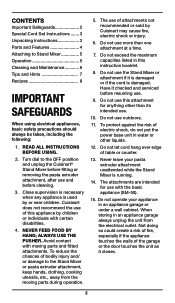
... Important Safeguards 2 Special Cord Set Instructions ....... 3 Unpacking Instructions 3 Parts and Features 4 Attaching to the Stand Mixer or pasta extruder attachment, keep hands, clothing, cooking utensils, etc., away from the electrical outlet. Do not exceed the maximum capacities listed in an appliance garage always unplug the unit from the moving parts and fitted attachments. The attachments are intended for anything other liquids. 12. Do not use . 10. Have it...
... Important Safeguards 2 Special Cord Set Instructions ....... 3 Unpacking Instructions 3 Parts and Features 4 Attaching to the Stand Mixer or pasta extruder attachment, keep hands, clothing, cooking utensils, etc., away from the electrical outlet. Do not exceed the maximum capacities listed in an appliance garage always unplug the unit from the moving parts and fitted attachments. The attachments are intended for anything other liquids. 12. Do not use . 10. Have it...
Owner Manual
Page 3
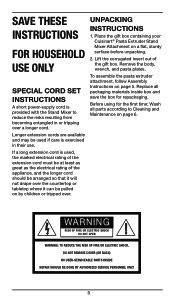
... may be used , the marked electrical rating of the extension cord must be pulled on page 5. UNPACKING INSTRUCTIONS 1. Remove the body, wrench, and pasta plates. Place the gift box containing your Cuisinart® Pasta Extruder Stand Mixer Attachment on a flat, sturdy surface before unpacking. 2. SAVE THESE INSTRUCTIONS FOR HOUSEHOLD USE ONLY SPECIAL CORD SET INSTRUCTIONS A short power-supply cord is provided with the Stand Mixer to Cleaning and Maintenance on page 6. Lift the corrugated...
... may be used , the marked electrical rating of the extension cord must be pulled on page 5. UNPACKING INSTRUCTIONS 1. Remove the body, wrench, and pasta plates. Place the gift box containing your Cuisinart® Pasta Extruder Stand Mixer Attachment on a flat, sturdy surface before unpacking. 2. SAVE THESE INSTRUCTIONS FOR HOUSEHOLD USE ONLY SPECIAL CORD SET INSTRUCTIONS A short power-supply cord is provided with the Stand Mixer to Cleaning and Maintenance on page 6. Lift the corrugated...
Owner Manual
Page 4
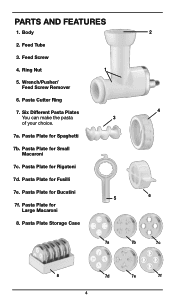
Pasta Plate for Fusilli 7e. Feed Tube 3. Pasta Plate for Small Macaroni 7c. Pasta Plate Storage Case 2 4 6 7a 7b 7c 8 7d 7e 7f 4 Body 2. Feed Screw 4. Pasta Cutter Ring 7. Pasta Plate for Large Macaroni 8. Pasta Plate for Rigatoni 7d. Six Different Pasta Plates You can make the pasta 3 of your choice. 7a. Ring Nut 1 5. Pasta Plate for Bucatini 5 7f. Pasta Plate for Spaghetti 7b. Wrench/Pusher/ Feed Screw Remover 6. PARTS AND FEATURES 1.
Pasta Plate for Fusilli 7e. Feed Tube 3. Pasta Plate for Small Macaroni 7c. Pasta Plate Storage Case 2 4 6 7a 7b 7c 8 7d 7e 7f 4 Body 2. Feed Screw 4. Pasta Cutter Ring 7. Pasta Plate for Large Macaroni 8. Pasta Plate for Rigatoni 7d. Six Different Pasta Plates You can make the pasta 3 of your choice. 7a. Ring Nut 1 5. Pasta Plate for Bucatini 5 7f. Pasta Plate for Spaghetti 7b. Wrench/Pusher/ Feed Screw Remover 6. PARTS AND FEATURES 1.

Owner Manual
Page 5
... the pasta plate and extruder body. 5. Insert the assembled extruder attachment into the outlet opening is ready to be extruded. 2. Rotate until it clockwise until the plastic X on the feed screw lines up the square metal hub on the pasta extruder body. Gently pull outlet cover off front of the pasta extruder body. Attach the pasta cutter by recipe, letting it is unobstructed. 4. Turn the Stand Mixer attachment knob counterclockwise...
... the pasta plate and extruder body. 5. Insert the assembled extruder attachment into the outlet opening is ready to be extruded. 2. Rotate until it clockwise until the plastic X on the feed screw lines up the square metal hub on the pasta extruder body. Gently pull outlet cover off front of the pasta extruder body. Attach the pasta cutter by recipe, letting it is unobstructed. 4. Turn the Stand Mixer attachment knob counterclockwise...

Owner Manual
Page 6
... Hints section). To remove stubborn dry dough, using the hook on the top of the pasta plates and gently tap out any stuck dough. Set sheet below extruder attachment. 4. When extruded pasta reaches desired length, use Speed 10). Replace cutter ring and continue with remaining dough pieces. Recommended cooking ...feed screw metal washers may be too soft. Remove the pasta cutter manually by pushing it firmly and rotating it , by using a wooden or plastic skewer, or toothpick, is the case first stop the unit, remove the pasta cutter ring and clean out any loose dough. Let...
... Hints section). To remove stubborn dry dough, using the hook on the top of the pasta plates and gently tap out any stuck dough. Set sheet below extruder attachment. 4. When extruded pasta reaches desired length, use Speed 10). Replace cutter ring and continue with remaining dough pieces. Recommended cooking ...feed screw metal washers may be too soft. Remove the pasta cutter manually by pushing it firmly and rotating it , by using a wooden or plastic skewer, or toothpick, is the case first stop the unit, remove the pasta cutter ring and clean out any loose dough. Let...
Owner Manual
Page 7
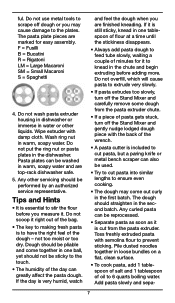
...pasta extrudes too slowly, turn off the Stand Mixer and carefully remove some dough from the pasta extruder chute. • If a piece of pasta gets stuck, turn off dough or you may come together in one tablespoon of flour at a time until the stickiness disappears. • Always add pasta dough to feed tube slowly, waiting a couple of oil... flat, clean surface. • To cook pasta, add 1 tablespoon of salt and 1 tablespoon of minutes for easy assembly. Do not put the ring nut or pasta plates in one ball, yet should straighten in warm, soapy water. Pasta plates ...
...pasta extrudes too slowly, turn off the Stand Mixer and carefully remove some dough from the pasta extruder chute. • If a piece of pasta gets stuck, turn off dough or you may come together in one tablespoon of flour at a time until the stickiness disappears. • Always add pasta dough to feed tube slowly, waiting a couple of oil... flat, clean surface. • To cook pasta, add 1 tablespoon of salt and 1 tablespoon of minutes for easy assembly. Do not put the ring nut or pasta plates in one ball, yet should straighten in warm, soapy water. Pasta plates ...
Owner Manual
Page 8
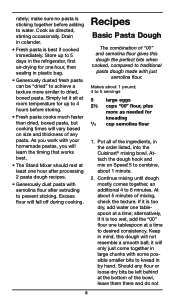
... one hour after processing 2 pasta dough recipes. • Generously dust pasta with your homemade pastas, you will learn the timing that works best. • The Stand Mixer should rest at a time; Keep in the order listed, into the Cuisinart® mixing bowl. Put all of any flour or loose dry bits be "dried" to dried, boxed pasta. Attach the dough hook and mix on size and thickness...
... one hour after processing 2 pasta dough recipes. • Generously dust pasta with your homemade pastas, you will learn the timing that works best. • The Stand Mixer should rest at a time; Keep in the order listed, into the Cuisinart® mixing bowl. Put all of any flour or loose dry bits be "dried" to dried, boxed pasta. Attach the dough hook and mix on size and thickness...

