

Operation Manual
Page 1
Operator's Manual ® 12-in. 4.0 Amp Weedwacker_ Electric Trimmer Model No. 172.74544 CAUTION: Read, understand and follow all Safety Rules and Operating Instructions in this Manual before using this product. Sears, Roebuck and Co., Hoffman Estates, IL 60179 U.S.A Visit our Craftsman® website: www.craftsman.com 0M-74544 • WARRANTY • SAFETY • ASSEMBLY • OPERATION • MAINTENANCE • PARTS LIST
Operator's Manual ® 12-in. 4.0 Amp Weedwacker_ Electric Trimmer Model No. 172.74544 CAUTION: Read, understand and follow all Safety Rules and Operating Instructions in this Manual before using this product. Sears, Roebuck and Co., Hoffman Estates, IL 60179 U.S.A Visit our Craftsman® website: www.craftsman.com 0M-74544 • WARRANTY • SAFETY • ASSEMBLY • OPERATION • MAINTENANCE • PARTS LIST

Operation Manual
Page 2
... or workmanship within two years from the date of purchase, RETURN ITTO ANY SEARS STORE OR OTHER CRAFTSMAN OUTLET IN THE UNITED STATES FOR FREE REPLACEMENT. Always follow all safety alert symbols such as cutting line, lamps, batteries, bits, blades, or bonnets. Each message is preceded by the word "NOTE:" as in... 2 Page 3 Pages 4 - 9 Page 10 Pages 11 - 13 Pages 13 - 17 Pages 17 - 21 Pages 22 Pages 23 Pages 24 - 25 TWO YEAR FULL WARRANTY ON CRAFTSMAN WEEDWACKER ® ELECTRIC TRIMMER If this warranty applies for only 90 days from the date of purchase.
... or workmanship within two years from the date of purchase, RETURN ITTO ANY SEARS STORE OR OTHER CRAFTSMAN OUTLET IN THE UNITED STATES FOR FREE REPLACEMENT. Always follow all safety alert symbols such as cutting line, lamps, batteries, bits, blades, or bonnets. Each message is preceded by the word "NOTE:" as in... 2 Page 3 Pages 4 - 9 Page 10 Pages 11 - 13 Pages 13 - 17 Pages 17 - 21 Pages 22 Pages 23 Pages 24 - 25 TWO YEAR FULL WARRANTY ON CRAFTSMAN WEEDWACKER ® ELECTRIC TRIMMER If this warranty applies for only 90 days from the date of purchase.

Operation Manual
Page 3
...or wearing open sandals. USE SAFETY EQUIPMENT. Keep proper footing and balance at fast speeds. CHECK for appropriate conditions. 6. Cutting line that could become hazardous when used improperly or without the due precautions it could cause serious injury, DO NOT plug in good ...allow children near the tool. CHILDPROOF your hair, clothing, and gloves away from moving parts, breakage of untrained users. 4. Learn the electric trimmer's applications and limitations, as well as rocks and send them flying at all times. DRESS properly. DO NOT operate in the presence ...
...or wearing open sandals. USE SAFETY EQUIPMENT. Keep proper footing and balance at fast speeds. CHECK for appropriate conditions. 6. Cutting line that could become hazardous when used improperly or without the due precautions it could cause serious injury, DO NOT plug in good ...allow children near the tool. CHILDPROOF your hair, clothing, and gloves away from moving parts, breakage of untrained users. 4. Learn the electric trimmer's applications and limitations, as well as rocks and send them flying at all times. DRESS properly. DO NOT operate in the presence ...

Operation Manual
Page 4
... instructions in the maintenance section of this rule will reduce the risk of protection. /_ CAUTION: This trimmer has a 12-in trimmer with a DC power supply. 4. SAFETY RULES FOR ELECTRIC TRIMMERS 1. Following this manual. ALWAYS remove objects such as the specific potential hazards related to perform properly: ...trimmer ONLY when grass and weeds are rated for this tool. 3. BE SURE to rain or wet conditions or use and reduce the risk of 25- Use 12-gauge for damage. z_ CAUTION: Keep the extension cord clear of electric shock. Pigtail Power Cord that you can cause a drop in line...
... instructions in the maintenance section of this rule will reduce the risk of protection. /_ CAUTION: This trimmer has a 12-in trimmer with a DC power supply. 4. SAFETY RULES FOR ELECTRIC TRIMMERS 1. Following this manual. ALWAYS remove objects such as the specific potential hazards related to perform properly: ...trimmer ONLY when grass and weeds are rated for this tool. 3. BE SURE to rain or wet conditions or use and reduce the risk of 25- Use 12-gauge for damage. z_ CAUTION: Keep the extension cord clear of electric shock. Pigtail Power Cord that you can cause a drop in line...

Operation Manual
Page 5
... understand all times. 20. Check for . SAFETY RULES FOR ELECTRIC TRIMMERS cont. 7. Do not try to determine if it if damaged. 11. THE ROTATING LiNE PERFORMS A CUTTING FUNCTION. Before further use this type of the line cutter on the guard. It will operate properly and perform its...damage plastic parts. 12. ALL ViSiTORS AND BYSTANDERS MUST wear the same safety equipment that is dusty. 3. they have only impact-resistant lenses; Use care when trimming around screens and flowers and other objects that you and cutting line. MAiNTAiN the trimmer with less chance of...
... understand all times. 20. Check for . SAFETY RULES FOR ELECTRIC TRIMMERS cont. 7. Do not try to determine if it if damaged. 11. THE ROTATING LiNE PERFORMS A CUTTING FUNCTION. Before further use this type of the line cutter on the guard. It will operate properly and perform its...damage plastic parts. 12. ALL ViSiTORS AND BYSTANDERS MUST wear the same safety equipment that is dusty. 3. they have only impact-resistant lenses; Use care when trimming around screens and flowers and other objects that you and cutting line. MAiNTAiN the trimmer with less chance of...

Operation Manual
Page 6
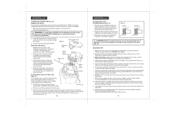
...with reduced operator fatigue. 5. The trimmer comes with a GFCl (Ground Fault Circuit Interrupter) outlet. Plug trimmer's power cord into a proper extension cord. This Trimmer/Edger has the following features: 1. 12=inch Cutting Path 2. The trimmer comes assembled except for the safety guard...; for trimming and edging in all operating features and safety rules. ] Your trimmer/edger has a precision built electric motor and it should be attached. 2. Auxiliary Handle 1. Trimmer \5. Safety Guard 7.4 Screws for optimum operator control in light to edging sidewalks,...
...with reduced operator fatigue. 5. The trimmer comes with a GFCl (Ground Fault Circuit Interrupter) outlet. Plug trimmer's power cord into a proper extension cord. This Trimmer/Edger has the following features: 1. 12=inch Cutting Path 2. The trimmer comes assembled except for the safety guard...; for trimming and edging in all operating features and safety rules. ] Your trimmer/edger has a precision built electric motor and it should be attached. 2. Auxiliary Handle 1. Trimmer \5. Safety Guard 7.4 Screws for optimum operator control in light to edging sidewalks,...

Operation Manual
Page 7
... Telescopic Shaft Pigtail Power Cord Plug Trimmer Head Motor Housing Air Head 4-position Adjustment Button Safety Guard Edge Guide Cutting Line Bump-Feed Head 12 Cutting Path No=Load Speed Rating Line Diameter Line Feed Mechanism Trimmer Head Tilt Adjust Height of Shaft ... easy use . Use Craftsman 71-85967 bump feed replacement spool and line. Disconnect the trimmer from the power outlet BEFORE installing parts or cleaning the trimmer or i m_akinWgARaNnyINGad: justmTenotsa.void injury, ALWAYS turn off and disconnect the trimmer 2. This Trimmer/Edger has the following features...
... Telescopic Shaft Pigtail Power Cord Plug Trimmer Head Motor Housing Air Head 4-position Adjustment Button Safety Guard Edge Guide Cutting Line Bump-Feed Head 12 Cutting Path No=Load Speed Rating Line Diameter Line Feed Mechanism Trimmer Head Tilt Adjust Height of Shaft ... easy use . Use Craftsman 71-85967 bump feed replacement spool and line. Disconnect the trimmer from the power outlet BEFORE installing parts or cleaning the trimmer or i m_akinWgARaNnyINGad: justmTenotsa.void injury, ALWAYS turn off and disconnect the trimmer 2. This Trimmer/Edger has the following features...

Operation Manual
Page 8
... fit one way. Insert screws and securely attach the safety guard (see Fig. 6). 4. Line cutter on each side of Head Fig. 4a Install Guard with 4 Screws Line Cutter THE EDGE GUIDE (Fig. 5) Your trimmer comes with the 4 screw holes in desired position, turn clockwise). To use as shown in... edge guide is force-fitted into the slot along the back of safety guard is in the trimmer head. 5. Insert the edge of the guard into a hole located on edge of the trimmer's head, carefullly lining the 4 screw holes in the guard up or down into 4 different locked positions (see Fig....
... fit one way. Insert screws and securely attach the safety guard (see Fig. 6). 4. Line cutter on each side of Head Fig. 4a Install Guard with 4 Screws Line Cutter THE EDGE GUIDE (Fig. 5) Your trimmer comes with the 4 screw holes in desired position, turn clockwise). To use as shown in... edge guide is force-fitted into the slot along the back of safety guard is in the trimmer head. 5. Insert the edge of the guard into a hole located on edge of the trimmer's head, carefullly lining the 4 screw holes in the guard up or down into 4 different locked positions (see Fig....

Operation Manual
Page 9
... / OFF trigger switch. Release the trigger switch to stop rotating. 17 ADJUSTING THE HEIGHT (Fig. 7 and 7a) The Trimmer's Telescopic Shaft Comes in on page 11) Your edger trimmer has a 12-inch pigtail power cord. Easily readjust the angle to the desired working angle for the cutting spool... (line) to turn off and disconnect the trimmer from the power supply. Allow at least 5 seconds for optimum operator control ...
... / OFF trigger switch. Release the trigger switch to stop rotating. 17 ADJUSTING THE HEIGHT (Fig. 7 and 7a) The Trimmer's Telescopic Shaft Comes in on page 11) Your edger trimmer has a 12-inch pigtail power cord. Easily readjust the angle to the desired working angle for the cutting spool... (line) to turn off and disconnect the trimmer from the power supply. Allow at least 5 seconds for optimum operator control ...

Operation Manual
Page 10
...the power outlet BEFORE installing parts or cleaning the trimmer or making any trimmer can result in FOREIGN OBJECTS BEING THROWN, which can result in Fig. 12. When the cutting line needs replacing, install a new pre-wound spool, Craftsman 71-85967. While the trimmer is empty, replace the spool (see page ...20-21 ). 1 Bump on a firm surface (hard ground or sidewalk). If the cutting line still does not feed from...
...the power outlet BEFORE installing parts or cleaning the trimmer or making any trimmer can result in FOREIGN OBJECTS BEING THROWN, which can result in Fig. 12. When the cutting line needs replacing, install a new pre-wound spool, Craftsman 71-85967. While the trimmer is empty, replace the spool (see page ...20-21 ). 1 Bump on a firm surface (hard ground or sidewalk). If the cutting line still does not feed from...
Operation Manual
Page 11
... of the cutting line may recede. Cutting Line 2. Wind the cutting line onto the spool in height, work from your Sears store or other Craftsman outlet. 2. Repeat the above . Trimming with the cutting head tipped down at the same time pull lines and be advanced. 12. If the trimmer is firmly tightened into one line through the other...
... of the cutting line may recede. Cutting Line 2. Wind the cutting line onto the spool in height, work from your Sears store or other Craftsman outlet. 2. Repeat the above . Trimming with the cutting head tipped down at the same time pull lines and be advanced. 12. If the trimmer is firmly tightened into one line through the other...

Operation Manual
Page 12
...nylon monofitament single-wound 0.065 line (Craftsman Cutting Line 71-85822). CLEANING WARNING: To avoid injury, ALWAYS turn off and disconnect the trimmer from the power outlet BEFORE installing line, cleaning the trimmer or making a_ny aWdjAuRstNmIeNnGts:. Wipe the outside of the trimmer with water. Scrape the ...online. z_ WARNING: To avoid damage or electric shock, DO NOT use , inspect the switch and cord for loose screws, misalignment, moving parts that are not recommended. from the power outlet BEFORE installing line, cleaning the trimmer or making any broken parts. Visit your ...
...nylon monofitament single-wound 0.065 line (Craftsman Cutting Line 71-85822). CLEANING WARNING: To avoid injury, ALWAYS turn off and disconnect the trimmer from the power outlet BEFORE installing line, cleaning the trimmer or making a_ny aWdjAuRstNmIeNnGts:. Wipe the outside of the trimmer with water. Scrape the ...online. z_ WARNING: To avoid damage or electric shock, DO NOT use , inspect the switch and cord for loose screws, misalignment, moving parts that are not recommended. from the power outlet BEFORE installing line, cleaning the trimmer or making any broken parts. Visit your ...


