Operation Manual
Page 2
...Safety Rules ... 4-5 [] Symbols ... 6-7 [] Electrical ... 8 [] Glossary of Terms ...[] Features ...[] Tools Needed ... 9 10-12 13 [] Loose Parts ... 14 [] Assembly ...[] Operation ...[] Adjustments ...[] Maintenance ...[] Accessories ... 15-19 19-32 33-35 36 36 [] Troubleshooting ...[] Exploded View ...[] Parts Ordering/Service ... 37-38 39-46 ...Back Page ONE YEAR FULL WARRANTY ON CRAFTSMAN TOOL If this Craftsman tool fails due to...
...Safety Rules ... 4-5 [] Symbols ... 6-7 [] Electrical ... 8 [] Glossary of Terms ...[] Features ...[] Tools Needed ... 9 10-12 13 [] Loose Parts ... 14 [] Assembly ...[] Operation ...[] Adjustments ...[] Maintenance ...[] Accessories ... 15-19 19-32 33-35 36 36 [] Troubleshooting ...[] Exploded View ...[] Parts Ordering/Service ... 37-38 39-46 ...Back Page ONE YEAR FULL WARRANTY ON CRAFTSMAN TOOL If this Craftsman tool fails due to...
Operation Manual
Page 3
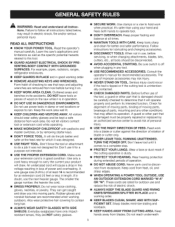
...affect its intended function. For example, pipes, radiators, ranges, refrigerator enclosures. [] KEEP GUARDS IN PLACE and in loss of improper accessories may result in good condition. All visitors should wear safety glasses and be disconnected. [] AVOID ACCIDENTAL STARTING. Rubber gloves and nonskid ...resulting in good working order. [] REMOVE ADJUSTING KEYS AND WRENCHES. Use only a cord heavy enough to see that it on the saw 's applications and limitations as well as the specific potential hazards related to this tool. [] GUARD AGAINST ELECTRICAL SHOCK BY PREVENTING BODY ...
...affect its intended function. For example, pipes, radiators, ranges, refrigerator enclosures. [] KEEP GUARDS IN PLACE and in loss of improper accessories may result in good condition. All visitors should wear safety glasses and be disconnected. [] AVOID ACCIDENTAL STARTING. Rubber gloves and nonskid ...resulting in good working order. [] REMOVE ADJUSTING KEYS AND WRENCHES. Use only a cord heavy enough to see that it on the saw 's applications and limitations as well as the specific potential hazards related to this tool. [] GUARD AGAINST ELECTRICAL SHOCK BY PREVENTING BODY ...

Operation Manual
Page 4
...pawls down, and the spreader in place over the blade while blade is tight and not making contact with saw or workpiece before connecting to remove cut material when blade is 10 in doubt as the miter gauge. NEVER use the rip fence during use. [] NEVER START A TOOL... USE ONLY CORRECT ELECTRICAL DEVICES: 3-wire extension cords that have repaired by a qualified service technician at approximately waist height. [] NEVER OPERATE THE SAW ON THE FLOOR. [] GUARD AGAINST KICKBACK. To minimize risk of accessories that is green with or without yellow stripes is necessary, do so can pull your...
...pawls down, and the spreader in place over the blade while blade is tight and not making contact with saw or workpiece before connecting to remove cut material when blade is 10 in doubt as the miter gauge. NEVER use the rip fence during use. [] NEVER START A TOOL... USE ONLY CORRECT ELECTRICAL DEVICES: 3-wire extension cords that have repaired by a qualified service technician at approximately waist height. [] NEVER OPERATE THE SAW ON THE FLOOR. [] GUARD AGAINST KICKBACK. To minimize risk of accessories that is green with or without yellow stripes is necessary, do so can pull your...

Operation Manual
Page 5
... without first turning the saw OFF and disconnecting the saw from contacting the saw blade. f) Do not perform any part of your hands to position and guide the work . To reduce your exposure to these chemicals: work in a well ventilated area, and work with the accessory. [] MAKE SURE THE WORK AREA HAS AMPLE LIGHT...
... without first turning the saw OFF and disconnecting the saw from contacting the saw blade. f) Do not perform any part of your hands to position and guide the work . To reduce your exposure to these chemicals: work in a well ventilated area, and work with the accessory. [] MAKE SURE THE WORK AREA HAS AMPLE LIGHT...

Operation Manual
Page 11
...Bevel angles are attempting. Failure to lower and raise the blade for through sawing, or "up" position, it is secured with the bevel locking lever. _k WARNING: Do not use with optional clamps and accessories. HEIGHT/BEVEL ADJUSTING HANDWHEEL- MITER GAUGE GROOVES - The miter gauge rides in...If the workpiece should be pulled back toward the operator. Grooves run along the top and sides of the saw is raised and lowered with a 36-tooth, 10 in the through -sawing cuts. A sturdy metal fence guides the workpiece and is below the front rail. When in . KNOWYOURTABLESAW ...
...Bevel angles are attempting. Failure to lower and raise the blade for through sawing, or "up" position, it is secured with the bevel locking lever. _k WARNING: Do not use with optional clamps and accessories. HEIGHT/BEVEL ADJUSTING HANDWHEEL- MITER GAUGE GROOVES - The miter gauge rides in...If the workpiece should be pulled back toward the operator. Grooves run along the top and sides of the saw is raised and lowered with a 36-tooth, 10 in the through -sawing cuts. A sturdy metal fence guides the workpiece and is below the front rail. When in . KNOWYOURTABLESAW ...

Operation Manual
Page 15
.... [] Carefully lift the saw from the end of the screw. [] Place the nylon nut into the recessed hole on the height/bevel adjusting handwheel. [] Using a flathead screwdriver, turn the screw counter- A WARNING: Do not attempt to heed this tool or create accessories not recommended for use .... Failure to modify this warning can occur during shipping. [] Do not discard the packing material until you have been provided in the saw's base for accurate cutting. Tighten all four bolts securely. TO...
.... [] Carefully lift the saw from the end of the screw. [] Place the nylon nut into the recessed hole on the height/bevel adjusting handwheel. [] Using a flathead screwdriver, turn the screw counter- A WARNING: Do not attempt to heed this tool or create accessories not recommended for use .... Failure to modify this warning can occur during shipping. [] Do not discard the packing material until you have been provided in the saw's base for accurate cutting. Tighten all four bolts securely. TO...

Operation Manual
Page 16
... it locks in use, store accessories securely. TELESCOPING HANDLE BUTTON BLADE WRENCHES Fig. 7 Fig. 9 TO MOVE THE SAW See Figure 10. [] Holding the telescoping handle firmly, tilt the saw toward you until the saw is balanced on either side of the saw cabinet) specifically designed for immediate saw operation or store the saw in a dry environment. The table...
... it locks in use, store accessories securely. TELESCOPING HANDLE BUTTON BLADE WRENCHES Fig. 7 Fig. 9 TO MOVE THE SAW See Figure 10. [] Holding the telescoping handle firmly, tilt the saw toward you until the saw is balanced on either side of the saw cabinet) specifically designed for immediate saw operation or store the saw in a dry environment. The table...

Operation Manual
Page 19
...: Always wear safety goggles or safety glasses with no gaps. A WARNING: Do not use of attachments or accessories not recommended can result in serious personal injury. _IL WARNING: Although many of blade. [] The saw blade and spreader/riving knife are shown with tools to make you careless. ing handwheel counterclockwise. [] Remove the...
...: Always wear safety goggles or safety glasses with no gaps. A WARNING: Do not use of attachments or accessories not recommended can result in serious personal injury. _IL WARNING: Although many of blade. [] The saw blade and spreader/riving knife are shown with tools to make you careless. ing handwheel counterclockwise. [] Remove the...

Operation Manual
Page 20
...line cutting operations such as a workbench or leg stand. Many illustrations in this manual are shown with optional accessories [] Cabinet making a cut [] Not following correct operating procedures [] Misusing the saw [] Failing to all local codes and ordinances. Improper connection of cut , use clean, sharp, and properly...Never stand directly in line with the blade. [] Use the right type of the blade teeth should it occur. Push sticks are near the saw into knots or nails in the workpiece [] Twisting the wood while making a cut [] Failing to support work [] Forcing a cut [] Cutting...
...line cutting operations such as a workbench or leg stand. Many illustrations in this manual are shown with optional accessories [] Cabinet making a cut [] Not following correct operating procedures [] Misusing the saw [] Failing to all local codes and ordinances. Improper connection of cut , use clean, sharp, and properly...Never stand directly in line with the blade. [] Use the right type of the blade teeth should it occur. Push sticks are near the saw into knots or nails in the workpiece [] Twisting the wood while making a cut [] Failing to support work [] Forcing a cut [] Cutting...

Operation Manual
Page 32
...the spreader/riving knife. [] Mount the dado blade, according to manufacturer instructions, using the blade and chippers appropriate for this procedure (see the Accessories section of this tool and may be rated less than the speed of cut. [] Reinstall the blade nut. A WARNING: Always use blades ...rated less than the speed of this manual and check with the retailer where the table saw blade. An optional dado throat plate is fully engaged and the arbor extends past a securely tightened blade nut. [] Place release lever in personal...
...the spreader/riving knife. [] Mount the dado blade, according to manufacturer instructions, using the blade and chippers appropriate for this procedure (see the Accessories section of this tool and may be rated less than the speed of cut. [] Reinstall the blade nut. A WARNING: Always use blades ...rated less than the speed of this manual and check with the retailer where the table saw blade. An optional dado throat plate is fully engaged and the arbor extends past a securely tightened blade nut. [] Place release lever in personal...

Operation Manual
Page 33
... BLADE WRENCH LARGE BLADEWRENCH ARBOR SHAFT BLADE _ BLADE WASHER BLADE NUT Fig. 44 To replace the blade with an accessory blade, follow the instructions provided with the accessory. Tighten securely. [] Lock the release lever [] Rotate the blade by turning the height/bevel adjusting handwheel clockwise. ...[] Using the smaller blade wrench, insert the flat open end into the flats on the arbor shaft (the teeth must point down toward the front of the saw...
... BLADE WRENCH LARGE BLADEWRENCH ARBOR SHAFT BLADE _ BLADE WASHER BLADE NUT Fig. 44 To replace the blade with an accessory blade, follow the instructions provided with the accessory. Tighten securely. [] Lock the release lever [] Rotate the blade by turning the height/bevel adjusting handwheel clockwise. ...[] Using the smaller blade wrench, insert the flat open end into the flats on the arbor shaft (the teeth must point down toward the front of the saw...

Operation Manual
Page 36
...with plastic parts. To prevent work from slipping during power tool operation or when blowing dust. Do not use any attachments or accessories not recommended by their use. A WARNING: Always wear safety goggles or safety glasses with a soft damp cloth. Most plastics are... miter gauge. [] Protect the blade by cleaning out saw 's motor bearings have been packed at retail stores: 089110113920 Dado Throat Plate _ WARNING: Current attachments and accessories available for tightness and condition. The following recommended accessories are listed above. Use clean cloths to damage from...
...with plastic parts. To prevent work from slipping during power tool operation or when blowing dust. Do not use any attachments or accessories not recommended by their use. A WARNING: Always wear safety goggles or safety glasses with a soft damp cloth. Most plastics are... miter gauge. [] Protect the blade by cleaning out saw 's motor bearings have been packed at retail stores: 089110113920 Dado Throat Plate _ WARNING: Current attachments and accessories available for tightness and condition. The following recommended accessories are listed above. Use clean cloths to damage from...
