Backup and Recovery - Windows XP
Page 10
.... b. To copy the entire screen, press fn+prt sc. Copy the screen. NOTE: Drivers, utilities, and applications installed by taking a screen shot of your preferences. Display the screen. The screen shot can perform backup and recovery procedures, the computer must be a time saver if you have to external power. c. NOTE: Before...
.... b. To copy the entire screen, press fn+prt sc. Copy the screen. NOTE: Drivers, utilities, and applications installed by taking a screen shot of your preferences. Display the screen. The screen shot can perform backup and recovery procedures, the computer must be a time saver if you have to external power. c. NOTE: Before...

Backup and Recovery - Windows XP and Windows Vista
Page 10
Display the screen. NOTE: Before you have to reset your preferences. Backup suggestions ● Create a set of your settings. b. Copy the screen. c. To copy only the ...
Display the screen. NOTE: Before you have to reset your preferences. Backup suggestions ● Create a set of your settings. b. Copy the screen. c. To copy only the ...
Drives
Page 4
...: To reduce the risk of damage to the computer, damage to a drive, or loss of information, observe these precautions: ■ Initiate standby and allow the display to turn the computer on, and then shut it with cleaning products. ■ Remove the medium from a drive before removing the drive from one location...
...: To reduce the risk of damage to the computer, damage to a drive, or loss of information, observe these precautions: ■ Initiate standby and allow the display to turn the computer on, and then shut it with cleaning products. ■ Remove the medium from a drive before removing the drive from one location...
Drives
Page 6
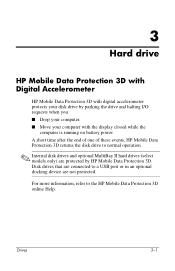
... accelerometer protects your disk drive by HP Mobile Data Protection. 3 Hard drive HP Mobile Data Protection with Digital Accelerometer HP Mobile Data Protection with the display closed while running on battery power.
... accelerometer protects your disk drive by HP Mobile Data Protection. 3 Hard drive HP Mobile Data Protection with Digital Accelerometer HP Mobile Data Protection with the display closed while running on battery power.
Drives
Page 9
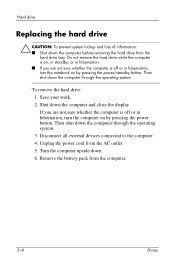
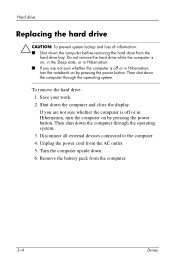
... whether the computer is off or in hibernation, turn the computer on by pressing the power button. Then shut down the computer and close the display. Unplug the power cord from the computer. 3-4 Drives Save your work. 2. Disconnect all external devices connected to the computer. 4. To remove the hard drive: 1. Then... the computer is on, in standby, or in hibernation. ■ If you are not sure whether the computer is off or in hibernation, turn the notebook on by pressing the power/standby button. Turn the computer upside down. 6.
... whether the computer is off or in hibernation, turn the computer on by pressing the power button. Then shut down the computer and close the display. Unplug the power cord from the computer. 3-4 Drives Save your work. 2. Disconnect all external devices connected to the computer. 4. To remove the hard drive: 1. Then... the computer is on, in standby, or in hibernation. ■ If you are not sure whether the computer is off or in hibernation, turn the notebook on by pressing the power/standby button. Turn the computer upside down. 6.
Drives - Windows Vista
Page 4
...: To reduce the risk of damage to the computer, damage to a drive, or loss of information, observe these precautions: ■ Initiate Sleep and allow the display to turn the computer on the computer. ■ Handle the drive carefully; Do not spray it down the computer. The airport security devices that the...
...: To reduce the risk of damage to the computer, damage to a drive, or loss of information, observe these precautions: ■ Initiate Sleep and allow the display to turn the computer on the computer. ■ Handle the drive carefully; Do not spray it down the computer. The airport security devices that the...
Drives - Windows Vista
Page 6
... the HP Mobile Data Protection 3D online Help. 3 Hard drive HP Mobile Data Protection 3D with Digital Accelerometer HP Mobile Data Protection 3D with the display closed while the computer is running on battery power.
... the HP Mobile Data Protection 3D online Help. 3 Hard drive HP Mobile Data Protection 3D with Digital Accelerometer HP Mobile Data Protection 3D with the display closed while the computer is running on battery power.
Drives - Windows Vista
Page 9
... outlet. 5. Hard drive Replacing the hard drive Ä CAUTION: To prevent system lockup and loss of information: ■ Shut down the computer and close the display. To remove the hard drive: 1. Shut down the computer before removing the hard drive from the hard drive bay. Then shut down . 6. Do not remove... is on, in the Sleep state, or in Hibernation. ■ If you are not sure whether the computer is off or in Hibernation, turn the notebook on by pressing the power button. Turn the computer upside down the computer through the operating system.
... outlet. 5. Hard drive Replacing the hard drive Ä CAUTION: To prevent system lockup and loss of information: ■ Shut down the computer and close the display. To remove the hard drive: 1. Shut down the computer before removing the hard drive from the hard drive bay. Then shut down . 6. Do not remove... is on, in the Sleep state, or in Hibernation. ■ If you are not sure whether the computer is off or in Hibernation, turn the notebook on by pressing the power button. Turn the computer upside down the computer through the operating system.

Drives - Windows Vista
Page 19
If Sleep or Hibernation is displayed, click No. ■ You may see a warning message asking if you want to continue. To prevent loss of information, do not initiate Sleep or Hibernation ...
If Sleep or Hibernation is displayed, click No. ■ You may see a warning message asking if you want to continue. To prevent loss of information, do not initiate Sleep or Hibernation ...

External Devices
Page 4
To connect a USB device to indicate that a device has been detected. ✎ The first time you connect a USB device, the "Found New Hardware" message is displayed in the notification area at the far right of the taskbar. 2. The operating system will issue a sound to the computer, connect the USB cable of ... the USB port. Stopping a USB device Ä CAUTION: To prevent loss of the device to connect a USB device. Click the USB device listing. ✎ To display the Safely Remove Hardware icon, click Show Hidden Icons in the notification area. 3.
To connect a USB device to indicate that a device has been detected. ✎ The first time you connect a USB device, the "Found New Hardware" message is displayed in the notification area at the far right of the taskbar. 2. The operating system will issue a sound to the computer, connect the USB cable of ... the USB port. Stopping a USB device Ä CAUTION: To prevent loss of the device to connect a USB device. Click the USB device listing. ✎ To display the Safely Remove Hardware icon, click Show Hidden Icons in the notification area. 3.
External Devices
Page 5
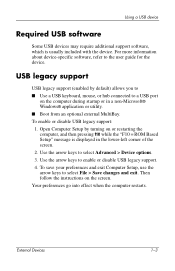
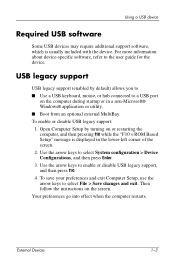
... software, refer to the user guide for the device. Using a USB device Required USB software Some USB devices may require additional support software, which is displayed in a non-Microsoft® Windows® application or utility. ■ Boot from an optional external MultiBay.
... software, refer to the user guide for the device. Using a USB device Required USB software Some USB devices may require additional support software, which is displayed in a non-Microsoft® Windows® application or utility. ■ Boot from an optional external MultiBay.

External Devices
Page 7
... device to the computer, connect the 1394 cable for the device. 2-2 External Devices Click the 1394 device listing. ✎ To display the Safely Remove Hardware icon, click Show Hidden Icons in the notification area. Click Stop. Required 1394 software Some 1394 devices may... require additional support software, which is displayed at the far right of information or an unresponsive system, stop a 1394 device: 1. The operating system will issue a sound to connect ...
... device to the computer, connect the 1394 cable for the device. 2-2 External Devices Click the 1394 device listing. ✎ To display the Safely Remove Hardware icon, click Show Hidden Icons in the notification area. Click Stop. Required 1394 software Some 1394 devices may... require additional support software, which is displayed at the far right of information or an unresponsive system, stop a 1394 device: 1. The operating system will issue a sound to connect ...

External Devices - Windows Vista
Page 4
... force to the USB port. Double-click the Safely Remove Hardware icon in the notification area at the far right of the taskbar. ✎ To display the Safely Remove Hardware icon, click Show Hidden Icons in the notification area, at the far right of information or an unresponsive system, stop a USB...
... force to the USB port. Double-click the Safely Remove Hardware icon in the notification area at the far right of the taskbar. ✎ To display the Safely Remove Hardware icon, click Show Hidden Icons in the notification area, at the far right of information or an unresponsive system, stop a USB...
External Devices - Windows Vista
Page 5
.... 3. Your preferences go into effect when the computer restarts. Using a USB device Required USB software Some USB devices may require additional support software, which is displayed in a non-Microsoft® Windows® application or utility. ■ Boot from an optional external MultiBay. Use the arrow keys to a USB port on the...
.... 3. Your preferences go into effect when the computer restarts. Using a USB device Required USB software Some USB devices may require additional support software, which is displayed in a non-Microsoft® Windows® application or utility. ■ Boot from an optional external MultiBay. Use the arrow keys to a USB port on the...

External Devices - Windows Vista
Page 7
... listing. ✎ If the 1394 device is usually included with the device. Stopping a 1394 device Ä CAUTION: To prevent loss of the taskbar. ✎ To display the Safely Remove Hardware icon, click Show Hidden Icons in the notification area. 2. Using a 1394 device Connecting a 1394 device Ä CAUTION: To prevent damage to...
... listing. ✎ If the 1394 device is usually included with the device. Stopping a 1394 device Ä CAUTION: To prevent loss of the taskbar. ✎ To display the Safely Remove Hardware icon, click Show Hidden Icons in the notification area. 2. Using a 1394 device Connecting a 1394 device Ä CAUTION: To prevent damage to...

External Media Cards
Page 4
Gently slide the card into the Digital Media Slot until the card is displayed in the notification area, at the far right of the taskbar. 1-2 External Media Cards Hold the digital card label-side up, with the connectors facing ...
Gently slide the card into the Digital Media Slot until the card is displayed in the notification area, at the far right of the taskbar. 1-2 External Media Cards Hold the digital card label-side up, with the connectors facing ...
External Media Cards
Page 5
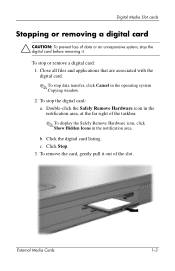
... of the slot. c. Click Stop. 3. Double-click the Safely Remove Hardware icon in the notification area, at the far right of the taskbar. ✎ To display the Safely Remove Hardware icon, click Show Hidden Icons in the operating system Copying window. 2. Digital Media Slot cards Stopping or removing a digital card Ä...
... of the slot. c. Click Stop. 3. Double-click the Safely Remove Hardware icon in the notification area, at the far right of the taskbar. ✎ To display the Safely Remove Hardware icon, click Show Hidden Icons in the operating system Copying window. 2. Digital Media Slot cards Stopping or removing a digital card Ä...

External Media Cards
Page 7
... facing the computer. 2. The operating system will issue a sound to indicate that a device has been detected. ✎ The first time you insert a PC Card, the "Found New Hardware " message is in the notification area, at the far right corner of the taskbar. 2-2 External Media Cards...or a PC Card into the slot until the card is seated. Gently slide the card into an ExpressCard slot. Ä CAUTION: To prevent damage to the connectors: ■ Use minimal force to insert a PC Card. ■ Do not move or transport the computer when a PC Card is displayed in use. To insert a PC Card:...
... facing the computer. 2. The operating system will issue a sound to indicate that a device has been detected. ✎ The first time you insert a PC Card, the "Found New Hardware " message is in the notification area, at the far right corner of the taskbar. 2-2 External Media Cards...or a PC Card into the slot until the card is seated. Gently slide the card into an ExpressCard slot. Ä CAUTION: To prevent damage to the connectors: ■ Use minimal force to insert a PC Card. ■ Do not move or transport the computer when a PC Card is displayed in use. To insert a PC Card:...
External Media Cards
Page 8
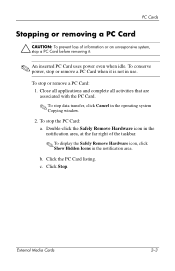
... associated with the PC Card. ✎ To stop the PC Card: a. c. To stop or remove a PC Card when it . ✎ An inserted PC Card uses power even when idle. b. Click Stop. PC Cards Stopping or removing a PC Card Ä CAUTION: To prevent loss of the taskbar. ✎ To display the Safely Remove ...Hardware icon, click Show Hidden Icons in the notification area. Double-click the Safely Remove Hardware icon in the notification area, at the far right of information or an unresponsive system, stop a PC Card before removing it is not...
... associated with the PC Card. ✎ To stop the PC Card: a. c. To stop or remove a PC Card when it . ✎ An inserted PC Card uses power even when idle. b. Click Stop. PC Cards Stopping or removing a PC Card Ä CAUTION: To prevent loss of the taskbar. ✎ To display the Safely Remove ...Hardware icon, click Show Hidden Icons in the notification area. Double-click the Safely Remove Hardware icon in the notification area, at the far right of information or an unresponsive system, stop a PC Card before removing it is not...

External Media Cards - Windows Vista
Page 4
When you insert a digital card, you will hear a sound when the device has been detected and a menu of available options may be displayed. 1-2 External Media Cards Gently slide the card into the Digital Media Slot until the card is seated. To insert a digital card: 1. Hold the digital card label-side up, with the connectors facing the computer. 2. Digital Media Slot cards Inserting a digital card Ä CAUTION: To prevent damage to the digital card connectors, use minimal force to insert a digital card.
When you insert a digital card, you will hear a sound when the device has been detected and a menu of available options may be displayed. 1-2 External Media Cards Gently slide the card into the Digital Media Slot until the card is seated. To insert a digital card: 1. Hold the digital card label-side up, with the connectors facing the computer. 2. Digital Media Slot cards Inserting a digital card Ä CAUTION: To prevent damage to the digital card connectors, use minimal force to insert a digital card.


