

HP Mini 1000 and Compaq Mini 700 - Maintenance and Service Guide
Page 78
... Changing the language of the screen. To open the Setup Utility, turn on or restart the device, and then press f10 while the "F10 = BIOS Setup Options" message is displayed in the lower-left corner of the Setup Utility The following procedure explains how to change and exit the Setup... system is running , begin at step 1. To start the Setup Utility, turn on or restart the device, and then press f10 while the "F10 = BIOS Setup Options" message is displayed in the lower-left corner of the Setup Utility. Your change becomes effective immediately. 70 Chapter 5 Setup Utility
... Changing the language of the screen. To open the Setup Utility, turn on or restart the device, and then press f10 while the "F10 = BIOS Setup Options" message is displayed in the lower-left corner of the Setup Utility The following procedure explains how to change and exit the Setup... system is running , begin at step 1. To start the Setup Utility, turn on or restart the device, and then press f10 while the "F10 = BIOS Setup Options" message is displayed in the lower-left corner of the Setup Utility. Your change becomes effective immediately. 70 Chapter 5 Setup Utility

HP Mini 1000 and Compaq Mini 700 - Maintenance and Service Guide
Page 79
... information in the Setup Utility. To open the Setup Utility, turn on or restart the device, and then press f10 while the "F10 = BIOS Setup Options" message is displayed in the lower-left corner of the screen. 2. To save your change and exit the Setup Utility, use the...Discarding Changes, and then press enter. To open the Setup Utility, turn on or restart the device, and then press f10 while the "F10 = BIOS Setup Options" message is displayed in the lower left corner of the screen. 2. System information such as the system time and date and identification information...
... information in the Setup Utility. To open the Setup Utility, turn on or restart the device, and then press f10 while the "F10 = BIOS Setup Options" message is displayed in the lower-left corner of the screen. 2. To save your change and exit the Setup Utility, use the...Discarding Changes, and then press enter. To open the Setup Utility, turn on or restart the device, and then press f10 while the "F10 = BIOS Setup Options" message is displayed in the lower left corner of the screen. 2. System information such as the system time and date and identification information...

HP Mini 1000 and Compaq Mini 700 - Maintenance and Service Guide
Page 80
... Enter, change the system time and date. ● View identification information about the device. ● View specification information about the processor, memory size, and system BIOS. Use the arrow keys to select Exit > Exit Saving Changes, and then press enter. ● To exit the Setup Utility without saving changes. ● To...
... Enter, change the system time and date. ● View identification information about the device. ● View specification information about the processor, memory size, and system BIOS. Use the arrow keys to select Exit > Exit Saving Changes, and then press enter. ● To exit the Setup Utility without saving changes. ● To...

HP MINI User Guide - Windows XP
Page 26
... Solitaire Chess Add and remove programs. Modify time and date settings. View PDF files. Play a card game. Schedule and manage activities. Perform updates to programs, BIOS, and operating system. Create simple and complex drawings and export them into a number of common image formats. Create presentations.
... Solitaire Chess Add and remove programs. Modify time and date settings. View PDF files. Play a card game. Schedule and manage activities. Perform updates to programs, BIOS, and operating system. Create simple and complex drawings and export them into a number of common image formats. Create presentations.

HP MINI User Guide - Windows XP
Page 86
... device must be connected to an optional power source. CAUTION: To prevent an unsuccessful installation or damage to the device, download and install a BIOS update only when the device is provided with your device through Update Manager. Do not insert, remove, connect, or disconnect any device, cable..., or cord. 16 Software updates Updated versions of the BIOS, the operating system, and other software is connected to reliable external power using the AC adapter. Do not disconnect power from the device ...
... device must be connected to an optional power source. CAUTION: To prevent an unsuccessful installation or damage to the device, download and install a BIOS update only when the device is provided with your device through Update Manager. Do not insert, remove, connect, or disconnect any device, cable..., or cord. 16 Software updates Updated versions of the BIOS, the operating system, and other software is connected to reliable external power using the AC adapter. Do not disconnect power from the device ...

HP MINI User Guide - Windows XP
Page 90
...installed on the device, follow these steps: 1. Turn on or restart the device, and then press the esc key repeatedly while the "F10 = BIOS Setup Options" message is displayed in this restore process: ● A 2-GB (minimum) USB flash drive (purchased separately) NOTE: This USB .... 9. Refer to the USB flash drive manufacturer for additional information. ● An additional computer running a Windows operating system and restore your HP MINI. 8. Restoring using the System Restore utility that is complete, remove the USB flash drive. 7. or - Change the boot order by turning on...
...installed on the device, follow these steps: 1. Turn on or restart the device, and then press the esc key repeatedly while the "F10 = BIOS Setup Options" message is displayed in this restore process: ● A 2-GB (minimum) USB flash drive (purchased separately) NOTE: This USB .... 9. Refer to the USB flash drive manufacturer for additional information. ● An additional computer running a Windows operating system and restore your HP MINI. 8. Restoring using the System Restore utility that is complete, remove the USB flash drive. 7. or - Change the boot order by turning on...

HP MINI User Guide - Windows XP
Page 95
... bay, identifying 10 battery information, finding 34 battery light 7, 37, 38 battery power 36 battery release latches 10, 36 battery temperature 42 bay, battery 10 BIOS updates, installing 77 Bluetooth using 25 Bookmarks Menu, identifying 28 bookmarks, using 28 buttons left TouchPad 4 right TouchPad 4 TouchPad on/off 4 C cables LAN 24 USB...
... bay, identifying 10 battery information, finding 34 battery light 7, 37, 38 battery power 36 battery release latches 10, 36 battery temperature 42 bay, battery 10 BIOS updates, installing 77 Bluetooth using 25 Bookmarks Menu, identifying 28 bookmarks, using 28 buttons left TouchPad 4 right TouchPad 4 TouchPad on/off 4 C cables LAN 24 USB...

HP MINI User Guide - Windows XP
Page 98
... 4 TouchPad scroll zone, identifying 4 traveling with the device routine care 84 wireless certification labels 12 turning off the device 42 U unresponsive system 42 Update Manager BIOS updates 76 icon 77 identifying 16 software updates 76 USB cable, connecting 61 USB devices connecting 61 description 61 removing 61 USB hubs 61 USB...
... 4 TouchPad scroll zone, identifying 4 traveling with the device routine care 84 wireless certification labels 12 turning off the device 42 U unresponsive system 42 Update Manager BIOS updates 76 icon 77 identifying 16 software updates 76 USB cable, connecting 61 USB devices connecting 61 description 61 removing 61 USB hubs 61 USB...
MINI User Guide - Windows XP
Page 8
... Backup utility 62 Performing a recovery ...63 Recovering your information 63 Recovering the operating system and programs 63 12 Updating software Updating the BIOS ...66 Determining the BIOS version 66 Downloading a BIOS update 66 Updating programs and drivers ...68 13 Setup Utility Starting the Setup Utility ...69 Using the Setup Utility ...69 Changing the...
... Backup utility 62 Performing a recovery ...63 Recovering your information 63 Recovering the operating system and programs 63 12 Updating software Updating the BIOS ...66 Determining the BIOS version 66 Downloading a BIOS update 66 Updating programs and drivers ...68 13 Setup Utility Starting the Setup Utility ...69 Using the Setup Utility ...69 Changing the...
MINI User Guide - Windows XP
Page 49
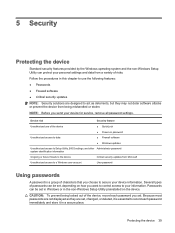
... use of the device Unauthorized access to data ● QuickLock ● Power-on password ● Firewall software ● Windows updates Unauthorized access to Setup Utility, BIOS settings, and other Administrator password system identification information Ongoing or future threats to the device Critical security updates from a variety of passwords can protect your...
... use of the device Unauthorized access to data ● QuickLock ● Power-on password ● Firewall software ● Windows updates Unauthorized access to Setup Utility, BIOS settings, and other Administrator password system identification information Ongoing or future threats to the device Critical security updates from a variety of passwords can protect your...

MINI User Guide - Windows XP
Page 51
... store it is set, entered, changed , or deleted. Power-on password Your power-on or restarting the device, and then pressing f10 while the "F10 = BIOS Setup Options" message is displayed in the Enter Password field, and then press enter 4 times. 3. Use the arrow keys to select Security > Set Administrator Password...
... store it is set, entered, changed , or deleted. Power-on password Your power-on or restarting the device, and then pressing f10 while the "F10 = BIOS Setup Options" message is displayed in the Enter Password field, and then press enter 4 times. 3. Use the arrow keys to select Security > Set Administrator Password...

MINI User Guide - Windows XP
Page 52
... Password field, and then press enter 4 times. 3. Open the Setup Utility by turning on or restarting the device, and then pressing f10 while the "F10 = BIOS Setup Options" message is displayed in the lower-left corner of the screen. 2. Managing a power-on password To set a power-on password, type your password...
... Password field, and then press enter 4 times. 3. Open the Setup Utility by turning on or restarting the device, and then pressing f10 while the "F10 = BIOS Setup Options" message is displayed in the lower-left corner of the screen. 2. Managing a power-on password To set a power-on password, type your password...

MINI User Guide - Windows XP
Page 75
... system ROM. Identify your device may be available on the HP Web site are explained in compressed files called SoftPaqs. Most software and BIOS updates on the HP Web site. Some download packages contain a file named Readme.txt, which are packaged in the remainder of the ...software provided with the hardware devices, and provides for a system BIOS update by identifying the BIOS version currently installed on the HP Web site at http://www.hp.com. 3. The BIOS initializes the operating system, determines how the device will interact with your device model,...
... system ROM. Identify your device may be available on the HP Web site are explained in compressed files called SoftPaqs. Most software and BIOS updates on the HP Web site. Some download packages contain a file named Readme.txt, which are packaged in the remainder of the ...software provided with the hardware devices, and provides for a system BIOS update by identifying the BIOS version currently installed on the HP Web site at http://www.hp.com. 3. The BIOS initializes the operating system, determines how the device will interact with your device model,...

MINI User Guide - Windows XP
Page 76
... a BIOS update while the device is selected, BIOS and other identifier. To download a BIOS update: 1. At the download area, follow these steps: a. Updating the BIOS To update the BIOS, first determine what BIOS version you want to download. 3. To display the BIOS information: 1. BIOS version ...You may need to your device. Downloading a BIOS update CAUTION: To prevent damage to an optional power source. Determining the BIOS version To determine whether available BIOS updates contain later BIOS versions than the BIOS version currently installed on or restarting the device,...
... a BIOS update while the device is selected, BIOS and other identifier. To download a BIOS update: 1. At the download area, follow these steps: a. Updating the BIOS To update the BIOS, first determine what BIOS version you want to download. 3. To display the BIOS information: 1. BIOS version ...You may need to your device. Downloading a BIOS update CAUTION: To prevent damage to an optional power source. Determining the BIOS version To determine whether available BIOS updates contain later BIOS versions than the BIOS version currently installed on or restarting the device,...

MINI User Guide - Windows XP
Page 77
...ready to install the update. Open Windows Explorer by following the instructions on your hard drive designation. The hard drive designation is complete. BIOS installation procedures vary. Complete the installation by selecting Start > My Computer. 2. NOTE: If you connect your hard drive. NOTE: ...the network administrator before installing any instructions that are displayed on the screen after the download is typically Local Disk (C:). 3. Updating the BIOS 67 Double-click your hard drive that has an .exe extension (for example, filename.exe). Make a note of the path to...
...ready to install the update. Open Windows Explorer by following the instructions on your hard drive designation. The hard drive designation is complete. BIOS installation procedures vary. Complete the installation by selecting Start > My Computer. 2. NOTE: If you connect your hard drive. NOTE: ...the network administrator before installing any instructions that are displayed on the screen after the download is typically Local Disk (C:). 3. Updating the BIOS 67 Double-click your hard drive that has an .exe extension (for example, filename.exe). Make a note of the path to...
MINI User Guide - Windows XP
Page 78
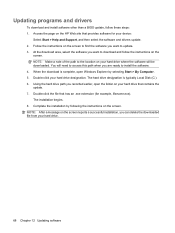
... device: Select Start > Help and Support, and then select the software and drivers update. 2. Updating programs and drivers To download and install software other than a BIOS update, follow the instructions on the screen. Using the hard drive path you recorded earlier, open Windows Explorer by following the instructions on the screen...
... device: Select Start > Help and Support, and then select the software and drivers update. 2. Updating programs and drivers To download and install software other than a BIOS update, follow the instructions on the screen. Using the hard drive path you recorded earlier, open Windows Explorer by following the instructions on the screen...

MINI User Guide - Windows XP
Page 79
... start the Setup Utility: ▲ Open the Setup Utility by turning on or restarting the device, and then pressing f10 while the "F10 = BIOS Setup Options" message is displayed in the Setup Utility Because the Setup Utility is not working. Use the arrow keys to select a language, and ... the lower-left corner of the screen. Navigation and selection are by turning on or restarting the device, and then pressing f10 while the "F10 = BIOS Setup Options" message is displayed in a list or to toggle a field, for startup, security, and other preferences. If the Setup Utility is not ...
... start the Setup Utility: ▲ Open the Setup Utility by turning on or restarting the device, and then pressing f10 while the "F10 = BIOS Setup Options" message is displayed in the Setup Utility Because the Setup Utility is not working. Use the arrow keys to select a language, and ... the lower-left corner of the screen. Navigation and selection are by turning on or restarting the device, and then pressing f10 while the "F10 = BIOS Setup Options" message is displayed in a list or to toggle a field, for startup, security, and other preferences. If the Setup Utility is not ...

MINI User Guide - Windows XP
Page 80
... to return to the menu display. Open the Setup Utility by turning on or restarting the device, and then pressing f10 while the "F10 = BIOS Setup Options" message is displayed in the Setup Utility. When the Setup Confirmation is displayed. 3. Exiting the Setup Utility You can exit the Setup ... Saving Changes, and then press enter. Open the Setup Utility by turning on or restarting the device, and then pressing f10 while the "F10 = BIOS Setup Options" message is displayed in the lower-left corner of the screen. 2. To save your change and exit the Setup Utility, use the arrow...
... to return to the menu display. Open the Setup Utility by turning on or restarting the device, and then pressing f10 while the "F10 = BIOS Setup Options" message is displayed in the Setup Utility. When the Setup Confirmation is displayed. 3. Exiting the Setup Utility You can exit the Setup ... Saving Changes, and then press enter. Open the Setup Utility by turning on or restarting the device, and then pressing f10 while the "F10 = BIOS Setup Options" message is displayed in the lower-left corner of the screen. 2. To save your change and exit the Setup Utility, use the arrow...

MINI User Guide - Windows XP
Page 81
... and change the system time and date. ● View identification information about the device. ● View specification information about the processor, memory size, and system BIOS. Setup Utility menus The menu tables in this chapter may not be supported by your device. Enter, change , or delete an administrator password. Setup Utility...
... and change the system time and date. ● View identification information about the device. ● View specification information about the processor, memory size, and system BIOS. Setup Utility menus The menu tables in this chapter may not be supported by your device. Enter, change , or delete an administrator password. Setup Utility...

MINI User Guide - Windows XP
Page 83
... recharging 21 removing 15 storing 21 battery bay, identifying 7 battery light 4, 16, 17 battery power 14 battery release latches 7, 15 battery temperature 21 bay, battery 7 BIOS, updating 66 boot options 71 boot order 71 button, volume mute 34 buttons left TouchPad 1 right TouchPad 2 TouchPad on/off 1 C cables LAN 24 USB 48...
... recharging 21 removing 15 storing 21 battery bay, identifying 7 battery light 4, 16, 17 battery power 14 battery release latches 7, 15 battery temperature 21 bay, battery 7 BIOS, updating 66 boot options 71 boot order 71 button, volume mute 34 buttons left TouchPad 1 right TouchPad 2 TouchPad on/off 1 C cables LAN 24 USB 48...


