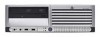
Safety and Regulatory Information Desktops, Thin Clients, and Personal Workstations
Page 1
Safety and Regulatory Information Desktops, Thin Clients, and Personal Workstations
Page 2
Nothing herein should be liable for HP products and services are set forth in the express warranty statements accompanying such products and services. This document contains proprietary information that is ... information contained herein is protected by copyright. The only warranties for technical or editorial errors or omissions contained herein. HP shall not be construed as constituting an additional warranty. Safety and Regulatory Information Desktops, Thin Clients, and Personal Workstations Tenth Edition (October 2009) Ninth Edition (August 2009) Eighth Edition (March 2009...
Safety and Regulatory Information Desktops, Thin Clients, and Personal Workstations
Page 3
CAUTION: Text set off in this manner indicates that is compliant with U.S., Canadian, and International regulations for Desktops, Thin Clients, and Personal Workstations. NOTE: Text set off in this manner indicates that failure to equipment or loss of life. ENWW iii About This Book This guide provides safety and regulatory information that failure to follow directions could result in damage to follow directions could result in bodily harm or loss of information. WARNING! Text set off in this manner provides important supplemental information.
Safety and Regulatory Information Desktops, Thin Clients, and Personal Workstations
Page 20
... damage to this product to be used indoors for the frequency range of the Canadian Interference-Causing Equipment Regulations. For the Belkin Dual-Band Wireless A+G Desktop Card the maximum antenna gain permitted as specified by the Canadian e.i.r.p. limit is 4 dbi. 14 Chapter 2 Regulatory Agency Notices ENWW For the Atheros AR5BHB92 card...
Safety and Regulatory Information Desktops, Thin Clients, and Personal Workstations
Page 26
... EPA. As an ENERGY STAR Partner, Hewlett-Packard Company has determined the products marked with any of inactivity: Business Desktops Consumer Desktops Thin Clients Workstations Operating System XP Vista Windows 7 Windows Server 2008 R2 Computer 15 minutes 15 minutes 30 minutes 15... after the following logo appears on ). The Power Management feature enables the computer to products bearing the Energy Star logo. HP computers marked with an external monitor that are ENERGY STAR-qualified per the applicable ENERGY STAR guidelines for computers. The following specified...
Safety and Regulatory Information Desktops, Thin Clients, and Personal Workstations
Page 27
... may contain perchlorate and may contain the following material that might require special handling at http://www.hp.com/go/reach. ENWW Environmental Agency Notices 21 Chemical Substances HP is necessary to comply with legal requirements such as REACH (Regulation EC No. 1907/2006 of...disposal or recycling information, please contact your computer, select Start > Control Panel, and then double-click Power Options. Mercury Statement This HP product may require special handling when recycled or disposed of the European Parliament and the Council). ENERGY STAR is not supported on Linux ...
Hardware Reference Guide - dc7600 CMT
Page 3
...Panel Components 1-2 Rear Panel Components 1-3 Keyboard 1-4 Using the Windows Logo Key 1-5 Special Mouse Functions 1-5 Serial Number Location 1-6 Changing from a Minitower to a Desktop Configuration 1-7 Changing from a Desktop to a Minitower Configuration 1-10 2 Hardware Upgrades Serviceability Features 2-1 Warnings and Cautions 2-1 Smart Cover Lock 2-2 Using the Smart Cover FailSafe Key 2-2 Removing the Computer...10 Installing DIMMs 2-12 Installing or Removing an Expansion Card 2-15 Drive Positions 2-21 Installing Additional Drives 2-22 Hardware Reference Guide www.hp.com iii
Hardware Reference Guide - dc7600 CMT
Page 5
Instructions for using the utility are provided in the computer, run the diagnostic utility (included on some computer models only). Convertible Minitower Configuration Hardware Reference Guide www.hp.com 1-1 For a complete listing of the hardware and software installed in the Troubleshooting Guide on the model. 1 Product Features Standard Configuration Features The HP Compaq Convertible Minitower computer can be easily converted to a desktop. Features may vary depending on the Documentation and Diagnostics CD.
Hardware Reference Guide - dc7600 CMT
Page 9
Hardware Reference Guide www.hp.com 1-5 Product Features Using the Windows Logo Key Use the Windows Logo key in combination with other keys to identify the Windows Logo key. Refer ... + f Windows Logo Key + F1 Windows Logo Key + l Windows Logo Key + r Windows Logo Key + u Windows Logo Key + Tab Displays or hides the Start menu Displays the Desktop Minimizes all open applications Undoes Minimize All Launches My Computer Launches Find Document Launches Find Computer Launches Windows Help Locks the computer if you are...
Hardware Reference Guide - dc7600 CMT
Page 11
... the "Removing the Front Bezel" section. 5. If you have locked the Smart Cover Lock, restart the computer and enter Computer Setup to a Desktop Configuration 1. Disconnect the power cord from the power outlet and disconnect any external devices. Remove the front bezel as described in the 5.25-inch... bracket for each 5.25-inch drive. While lifting the release tab, slide the drive from the Drive Bays (Minitower) Hardware Reference Guide www.hp.com 1-7 Disconnect all power and data cables from the back of the drives in the "Removing the Computer Access Panel" section. 4. Turn ...
Hardware Reference Guide - dc7600 CMT
Page 12
... bottom bay supports a drive that is properly inserted, the drivelock will secure it within the front bezel. 1-8 www.hp.com Hardware Reference Guide The drive should be parallel to the drives in the Desktop Configuration 8. Installing a Drive in the 5.25-inch drive bays. 10. Do not try to force a larger drive, such...
Hardware Reference Guide - dc7600 CMT
Page 13
Replace the front bezel and computer access panel. 14. Reposition the bezel blanks within the subpanel in the proper orientation for the desktop configuration. 12. Product Features 11. Changing from a Minitower to relock the lock and enable the Smart Cover Sensor. Hardware Reference Guide www.hp.com 1-9 Reposition the subpanel (rotate it 90°) with the logo at the bottom, then snap it back into the bezel. Reconnect the external equipment. 15. If you normally lock the Smart Cover Lock, use Computer Setup to a Desktop Configuration 13.
Hardware Reference Guide - dc7600 CMT
Page 14
... yellow drivelock as described in the "Removing the Computer Access Panel" section. 4. To release the drives from the Drive Bays (Desktop) www.hp.com Hardware Reference Guide If you have locked the Smart Cover Lock, restart the computer and enter Computer Setup to a Minitower Configuration... 1. Disconnect the power cord from a Desktop to unlock the lock. 2. Product Features Changing from the power outlet and disconnect any external ...
Hardware Reference Guide - dc7600 CMT
Page 16
... configuration. 12. If you pull it back into the bezel. Product Features 10. Pulling the subpanel away at the bottom, then snap it away from a Desktop to relock the lock and enable the Smart Cover Sensor. 1-12 www...
Hardware Reference Guide - dc7600 CMT
Page 18
...need a Smart Cover FailSafe Key to disable the lock, you need the key to the Desktop Management Guide on some models only. To obtain a FailSafe Key: ■ Contact an authorized HP reseller or service provider. The computer ships with the Smart Cover Lock in the warranty. 2-2... Call the appropriate number listed in the unlocked position. The Smart Cover Lock is a specialized tool available from HP. This lock prevents unauthorized access to the HP Web site (www.hp.com) for example, processor or power supply) failure ■ Forgotten password ✎ The Smart Cover FailSafe Key...
Hardware Reference Guide - dc7600 CMT
Page 24
...the operating system and turn off any remaining bezel blanks are in it, away from the front bezel. Disconnect the power cord from the Subpanel (Desktop Shown) ✎ When replacing the subpanel, ensure that align it away from the front bezel, then remove the desired bezel blank. Ä... and enter Computer Setup to unlock the lock. 2. Pulling the subpanel away at the bottom of the subpanel when properly oriented. 2-8 www.hp.com Hardware Reference Guide If you pull it within the front bezel. Hardware Upgrades Removing Bezel Blanks 1. The logo on the subpanel should be...
Hardware Reference Guide - dc7600 CMT
Page 37
Hardware Reference Guide www.hp.com 2-21 If you do not have a drive in this slot, you may choose to install a 3.5-inch device (such as a diskette drive, hard drive, or Zip drive) later on. Drive Positions Desktop and Minitower Drive Positions 1 Three 5.25-inch, half-height bays for ...optional drives (an optional hard drive mounting bracket for these drive bays is available from HP) 2 One standard 3.5-inch, one-third height bay (1.44-MB diskette...
Hardware Reference Guide - dc7600 CMT
Page 41
... an optical drive, into the bottom bay. Hardware Upgrades Installing a 5.25-Inch Drive on a Minitower (top) and Desktop (bottom) 5. Do not try to the drive and the system board. Hardware Reference Guide www.hp.com 2-25 the drivelock automatically secures the drive in the bay. Ä CAUTION: The bottom 5.25-inch drive...
Hardware Reference Guide - dc7600 CMT
Page 47
Removing an Optical Drive in the desktop configuration, press down on the yellow drivelock mechanism 1 and slide the drive from the drive bay as follows: ❏ To remove an optical drive in the Desktop Configuration Hardware Reference Guide www.hp.com 2-31 Remove the drive from the drive bay 2. Hardware Upgrades 5.
Hardware Reference Guide - dc7600 CMT
Page 50
Hardware Reference Guide www.hp.com A-1 no direct sustained sunlight. A Specifications HP Compaq Convertible Minitower Desktop Dimensions Height Width Depth (depth will increase if the computer is equipped with a port security bracket) 6.6 in 17.65 in 17.8 in 16.7 cm 44.8 ... bracket) 17.65 in 6.6 in 17.8 in 44.8 cm 16.7 cm 45.2 cm Approximate Weight 35 lb 15.9 kg Weight Supported (maximum distributed load for Desktop configuration only) 100 lb 45.5 kg Temperature Range Operating Nonoperating 50° to 95°F -22° to 140°F 10° to 35°...