Quick Start Guide
Page 3
... you are attaching one thumb screw, or double with one 7914 Expansion Module, you need to have the single Footstand Kit. Before You Begin Before you begin installing your 7914 Expansion Module, read all of the following parts in your package: • One Cisco IP Phone 7914 Expansion Module • One RS 232 cable • One Quick Start Guide • One...
... you are attaching one thumb screw, or double with one 7914 Expansion Module, you need to have the single Footstand Kit. Before You Begin Before you begin installing your 7914 Expansion Module, read all of the following parts in your package: • One Cisco IP Phone 7914 Expansion Module • One RS 232 cable • One Quick Start Guide • One...
Quick Start Guide
Page 6
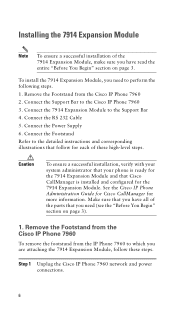
... information. Connect the Support Bar to the Support Bar 4. Remove the Footstand from the Cisco IP Phone 7960 To remove the footstand from the Cisco IP Phone 7960 2. Installing the 7914 Expansion Module Note To ensure a successful installation of the 7914 Expansion Module, make sure you are attaching the 7914 Expansion Module, follow for each of the parts that you need (see the...
... information. Connect the Support Bar to the Support Bar 4. Remove the Footstand from the Cisco IP Phone 7960 To remove the footstand from the Cisco IP Phone 7960 2. Installing the 7914 Expansion Module Note To ensure a successful installation of the 7914 Expansion Module, make sure you are attaching the 7914 Expansion Module, follow for each of the parts that you need (see the...
Quick Start Guide
Page 7
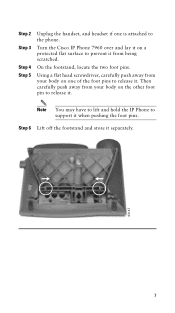
... store it when pushing the foot pins. Then carefully push away from your body on a protected flat surface to the phone. On the footstand, locate the two foot pins. Step 2 Step 3 Step 4 Step 5 Unplug the handset, and headset if one of the foot pins to support it separately. 63147 7 ...Note You may have to lift and hold the IP Phone to release it from being scratched. Turn the Cisco IP Phone 7960 over and lay it on the other foot pin to release it.
... store it when pushing the foot pins. Then carefully push away from your body on a protected flat surface to the phone. On the footstand, locate the two foot pins. Step 2 Step 3 Step 4 Step 5 Unplug the handset, and headset if one of the foot pins to support it separately. 63147 7 ...Note You may have to lift and hold the IP Phone to release it from being scratched. Turn the Cisco IP Phone 7960 over and lay it on the other foot pin to release it.

Quick Start Guide
Page 13
... the three hooks on the support bar. This lets you choose the angle of open slots on the footstand 3 Insert and rotate footstand to connect to support bar 13 Connect the Footstand To connect the footstand to make the connection. 1 Slots on the support bar 2 Hooks on the support bar. Note There are ...four positions in slightly to the support bar, follow these steps. Step 3 Insert the footstand hooks into the support bar and push in each of the three sets of the footstand. Position the hooks so that they align with the two open slots on the...
... the three hooks on the support bar. This lets you choose the angle of open slots on the footstand 3 Insert and rotate footstand to connect to support bar 13 Connect the Footstand To connect the footstand to make the connection. 1 Slots on the support bar 2 Hooks on the support bar. Note There are ...four positions in slightly to the support bar, follow these steps. Step 3 Insert the footstand hooks into the support bar and push in each of the three sets of the footstand. Position the hooks so that they align with the two open slots on the...