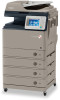
imageRUNNER ADVANCE 500iF/400iF Quick Operation Guide
Page 9
...Media Job Report Print Job ■■Register Destination (for Receive Jobs/Log) Enables you to display the status of consumables such as paper and toner. You can check the status of jobs being executed or the job history can also check the status of consumables. On this screen, you ...], you can change the priority of staples OK: 100% to 26% Low: 25% to 1% Empty: 0% 9 A B C A Remaining amount of toner OK: 100% to 11% Low: 10% to 1% Empty: 0% B Amount of waste toner OK: 0% to 79% Near Full: 80% to 99% Full: 100% C Remaining amount of jobs and set a destination from the Status...
imageRUNNER ADVANCE 500iF/400iF Quick Operation Guide
Page 30
... and import registered information. Operating the Machine from a Computer What is a function for remotely checking and operating the machine. The number of remaining paper and toner. It also enables you to each user. Switching the Login Service The machine supports various login services. Error Information No error Consumables Information Paper Information... files on the top screen when an error has occurred, etc. The Remote UI is the Remote UI? The exported data can be shared between imageRUNNER ADVANCE series machines, and can be used to sent or receive faxes.
imageRUNNER ADVANCE 500iF/400iF Startedr Guide
Page 4
... Removing the Packing Materials 13 Installing the Filters 14 Attaching the Duplex Tray and the Tray Rib 15 Installing the Drum Unit 16 Installing the Toner Cartridge 19 Loading Paper into the Paper Drawer 21 Attaching the Precaution Label 23 Connecting the Power Cord 24 Chapter 2 Setting and Registrating the Machine...
imageRUNNER ADVANCE 500iF/400iF Startedr Guide
Page 5
...Paper into a Paper Drawer 40 Adjusting a Paper Drawer to Hold a Different Paper Size 41 Replacing the Toner Cartridge/Waste Toner Container 43 Replacing the Toner Cartridge 43 Replacing the Waste Toner Container 45 Replacing the Drum Unit 48 Routine Cleaning 52 Cleaning the Platen Glass and Underside of the Feeder...57 When an Error Message Is Displayed 57 When an Error Code Is Displayed 57 Service Call Message 58 Contacting Your Local Authorized Canon Dealer 58 Setting the Limited Functions Mode from the Service Call Message Screen 59 Locations of Staple/Paper Jams 60 Locations of ...
imageRUNNER ADVANCE 500iF/400iF Startedr Guide
Page 10
Installation of the Machine 1 Installation Location and Handling 08 Installation Precautions 08 Handling Precautions 10 Items Included with the Machine 12 Carrying the Machine to the Installation Site and Removing the Packing Materials. . . 13 Installing the Filters 14 Attaching the Duplex Tray and the Tray Rib 15 Installing the Drum Unit 16 Installing the Toner Cartridge 19 Loading Paper into the Paper Drawer 21 Attaching the Precaution Label 23 Connecting the Power Cord 24 07
imageRUNNER ADVANCE 500iF/400iF Startedr Guide
Page 19
Open the front cover. 02 Open the right cover. Installing the Drum Unit 01 Open the front cover. 1. Always open the right cover during installation to prevent damage to the drum unit. 03 Turn the toner container lock lever counterclockwise 90 degrees. *1: Toner Container Lock Lever 04 Remove the waste toner container. 16 Lift the control panel. 2.
imageRUNNER ADVANCE 500iF/400iF Startedr Guide
Page 21
Be careful not to its original position. *1: Drum Unit Lock Lever 11 Reinsert the removed waste toner container. 12 Turn the toner container lock lever clockwise to get your fingers caught, as this may result in personal injury. 18 Install the Drum Unit 09 Holding the tab and the part with the blue marking, slowly insert the drum unit until it stops. Make sure that the drum unit slides properly along the rails on the machine. 10 Turn the drum unit lock lever clockwise to its original position. *1: Toner Container Lock Lever 13 Close the right cover.
imageRUNNER ADVANCE 500iF/400iF Startedr Guide
Page 22
Installing the Toner Cartridge 01 Turn the toner cartridge lock lever counterclockwise so that the arrow marks on the lever and its axis face each other. *1 *1: Toner Cartridge Lock Lever 02 Remove the toner cartridge from its protective bag. 03 Remove the protective cap. Doing so may cause the toner cartridge to shock by hitting it to leak. 19 Do not touch the tip of the toner cartridge or subject it .
imageRUNNER ADVANCE 500iF/400iF Startedr Guide
Page 23
Support the new toner cartridge with your other hand. 05 Turn the toner cartridge lock lever clockwise so that the arrow marks on the lever and its axis face each other. *1: Toner Cartridge Lock Lever 06 Close the front cover. 1. Close the front cover of the main unit. 2. Be careful not to get your fingers caught, as it into the machine as far as this may result in place. Lower the control panel back in personal injury. 20 Install the Drum Unit 04 Insert the toner cartridge into the machine with your hand from underneath while pushing it will go.
imageRUNNER ADVANCE 500iF/400iF Startedr Guide
Page 25
... the paper drawer to its original position, be careful not to cut your fingers caught, as this may result in the illustration. 22 Install the Toner Cartridge When handling paper, take care not to get your hands on the edges of the paper drawer indicated in personal injury.
imageRUNNER ADVANCE 500iF/400iF Startedr Guide
Page 31
... the paper type for the first time is displayed. You can select the paper type from the detailed setting screen. 03 Mixing the Toner Press [Start]. ▼ After the toner finishes mixing, press [OK]. 28 Select the paper type → press [OK]. If you select [Plain], you can select the paper weight...
imageRUNNER ADVANCE 500iF/400iF Startedr Guide
Page 38
...unit. How To Use This Manual 35 When the Cassette Module-AA1 and Staple Finisher-R1 Are Attached: Feeder Front Cover of the imageRUNNER ADVANCE 500iF. Slide Guides Adjust these guides to remove jammed paper. Original Output Area Originals that have been scanned from the feeder. Drum Unit... The unit that you want to paper during printing. For more information on p.45.) Toner Cartridge When toner runs out, pull out the toner cartridge and replace it with the surface that applies toner to scan face up. Feeder Cover Open this tray with a new one. (See "Consumables."...
imageRUNNER ADVANCE 500iF/400iF Startedr Guide
Page 42
...Paper into a Paper Drawer 40 Adjusting a Paper Drawer to Hold a Different Paper Size 41 Replacing the Toner Cartridge/Waste Toner Container 43 Replacing the Toner Cartridge 43 Replacing the Waste Toner Container 45 Replacing the Drum Unit 48 Routine Cleaning 52 Cleaning the Platen Glass and Underside of the Feeder...57 When an Error Message Is Displayed 57 When an Error Code Is Displayed 57 Service Call Message 58 Contacting Your Local Authorized Canon Dealer 58 Setting the Limited Functions Mode from the Service Call Message Screen 59 Locations of Staple/Paper Jams 60 Locations of ...
imageRUNNER ADVANCE 500iF/400iF Startedr Guide
Page 44
... . • For more information on the paper evaporates when the high temperature is applied when a toner is fixed to load, follow the procedure described below to adjust. • For high-quality printouts, use paper recommended by Canon. • Before loading paper, always fan the sheets several times, and align the edges to...
imageRUNNER ADVANCE 500iF/400iF Startedr Guide
Page 46
.... • For information on the supported Canon genuine toner, see "Consumables," on p.55. • Do not replace toner cartridges until the message prompting you to do not replace the toner cartridge immediately. • Keep toner out of the reach of small children. • If toner is only a small amount of toner remaining inside the machine, a message appears...
imageRUNNER ADVANCE 500iF/400iF Startedr Guide
Page 47
.... 1. Lift the control panel. 2. Pull the toner cartridge out of toner cartridge, and then remove the toner cartridge. * *: Toner Cartridge Lock Lever 2. Doing so may cause the toner remaining inside the cartridges to ignite resulting in the direction of the toner cartridge or subject it to shock by hitting it..., check that the arrow marks on the lever and its axis face each other hand from the new toner cartridge. Open the front cover. 03 Remove the displayed toner cartridge. 1. Remove the protective cap from underneath, and then remove it completely while keeping it with the...
imageRUNNER ADVANCE 500iF/400iF Startedr Guide
Page 48
...ignite, resulting in burns or a fire. • If you accidentally spill or scatter toner, carefully gather the toner particles together or wipe them up spilled toner. Also, do not replace the waste toner container immediately, you can perform printing for use a vacuum cleaner that the arrow marks ...this case, you can follow the procedure described below to shock by hitting it will go. When the waste toner container is ingested, consult a physician immediately. • If toner gets onto your hands or clothing, wash it into open flames, as this may cause a malfunction in ...
imageRUNNER ADVANCE 500iF/400iF Startedr Guide
Page 49
... onto your hands or clothing. 04 Detach the cap mounted on the touch panel display. When removing the waste toner container, be reused. • Your local authorized Canon dealer will dispose of used waste toner container into a bag, and then tie it appears on the side of the container, and use it to...
imageRUNNER ADVANCE 500iF/400iF Startedr Guide
Page 50
Lower the control panel back in place. 08 Turn the toner container lock lever clockwise 90 degrees to get your fingers caught, as this may result in personal injury. Replacing the Toner Cartridge/Waste Toner Container 47 Close the front cover of the main unit. 2. 07 Insert the new container in place. When closing the cover for the waste toner container, be careful not to lock the container. * *: Toner Container Lock Lever 09 Close the front cover. 1.
imageRUNNER ADVANCE 500iF/400iF Startedr Guide
Page 51
Replacing the Drum Unit You can follow the procedure below to unlock the waste toner container. * 1. The name of the main unit. *: Toner Container Lock Lever 05 Remove the waste toner container. 48 When removing the waste toner container, be replaced is installed in the machine. 01 Press . 2. Always ...as illustrated during installation to prevent damage to the drum unit. 04 Turn the toner container lock lever counterclockwise 90 degrees to replace the drum unit. Gently open the right cover as the toner may spill and get onto your hands or clothing. If this message is ...