ScanFront 400 Setup and Operation Guide
Page 1
Setup and Operation Guide Please read this manual, keep it in a safe place for future reference. After you finish reading this manual before using the scanner.
Setup and Operation Guide Please read this manual, keep it in a safe place for future reference. After you finish reading this manual before using the scanner.
ScanFront 400 Setup and Operation Guide
Page 2
... television reception, which business proprietors can radiate radio frequency energy and, if not installed and used in a residential installation. FCC REGULATIONS (For 120 V model) Network Scanner, Model M111271 This device complies with the instructions, may cause undesired operation. This equipment generates, uses, and can participate voluntarily. If this device 2 must accept... stop operation of the FCC Rules. Reorient or relocate the receiving antenna. - International ENERGY STAR® Office Equipment Program As an ENERGY STAR® Partner, Canon Electronics Inc.
... television reception, which business proprietors can radiate radio frequency energy and, if not installed and used in a residential installation. FCC REGULATIONS (For 120 V model) Network Scanner, Model M111271 This device complies with the instructions, may cause undesired operation. This equipment generates, uses, and can participate voluntarily. If this device 2 must accept... stop operation of the FCC Rules. Reorient or relocate the receiving antenna. - International ENERGY STAR® Office Equipment Program As an ENERGY STAR® Partner, Canon Electronics Inc.

ScanFront 400 Setup and Operation Guide
Page 3
...or your waste equipment for the safety regulations in each sales region of with EEE. ScanFront 400: Model M111271 3 One Canon Park, Melville, NY 11747, U.S.A. Tel. special handling may be disposed of the Network Scanner. This product should be handed over to a designated collection point, e.g., on the .... For more information about where you buy a new similar product or to the effective usage of WEEE products, please visit www.canon-europe.com/environment. (EEA: Norway, Iceland and Liechtenstein) Model Names The following names may apply. For CA, USA Only Included battery...
...or your waste equipment for the safety regulations in each sales region of with EEE. ScanFront 400: Model M111271 3 One Canon Park, Melville, NY 11747, U.S.A. Tel. special handling may be disposed of the Network Scanner. This product should be handed over to a designated collection point, e.g., on the .... For more information about where you buy a new similar product or to the effective usage of WEEE products, please visit www.canon-europe.com/environment. (EEA: Norway, Iceland and Liechtenstein) Model Names The following names may apply. For CA, USA Only Included battery...

ScanFront 400 Setup and Operation Guide
Page 4
...laws, including, but not limited to, counterfeit and copyright laws, as well as the original may also be prosecuted in this scanner is used in a legal manner, in the United States and other certificates or documents issued by government officials or agencies This is...• Passports, licenses, or other countries. • Other product and company names herein may be the trademarks of Canon Inc. in the United States and may be trademarks or registered trademarks in other countries. • imageFORMULA is protected by an individual. Any person(s) found to national security.
...laws, including, but not limited to, counterfeit and copyright laws, as well as the original may also be prosecuted in this scanner is used in a legal manner, in the United States and other certificates or documents issued by government officials or agencies This is...• Passports, licenses, or other countries. • Other product and company names herein may be the trademarks of Canon Inc. in the United States and may be trademarks or registered trademarks in other countries. • imageFORMULA is protected by an individual. Any person(s) found to national security.

ScanFront 400 Setup and Operation Guide
Page 6
... Internet Fax Service 6 After reading this manual thoroughly before using the scanner without connecting to a printer for printing, or deliver it in a safe place for purchasing the Canon imageFORMULA ScanFront 400 network scanner. Shared Folder (Server PC, Client PC) Network Save File Printer FTP... Server Save File Send E-mail Save File ScanFront USB Memory Conceptual Diagram of its capabilities, and to a ...
... Internet Fax Service 6 After reading this manual thoroughly before using the scanner without connecting to a printer for printing, or deliver it in a safe place for purchasing the Canon imageFORMULA ScanFront 400 network scanner. Shared Folder (Server PC, Client PC) Network Save File Printer FTP... Server Save File Send E-mail Save File ScanFront USB Memory Conceptual Diagram of its capabilities, and to a ...

ScanFront 400 Setup and Operation Guide
Page 7
...Manual* Describes the procedure for setting up the scanner for scanning, an overview of the functions of an operation, or contains additional explanations for a procedure. For details of the ScanFront and settings, refer to the ScanFront 400 INSTRUCTIONS (electronic manual). * The printed version...not performed correctly. To use the scanner safely, always pay attention to these cautions. ❏ Manuals for the Scanner The following symbols are provided with the Canon ScanFront 400. To use the scanner, and includes instructions for configuring the scanner settings, as well as a PDF ...
...Manual* Describes the procedure for setting up the scanner for scanning, an overview of the functions of an operation, or contains additional explanations for a procedure. For details of the ScanFront and settings, refer to the ScanFront 400 INSTRUCTIONS (electronic manual). * The printed version...not performed correctly. To use the scanner safely, always pay attention to these cautions. ❏ Manuals for the Scanner The following symbols are provided with the Canon ScanFront 400. To use the scanner, and includes instructions for configuring the scanner settings, as well as a PDF ...
ScanFront 400 Setup and Operation Guide
Page 8
... operating procedures for the administrator to respond when problems occur. 8 ❏ How This Manual is Organized This manual consists of the scanner. Chapter 3 Handling This chapter describes the types of documents that can be scanned, and the basic operations of the ScanFront. Chapter 1 Before Use This chapter provides an overview of the...
... operating procedures for the administrator to respond when problems occur. 8 ❏ How This Manual is Organized This manual consists of the scanner. Chapter 3 Handling This chapter describes the types of documents that can be scanned, and the basic operations of the ScanFront. Chapter 1 Before Use This chapter provides an overview of the...
ScanFront 400 Setup and Operation Guide
Page 9
...27 5. Flow of Parts 16 Front and Document Feed and Eject Trays........... 16 Rear 17 Chapter 2 ScanFront Setup ScanFront Setup Overview 20 1. Configuring the Scanner Settings 28 Network Settings 29 Configuring the Date and Time and Confirming the Time Zone 32 Mail Server ...Card (plastic 37 Passport 37 2. Important Safety Instructions 12 Installation Location 12 Power 13 Moving the Scanner 13 Handling 13 Disposal 15 2. ❏ Table of Contents Introduction 6 About ScanFront 400 6 About the ScanFront 400 Web Application Mode.... 6 Manuals for Passports 45 4.
...27 5. Flow of Parts 16 Front and Document Feed and Eject Trays........... 16 Rear 17 Chapter 2 ScanFront Setup ScanFront Setup Overview 20 1. Configuring the Scanner Settings 28 Network Settings 29 Configuring the Date and Time and Confirming the Time Zone 32 Mail Server ...Card (plastic 37 Passport 37 2. Important Safety Instructions 12 Installation Location 12 Power 13 Moving the Scanner 13 Handling 13 Disposal 15 2. ❏ Table of Contents Introduction 6 About ScanFront 400 6 About the ScanFront 400 Web Application Mode.... 6 Manuals for Passports 45 4.

ScanFront 400 Setup and Operation Guide
Page 11
Chapter 1 Before Use 1. Important Safety Instructions 12 Installation Location 12 Power 13 Moving the Scanner 13 Handling 13 Disposal 15 2. Names and Functions of Parts 16 Front and Document Feed and Eject Trays ...........16 Rear 17
Chapter 1 Before Use 1. Important Safety Instructions 12 Installation Location 12 Power 13 Moving the Scanner 13 Handling 13 Disposal 15 2. Names and Functions of Parts 16 Front and Document Feed and Eject Trays ...........16 Rear 17

ScanFront 400 Setup and Operation Guide
Page 12
...is unavoidable, use curtains to rapid changes in the vicinity of this is installed. The following environmental requirements. ● Provide adequate space around the scanner for optimal scanning quality: Room temperature: 10 °C to 32.5 °C (50 °F to 90.5 °F) Humidity: 20% ... ammonia, paint thinner, or other volatile chemicals may result in a noticeable degradation in direct sunlight. If this scanner is affected by the environment in which the scanner is installed is installed meets the following conditions are subject to vibration. ● Avoid exposing the...
...is unavoidable, use curtains to rapid changes in the vicinity of this is installed. The following environmental requirements. ● Provide adequate space around the scanner for optimal scanning quality: Room temperature: 10 °C to 32.5 °C (50 °F to 90.5 °F) Humidity: 20% ... ammonia, paint thinner, or other volatile chemicals may result in a noticeable degradation in direct sunlight. If this scanner is affected by the environment in which the scanner is installed is installed meets the following conditions are subject to vibration. ● Avoid exposing the...

ScanFront 400 Setup and Operation Guide
Page 13
... V, 60 Hz or 220-240 V, 50/60 Hz, depending on your local authorized Canon dealer or service representative for the current requirements of the scanner. ● Never try to an accident, such as this scanner. When disconnecting the power cord, grasp the plug and remove it is connected. Also..., paint thinner, aerosol sprays, or any way, as a fire or electrical shock. ● Do not use the AC adapter provided with the scanner with any questions regarding the power supply, contact your region). ● Do not connect other electrical equipment to the same power outlet to them ...
... V, 60 Hz or 220-240 V, 50/60 Hz, depending on your local authorized Canon dealer or service representative for the current requirements of the scanner. ● Never try to an accident, such as this scanner. When disconnecting the power cord, grasp the plug and remove it is connected. Also..., paint thinner, aerosol sprays, or any way, as a fire or electrical shock. ● Do not use the AC adapter provided with the scanner with any questions regarding the power supply, contact your region). ● Do not connect other electrical equipment to the same power outlet to them ...

ScanFront 400 Setup and Operation Guide
Page 14
Then, contact your local authorized Canon dealer or service representative to have the unit serviced. ■ Before moving the scanner, make sure that is unstable or tilted, or in an area subject to excessive vibrations, as this may cause the scanner to fall, resulting in a fire or ...in fire or electric shock. ■ Never connect the power cord when your local authorized Canon dealer or service representative for use power cord sets other electronic equipment. Should the scanner ever become damaged, immediately turn the power OFF and disconnect the power cord from the power...
Then, contact your local authorized Canon dealer or service representative to have the unit serviced. ■ Before moving the scanner, make sure that is unstable or tilted, or in an area subject to excessive vibrations, as this may cause the scanner to fall, resulting in a fire or ...in fire or electric shock. ■ Never connect the power cord when your local authorized Canon dealer or service representative for use power cord sets other electronic equipment. Should the scanner ever become damaged, immediately turn the power OFF and disconnect the power cord from the power...

ScanFront 400 Setup and Operation Guide
Page 15
... will not be disconnected easily. If objects are using the scanner for a long period of the scanner, make sure to cut your local authorized Canon dealer or service representative to stop the scanner. ■ Be careful when placing paper in the scanner and when removing jammed paper. Also, turn the power OFF... cause fire or electric shock. ■ When disconnecting the power cord, grasp it firmly by its plug. Do not pull directly on the scanner. This may result in personal injury. ■ Never place small metal objects such as staples, paper clips, or jewelry on the power cord...
... will not be disconnected easily. If objects are using the scanner for a long period of the scanner, make sure to cut your local authorized Canon dealer or service representative to stop the scanner. ■ Be careful when placing paper in the scanner and when removing jammed paper. Also, turn the power OFF... cause fire or electric shock. ■ When disconnecting the power cord, grasp it firmly by its plug. Do not pull directly on the scanner. This may result in personal injury. ■ Never place small metal objects such as staples, paper clips, or jewelry on the power cord...

ScanFront 400 Setup and Operation Guide
Page 16
... support loaded documents. Pull the lever toward you to unlock the panel unit. (See p. 48.) f Document Guides Adjust these to match the width of the ScanFront are shown below. ❏ Front and Document Feed and Eject Trays b Document Eject Tray Open this out to operate the... ScanFront. Names and Functions of Parts The names and functions of the parts of the document. (See p. 42.) g Document Feed Tray Place documents here. (See p. 38.) h ...
... support loaded documents. Pull the lever toward you to unlock the panel unit. (See p. 48.) f Document Guides Adjust these to match the width of the ScanFront are shown below. ❏ Front and Document Feed and Eject Trays b Document Eject Tray Open this out to operate the... ScanFront. Names and Functions of Parts The names and functions of the parts of the document. (See p. 42.) g Document Feed Tray Place documents here. (See p. 38.) h ...

ScanFront 400 Setup and Operation Guide
Page 17
... Eject Stopper This prevents the ejected documents from the bottom. ❏ Rear n Kensington Slot This is on the touch panel to turn on the scanner status. The angle of the document eject stopper on the document eject tray will change depending on the volume of the document eject tray and ...plug of the supplied AC adapter. (See p. 24.) p Service Switch This is lit. The power button lights or flashes as follows depending on the scanner. k Power button Press this hole. Scanned documents are arranged in the tray by supporting and lifting up the document eject tray from falling out of...
... Eject Stopper This prevents the ejected documents from the bottom. ❏ Rear n Kensington Slot This is on the touch panel to turn on the scanner status. The angle of the document eject stopper on the document eject tray will change depending on the volume of the document eject tray and ...plug of the supplied AC adapter. (See p. 24.) p Service Switch This is lit. The power button lights or flashes as follows depending on the scanner. k Power button Press this hole. Scanned documents are arranged in the tray by supporting and lifting up the document eject tray from falling out of...

ScanFront 400 Setup and Operation Guide
Page 19
Chapter 2 ScanFront Setup ScanFront Setup Overview 20 1. Turning the Power ON and OFF 26 Turning the Power ON 26 Turning the Power OFF 27 5. Configuring the Scanner Settings 28 Network Settings 29 Configuring the Date and Time and Confirming the Time Zone 32 Mail Server Settings 34 Before Setting Up the Scanner 24 Connecting the AC Adapter 24 Connecting the Network Cable 25 4. Removing the Packing Materials 22 3. Checking the Supplied Accessories 21 2.
Chapter 2 ScanFront Setup ScanFront Setup Overview 20 1. Turning the Power ON and OFF 26 Turning the Power ON 26 Turning the Power OFF 27 5. Configuring the Scanner Settings 28 Network Settings 29 Configuring the Date and Time and Confirming the Time Zone 32 Mail Server Settings 34 Before Setting Up the Scanner 24 Connecting the AC Adapter 24 Connecting the Network Cable 25 4. Removing the Packing Materials 22 3. Checking the Supplied Accessories 21 2.
ScanFront 400 Setup and Operation Guide
Page 20
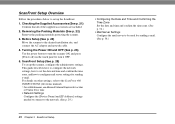
... site, and connect the AC adaptor and network cable. 4. Before Setup (See p. 24) Move the scanner to turn the scanner ON, and press [Power off] on other settings, refer to the ScanFront 400 INSTRUCTIONS (electronic manual). * For a Web browser, use Microsoft Internet Explorer 6.0 or later or Firefox ...the mail server to configure mail server settings for sending e-mail. (See p. 34.) 20 Chapter 2 ScanFront Setup Removing the Packing Materials (See p. 22) Remove the packing materials protecting the scanner. 3. Turning the Power ON and OFF (See p. 26) Use the power button to turn it ...
... site, and connect the AC adaptor and network cable. 4. Before Setup (See p. 24) Move the scanner to turn the scanner ON, and press [Power off] on other settings, refer to the ScanFront 400 INSTRUCTIONS (electronic manual). * For a Web browser, use Microsoft Internet Explorer 6.0 or later or Firefox ...the mail server to configure mail server settings for sending e-mail. (See p. 34.) 20 Chapter 2 ScanFront Setup Removing the Packing Materials (See p. 22) Remove the packing materials protecting the scanner. 3. Turning the Power ON and OFF (See p. 26) Use the power button to turn it ...

ScanFront 400 Setup and Operation Guide
Page 21
... sure to open. (You can download Adobe Reader from the Adobe Web site.) Chapter 2 ScanFront Setup 21 Application Disc** The following accessories are included. 1. ScanFront Feed Tray Attach this to the scanner during installation. (See p. 22.) Setup and Operation Guide (this manual) The printed version of...Cord* (Cord length: 3.3 ft. (1 m)) The shape of these accessories are stored as PDF files on your local authorized Canon dealer. Checking the Supplied Accessories After unpacking the scanner, confirm that any of the power plug varies by country and region. 0880281099-L5T1P7-BR01...
... sure to open. (You can download Adobe Reader from the Adobe Web site.) Chapter 2 ScanFront Setup 21 Application Disc** The following accessories are included. 1. ScanFront Feed Tray Attach this to the scanner during installation. (See p. 22.) Setup and Operation Guide (this manual) The printed version of...Cord* (Cord length: 3.3 ft. (1 m)) The shape of these accessories are stored as PDF files on your local authorized Canon dealer. Checking the Supplied Accessories After unpacking the scanner, confirm that any of the power plug varies by country and region. 0880281099-L5T1P7-BR01...

ScanFront 400 Setup and Operation Guide
Page 22
2. Pull the lock lever toward you and then fully open the document eject tray. 4. Remove the sheet. 2. Lock lever 22 Chapter 2 ScanFront Setup Remove the orange tape (3 pieces) securing the outer case. 3. Removing the Packing Materials Remove all of the packing materials protecting the scanner. 1. Attach the feed tray and gently open the panel unit.
2. Pull the lock lever toward you and then fully open the document eject tray. 4. Remove the sheet. 2. Lock lever 22 Chapter 2 ScanFront Setup Remove the orange tape (3 pieces) securing the outer case. 3. Removing the Packing Materials Remove all of the packing materials protecting the scanner. 1. Attach the feed tray and gently open the panel unit.

ScanFront 400 Setup and Operation Guide
Page 24
a Connect the power cord and AC adapter. c Connect the power cord to connect the AC adapter. Before Setting Up the Scanner Before setting up the scanner, you need to move it to the installation site, and connect the AC adaptor and network cable. ❏ Connecting the AC Adapter Follow the procedure shown below to the wall outlet. 24 Chapter 2 ScanFront Setup The shape of the AC adapter into the power connector. b Insert the plug of the power plug varies by country and region. CAUTION Make sure to use only the AC adapter and power cord included with the scanner. 3.
a Connect the power cord and AC adapter. c Connect the power cord to connect the AC adapter. Before Setting Up the Scanner Before setting up the scanner, you need to move it to the installation site, and connect the AC adaptor and network cable. ❏ Connecting the AC Adapter Follow the procedure shown below to the wall outlet. 24 Chapter 2 ScanFront Setup The shape of the AC adapter into the power connector. b Insert the plug of the power plug varies by country and region. CAUTION Make sure to use only the AC adapter and power cord included with the scanner. 3.


