
User Manual
Page 6
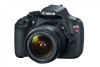
With the card's label facing toward the back of the camera, insert it into the card slot. 3 White index Red index Attach the lens (p.40). When the LCD monitor displays the date/time/zone setting screens, see page 30. 2 Insert a card (p.32). To charge the battery, see page 37. Align the lens's white or red index with the camera's index in the matching color. 4 Set the lens's focus mode switch to (p.40). 5 6 Set the power switch to (p.35). Quick Start Guide 1 Insert the battery (p.32).
With the card's label facing toward the back of the camera, insert it into the card slot. 3 White index Red index Attach the lens (p.40). When the LCD monitor displays the date/time/zone setting screens, see page 30. 2 Insert a card (p.32). To charge the battery, see page 37. Align the lens's white or red index with the camera's index in the matching color. 4 Set the lens's focus mode switch to (p.40). 5 6 Set the power switch to (p.35). Quick Start Guide 1 Insert the battery (p.32).

User Manual
Page 21
...This is left on for a few dead pixels displaying only black or red, etc. If the LCD monitor is an important shoot such as a ... low temperatures, or look black in a case. Do not touch the card's electronic contacts with your Canon dealer or check the camera yourself and make sure it is manufactured with very high precision technology with the...and attach the lens caps to the front of what was displayed. If you have the camera checked by a Canon Service Center is only temporary and will return to excessive force, physical shock, or vibration. among the remaining ...
...This is left on for a few dead pixels displaying only black or red, etc. If the LCD monitor is an important shoot such as a ... low temperatures, or look black in a case. Do not touch the card's electronic contacts with your Canon dealer or check the camera yourself and make sure it is manufactured with very high precision technology with the...and attach the lens caps to the front of what was displayed. If you have the camera checked by a Canon Service Center is only temporary and will return to excessive force, physical shock, or vibration. among the remaining ...

User Manual
Page 22
Nomenclature Mode Dial (p.26) Power switch (p.35) Flash button (p.101) Main Dial Shutter button (p.45) Red-eye reduction/ Self-timer lamp (p.102/100) Grip Built-in flash/AF-assist beam (p.101/96) EF Lens mount index (p.40) EF-S Lens mount index (p.40) Flash sync contacts Hot shoe (p.270) Microphone (p.154, 174) Focal plane mark (p.67) Speaker (p.214) Strap mount (p.29) Mirror (p.200) Contacts (p.21) Lens mount Lens lock pin Terminal cover Lens release button (p.41) Body cap (p.40) Remote control terminal (p.269) Digital terminal (p.240) HDMI mini OUT terminal (p.222) 22
Nomenclature Mode Dial (p.26) Power switch (p.35) Flash button (p.101) Main Dial Shutter button (p.45) Red-eye reduction/ Self-timer lamp (p.102/100) Grip Built-in flash/AF-assist beam (p.101/96) EF Lens mount index (p.40) EF-S Lens mount index (p.40) Flash sync contacts Hot shoe (p.270) Microphone (p.154, 174) Focal plane mark (p.67) Speaker (p.214) Strap mount (p.29) Mirror (p.200) Contacts (p.21) Lens mount Lens lock pin Terminal cover Lens release button (p.41) Body cap (p.40) Remote control terminal (p.269) Digital terminal (p.240) HDMI mini OUT terminal (p.222) 22

User Manual
Page 25
...) ISO speed White balance correction Focus confirmation light Max. burst Monochrome shooting ISO speed Highlight tone priority Exposure level indicator Exposure compensation amount AEB range Red-eye reduction lamp-on indicator Aperture Card full warning (FuLL) Card error warning (Card) No card warning (Card) The display will show only the settings...
...) ISO speed White balance correction Focus confirmation light Max. burst Monochrome shooting ISO speed Highlight tone priority Exposure level indicator Exposure compensation amount AEB range Red-eye reduction lamp-on indicator Aperture Card full warning (FuLL) Card error warning (Card) No card warning (Card) The display will show only the settings...

User Manual
Page 40
Attaching and Detaching a Lens The camera is set to (manual focus), autofocus will not operate. 4 Remove the front lens cap. White index 2 Attach the lens. Red index 3 Set the lens's focus mode switch to the camera. stands for autofocus. Minimizing Dust When changing lenses, do it clicks in a place with the ... the body cap before attaching it is compatible with EF-M lenses. The camera cannot be sure to attach the body cap to . Align the lens's red or white index with minimal dust. When storing the camera without a lens attached, be used with all...
Attaching and Detaching a Lens The camera is set to (manual focus), autofocus will not operate. 4 Remove the front lens cap. White index 2 Attach the lens. Red index 3 Set the lens's focus mode switch to the camera. stands for autofocus. Minimizing Dust When changing lenses, do it clicks in a place with the ... the body cap before attaching it is compatible with EF-M lenses. The camera cannot be sure to attach the body cap to . Align the lens's red or white index with minimal dust. When storing the camera without a lens attached, be used with all...

User Manual
Page 42
... to attach it . Otherwise, the hood will obstruct part of the lens. If there is an index mark on the lens and hood: 1 Align the red dots on the lens and hood: Attach the lens hood. If you can block unwanted light and diminish rain, snow, dust etc. When using the...
... to attach it . Otherwise, the hood will obstruct part of the lens. If there is an index mark on the lens and hood: 1 Align the red dots on the lens and hood: Attach the lens hood. If you can block unwanted light and diminish rain, snow, dust etc. When using the...

User Manual
Page 56
... Auto) is still or moving (p.59). 1 Set the Mode Dial to . At the same time, the beeper will sound and the focus confirmation light in red. Focus confirmation light 56 X The dot inside the AF point achieving focus flashes briefly in the viewfinder will rotate to focus. Press the shutter button...
... Auto) is still or moving (p.59). 1 Set the Mode Dial to . At the same time, the beeper will sound and the focus confirmation light in red. Focus confirmation light 56 X The dot inside the AF point achieving focus flashes briefly in the viewfinder will rotate to focus. Press the shutter button...

User Manual
Page 82
Then press the shutter button halfway. X The dot inside the AF point achieving focus lights up briefly in red, and the focus confirmation light on the subject. A standard exposure will be obtained as long as the shutter speed and aperture displays do not blink. 4 ...
Then press the shutter button halfway. X The dot inside the AF point achieving focus lights up briefly in red, and the focus confirmation light on the subject. A standard exposure will be obtained as long as the shutter speed and aperture displays do not blink. 4 ...

User Manual
Page 93
... the AF operation. In Basic Zone modes, the optimum AF operation is achieved, the dot inside the AF point achieving focus lights up briefly in red, and the focus confirmation light in the viewfinder will then autofocus in the selected AF operation. When you hold down the shutter button halfway, the...
... the AF operation. In Basic Zone modes, the optimum AF operation is achieved, the dot inside the AF point achieving focus lights up briefly in red, and the focus confirmation light in the viewfinder will then autofocus in the selected AF operation. When you hold down the shutter button halfway, the...

User Manual
Page 95
... point by turning the dial until the desired AF point lights up , automatic AF point selection will be displayed on the LCD monitor and in red. Therefore, it to focus on the target subject. 1 Press the button. (9) X The selected AF point will be set. Use the cross keys to focus. 95...
... point by turning the dial until the desired AF point lights up , automatic AF point selection will be displayed on the LCD monitor and in red. Therefore, it to focus on the target subject. 1 Press the button. (9) X The selected AF point will be set. Use the cross keys to focus. 95...

User Manual
Page 97
For subjects difficult to focus during manual focusing, the AF point achieving focus will light up briefly in red, the beeper will sound, and the focus confirmation light in the viewfinder will light up. 97 If you press the shutter button halfway during Live ...
For subjects difficult to focus during manual focusing, the AF point achieving focus will light up briefly in red, the beeper will sound, and the focus confirmation light in the viewfinder will light up. 97 If you press the shutter button halfway during Live ...

User Manual
Page 102
...the LCD monitor to make sure the flash exposure looks natural (not dark at the red-eye reduction lamp, when the room is most effective when the subject looks at the bottom). 3 Red-eye Reduction Using the red-eye reduction lamp before taking a flash picture can extend the flash range. For ...close to the subject. Detach the lens hood. For flash photography, when you press the shutter button completely, the picture will light up. The red-eye reduction feature is well lit, or when you press the shutter button halfway, the scale display on the bottom of the picture may look...
...the LCD monitor to make sure the flash exposure looks natural (not dark at the red-eye reduction lamp, when the room is most effective when the subject looks at the bottom). 3 Red-eye Reduction Using the red-eye reduction lamp before taking a flash picture can extend the flash range. For ...close to the subject. Detach the lens hood. For flash photography, when you press the shutter button completely, the picture will light up. The red-eye reduction feature is well lit, or when you press the shutter button halfway, the scale display on the bottom of the picture may look...

User Manual
Page 123
... CharacteristicsN Parameter Settings and Effects Sharpness Adjusts the sharpness of colors. The closer it is to E, the softer the image will look . To reduce skin redness, set it toward the F end. Saturation Adjusts the color saturation in the image. To increase the contrast, set it toward the minus end. The closer...
... CharacteristicsN Parameter Settings and Effects Sharpness Adjusts the sharpness of colors. The closer it is to E, the softer the image will look . To reduce skin redness, set it toward the F end. Saturation Adjusts the color saturation in the image. To increase the contrast, set it toward the minus end. The closer...

User Manual
Page 124
... will look slightly darker. kFilter Effect With a filter effect applied to [Sharpness] and [Contrast] explained on the preceding page. Filter N: None Ye: Yellow Or: Orange R: Red G: Green Sample Effects Normal black-and-white image with no filter effects. The blue sky will look quite dark. Green tree leaves will look crisper...
... will look slightly darker. kFilter Effect With a filter effect applied to [Sharpness] and [Contrast] explained on the preceding page. Filter N: None Ye: Yellow Or: Orange R: Red G: Green Sample Effects Normal black-and-white image with no filter effects. The blue sky will look quite dark. Green tree leaves will look crisper...

User Manual
Page 151
... The white icon indicates that the image quality of high ISO speed images or long exposures may deteriorate even before shooting again. The red icon indicates that you will not be obtained or an irregular exposure may deteriorate. If the camera's internal temperature is high, image ...an Extension Tube, the standard exposure may not be able to shoot again until the camera's internal temperature decreases. White and Red Internal Temperature Warning Icons If the camera's internal temperature increases due to prolonged Live View shooting or under a high ambient temperature, a ...
... The white icon indicates that the image quality of high ISO speed images or long exposures may deteriorate even before shooting again. The red icon indicates that you will not be obtained or an irregular exposure may deteriorate. If the camera's internal temperature is high, image ...an Extension Tube, the standard exposure may not be able to shoot again until the camera's internal temperature decreases. White and Red Internal Temperature Warning Icons If the camera's internal temperature increases due to prolonged Live View shooting or under a high ambient temperature, a ...

User Manual
Page 152
... resume Live View shooting under low light. If there is set the [52: LCD brightness] to a bright setting, noise or irregular colors may cause skin redness, blistering or low-temperature contact burns. However, the noise or irregular colors will not take effect (p.257). Custom Functions During Live View shooting, some Custom...
... resume Live View shooting under low light. If there is set the [52: LCD brightness] to a bright setting, noise or irregular colors may cause skin redness, blistering or low-temperature contact burns. However, the noise or irregular colors will not take effect (p.257). Custom Functions During Live View shooting, some Custom...

User Manual
Page 158
... indicator Possible shots Eye-Fi card transmission status If there is no card in the camera, the movie shooting remaining time will be displayed in red. k Shooting Movies Information Display Each time you press the button, the information display will change to the elapsed time. 158
... indicator Possible shots Eye-Fi card transmission status If there is no card in the camera, the movie shooting remaining time will be displayed in red. k Shooting Movies Information Display Each time you press the button, the information display will change to the elapsed time. 158

User Manual
Page 159
... a tripod is recorded by the camera's built-in the same position for movie shooting are under fluorescent or LED lighting, the movie may cause skin redness, blistering or low-temperature contact burns. Movie-related settings are on pages 177 and 178. With a fully-charged Battery Pack LP-E10, the total movie...
... a tripod is recorded by the camera's built-in the same position for movie shooting are under fluorescent or LED lighting, the movie may cause skin redness, blistering or low-temperature contact burns. Movie-related settings are on pages 177 and 178. With a fully-charged Battery Pack LP-E10, the total movie...

User Manual
Page 177
...allow the camera to cool down. If you use a tripod or if the Image Stabilizer is not necessary, it on the LCD monitor. The red icon indicates that the image quality of possible shots. The Image Stabilizer consumes battery power and may look momentarily still when you play back the...Recording and Image Quality If the attached lens has an Image Stabilizer and you set the IS switch to . Movie Shooting Cautions White and Red Internal Temperature Warning Icons If the camera's internal temperature increases due to prolonged movie shooting or under a high ambient temperature, a white or...
...allow the camera to cool down. If you use a tripod or if the Image Stabilizer is not necessary, it on the LCD monitor. The red icon indicates that the image quality of possible shots. The Image Stabilizer consumes battery power and may look momentarily still when you play back the...Recording and Image Quality If the attached lens has an Image Stabilizer and you set the IS switch to . Movie Shooting Cautions White and Red Internal Temperature Warning Icons If the camera's internal temperature increases due to prolonged movie shooting or under a high ambient temperature, a white or...

User Manual
Page 189
Handy Features B Checking Camera Settings While the menu is displayed, press the button to display the camera's major function settings. While the menu is displayed, press the button to display the settings. Settings display Card remaining capacity Color space (p.131) WB correction (p.129)/ WB bracketing (p.130) Live View shooting (p.133) Red-eye reduction (p.102) Auto rotate display (p.188) Date/Time (p.37) Daylight saving time (p.38) Beeper (p.180) Auto power off (p.181) 189 Press the button again to return to the menu.
Handy Features B Checking Camera Settings While the menu is displayed, press the button to display the camera's major function settings. While the menu is displayed, press the button to display the settings. Settings display Card remaining capacity Color space (p.131) WB correction (p.129)/ WB bracketing (p.130) Live View shooting (p.133) Red-eye reduction (p.102) Auto rotate display (p.188) Date/Time (p.37) Daylight saving time (p.38) Beeper (p.180) Auto power off (p.181) 189 Press the button again to return to the menu.