
Instruction Manual
Page 5
... 2 Safety Precautions 6 Chapter 1 About DR-5020/5080C 11 1.1 Features of DR-5020/5080C 12 1.2 Packaging: What's in the Box 14 1.3 Part Names 15 N Front view 15 N Rear view 16 N Operation panel 17 N Removable tray 20 N Document eject support plate 20 N Function key labels...cable 24 N Setting the SCSI ID and terminator 25 Connecting the Power Cord 26 N Connecting the power cord 26 2.3 Preparing for Paper Feed and Eject 27 Preparing the Document Tray Extension and Document Eject Tray Extension 27 N Document tray extension 27 N Document eject tray extension 29 N Document...
... 2 Safety Precautions 6 Chapter 1 About DR-5020/5080C 11 1.1 Features of DR-5020/5080C 12 1.2 Packaging: What's in the Box 14 1.3 Part Names 15 N Front view 15 N Rear view 16 N Operation panel 17 N Removable tray 20 N Document eject support plate 20 N Function key labels...cable 24 N Setting the SCSI ID and terminator 25 Connecting the Power Cord 26 N Connecting the power cord 26 2.3 Preparing for Paper Feed and Eject 27 Preparing the Document Tray Extension and Document Eject Tray Extension 27 N Document tray extension 27 N Document eject tray extension 29 N Document...

Instruction Manual
Page 11
...; Never bundle the power cord or wrap the cord around the power outlet free of purchase or your fingers and cause unexpected injuries. Moving the scanner with both hands as a table leg. • Do not tug the power cord. About the Power Supply • Be sure to connect to a AC 220... plug head. • Keep the area around an object such as shown in electrical shock. 9 When you move the DR-5020/5080C, hold it firmly with the power still ON or the SCSI cable still connected might result in the figure below and carry it carefully. If you carry it without holding its...
...; Never bundle the power cord or wrap the cord around the power outlet free of purchase or your fingers and cause unexpected injuries. Moving the scanner with both hands as a table leg. • Do not tug the power cord. About the Power Supply • Be sure to connect to a AC 220... plug head. • Keep the area around an object such as shown in electrical shock. 9 When you move the DR-5020/5080C, hold it firmly with the power still ON or the SCSI cable still connected might result in the figure below and carry it carefully. If you carry it without holding its...

Instruction Manual
Page 23
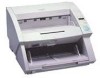
Chapter 2 Preparation Before Use System Requirements To use the DR-5020/5080C, you need the following items in addition to the standard accessories: G Computer G SCSI card G SCSI cable G Application MEMO • The driver may not function properly depending on the application you are using. • Select a computer, operating environment and SCSI card to suit the application you are using. 22
Chapter 2 Preparation Before Use System Requirements To use the DR-5020/5080C, you need the following items in addition to the standard accessories: G Computer G SCSI card G SCSI cable G Application MEMO • The driver may not function properly depending on the application you are using. • Select a computer, operating environment and SCSI card to suit the application you are using. 22

Instruction Manual
Page 24
..." in electrical shock. 23 WARNING Before you move the DR-5020/5080C, hold it firmly with the power still ON or the SCSI cable still connected might result in the Safety Precautions (P.8). The scanner weights approximately 20 kg (44.2 lb). Also, disconnect the SCSI cable from the power outlet. If you carry it without holding...
..." in electrical shock. 23 WARNING Before you move the DR-5020/5080C, hold it firmly with the power still ON or the SCSI cable still connected might result in the Safety Precautions (P.8). The scanner weights approximately 20 kg (44.2 lb). Also, disconnect the SCSI cable from the power outlet. If you carry it without holding...

Instruction Manual
Page 25
...driver application you are turned OFF. Half-pitch 50-pin (pin type) Insert into either of the scanner. Half-pitch 50-pin (pin type) 24 G SCSI cable The scanner's SCSI connector is installed on the rear of these connectors. Set the SCSI ID and terminator. (P....25) N Connecting the SCSI cable CAUTION Before you connect the scanner: G SCSI card Check that the scanner and the computer are using the SCSI cable. Chapter 2 Preparation Before Use Connecting to a Computer Connect the scanner to the computer by the SCSI cable. (P.24) 2. CAUTION Before you hear...
...driver application you are turned OFF. Half-pitch 50-pin (pin type) Insert into either of the scanner. Half-pitch 50-pin (pin type) 24 G SCSI cable The scanner's SCSI connector is installed on the rear of these connectors. Set the SCSI ID and terminator. (P....25) N Connecting the SCSI cable CAUTION Before you connect the scanner: G SCSI card Check that the scanner and the computer are using the SCSI cable. Chapter 2 Preparation Before Use Connecting to a Computer Connect the scanner to the computer by the SCSI cable. (P.24) 2. CAUTION Before you hear...

Instruction Manual
Page 27
... power strip. • Never bundle or tie the power cord around itself or another device. If you use only the power cord provided with the scanner. • Before you connect the power cord, be sure to turn the power switch OFF. • Be sure to connect to the rear of the... connecting the power cord, follow these precautions. Chapter 2 Preparation Before Use Connecting the Power Cord Connect the power cord. Be sure to use an extension cable, pay attention to do so might cause a fire or electrical shock. • Never grasp the plug when your hands are wet. • Never plug ...
... power strip. • Never bundle or tie the power cord around itself or another device. If you use only the power cord provided with the scanner. • Before you connect the power cord, be sure to turn the power switch OFF. • Be sure to connect to the rear of the... connecting the power cord, follow these precautions. Chapter 2 Preparation Before Use Connecting the Power Cord Connect the power cord. Be sure to use an extension cable, pay attention to do so might cause a fire or electrical shock. • Never grasp the plug when your hands are wet. • Never plug ...
Instruction Manual
Page 93
... Feed Adjustment 32 Document tray 15 Paper feed adjustment lever ..... 15, 32 Document tray extension .......... 15, 27 Paper jam 70 Double Feed Detection 63 - F - - in paper exit section 73 - Cleaning 82 Imprinter ...... 60, 62, 64, 78, 79, 87, 92 - O - B - Carrying the scanner 9, 23 - ...61 Counting the Number of Originals In a Mode Selection key 18, 59 Document 53 Document guide label 20, 32 - N - 5 New File key 19, 59 - Scanning Glasses and Rollers ... 83 Connecting the SCSI cable 24 - P - DIP switch 16, 25 - Daily maintenance 6 ...
... Feed Adjustment 32 Document tray 15 Paper feed adjustment lever ..... 15, 32 Document tray extension .......... 15, 27 Paper jam 70 Double Feed Detection 63 - F - - in paper exit section 73 - Cleaning 82 Imprinter ...... 60, 62, 64, 78, 79, 87, 92 - O - B - Carrying the scanner 9, 23 - ...61 Counting the Number of Originals In a Mode Selection key 18, 59 Document 53 Document guide label 20, 32 - N - 5 New File key 19, 59 - Scanning Glasses and Rollers ... 83 Connecting the SCSI cable 24 - P - DIP switch 16, 25 - Daily maintenance 6 ...

