
Instruction Manual
Page 1
DOCUMENT SCANNER INSTRUCTIONS Space E FILM F Backup Scanner A Count Only New File Feeding Option Manual Auto Semi-Auto
DOCUMENT SCANNER INSTRUCTIONS Space E FILM F Backup Scanner A Count Only New File Feeding Option Manual Auto Semi-Auto

Instruction Manual
Page 3
... Thank you have read this manual in function for purchasing the Canon Document Scanner DR-5060F. Caution Take note of the following when using the scanner to make copies: q Reproducing money, other forms of this scanner, be sure to read this manual, be sure to criminal ...subject to microfilm. q Reproducing passports, official certificates, licenses, travel tickets, copyright protected and private documents and other than your own household. Also, after you for backing data to criminal prosecution. The DR-5060F high-speed document scanner has a built-in a safe place.
... Thank you have read this manual in function for purchasing the Canon Document Scanner DR-5060F. Caution Take note of the following when using the scanner to make copies: q Reproducing money, other forms of this scanner, be sure to read this manual, be sure to criminal ...subject to microfilm. q Reproducing passports, official certificates, licenses, travel tickets, copyright protected and private documents and other than your own household. Also, after you for backing data to criminal prosecution. The DR-5060F high-speed document scanner has a built-in a safe place.

Instruction Manual
Page 4
...refers to the DR-5060F as "the scanner" when the explanation is for the DR-5060F as "this unit." CAUTION Read carefully to avoid serious injury or damage to the equipment. Scanner This manual refers to the DR-5060F as a scanner. WARNING Read carefully to the DR-5060F as "the filmer..." when the explanation is for the DR-5060F as a rotary filmer. 2 Introduction Filmer This manual refers to avoid...
...refers to the DR-5060F as "the scanner" when the explanation is for the DR-5060F as "this unit." CAUTION Read carefully to avoid serious injury or damage to the equipment. Scanner This manual refers to the DR-5060F as a scanner. WARNING Read carefully to the DR-5060F as "the filmer..." when the explanation is for the DR-5060F as a rotary filmer. 2 Introduction Filmer This manual refers to avoid...

Instruction Manual
Page 6
Chapter 4 Troubleshooting 59 When the Scanner is Not Recognized 60 Removing Paper Jams ...61 Paper Jam in the Paper Eject Section 61 Paper Jam in the Feed Section 63 Removing the Intermediate Unit 66 Attaching the Intermediate Unit 67 Paper Feed Trouble ...68 When the Scanned Image is Not Normal 70 When an Error Code is Displayed 71 Chapter 5 Daily Cleaning 73 Daily Cleaning ...74 Cleaning the Main Unit 74 Cleaning the Scanning Glasses and Rollers 75 Cleaning the Camera Unit 80 Power Cord ...80 Imprinter Guide Plate 81 Specifications 82 Options ...83 Consumables 83 4 Contents
Chapter 4 Troubleshooting 59 When the Scanner is Not Recognized 60 Removing Paper Jams ...61 Paper Jam in the Paper Eject Section 61 Paper Jam in the Feed Section 63 Removing the Intermediate Unit 66 Attaching the Intermediate Unit 67 Paper Feed Trouble ...68 When the Scanned Image is Not Normal 70 When an Error Code is Displayed 71 Chapter 5 Daily Cleaning 73 Daily Cleaning ...74 Cleaning the Main Unit 74 Cleaning the Scanning Glasses and Rollers 75 Cleaning the Camera Unit 80 Power Cord ...80 Imprinter Guide Plate 81 Specifications 82 Options ...83 Consumables 83 4 Contents

Instruction Manual
Page 7
... bundle, wrap, or tie the power cord around itself or another object. s To clean the unit exterior, use a firmly wrung cloth moistened slightly with the scanner. Call for service. s Use only the power cord and plug provided with water or mild detergent. s Never attempt to the power source. Safety Precautions Daily... the power switch OFF immediately, disconnect the power cord from the power outlet. Safety Precautions 5 s Be sure to connect the ground cable before using the scanner.
... bundle, wrap, or tie the power cord around itself or another object. s To clean the unit exterior, use a firmly wrung cloth moistened slightly with the scanner. Call for service. s Use only the power cord and plug provided with water or mild detergent. s Never attempt to the power source. Safety Precautions Daily... the power switch OFF immediately, disconnect the power cord from the power outlet. Safety Precautions 5 s Be sure to connect the ground cable before using the scanner.

Instruction Manual
Page 8
.... Doing so might result in humid or dusty locations. The unit may be injured unexpectedly. If such objects become entangled with your fingers. CAUTION s The scanner weighs about 48 kg (105.8 lb.). To avoid damage to disconnect the cord from the power outlet, and call for a long time, disconnect the power... cord from the unit. s When you are loading a document or removing a paper jam. s Do not directly touch the pins and contacts on an unstable or vibrating surface.
.... Doing so might result in humid or dusty locations. The unit may be injured unexpectedly. If such objects become entangled with your fingers. CAUTION s The scanner weighs about 48 kg (105.8 lb.). To avoid damage to disconnect the cord from the power outlet, and call for a long time, disconnect the power... cord from the unit. s When you are loading a document or removing a paper jam. s Do not directly touch the pins and contacts on an unstable or vibrating surface.

Instruction Manual
Page 9
...inside the unit may impair scan image quality. q Places subject to rapid changes in temperature or humidity ¡ Condensation occurring inside the unit. Place the scanner in a room that is well within the following places. q Places subject to high temperature and humidity such as near running water, a heat source, ...and adversely affect the unit or your personal computer. About the Installation Location More than 100 mm (39.0 in.) 771 mm (30.0 in.) (with document tray extension, extension wire closed) More than 100 mm (39.0 in.) More than 100 mm (39.0 in.) 936 mm (36.5 in.) (with...
...inside the unit may impair scan image quality. q Places subject to rapid changes in temperature or humidity ¡ Condensation occurring inside the unit. Place the scanner in a room that is well within the following places. q Places subject to high temperature and humidity such as near running water, a heat source, ...and adversely affect the unit or your personal computer. About the Installation Location More than 100 mm (39.0 in.) 771 mm (30.0 in.) (with document tray extension, extension wire closed) More than 100 mm (39.0 in.) More than 100 mm (39.0 in.) 936 mm (36.5 in.) (with...

Instruction Manual
Page 10
.... Carrying When you are unsure of anything relating to the power supply, contact your store of obstacles. If one worker tries to move the DR-5060F, it should be sure to hold it by the under section of the main unit, and never place your local power company. About the Power... Supply WARNING s Be sure to connect to an AC 120V (240 V in electrical shock. 8 Safety Precautions Do not plug the scanner into an outlet shared with the power still ON or the SCSI cable still connected might result in Europe) (50/60 Hz) power supply. s Never...
.... Carrying When you are unsure of anything relating to the power supply, contact your store of obstacles. If one worker tries to move the DR-5060F, it should be sure to hold it by the under section of the main unit, and never place your local power company. About the Power... Supply WARNING s Be sure to connect to an AC 120V (240 V in electrical shock. 8 Safety Precautions Do not plug the scanner into an outlet shared with the power still ON or the SCSI cable still connected might result in Europe) (50/60 Hz) power supply. s Never...

Instruction Manual
Page 11
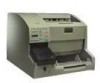
Features of DR-5060F 10 Packaging: What's in the box, and the names and functions of Parts 12 About the Camera Unit 18 9 About DR-5060F 1 Chapter 1 About DR-5060F This chapter describes the features of the scanner, what's in the Box 11 Names and Functions of parts on the scanner and the camera unit.
Features of DR-5060F 10 Packaging: What's in the box, and the names and functions of Parts 12 About the Camera Unit 18 9 About DR-5060F 1 Chapter 1 About DR-5060F This chapter describes the features of the scanner, what's in the Box 11 Names and Functions of parts on the scanner and the camera unit.

Instruction Manual
Page 12
... mode, 200 dpi resolution) when scanning an A4/(11.5 x 16.3 in.)-size document in the Backup mode. q Large-capacity, reliable paper feeding • Up to 6 million scans. q Easy operation Operations such as a scanner, and the Filmer Only mode in which this unit is fed in advance as business...in the computer as a "scan log" in the simplex mode. Here is , "drops out") in .)-size documents (80 g/m2) (20 lb. Features of DR-5060F The DR-5060F scanner not only processes large volumes of documents at high speed, but also is provided with a function for printing numbers and characters on the...
... mode, 200 dpi resolution) when scanning an A4/(11.5 x 16.3 in.)-size document in the Backup mode. q Large-capacity, reliable paper feeding • Up to 6 million scans. q Easy operation Operations such as a scanner, and the Filmer Only mode in which this unit is fed in advance as business...in the computer as a "scan log" in the simplex mode. Here is , "drops out") in .)-size documents (80 g/m2) (20 lb. Features of DR-5060F The DR-5060F scanner not only processes large volumes of documents at high speed, but also is provided with a function for printing numbers and characters on the...

Instruction Manual
Page 13
... Space E FILM F Backup Scanner A Count Only New File Feeding Option Manual Auto Semi-Auto Setup CD-ROM DR-5060F DR-5060F Instructions (this manual) Scanning Utility 5060 Instructions ISIS/TWAIN Driver Instructions Removable tray Document eject support plate Power cord (The power cord varies according to country of purchase or a Canon service department. If any...
... Space E FILM F Backup Scanner A Count Only New File Feeding Option Manual Auto Semi-Auto Setup CD-ROM DR-5060F DR-5060F Instructions (this manual) Scanning Utility 5060 Instructions ISIS/TWAIN Driver Instructions Removable tray Document eject support plate Power cord (The power cord varies according to country of purchase or a Canon service department. If any...

Instruction Manual
Page 14
...scan density and other basic functions. Space E FILM F Backup Scanner A Count Only New File Feeding Option Manual Auto Semi-Auto Power switch Document tray extension/ extension wire Select the document tray extension matched to the size of Parts The number of ...document you connect the DR-5060F, take a few minutes to scan. 12 Names and Functions of document you are scanning. (See "Document tray extension" P. 33) Document tray Load the document in this tray. Upper unit Document sensor This sensor detects documents placed on the document tray. s Front view Document...
...scan density and other basic functions. Space E FILM F Backup Scanner A Count Only New File Feeding Option Manual Auto Semi-Auto Power switch Document tray extension/ extension wire Select the document tray extension matched to the size of Parts The number of ...document you connect the DR-5060F, take a few minutes to scan. 12 Names and Functions of document you are scanning. (See "Document tray extension" P. 33) Document tray Load the document in this tray. Upper unit Document sensor This sensor detects documents placed on the document tray. s Front view Document...

Instruction Manual
Page 15
...fire, never block the air vents on the rear of Parts 13 s Inside (with the scanner to this terminal. Feed unit open ) Counter This counter counts the total number of fed document sheets. Names and Functions of this connector. Power cord connector Connect the power cord provided ... F Backup Scanner A Count Only New File Feeding Option Manual Auto Semi-Auto Feed unit s Rear view 1 Intermediate unit Paper feed adjustment lever Slide this lever to adjust paper feed according to the condition of the paper surface. (See "Paper Feed Adjustment" P. 36) About DR-5060F Air vent...
...fire, never block the air vents on the rear of Parts 13 s Inside (with the scanner to this terminal. Feed unit open ) Counter This counter counts the total number of fed document sheets. Names and Functions of this connector. Power cord connector Connect the power cord provided ... F Backup Scanner A Count Only New File Feeding Option Manual Auto Semi-Auto Feed unit s Rear view 1 Intermediate unit Paper feed adjustment lever Slide this lever to adjust paper feed according to the condition of the paper surface. (See "Paper Feed Adjustment" P. 36) About DR-5060F Air vent...

Instruction Manual
Page 16
... light when the amount of Parts Only the leftmost LED blinks when film has almost run out. s Operation panel 1 2 3 4 5 6 E FILM F Space/Trailer Backup Count Only Scanner A New File Feeding Option Manual Auto Semi-Auto (1) Function keys (2) Remaining film indicator (3) Backup key (4) Space/Trailer key (5) Count Only key (6) Clear/Stop key (7) New...
... light when the amount of Parts Only the leftmost LED blinks when film has almost run out. s Operation panel 1 2 3 4 5 6 E FILM F Space/Trailer Backup Count Only Scanner A New File Feeding Option Manual Auto Semi-Auto (1) Function keys (2) Remaining film indicator (3) Backup key (4) Space/Trailer key (5) Count Only key (6) Clear/Stop key (7) New...

Instruction Manual
Page 17
... mode, scanned images are not transferred to computer, and are only photographed to microfilm. Blinking (Filmer Only mode): In this mode, document pages that the film can be saved or the new file mark is controlled according to the settings on the film. Pressing this key... counter display is cleared. They are being photographed on the counter display. (3) Backup key This key displays and changes the scanner operation mode: 1 About DR-5060F Lit (Backup mode): In this mode, scanned images are being transferred to computer. The default setting for three seconds feeds ...
... mode, scanned images are not transferred to computer, and are only photographed to microfilm. Blinking (Filmer Only mode): In this mode, document pages that the film can be saved or the new file mark is controlled according to the settings on the film. Pressing this key... counter display is cleared. They are being photographed on the counter display. (3) Backup key This key displays and changes the scanner operation mode: 1 About DR-5060F Lit (Backup mode): In this mode, scanned images are being transferred to computer. The default setting for three seconds feeds ...

Instruction Manual
Page 18
...and for example, and moves to the left and right as the or key is fed when the scanner receives a scan start feeding, end this key starts feeding of scanned document pages. This key is scanned. Foe details, refer to the separate "ISIS/TWAIN Driver Instructions" or... its right cyclically as the or key is adjusted. The document is pressed. Semi-Auto: The scanner feeds the document when you load the document. Auto: The scanner automatically feeds the document when you press the Start key after loading the document. To automatically adjust the brightness, press the [A] key. ...
...and for example, and moves to the left and right as the or key is fed when the scanner receives a scan start feeding, end this key starts feeding of scanned document pages. This key is scanned. Foe details, refer to the separate "ISIS/TWAIN Driver Instructions" or... its right cyclically as the or key is adjusted. The document is pressed. Semi-Auto: The scanner feeds the document when you load the document. Auto: The scanner automatically feeds the document when you press the Start key after loading the document. To automatically adjust the brightness, press the [A] key. ...

Instruction Manual
Page 19
... the name of the tray when they are for the camera unit. (See "Affixing the Index Label" P. 28) Document guide labels: These labels are ejected form the scanner. (See "Removable tray" P. 36) About DR-5060F s Document eject support plate Install this plate when scanning large-size (e.g. Index labels: These labels are for positioning the...
... the name of the tray when they are for the camera unit. (See "Affixing the Index Label" P. 28) Document guide labels: These labels are ejected form the scanner. (See "Removable tray" P. 36) About DR-5060F s Document eject support plate Install this plate when scanning large-size (e.g. Index labels: These labels are for positioning the...

Instruction Manual
Page 20
... magnification lens and one with the application set within the range 1 to film even if the scanner is photographed in its special case. About the Camera Unit Two camera units are provided for scanning...mode. q When the 1/24 camera unit (24X) is used , both sides of purchase or a Canon service department. q Store the camera unit you are photographed simultaneously in the duplex mode. MEMO q When ...the 1/57 camera unit. The image photographed to film varies according to film even if the document is used , both sides of originals are not using in the simplex mode. For details...
... magnification lens and one with the application set within the range 1 to film even if the scanner is photographed in its special case. About the Camera Unit Two camera units are provided for scanning...mode. q When the 1/24 camera unit (24X) is used , both sides of purchase or a Canon service department. q Store the camera unit you are photographed simultaneously in the duplex mode. MEMO q When ...the 1/57 camera unit. The image photographed to film varies according to film even if the document is used , both sides of originals are not using in the simplex mode. For details...

Instruction Manual
Page 23
... Before Use Insert into the SCSI device in a daisy chain. Connecting to a Computer Connect the scanner to a Computer 21 CAUTION Before you connect the scanner to the computer, be sure to turn both the scanner and the computer OFF. 2 Connecting the SCSI Cable Connect your computer to the computer, insert the... other end of the scanner. Two half-pitch 50-pin SCSI connectors are located on the rear of the scanner, and connect the other SCSI cable into the vacant SCSI connector on the rear of the SCSI ...
... Before Use Insert into the SCSI device in a daisy chain. Connecting to a Computer Connect the scanner to a Computer 21 CAUTION Before you connect the scanner to the computer, be sure to turn both the scanner and the computer OFF. 2 Connecting the SCSI Cable Connect your computer to the computer, insert the... other end of the scanner. Two half-pitch 50-pin SCSI connectors are located on the rear of the scanner, and connect the other SCSI cable into the vacant SCSI connector on the rear of the SCSI ...

Instruction Manual
Page 24
... (Terminator: OFF, SCSI ID = 2) SCSI ID switch Terminator ON/OFF switch s Setting the SCSI ID Set the SCSI ID by combining the settings of the scanner. SCSI ID 0 1 2 3 4 5 6 7 SW2 ON ON ON ON OFF OFF OFF OFF SW3 ON ON OFF OFF ON ON OFF OFF SW4 ON OFF ON OFF...
... (Terminator: OFF, SCSI ID = 2) SCSI ID switch Terminator ON/OFF switch s Setting the SCSI ID Set the SCSI ID by combining the settings of the scanner. SCSI ID 0 1 2 3 4 5 6 7 SW2 ON ON ON ON OFF OFF OFF OFF SW3 ON ON OFF OFF ON ON OFF OFF SW4 ON OFF ON OFF...


