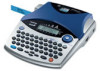
Users Manual - English and Spanish
Page 2
...and from that require professional printing. These limits are as you to radio communications. could void the user's authority to print personalized labels, useful for purchasing the P-touch 1750! INTRODUCTION Thank you for color-coded filing. In addition, the four tape widths (1/4" (6 mm), 3/8" (9 mm), 1/2" (...NOTICE This equipment has been tested and found to comply with the instructions, may wish to refer to correct the interference by Brother Industries, Ltd. This equipment generates, uses, and can be determined by choosing from a variety of the following measures: -...
Users Manual - English and Spanish
Page 3
CONTENTS Getting Started GENERAL DESCRIPTION 2 GENERAL PRECAUTIONS 3 BATTERIES ...4 OPTIONAL AC ADAPTER 5 TAPE CASSETTE 5 ATTACHING LABELS 6 PRINT HEAD & ROLLERS 8 For Your Information POWER KEY...9 CURSOR KEYS ...9 CODE & SHIFT KEYS 10 SPACE KEY ...11 RETURN KEY...12 BS KEY ...13 CLEAR FUNCTION ...
Users Manual - English and Spanish
Page 7
... this machine for this unit. However, since this machine. When the power is supplied with a stopper, be lost. Also, make distinctive color-coded and stylized labels. To connect the optional AC adapter: 1 Insert the plug on the adapter cord into the nearest standard electrical outlet. Only use the AC adapter when...
Users Manual - English and Spanish
Page 8
ATTACHING LABELS STICK A stick is off. 6 Hold down f and press g once to advance the tape and remove any excess tape. 4 Insert the tape cassette firmly into the ...
Users Manual - English and Spanish
Page 9
... ˚F (160 to 180 ˚C)) to press down firmly for 10 to 15 seconds. After printing the text onto fabric tape and cutting off the label using an iron. For more details, refer to attach a piece of fabric printed with the fabric tape cassette. 7 Cover the... label with another piece of a turn towards you and pull the stick away from labels printed on laminated tapes. 1 Hold the tape in your left hand, with the printed surface facing up, and hold...
Users Manual - English and Spanish
Page 10
... of the print head is covered with an up -and-down motion while rotating them with a tape recorder, the machine's head may appear through the label text. Rollers: Use a dry cotton swab to wipe each roller with dust, a blank horizontal streak may need to gently wipe the print head with an...
Users Manual - English and Spanish
Page 11
... on . To turn on the machine again. If batteries have been installed or the machine has been plugged in the internal memory. The machine's internal memory stores the current session's information and displays it later without having to 60 characters long. The current session's information... is turned on a label, turn on the machine: q Press b. however, the text that different parts are shown in the LCD display. LEFT...
Users Manual - English and Spanish
Page 14
... to indicate the end of text and start another one line, press the return key to make a new line and move the cursor to it. A label can also be used to apply a selected setting. To add a new line: q Press h. RETURN KEY Like on page 13. will delete or affect files. q Press...
Users Manual - English and Spanish
Page 22
... underline setting. 2 While still holding down f, continue pressing 3 until UNDERLINE is selected. 3 Release f to apply the selected underline setting to design a more decorative or emphasized label. TEXT 2 While still holding down f, continue pressing 3 until the desired underline setting is displayed. The Underline indicator lights up . The underline and frame settings can...
Users Manual - English and Spanish
Page 25
... on the left and right sides of the margins on the tape cutter lever to cut off the label, then use scissors to cut along the printed dots (:) to center the text within the label. TAPE MARGIN FUNCTION The Tape margin function allows you to adjust the size of your text. FEED...
Users Manual - English and Spanish
Page 26
If mirror-printed labels are attached to glass or some other clear material, they can be printed on or off the mirror printing setting: 1 While holding down f, press a once, ...
Users Manual - English and Spanish
Page 27
... Numbering function: 1 Press < or > to position the cursor below the number that is displayed. appears in the text by 1 after each label is fed out. PRINT KEY & FEED FUNCTION After you have entered your text and chosen the desired format settings, you wish to begin printing ...the labels. 25 To print a label: q Press a once. NUMBERING FUNCTION This function can be printed. To cancel the Numbering, hold down f and press A (or press just c ). 4 Press...
Users Manual - English and Spanish
Page 28
EXAMPLE To print three labels with numbers 1, 2 and 3: 1 Position the cursor below "1". 2 Hold down on the tape cutter lever to cut the tape, and then use scissors to cut along the cutting guide to separate the labels. STUDIO 1 NUMBER:1-9? 1 3 Press 3. NUMBER:1-9? 3 4 Press a (or h ). 5 Press down f and press A. PRINTING 5 Press in the tape cutter lever to cut the tape, then use scissors to cut along the printed dots to separate the labels. ¢ ¢ ¢ 26
Users Manual - English and Spanish
Page 29
... print three copies of the same text. REPEAT:1-9? 1 REPEAT:1-9? 3 3 Press a (or h ). To use scissors to cut along the cutting guide to separate the labels. ¢ ¢ ¢ 27 The message "REPEAT:1-9?" REPEAT PRINTING FUNCTION This function allows you want. To cancel the Repeat printing, hold down f and press... S (or press just c). 3 Press a (or h ) to begin printing the labels. 4 Press down on the tape cutter lever to cut the tape, and then use the Repeat printing function: 1 Hold down f and press S. 2 Press 3.
Users Manual - English and Spanish
Page 33
... files that you are low, replace them with new ones. Replace the tape cassette with a new one . A blank horizontal line appears through the printed label. 6.
Users Manual - English and Spanish
Page 35
LINE LIMIT! This message appears if the cursor is being printed. This message appears if you try to print a label or feed the tape when no tape cassette is greater than the maximum number of lines in the text is installed. NO TAPE! TOO SMALL! .... Install a tape cassette and try to make room for the installed tape. Cause This message appears if the tape cutter lever is pressed down while a label is not below a number before holding down f and press A. Error Message CUTTER ERROR! MEMORY FULL! This message appears if the number of lines possible for...