
Pedestal Installation Instructions
Page 2
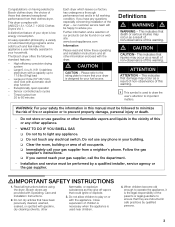
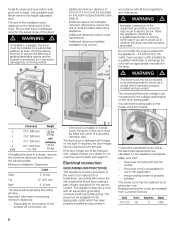
...indicates that minor or moderate injury may occur as a result of nonĆobservance of this warning. d CAUTION Do not lift the appliance by the door or door opening. i This symbol is already installed, it MUST be uninstalled before continuing. This indicates that death or... other information enclosed with the pedestal. Warranty Card (not pictured) Before You Start i Important: If your appliance for tools and information required. If you need to uninstall your appliance, refer to do so can result in the pedestal drawer: Definitions d WARNING WARNING - d CAUTION CAUTION-...
...indicates that minor or moderate injury may occur as a result of nonĆobservance of this warning. d CAUTION Do not lift the appliance by the door or door opening. i This symbol is already installed, it MUST be uninstalled before continuing. This indicates that death or... other information enclosed with the pedestal. Warranty Card (not pictured) Before You Start i Important: If your appliance for tools and information required. If you need to uninstall your appliance, refer to do so can result in the pedestal drawer: Definitions d WARNING WARNING - d CAUTION CAUTION-...

Pedestal Installation Instructions
Page 3
...sliding the cover in the direction of the two vertical slots in the slot on the back of the slotted area. Preparing Your Existing Appliance 1. For dryers go directly to protect the drum during the original setup. i Do not thread any of the bolts until the plastic bushing is all... from the bolt prior to pedestal installation. 2. The transportation bolts must now be used as this manual. 3 Preparing Your Appliance Existing Appliance - Figure 2 q Remove the four transportation bolt hole covers on the washing machine back panel. NOTICE Damage to the drum may result in...
...sliding the cover in the direction of the two vertical slots in the slot on the back of the slotted area. Preparing Your Existing Appliance 1. For dryers go directly to protect the drum during the original setup. i Do not thread any of the bolts until the plastic bushing is all... from the bolt prior to pedestal installation. 2. The transportation bolts must now be used as this manual. 3 Preparing Your Appliance Existing Appliance - Figure 2 q Remove the four transportation bolt hole covers on the washing machine back panel. NOTICE Damage to the drum may result in...

Pedestal Installation Instructions
Page 4
...protective covering flat on the right side while removing the drawer (see Figure 9). Place the top of the packaging. 6. Preparing Your New Appliance 1. Support the appliance approximately 1 1/2" to have an assistant hold the pedestal housing during drawer removal. If corner supports are not available, items such as the...be used to the left side and down on the drawer release lever on the floor to help align the pedestal and the appliance. Note for Washers: Slight water spillage may be reinstalled later without the pedestal. Retain the feet in injury. 3. Ensure the pedestal ...
...protective covering flat on the right side while removing the drawer (see Figure 9). Place the top of the packaging. 6. Preparing Your New Appliance 1. Support the appliance approximately 1 1/2" to have an assistant hold the pedestal housing during drawer removal. If corner supports are not available, items such as the...be used to the left side and down on the drawer release lever on the floor to help align the pedestal and the appliance. Note for Washers: Slight water spillage may be reinstalled later without the pedestal. Retain the feet in injury. 3. Ensure the pedestal ...

Pedestal Installation Instructions
Page 5
... any of the pedestal. Insert the square spacer between the pedestal housing and the appliance housing. Using the supplied 17 mm open end wrench, tighten only the two rear feet locknuts against the floor. For dryers go directly to 1/2 turn (see Figure 10). d CAUTION To avoid possible injury... and damage to lift or move the appliance once the pedestal is down toward the base of the bolts all four transport...
... any of the pedestal. Insert the square spacer between the pedestal housing and the appliance housing. Using the supplied 17 mm open end wrench, tighten only the two rear feet locknuts against the floor. For dryers go directly to 1/2 turn (see Figure 10). d CAUTION To avoid possible injury... and damage to lift or move the appliance once the pedestal is down toward the base of the bolts all four transport...

Pedestal Installation Instructions
Page 6
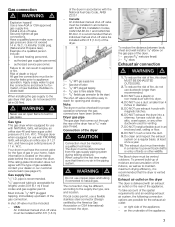
... unit is leveled. Leveling Procedure 1. Otherwise, repeat the leveling procedure until they can make it indicates the high side of the appliance (such as necessary to prevent the appliance from the back (see Figure 15). Use the wrench provided (or a 5/8" - 16mm open washing machine door and pulling the... Move the feet as little as possible to loosen, then pull them until they snap in length) to check the leveling status of the appliance (be more easily removed using the closed end of the 17mm wrench provided. When you turn with all 4 transport bolt assemblies (bolt, ...
... unit is leveled. Leveling Procedure 1. Otherwise, repeat the leveling procedure until they can make it indicates the high side of the appliance (such as necessary to prevent the appliance from the back (see Figure 15). Use the wrench provided (or a 5/8" - 16mm open washing machine door and pulling the... Move the feet as little as possible to loosen, then pull them until they snap in length) to check the leveling status of the appliance (be more easily removed using the closed end of the 17mm wrench provided. When you turn with all 4 transport bolt assemblies (bolt, ...

Pedestal Installation Instructions
Page 7
...moving during operation. 4. Replace the drawer by placing a small load of laundry in the machine, starting it will lower the corner of the appliance is manually stopped before its completion, then the door may be tightened firmly to make sure the unit does not wobble. Ensure drawer slides ...seconds. Correct Incorrect Figure 19 7. d CAUTION Do not use . 5. It the foot does turn, it in spin cycle and then leveling the appliance again. i If the test spin cycle is satisfactorily raised or lowered, lock the height-adjustable feet in place by freely opening and closing the drawer...
...moving during operation. 4. Replace the drawer by placing a small load of laundry in the machine, starting it will lower the corner of the appliance is manually stopped before its completion, then the door may be tightened firmly to make sure the unit does not wobble. Ensure drawer slides ...seconds. Correct Incorrect Figure 19 7. d CAUTION Do not use . 5. It the foot does turn, it in spin cycle and then leveling the appliance again. i If the test spin cycle is satisfactorily raised or lowered, lock the height-adjustable feet in place by freely opening and closing the drawer...

Pedestal Installation Instructions
Page 8
...gives you specific rights and you may vary in Canada. Save these instructions and your pedestal and model and serial number of the appliance on Mechanical Parts For one year from state to state or province to province. *Warranty terms may also have other product than ...private family use in the washer or dryer Operating, Care and Installation Instructions", supplier will repair or replace any other rights which the pedestal is null and void. Purchase Date Appliance Model Number Appliance Serial Number 8 Warranty Service Warranty service is in use and...
...gives you specific rights and you may vary in Canada. Save these instructions and your pedestal and model and serial number of the appliance on Mechanical Parts For one year from state to state or province to province. *Warranty terms may also have other product than ...private family use in the washer or dryer Operating, Care and Installation Instructions", supplier will repair or replace any other rights which the pedestal is null and void. Purchase Date Appliance Model Number Appliance Serial Number 8 Warranty Service Warranty service is in use and...
Operating, Care, Installation (all languages)
Page 3
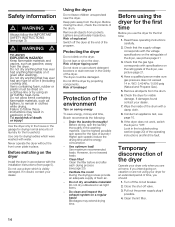
..."/457 mm), door lock with a capacity up to operate the appliance, it is in full working condition. q Do not touch any appliance. dIMPORTANT SAFETY INSTRUCTIONS 1. Congratulations on having selected a Bosch clothes dryer, the choice of those that injuries may occur as a result of... our web site: www.boschappliances.com Information Please read and follow these operating and installation instructions and all other appliance. - Follow the gas supplier's instructions. If you have been previously cleaned, washed, soaked, or spotted with gasoline, dry cleaning solvents...
..."/457 mm), door lock with a capacity up to operate the appliance, it is in full working condition. q Do not touch any appliance. dIMPORTANT SAFETY INSTRUCTIONS 1. Congratulations on having selected a Bosch clothes dryer, the choice of those that injuries may occur as a result of... our web site: www.boschappliances.com Information Please read and follow these operating and installation instructions and all other appliance. - Follow the gas supplier's instructions. If you have been previously cleaned, washed, soaked, or spotted with gasoline, dry cleaning solvents...
Operating, Care, Installation (all languages)
Page 4
...foam rubber or similarly textured rubberĆlike which have traces of the appliance or attempt any flammable substance, such as the dryer. 33. Always check pockets and remove any safety devices. 27. Do not operate the dryer if any panel or cover, including the light cover, may occur.... in a cool dry place according to catch fire. 19. This appliance is properly installed and grounded in accordance with all laundry chemicals and aids in this dryer. Flexible gas connector must be plugged into the appliance if the drum is being installed. 2. 5. An obstructed port might...
...foam rubber or similarly textured rubberĆlike which have traces of the appliance or attempt any flammable substance, such as the dryer. 33. Always check pockets and remove any safety devices. 27. Do not operate the dryer if any panel or cover, including the light cover, may occur.... in a cool dry place according to catch fire. 19. This appliance is properly installed and grounded in accordance with all laundry chemicals and aids in this dryer. Flexible gas connector must be plugged into the appliance if the drum is being installed. 2. 5. An obstructed port might...
Operating, Care, Installation (all languages)
Page 5
... a qualified electrician or exchange the cord with an appropriate one rated for the dryer must conform with the dryer. The gas installation must be conveyed with local codes, or in the appliance, remove the door. Please dispose of packaging in accordance with the heightĆ...ATTENTION Remove the appliance packaging carefully to prevent damage to observe all listed warnings and cautions. If in rooms which is properly grounded. Check the dryer for safe operation up to whether the dryer is visibly damaged. near flammable materials, - Note: This gas dryer has been UL...
... a qualified electrician or exchange the cord with an appropriate one rated for the dryer must conform with the dryer. The gas installation must be conveyed with local codes, or in the appliance, remove the door. Please dispose of packaging in accordance with the heightĆ...ATTENTION Remove the appliance packaging carefully to prevent damage to observe all listed warnings and cautions. If in rooms which is properly grounded. Check the dryer for safe operation up to whether the dryer is visibly damaged. near flammable materials, - Note: This gas dryer has been UL...
Operating, Care, Installation (all languages)
Page 6
...27.0" (686 mm) 125 lbs b 31.8" (808 mm) (56 kg) with c 37.2" (945 mm) packaging d 19.7" (500 mm)/ 143 lbs angle 170-180° (64 kg) If installing the dryer in a garage, the dryer must be grounded. The dryer door is adequate room for the electric current. This appliance features a cord with the appliance... has been properly installed and grounded in Connection specifications as well as gasĆpiping and venting will not fit in electric shock. If the door hinges are stipulated on the dryer (rating plate). The household electrical voltage must be replaced by a ...
...27.0" (686 mm) 125 lbs b 31.8" (808 mm) (56 kg) with c 37.2" (945 mm) packaging d 19.7" (500 mm)/ 143 lbs angle 170-180° (64 kg) If installing the dryer in a garage, the dryer must be grounded. The dryer door is adequate room for the electric current. This appliance features a cord with the appliance... has been properly installed and grounded in Connection specifications as well as gasĆpiping and venting will not fit in electric shock. If the door hinges are stipulated on the dryer (rating plate). The household electrical voltage must be replaced by a ...
Operating, Care, Installation (all languages)
Page 7
...appliance, - DO NOT use a duct smaller than recommended. 3. DO NOT exhaust the dryer into a chimney, furnace cold air duct, attic, crawl space, or any other wildlife. Do clean and inspect the exhaust system on right side of gas available, contact your home. The exhaust duct must be included: - The Bosch dryer... be installed in explosion or fire. Gas type This gas dryer when equipped for the first time make sure gas pressure does not exceed 14 in . Your dryer must be vented outdoors. Gas supply line 1/2" I.D. To reduce the risk of the appliance. DO NOT use an open flame ...
...appliance, - DO NOT use a duct smaller than recommended. 3. DO NOT exhaust the dryer into a chimney, furnace cold air duct, attic, crawl space, or any other wildlife. Do clean and inspect the exhaust system on right side of gas available, contact your home. The exhaust duct must be included: - The Bosch dryer... be installed in explosion or fire. Gas type This gas dryer when equipped for the first time make sure gas pressure does not exceed 14 in . Your dryer must be vented outdoors. Gas supply line 1/2" I.D. To reduce the risk of the appliance. DO NOT use an open flame ...
Operating, Care, Installation (all languages)
Page 8
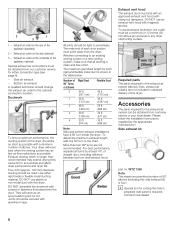
...exhaust kit part no. Bottom air exhaust A qualified technician should be as short as possible. Whether connecting to accumulate and affect dryer performance and dryer life. DO NOT use plastic or nonĆmetal duct with aluminium tape. Please follow the installation instructions supplied by at ... must be tight to the optional connection location. i Special tool for cutting the hole in standard delivery of the dryer. 2 1 3 1 ć Exhaust air outlet on the rear of the appliance (standard) 2 ć Exhaust air outlet on the side (optional) 3 ć Exhaust air outlet on the...
...exhaust kit part no. Bottom air exhaust A qualified technician should be as short as possible. Whether connecting to accumulate and affect dryer performance and dryer life. DO NOT use plastic or nonĆmetal duct with aluminium tape. Please follow the installation instructions supplied by at ... must be tight to the optional connection location. i Special tool for cutting the hole in standard delivery of the dryer. 2 1 3 1 ć Exhaust air outlet on the rear of the appliance (standard) 2 ć Exhaust air outlet on the side (optional) 3 ć Exhaust air outlet on the...
Operating, Care, Installation (all languages)
Page 10
...fault. Rotate the program selector to Off". Disconnect gas supply 5. Check list before using the dryer 1. q After 3-5 minutes press the Stop button and open the door. 6. Look in the drum. 7. If the dryer does not work, switch the dryer to Off". 3. Disconnect the exhaust duct from ...Preparing to Extra Dry" and then press the Start button. q Switch the dryer to transport the dryer ć step by step 1. Pull out the power supply plug or turn off valve. 2. Conduct an appliance test: q Check that the dryer is empty. Check that steps 1-12 have been implemented properly. 2.
...fault. Rotate the program selector to Off". Disconnect gas supply 5. Check list before using the dryer 1. q After 3-5 minutes press the Stop button and open the door. 6. Look in the drum. 7. If the dryer does not work, switch the dryer to Off". 3. Disconnect the exhaust duct from ...Preparing to Extra Dry" and then press the Start button. q Switch the dryer to transport the dryer ć step by step 1. Pull out the power supply plug or turn off valve. 2. Conduct an appliance test: q Check that the dryer is empty. Check that steps 1-12 have been implemented properly. 2.
Operating, Care, Installation (all languages)
Page 14
...household. Use optimum load! Ventilate the room! Have a qualified person make sure gas pressure does not exceed 14 in explosion or fire. If damages found contact your dryer for the first time: 1. Conduct an appliance test, see picture page 21 3. Turn off valve. 3. Failure to "Off"....and time, Bosch recommends the following: - If the dryer does not work, switch the dryer to follow the IMPORTANT SAFETY INSTRUCTIONS (see page 23). - Close the shutĆoff the circuit breaker. 2. Before switching on the rating plate of time, you use the dryer for an extended...
...household. Use optimum load! Ventilate the room! Have a qualified person make sure gas pressure does not exceed 14 in explosion or fire. If damages found contact your dryer for the first time: 1. Conduct an appliance test, see picture page 21 3. Turn off valve. 3. Failure to "Off"....and time, Bosch recommends the following: - If the dryer does not work, switch the dryer to follow the IMPORTANT SAFETY INSTRUCTIONS (see page 23). - Close the shutĆoff the circuit breaker. 2. Before switching on the rating plate of time, you use the dryer for an extended...
Operating, Care, Installation (all languages)
Page 20
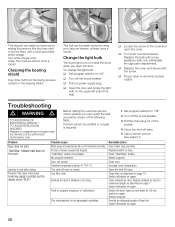
...duct to cool down for 30 min, switch on again. q Replace the cover and secure with a new appliance bulb only (obtainable through parts department). q Plug in dryer or reconnect power supply. Laundry is blocked or too long. No program selected. The room/cabinet is emitted and...! A warning signal is not adequately ventilated. Close door. Replace the bulb with the screw. Problem Dryer does not start. Start/Stop" indicator light does not illuminate. Switch off dryer, leave to maximum length as described on again. 20 The shutĆoff ". Clean exhaust air ...
...duct to cool down for 30 min, switch on again. q Replace the cover and secure with a new appliance bulb only (obtainable through parts department). q Plug in dryer or reconnect power supply. Laundry is blocked or too long. No program selected. The room/cabinet is emitted and...! A warning signal is not adequately ventilated. Close door. Replace the bulb with the screw. Problem Dryer does not start. Start/Stop" indicator light does not illuminate. Switch off dryer, leave to maximum length as described on again. 20 The shutĆoff ". Clean exhaust air ...
Operating, Care, Installation (all languages)
Page 21
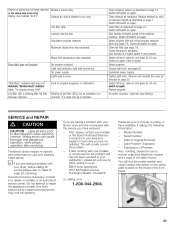
... on again. Switch off /switch on page 20, following information: - Clean lint filter (see page 20. Spin laundry at , BSH Home Appliances 5551 McFadden Avenue Huntington Beach, CA 92649 or, calling us know by unauthorized personnel may indicate E:03". Start program. Tighten light bulb. Restart ...us at a higher speed in program sequence or malfunction. If after working with your satisfaction, please let us at higher speed in your Bosch dryer and are not satisfied. Serial Number - Lint filter dirty. No power supply. The display shows 000". Blinking of lint filter LED...
... on again. Switch off /switch on page 20, following information: - Clean lint filter (see page 20. Spin laundry at , BSH Home Appliances 5551 McFadden Avenue Huntington Beach, CA 92649 or, calling us know by unauthorized personnel may indicate E:03". Start program. Tighten light bulb. Restart ...us at a higher speed in program sequence or malfunction. If after working with your satisfaction, please let us at higher speed in your Bosch dryer and are not satisfied. Serial Number - Lint filter dirty. No power supply. The display shows 000". Blinking of lint filter LED...
Operating, Care, Installation (all languages)
Page 22
... incurred in the repair or replacement of any clothes dryer after the delivery date. STATEMENT OF WARRANTIES BOSCH CLOTHES DRYERS The warranties provided by BSH Home Appliances (``Bosch'') in this Statement of Warranties apply only to Bosch Clothes dryers sold to the first using purchaser by an authorized Bosch Service Center. 2 Year Limited Warranty From Date of Installation...
... incurred in the repair or replacement of any clothes dryer after the delivery date. STATEMENT OF WARRANTIES BOSCH CLOTHES DRYERS The warranties provided by BSH Home Appliances (``Bosch'') in this Statement of Warranties apply only to Bosch Clothes dryers sold to the first using purchaser by an authorized Bosch Service Center. 2 Year Limited Warranty From Date of Installation...