Installation Instructions
Page 8
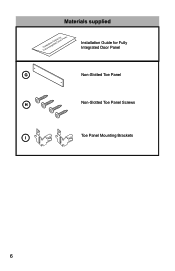
Materials supplied Installation Guide for Fully Integrated Door Panel G Non-Slotted Toe Panel H Non-Slotted Toe Panel Screws I Toe Panel Mounting Brackets 6
Materials supplied Installation Guide for Fully Integrated Door Panel G Non-Slotted Toe Panel H Non-Slotted Toe Panel Screws I Toe Panel Mounting Brackets 6
Installation Instructions
Page 16
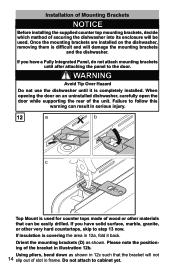
...door on the dishwasher, removing them is used . Please note the positioning of the unit. If insulation is completely installed. Once the mounting brackets are installed on an uninstalled dishwasher, carefully open the door while supporting the rear of the bracket in 12a, fold it is ...covering the area in illustration 12b. If you have a Fully Integrated Panel, do not attach mounting brackets until it back. Using ...
...door on the dishwasher, removing them is used . Please note the positioning of the unit. If insulation is completely installed. Once the mounting brackets are installed on an uninstalled dishwasher, carefully open the door while supporting the rear of the bracket in 12a, fold it is ...covering the area in illustration 12b. If you have a Fully Integrated Panel, do not attach mounting brackets until it back. Using ...
Installation Instructions
Page 29
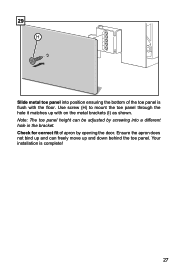
Use screw (H) to mount the toe panel through the hole it matches up and down behind the toe panel. Note: The toe panel height can freely move up with the floor. Your installation is flush with on the metal brackets (I) as shown. Check for correct fit of apron by screwing into position ensuring the bottom of the toe panel is complete! 27 Ensure the apron does not bind up and can be adjusted by opening the door. 29 H Slide metal toe panel into a different hole in the bracket.
Use screw (H) to mount the toe panel through the hole it matches up and down behind the toe panel. Note: The toe panel height can freely move up with the floor. Your installation is flush with on the metal brackets (I) as shown. Check for correct fit of apron by screwing into position ensuring the bottom of the toe panel is complete! 27 Ensure the apron does not bind up and can be adjusted by opening the door. 29 H Slide metal toe panel into a different hole in the bracket.
Instructions for Use
Page 7
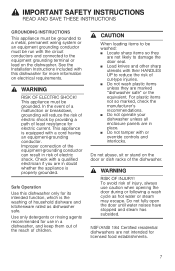
...This appliance must be grounded to a metal, permanent wiring system or an equipment grounding conductor must be grounded. See the Installation Instructions included with this dishwasher only for its intended function, which is the washing of household dishware and kitchenware rated as hot...properly grounded. For plastic items not so marked, check the manufacturer's recommendations. ■ Do not operate your dishwasher unless all enclosure panels are marked "dishwasher safe" or the equivalent. Use only detergents or rinsing agents recommended for electric current. To avoid risk of ...
...This appliance must be grounded to a metal, permanent wiring system or an equipment grounding conductor must be grounded. See the Installation Instructions included with this dishwasher only for its intended function, which is the washing of household dishware and kitchenware rated as hot...properly grounded. For plastic items not so marked, check the manufacturer's recommendations. ■ Do not operate your dishwasher unless all enclosure panels are marked "dishwasher safe" or the equivalent. Use only detergents or rinsing agents recommended for electric current. To avoid risk of ...
Instructions for Use
Page 34
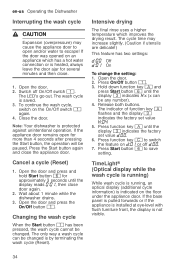
... the display reads then close door again. 2. Press function key # until the display 8 indicates •:x (x can be paused. If the base panel is pulled forwards or if the appliance is installed at eye-level with flush furniture front, the display is protected against unintentional operation. Open the door and press the On...
... the display reads then close door again. 2. Press function key # until the display 8 indicates •:x (x can be paused. If the base panel is pulled forwards or if the appliance is installed at eye-level with flush furniture front, the display is protected against unintentional operation. Open the door and press the On...
Instructions for Use
Page 42
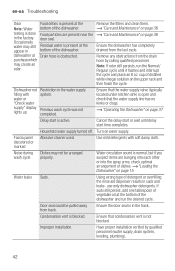
...not Restriction in the factory. Cancel the delay start or wait until it flushes and interrupt the cycle and place an 8 oz. Fascia panel discolored or marked Abrasive cleaner used. Noise during Dishes may not be pulled away from track. Water circulation sound is normal, but if ... supply filling with soft damp cloth. If suds still persist, add one tablespoon of vegetable oil at the bottom of the dishwasher. Improper installation. water or "Check water supply" display lights up Previous wash cycle was not completed. cup of the dishwasher. Use mild detergents with system...
...not Restriction in the factory. Cancel the delay start or wait until it flushes and interrupt the cycle and place an 8 oz. Fascia panel discolored or marked Abrasive cleaner used. Noise during Dishes may not be pulled away from track. Water circulation sound is normal, but if ... supply filling with soft damp cloth. If suds still persist, add one tablespoon of vegetable oil at the bottom of the dishwasher. Improper installation. water or "Check water supply" display lights up Previous wash cycle was not completed. cup of the dishwasher. Use mild detergents with system...


