Installation Instructions
Page 4
.... Attaching the toe kick panel 29 17. Adjusting the door opening angle 41 31. Removing the packaging 19 4. Attaching the finger guard 36 25. Changing over the door hinges 20 6. Attaching an alternative antiĆtip device 24 8. Transport of air separator 40 30. Preparing to the appliance 28 16. Attaching the covers 37 26. Preparing the installation cavity 22 7. Mounting...
.... Attaching the toe kick panel 29 17. Adjusting the door opening angle 41 31. Removing the packaging 19 4. Attaching the finger guard 36 25. Changing over the door hinges 20 6. Attaching an alternative antiĆtip device 24 8. Transport of air separator 40 30. Preparing to the appliance 28 16. Attaching the covers 37 26. Preparing the installation cavity 22 7. Mounting...
Installation Instructions
Page 5
... instructions with your Owner's Manual for future reference. e WARNING These appliances are intended for use . e CAUTION Skill - e WARNING Use this installation manual cannot be secured to something in particular. Unplug the appliance or switch off the fuse before cleaning or making repairs. - Definitions d WARNING d WARNING - Repairs should be carried out by a qualified service technician. 5 Note to leave these instructions with the Consumer. All connections for water, electrical power...
... instructions with your Owner's Manual for future reference. e WARNING These appliances are intended for use . e CAUTION Skill - e WARNING Use this installation manual cannot be secured to something in particular. Unplug the appliance or switch off the fuse before cleaning or making repairs. - Definitions d WARNING d WARNING - Repairs should be carried out by a qualified service technician. 5 Note to leave these instructions with the Consumer. All connections for water, electrical power...

Installation Instructions
Page 7
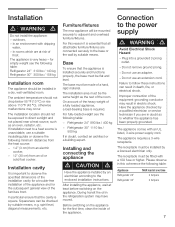
... Water Dispenser) Installation room The appliance should be flush. If installation next to adjacent and overhead furniture/fixtures. spirit level, diagonal measurements, etc. i The side walls of frost. A thickness of ¾" (19 mm) is unavoidable, use a suitable insulating plate or observe the following table: Refrigerator 24" Refrigerator 30" approx. 310 lbs / 140 kg approx. 350 lbs / 158 kg Freezer...
... Water Dispenser) Installation room The appliance should be flush. If installation next to adjacent and overhead furniture/fixtures. spirit level, diagonal measurements, etc. i The side walls of frost. A thickness of ¾" (19 mm) is unavoidable, use a suitable insulating plate or observe the following table: Refrigerator 24" Refrigerator 30" approx. 310 lbs / 140 kg approx. 350 lbs / 158 kg Freezer...
Installation Instructions
Page 8
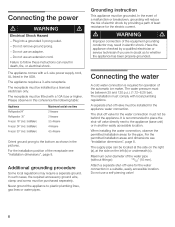
... required for operation of electric shock by a licensed electrician only. When installing the water connection, observe the permitted installation areas for the water connection in electric shock. The supply pipe can result in another easily accessible location. Failure to follow these instructions can be behind the appliance. Additional grounding procedure3. The shutĆoff valve directly next to plastic plumbing lines, gas lines or water pipes. Plug into...
... required for operation of electric shock by a licensed electrician only. When installing the water connection, observe the permitted installation areas for the water connection in electric shock. The supply pipe can result in another easily accessible location. Failure to follow these instructions can be behind the appliance. Additional grounding procedure3. The shutĆoff valve directly next to plastic plumbing lines, gas lines or water pipes. Plug into...
Installation Instructions
Page 17
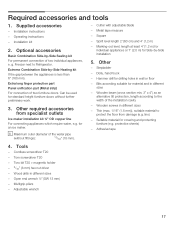
... truck - protective sheets) - Other required accessories from damage (e.g. MarkingĆout level, length at least 4' (1.2 m) for individual appliances or 7' (2.0 m) for material and in different sizes - Hammer drill for covering and protecting furniture (e.g. Required accessories and tools 1. Supplied accessories - Operating instructions - g. Freezer next to protect the floor from specialist outlets Ice maker installation kit ¼" OD copper line For connecting appliances which require water, e.g. Extreme Combination...
... truck - protective sheets) - Other required accessories from damage (e.g. MarkingĆout level, length at least 4' (1.2 m) for individual appliances or 7' (2.0 m) for material and in different sizes - Hammer drill for covering and protecting furniture (e.g. Required accessories and tools 1. Supplied accessories - Operating instructions - g. Freezer next to protect the floor from specialist outlets Ice maker installation kit ¼" OD copper line For connecting appliances which require water, e.g. Extreme Combination...
Installation Instructions
Page 18
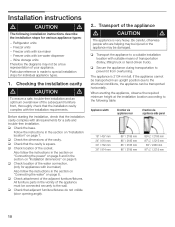
... with ice maker) Also follow the instructions in the section on Connecting the power" on page 8 and in the section on Installation location" on page 7. q Secure the appliance during transportation to the following installation instructions describe the installation steps for individual appliance types. 1. Follow the instructions in the section on Installation dimensions" on page 8. When erecting the appliance, observe the required minimum height at the installation location...
... with ice maker) Also follow the instructions in the section on Connecting the power" on page 8 and in the section on Installation location" on page 7. q Secure the appliance during transportation to the following installation instructions describe the installation steps for individual appliance types. 1. Follow the instructions in the section on Installation dimensions" on page 8. When erecting the appliance, observe the required minimum height at the installation location...

Installation Instructions
Page 23
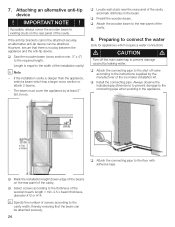
..." (2 mm) for this anchor. Do not use in lightĆweight masonry material such as block or brick. q Drill a 10 mm diameter hole any depth exceeding the minimum embedment. q Clean hole or continue drilling additional depth. 23 q ...plug until the screw head is approx. ½" (13 mm) from the antiĆtip bracket. q Tighten the screw. Use the provided drill. q Manually insert the screw into the hole until the screw begins to cure. Concrete floor applications d CAUTION d Always wear safety glasses and other necessary protective devices or apparel when installing or working...
..." (2 mm) for this anchor. Do not use in lightĆweight masonry material such as block or brick. q Drill a 10 mm diameter hole any depth exceeding the minimum embedment. q Clean hole or continue drilling additional depth. 23 q ...plug until the screw head is approx. ½" (13 mm) from the antiĆtip bracket. q Tighten the screw. Use the provided drill. q Manually insert the screw into the hole until the screw begins to cure. Concrete floor applications d CAUTION d Always wear safety glasses and other necessary protective devices or apparel when installing or working...
Installation Instructions
Page 24
...caused by leaking water. If the installation cavity is deeper than the appliance, select a beam which require a water connection) d CAUTION d Turn off valve according to the rear panel of the ice maker installation kit. Always observe the indicated gap dimensions to ...cover the appliance by the manufacturer of the cavity. 8. q Locate wall studs near the rear panel of screws according to the connecting pipe when pushing in the beam. q Attach the wooden beam to the instructions supplied by at least 2" (50.8 mm). q Attach the connecting pipe to the shutĆoff the main water...
...caused by leaking water. If the installation cavity is deeper than the appliance, select a beam which require a water connection) d CAUTION d Turn off valve according to the rear panel of the ice maker installation kit. Always observe the indicated gap dimensions to ...cover the appliance by the manufacturer of the cavity. 8. q Locate wall studs near the rear panel of screws according to the connecting pipe when pushing in the beam. q Attach the wooden beam to the instructions supplied by at least 2" (50.8 mm). q Attach the connecting pipe to the shutĆoff the main water...

Installation Instructions
Page 32
...section on Optional accessories" on the rear. Always screw into fillers, decorative strips or similar. Attaching the adjusting rail to the furniture doors, observe the maximum possible length of the screws and the position of the drill holes. In the case ... 44 lbs / 20 kg q Unscrew the installation support part from customer service as possible. i Using the positioning aid, set both longitudinal sides of the furniture door. These furniture doors must be connected to ensure that the gap width is recommended to load the door storage compartments in the appliance with weights in ...
...section on Optional accessories" on the rear. Always screw into fillers, decorative strips or similar. Attaching the adjusting rail to the furniture doors, observe the maximum possible length of the screws and the position of the drill holes. In the case ... 44 lbs / 20 kg q Unscrew the installation support part from customer service as possible. i Using the positioning aid, set both longitudinal sides of the furniture door. These furniture doors must be connected to ensure that the gap width is recommended to load the door storage compartments in the appliance with weights in ...
Installation Instructions
Page 34
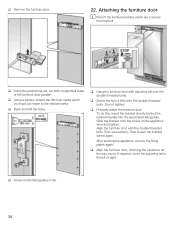
q Remove the furniture door. 22. q Using the positioning aid, set both longitudinal sides of the furniture door parallel. q Using a square, extend the drill hole marks which are screwed from behind the furniture handle into the associated fixing plate. If required, move the adjusting rail to the vertical marks. q Mark and drill the holes. Do not tighten! Slide the bracket onto the...
q Remove the furniture door. 22. q Using the positioning aid, set both longitudinal sides of the furniture door parallel. q Using a square, extend the drill hole marks which are screwed from behind the furniture handle into the associated fixing plate. If required, move the adjusting rail to the vertical marks. q Mark and drill the holes. Do not tighten! Slide the bracket onto the...

Installation Instructions
Page 38
... the cover strip into the space between the appliance and the wooden panel. 26. This allows the dispenser to be aligned inside the cutout of the 4 slots and push the blocks sideways until the iceĆwater dispenser are the same distance from the furniture door. A Appliance B Furniture q Screw on the brackets (side) for freezer unit with iceĆwater dispenser only...
... the cover strip into the space between the appliance and the wooden panel. 26. This allows the dispenser to be aligned inside the cutout of the 4 slots and push the blocks sideways until the iceĆwater dispenser are the same distance from the furniture door. A Appliance B Furniture q Screw on the brackets (side) for freezer unit with iceĆwater dispenser only...
Use & Care Manual
Page 3
... IMPORTANT SAFETY INSTRUCTIONS 4 Congratulations 5 Your new appliance 6 Installation 7 Installing and connecting the appliance 7 Connection to the power supply 7 Additional grounding procedure 8 Grounding instruction 8 Switching on the appliance 8 Switching off and disconnecting the appliance 8 Functions 8 Variable interior design 9 Control panel 10 Setting the temperature 11 Super function 11 Setup mode 11 Settings which can be changed in setup mode 12 Vacation Mode 13 Sabbath Mode 13 Refrigerating 14 How to save energy 14 Operating noises 14 Defrosting 14 Cleaning the...
... IMPORTANT SAFETY INSTRUCTIONS 4 Congratulations 5 Your new appliance 6 Installation 7 Installing and connecting the appliance 7 Connection to the power supply 7 Additional grounding procedure 8 Grounding instruction 8 Switching on the appliance 8 Switching off and disconnecting the appliance 8 Functions 8 Variable interior design 9 Control panel 10 Setting the temperature 11 Super function 11 Setup mode 11 Settings which can be changed in setup mode 12 Vacation Mode 13 Sabbath Mode 13 Refrigerating 14 How to save energy 14 Operating noises 14 Defrosting 14 Cleaning the...
Use & Care Manual
Page 4
... grounded. Never ground the appliance to the light circuit. Unplug your refrigerator before it is used. 3. Before replacing a burnedĆout light bulb, set the on the bottom of the icemaker. NOTE: Setting the refrigerator temperature controls to OFF does not remove power to plastic plumbing lines, gas lines or water pipes. 4 even if they will reduce the risk of electric shock by a licensed electrician only. In the...
... grounded. Never ground the appliance to the light circuit. Unplug your refrigerator before it is used. 3. Before replacing a burnedĆout light bulb, set the on the bottom of the icemaker. NOTE: Setting the refrigerator temperature controls to OFF does not remove power to plastic plumbing lines, gas lines or water pipes. 4 even if they will reduce the risk of electric shock by a licensed electrician only. In the...

Use & Care Manual
Page 5
... throwing away an old refrigeration product, make sure the CFC refrigerant is suitable for the next owner. Observe all documents for subsequent use only. 5 Definitions d WARNING d WARNING - General information This appliance is removed for future reference. Note to something in perfect condition. This indicates that used to draw the user's attention to Consumer ć Keep these operating instructions as well as a result...
... throwing away an old refrigeration product, make sure the CFC refrigerant is suitable for the next owner. Observe all documents for subsequent use only. 5 Definitions d WARNING d WARNING - General information This appliance is removed for future reference. Note to something in perfect condition. This indicates that used to draw the user's attention to Consumer ć Keep these operating instructions as well as a result...
Use & Care Manual
Page 7
... use an adapter. - in death, fire, or electrical shock. Refrigerator 30" 1110 lbs / 500 kg If in an environment with an UL listed, 3Ćwire power supply cord. The appliance is required. Before switching on the appliance. Failure to observe the specified dimensions of the installation cavity for a troubleĆfree installation of the appliance and for the first time, clean the inside of frost. Installation...
... use an adapter. - in death, fire, or electrical shock. Refrigerator 30" 1110 lbs / 500 kg If in an environment with an UL listed, 3Ćwire power supply cord. The appliance is required. Before switching on the appliance. Failure to observe the specified dimensions of the installation cavity for a troubleĆfree installation of the appliance and for the first time, clean the inside of frost. Installation...
Use & Care Manual
Page 14
...). Bubbling, humming or gurgling noises ć refrigerant is running . Use the heightĆadjustable feet or place something underneath. Drawers, baskets or storage areas wobble or stick Check the removable parts and, if required, reinsert them in the dishwasher. Do not let the water used for cleaning drip onto the control panel or light. Pull out the mains plug or switch off button! q Check the ventilation openings on or off. How...
...). Bubbling, humming or gurgling noises ć refrigerant is running . Use the heightĆadjustable feet or place something underneath. Drawers, baskets or storage areas wobble or stick Check the removable parts and, if required, reinsert them in the dishwasher. Do not let the water used for cleaning drip onto the control panel or light. Pull out the mains plug or switch off button! q Check the ventilation openings on or off. How...
Use & Care Manual
Page 15
.... Remedial action q Close the door. A technical defect is prolonged, inform your supplier inform you about special cleaning and care information for appliance surfaces. An appliance door has not been closed properly or has been open too long. After cleaning: q Reinsert the mains plug or switch on /off button. Switch on the appliance with the on Changing the odor filter". Then immediately wipe dry...
.... Remedial action q Close the door. A technical defect is prolonged, inform your supplier inform you about special cleaning and care information for appliance surfaces. An appliance door has not been closed properly or has been open too long. After cleaning: q Reinsert the mains plug or switch on /off button. Switch on the appliance with the on Changing the odor filter". Then immediately wipe dry...
Use & Care Manual
Page 16
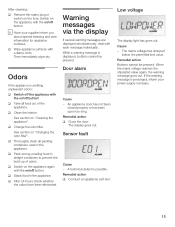
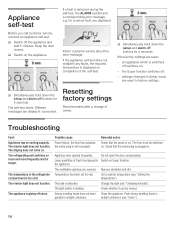
...; Appliance door opened frequently. airtight containers (see Setting the temperature"). for 5 seconds. If the factory settings are displayed. The temperature in Switch on the appliance. Inform customer service about the error message. Resetting factory settings Recommended after a change of the selfĆtest. The interior light does not function. Possible cause Power failure; The fuse must be moved. the appliance. Set a warmer temperature (see Odors"). 16 Change the bulb (see Changing the bulb"). Troubleshooting Fault...
...; Appliance door opened frequently. airtight containers (see Setting the temperature"). for 5 seconds. If the factory settings are displayed. The temperature in Switch on the appliance. Inform customer service about the error message. Resetting factory settings Recommended after a change of the selfĆtest. The interior light does not function. Possible cause Power failure; The fuse must be moved. the appliance. Set a warmer temperature (see Odors"). 16 Change the bulb (see Changing the bulb"). Troubleshooting Fault...

Use & Care Manual
Page 18
... q Remove the Temperature Controlled Drawer. q Open the filter holder. q Pull out used odor filter. q Insert the filter mats. q Release the cover and remove from your dealer. q Insert a new halogen bulb. i Open the filter holder for cleaning only. q Insert a new odor filter. Halogen bulb in the FlexTemp drawer Halogen bulb type: 5 W/12 V/socket G4 Cleaning the FlexTemp filter To clean the filter mats in clear water. Touch the halogen bulb with both hands (1.). Clean the filter mats in the Temperature Controlled Drawer: Changing the odor filter i Replacement filters...
... q Remove the Temperature Controlled Drawer. q Open the filter holder. q Pull out used odor filter. q Insert the filter mats. q Release the cover and remove from your dealer. q Insert a new halogen bulb. i Open the filter holder for cleaning only. q Insert a new odor filter. Halogen bulb in the FlexTemp drawer Halogen bulb type: 5 W/12 V/socket G4 Cleaning the FlexTemp filter To clean the filter mats in clear water. Touch the halogen bulb with both hands (1.). Clean the filter mats in the Temperature Controlled Drawer: Changing the odor filter i Replacement filters...

Use & Care Manual
Page 20
... your refrigerator, to instruct you need service, first see the "Troubleshooting" section of this book and your refrigerator, to replace house fuses or correct house wiring or plumbing, to replace light bulbs, or to replace water filters other than normal, singleĆfamily household use. 3. Contact your designated Bosch Canada service company or call 1-800-944-2904 . You must be repaired in the home. 4. Water filter cartridge: 30 day limited warranty on water filter...
... your refrigerator, to instruct you need service, first see the "Troubleshooting" section of this book and your refrigerator, to replace house fuses or correct house wiring or plumbing, to replace light bulbs, or to replace water filters other than normal, singleĆfamily household use. 3. Contact your designated Bosch Canada service company or call 1-800-944-2904 . You must be repaired in the home. 4. Water filter cartridge: 30 day limited warranty on water filter...


