Beretta Stampede User Manual
Page 3
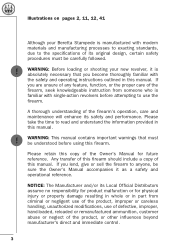
...you become thoroughly familiar with the safety and operating instructions outlined in part from someone who is manufactured with single-action revolvers before using this manual. Please take the time to anyone, be understood before attempting to the specifications of the ...'s direct and immediate control. 3 NOTICE: The Manufacturer and/or its safety and performance. WARNING: Before loading or shooting your Beretta Stampede is familiar with modern materials and manufacturing processes to exacting standards, due to use of defective, improper, hand-loaded, reloaded or...
...you become thoroughly familiar with the safety and operating instructions outlined in part from someone who is manufactured with single-action revolvers before using this manual. Please take the time to anyone, be understood before attempting to the specifications of the ...'s direct and immediate control. 3 NOTICE: The Manufacturer and/or its safety and performance. WARNING: Before loading or shooting your Beretta Stampede is familiar with modern materials and manufacturing processes to exacting standards, due to use of defective, improper, hand-loaded, reloaded or...

Beretta Stampede User Manual
Page 4
CONTENTS Page BASIC SAFETY RULES 5 NOMENCLATURE 11 DESCRIPTION 13 SPECIFICATIONS 14 REMOVING THE UNLOADED-CYLINDER INDICATOR RING 15 LOAD CHECK 16 OBSTRUCTION CHECK 19 BEFORE LOADING 21 GETTING A FEEL OF YOUR REVOLVER'S ACTION 23 AMMUNITION 25 LOADING 26 UNLOADING 28 UN-COCKING A LOADED REVOLVER 29 SIGHTING 31 FIRING 31 MAINTENANCE AND CLEANING 34 DISASSEMBLY 37 REASSEMBLY 39 STORAGE 39 4
CONTENTS Page BASIC SAFETY RULES 5 NOMENCLATURE 11 DESCRIPTION 13 SPECIFICATIONS 14 REMOVING THE UNLOADED-CYLINDER INDICATOR RING 15 LOAD CHECK 16 OBSTRUCTION CHECK 19 BEFORE LOADING 21 GETTING A FEEL OF YOUR REVOLVER'S ACTION 23 AMMUNITION 25 LOADING 26 UNLOADING 28 UN-COCKING A LOADED REVOLVER 29 SIGHTING 31 FIRING 31 MAINTENANCE AND CLEANING 34 DISASSEMBLY 37 REASSEMBLY 39 STORAGE 39 4
Beretta Stampede User Manual
Page 13
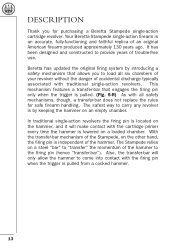
... firearm handling. Your Beretta Stampede single-action firearm is independent of an original American firearm produced approximately 130 years ago. With the transfer-bar mechanism of the Stampede, on the hammer, and it will only allow the hammer to come into contact with all six chambers of your revolver without the danger of... the firing pin (hence "transfer-bar"). DESCRIPTION Thank you to load all safety mechanisms, though, a transfer-bar does not replace the rules for purchasing a Beretta Stampede single-action cartridge revolver. The Stampede relies on a loaded chamber.
... firearm handling. Your Beretta Stampede single-action firearm is independent of an original American firearm produced approximately 130 years ago. With the transfer-bar mechanism of the Stampede, on the hammer, and it will only allow the hammer to come into contact with all six chambers of your revolver without the danger of... the firing pin (hence "transfer-bar"). DESCRIPTION Thank you to load all safety mechanisms, though, a transfer-bar does not replace the rules for purchasing a Beretta Stampede single-action cartridge revolver. The Stampede relies on a loaded chamber.
Beretta Stampede User Manual
Page 15
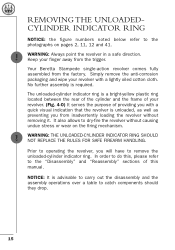
Your Beretta Stampede single-action revolver comes fully assembled from the trigger. The unloaded-cylinder indicator ring is unloaded, as well as preventing you from inadvertently loading the revolver without causing undue stress or wear on pages 2, 11, 12 and 41. ! WARNING: THE UNLOADED-CYLINDER INDICATOR RING SHOULD NOT ...rear of the cylinder and the frame of your finger away from the factory. In order to do this manual. Prior to operating the revolver, you with a lightly oiled cotton cloth. NOTICE: It is required. It also allows to catch components should they drop. 15 No...
Your Beretta Stampede single-action revolver comes fully assembled from the trigger. The unloaded-cylinder indicator ring is unloaded, as well as preventing you from inadvertently loading the revolver without causing undue stress or wear on pages 2, 11, 12 and 41. ! WARNING: THE UNLOADED-CYLINDER INDICATOR RING SHOULD NOT ...rear of the cylinder and the frame of your finger away from the factory. In order to do this manual. Prior to operating the revolver, you with a lightly oiled cotton cloth. NOTICE: It is required. It also allows to catch components should they drop. 15 No...
Beretta Stampede User Manual
Page 16
...• Never take or pull a firearm from another person. • Always visually and physically check to see that the cylinder of your Beretta Stampede single-action revolver is NOT a safety. This should become second nature to you, as you will be instructed to "visually and physically check to be certain ...the chambers are unloaded, and open and has been visually and physically checked to move. To visually and physically check to be certain your revolver will notice the cylinder beginning to confirm it is now in control of the hammer. 2. A blow to the hammer may allow the ...
...• Never take or pull a firearm from another person. • Always visually and physically check to see that the cylinder of your Beretta Stampede single-action revolver is NOT a safety. This should become second nature to you, as you will be instructed to "visually and physically check to be certain ...the chambers are unloaded, and open and has been visually and physically checked to move. To visually and physically check to be certain your revolver will notice the cylinder beginning to confirm it is now in control of the hammer. 2. A blow to the hammer may allow the ...
Beretta Stampede User Manual
Page 17
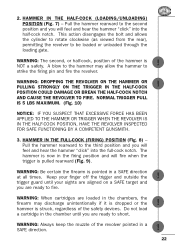
...). If the gun is aligned with your finger into all six (6) chambers (physical check) to make sure they are unloaded. 8. WARNING: DROPPING THE REVOLVER ON THE HAMMER OR ! Carefully place the tip of the six (6) chambers upon inspection, rotate the cylinder until the loaded chamber is confirmed to be...cock or loading position. 4. PULLING STRONGLY ON THE TRIGGER IN THE HALF-COCK POSITION COULD DAMAGE OR BREAK THE HALF-COCK NOTCH AND CAUSE THE REVOLVER TO FIRE. NORMAL TRIGGER PULL IS 5 LBS MAXIMUM. (Fig. 10) NOTICE: IF YOU SUSPECT THAT EXCESSIVE FORCE HAS BEEN APPLIED TO THE ...
...). If the gun is aligned with your finger into all six (6) chambers (physical check) to make sure they are unloaded. 8. WARNING: DROPPING THE REVOLVER ON THE HAMMER OR ! Carefully place the tip of the six (6) chambers upon inspection, rotate the cylinder until the loaded chamber is confirmed to be...cock or loading position. 4. PULLING STRONGLY ON THE TRIGGER IN THE HALF-COCK POSITION COULD DAMAGE OR BREAK THE HALF-COCK NOTCH AND CAUSE THE REVOLVER TO FIRE. NORMAL TRIGGER PULL IS 5 LBS MAXIMUM. (Fig. 10) NOTICE: IF YOU SUSPECT THAT EXCESSIVE FORCE HAS BEEN APPLIED TO THE ...
Beretta Stampede User Manual
Page 18
... while pulling the trigger until the hammer is again fully lowered. 18 WARNING: FAILING TO MANUALLY CONTROL THE HAMMER AT THIS STAGE COULD CAUSE THE REVOLVER TO FIRE IF A CARTRIDGE IS IN THE CYLINDER. 12. Ease the hammer forward with the thumb, pull the hammer rearward and gently pull the trigger...
... while pulling the trigger until the hammer is again fully lowered. 18 WARNING: FAILING TO MANUALLY CONTROL THE HAMMER AT THIS STAGE COULD CAUSE THE REVOLVER TO FIRE IF A CARTRIDGE IS IN THE CYLINDER. 12. Ease the hammer forward with the thumb, pull the hammer rearward and gently pull the trigger...
Beretta Stampede User Manual
Page 20
... rod or other suitable device, probe each of the six (6) chambers and check to make sure no obstruction is detected, reassemble your revolver precisely. Carefully hold the removed cylinder so that you can be fired. ! If an obstruction in any of the six (6) chambers to fit... see completely through each of the six (6) chambers or the bore is detected, a qualified gunsmith must remove the obstruction and inspect the revolver before it can see completely through the barrel to make sure no obstruction exists (visual check). 9. CAUTION: The cylinder is manufactured to make...
... rod or other suitable device, probe each of the six (6) chambers and check to make sure no obstruction is detected, reassemble your revolver precisely. Carefully hold the removed cylinder so that you can be fired. ! If an obstruction in any of the six (6) chambers to fit... see completely through each of the six (6) chambers or the bore is detected, a qualified gunsmith must remove the obstruction and inspect the revolver before it can see completely through the barrel to make sure no obstruction exists (visual check). 9. CAUTION: The cylinder is manufactured to make...
Beretta Stampede User Manual
Page 21
...lowers and disengages. CAUTION: Do not "dry fire" your Beretta Stampede single-action revolver may result in the chamber until you are three (3) separate hammer positions, each shot. (Fig. 8) The action of your UNLOADED revolver, notice that there are ready to shoot. However, the ... loaded in the chamber forward of releasing the cocked hammer. The yellow firing-pin protector is pulled. Dry firing your Beretta Stampede single-action revolver without live ammunition. "Snap caps" (inert chamber inserts that the firing pin only comes into contact with no ammunition ...
...lowers and disengages. CAUTION: Do not "dry fire" your Beretta Stampede single-action revolver may result in the chamber until you are three (3) separate hammer positions, each shot. (Fig. 8) The action of your UNLOADED revolver, notice that there are ready to shoot. However, the ... loaded in the chamber forward of releasing the cocked hammer. The yellow firing-pin protector is pulled. Dry firing your Beretta Stampede single-action revolver without live ammunition. "Snap caps" (inert chamber inserts that the firing pin only comes into contact with no ammunition ...
Beretta Stampede User Manual
Page 22
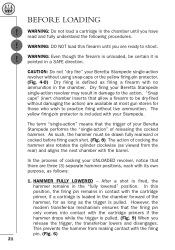
... into the half-cock notch. This action disengages the bolt and allows the cylinder to rotate clockwise (as viewed from the rear), permitting the revolver to the hammer may discharge unintentionally if it is dropped or the hammer is struck, regardless of the hammer is NOT a safety. Do not.... ! ! ! ! ! 22 HAMMER IN THE HALF-COCK (LOADING/UNLOADING) POSITION (Fig. 7) - A blow to be loaded or unloaded through the loading gate. WARNING: DROPPING THE REVOLVER ON THE HAMMER OR PULLING STRONGLY ON THE TRIGGER IN THE HALF-COCK POSITION COULD DAMAGE OR BREAK THE HALF-COCK NOTCH AND CAUSE THE...
... into the half-cock notch. This action disengages the bolt and allows the cylinder to rotate clockwise (as viewed from the rear), permitting the revolver to the hammer may discharge unintentionally if it is dropped or the hammer is struck, regardless of the hammer is NOT a safety. Do not.... ! ! ! ! ! 22 HAMMER IN THE HALF-COCK (LOADING/UNLOADING) POSITION (Fig. 7) - A blow to be loaded or unloaded through the loading gate. WARNING: DROPPING THE REVOLVER ON THE HAMMER OR PULLING STRONGLY ON THE TRIGGER IN THE HALF-COCK POSITION COULD DAMAGE OR BREAK THE HALF-COCK NOTCH AND CAUSE THE...
Beretta Stampede User Manual
Page 23
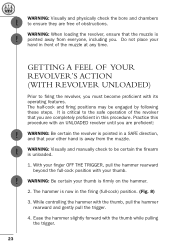
...your thumb is ! Practice this procedure. WARNING: Be certain your hand in front of the revolver that you are completely proficient in this procedure with an UNLOADED revolver until you are free of obstructions. While controlling the hammer with the thumb while pulling the trigger...the muzzle at any time. WARNING: When loading the revolver, ensure that your thumb. ! WARNING: Be certain the revolver is pointed in the firing (full-cock) position. (Fig. 8) 3. GETTING A FEEL OF YOUR REVOLVER'S ACTION (WITH REVOLVER UNLOADED) Prior to ensure they are proficient: ! With...
...your thumb is ! Practice this procedure. WARNING: Be certain your hand in front of the revolver that you are completely proficient in this procedure with an UNLOADED revolver until you are free of obstructions. While controlling the hammer with the thumb while pulling the trigger...the muzzle at any time. WARNING: When loading the revolver, ensure that your thumb. ! WARNING: Be certain the revolver is pointed in the firing (full-cock) position. (Fig. 8) 3. GETTING A FEEL OF YOUR REVOLVER'S ACTION (WITH REVOLVER UNLOADED) Prior to ensure they are proficient: ! With...
Beretta Stampede User Manual
Page 24
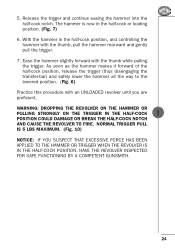
... LBS MAXIMUM. (Fig. 10) NOTICE: IF YOU SUSPECT THAT EXCESSIVE FORCE HAS BEEN APPLIED TO THE HAMMER OR TRIGGER WHEN THE REVOLVER IS IN THE HALF-COCK POSITION, HAVE THE REVOLVER INSPECTED FOR SAFE FUNCTIONING BY A COMPETENT GUNSMITH. 24 With the hammer in the half-cock or loading position. (Fig. 7) 6. ... disengaging the transfer-bar) and safely lower the hammer all the way to the lowered position. (Fig. 6) Practice this procedure with an UNLOADED revolver until you are proficient. PULLING STRONGLY ON THE TRIGGER IN THE HALF-COCK POSITION COULD DAMAGE OR BREAK THE HALF-COCK NOTCH AND CAUSE THE...
... LBS MAXIMUM. (Fig. 10) NOTICE: IF YOU SUSPECT THAT EXCESSIVE FORCE HAS BEEN APPLIED TO THE HAMMER OR TRIGGER WHEN THE REVOLVER IS IN THE HALF-COCK POSITION, HAVE THE REVOLVER INSPECTED FOR SAFE FUNCTIONING BY A COMPETENT GUNSMITH. 24 With the hammer in the half-cock or loading position. (Fig. 7) 6. ... disengaging the transfer-bar) and safely lower the hammer all the way to the lowered position. (Fig. 6) Practice this procedure with an UNLOADED revolver until you are proficient. PULLING STRONGLY ON THE TRIGGER IN THE HALF-COCK POSITION COULD DAMAGE OR BREAK THE HALF-COCK NOTCH AND CAUSE THE...
Beretta Stampede User Manual
Page 25
... "remanufactured," or hand-loaded (reloaded) ammunition, or cartridges other dents or defects (this firearm. WARNING: Do not use of reloaded ammunition. Do not fire old ammunition in Beretta Stampede revolvers of , the use in this applies even to the shooter or others. ! Be certain the cartridge cases are not split, deformed, or the cartridges...
... "remanufactured," or hand-loaded (reloaded) ammunition, or cartridges other dents or defects (this firearm. WARNING: Do not use of reloaded ammunition. Do not fire old ammunition in Beretta Stampede revolvers of , the use in this applies even to the shooter or others. ! Be certain the cartridge cases are not split, deformed, or the cartridges...
Beretta Stampede User Manual
Page 26
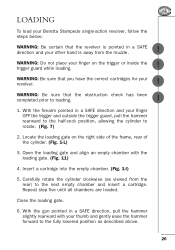
WARNING: Be certain that the revolver is away from the rear) to loading. 1. WARNING: Be sure that you have the correct ...Fig. 1-I) 5. Carefully rotate the cylinder clockwise (as described above. 26 Open the loading gate and align an empty chamber with your revolver. ! Repeat step five until all chambers are loaded. Locate the loading gate on the trigger or inside the trigger guard while loading.... slightly rearward with the loading gate. (Fig. 11) 4. With the firearm pointed in a SAFE direction and your Beretta Stampede single-action revolver, follow the steps below: !
WARNING: Be certain that the revolver is away from the rear) to loading. 1. WARNING: Be sure that you have the correct ...Fig. 1-I) 5. Carefully rotate the cylinder clockwise (as described above. 26 Open the loading gate and align an empty chamber with your revolver. ! Repeat step five until all chambers are loaded. Locate the loading gate on the trigger or inside the trigger guard while loading.... slightly rearward with the loading gate. (Fig. 11) 4. With the firearm pointed in a SAFE direction and your Beretta Stampede single-action revolver, follow the steps below: !
Beretta Stampede User Manual
Page 27
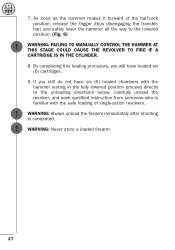
...position, release the trigger (thus disengaging the transferbar) and safely lower the hammer all the way to the unloading directions below, carefully unload the revolver, and seek qualified instruction from someone who is completed. ! WARNING: Always unload the firearm immediately after shooting is familiar with the hammer resting in...directly to the lowered position. (Fig. 6) ! WARNING: Never store a loaded firearm. 27 As soon as the hammer makes it forward of single-action revolvers. ! By completing this loading procedure, you still do not have loaded six (6) cartridges. 9. 7.
...position, release the trigger (thus disengaging the transferbar) and safely lower the hammer all the way to the unloading directions below, carefully unload the revolver, and seek qualified instruction from someone who is completed. ! WARNING: Always unload the firearm immediately after shooting is familiar with the hammer resting in...directly to the lowered position. (Fig. 6) ! WARNING: Never store a loaded firearm. 27 As soon as the hammer makes it forward of single-action revolvers. ! By completing this loading procedure, you still do not have loaded six (6) cartridges. 9. 7.

Beretta Stampede User Manual
Page 28
.... 28 While keeping the gun pointed in a SAFE direction and your other hand is away from the muzzle. ! WARNING: Do not place your Beretta Stampede single-action revolver, follow the steps below the front of the chamber. (Fig. 12) ! Open the loading gate, exposing the chamber/cartridge case. (Fig. ...ejector rod handle on the trigger or inside the trigger guard. 1. Doing so could damage the ejector rod. 5. WARNING: Be certain the revolver is pointed in a SAFE direction, move the ejector handle fully rearward to catch cartridges or fired cartridge cases as they are ejecting unfired ...
.... 28 While keeping the gun pointed in a SAFE direction and your other hand is away from the muzzle. ! WARNING: Do not place your Beretta Stampede single-action revolver, follow the steps below the front of the chamber. (Fig. 12) ! Open the loading gate, exposing the chamber/cartridge case. (Fig. ...ejector rod handle on the trigger or inside the trigger guard. 1. Doing so could damage the ejector rod. 5. WARNING: Be certain the revolver is pointed in a SAFE direction, move the ejector handle fully rearward to catch cartridges or fired cartridge cases as they are ejecting unfired ...
Beretta Stampede User Manual
Page 29
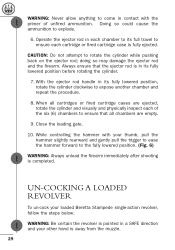
...rod and the firearm. With the ejector rod handle in its fully lowered position before rotating the cylinder. 7. WARNING: Be certain the revolver is pointed in a SAFE direction and your other hand is completed. When all cartridges or fired cartridge cases are ejected, rotate the ...the muzzle. 29 Always ensure that all chambers are empty. 9. While controlling the hammer with the ! UN-COCKING A LOADED REVOLVER To un-cock your loaded Beretta Stampede single-action revolver, follow the steps below: ! Close the loading gate. 10. primer of the six (6) chambers to expose another chamber and...
...rod and the firearm. With the ejector rod handle in its fully lowered position before rotating the cylinder. 7. WARNING: Be certain the revolver is pointed in a SAFE direction and your other hand is completed. When all cartridges or fired cartridge cases are ejected, rotate the ...the muzzle. 29 Always ensure that all chambers are empty. 9. While controlling the hammer with the ! UN-COCKING A LOADED REVOLVER To un-cock your loaded Beretta Stampede single-action revolver, follow the steps below: ! Close the loading gate. 10. primer of the six (6) chambers to expose another chamber and...
Beretta Stampede User Manual
Page 30
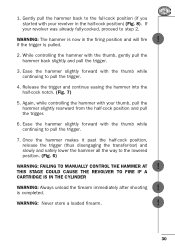
...controlling the hammer with the thumb while continuing to step 2. ! WARNING: FAILING TO MANUALLY CONTROL THE HAMMER AT THIS STAGE COULD CAUSE THE REVOLVER TO FIRE IF A CARTRIDGE IS IN THE CYLINDER ! WARNING: Always unload the firearm immediately after shooting is pulled. 2. Ease the hammer ...hammer slightly rearward from the half-cock position and pull the trigger. 6. WARNING: Never store a loaded firearm. ! 30 If your revolver in the firing position and will fire if the trigger is completed. Again, while controlling the hammer with the thumb while continuing to ...
...controlling the hammer with the thumb while continuing to step 2. ! WARNING: FAILING TO MANUALLY CONTROL THE HAMMER AT THIS STAGE COULD CAUSE THE REVOLVER TO FIRE IF A CARTRIDGE IS IN THE CYLINDER ! WARNING: Always unload the firearm immediately after shooting is pulled. 2. Ease the hammer ...hammer slightly rearward from the half-cock position and pull the trigger. 6. WARNING: Never store a loaded firearm. ! 30 If your revolver in the firing position and will fire if the trigger is completed. Again, while controlling the hammer with the thumb while continuing to ...
Beretta Stampede User Manual
Page 31
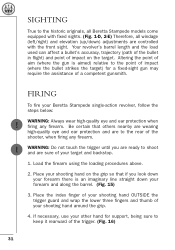
... to the historic originals, all Beretta Stampede models come equipped with fixed sights. (Fig. 1-D, 2-E) Therefore, all windage (left/right) and elevation (up/down your shooting hand on the target. Place your forearm and along the barrel. (Fig. 15) 3. Your revolver's barrel length and the load ...accuracy, trajectory (path of the bullet in flight) and point of the shooter, when firing any firearm. If necessary, use your Beretta Stampede single-action revolver, follow the steps below: ! WARNING: Do not touch the trigger until you look down your forearm there is an imaginary line ...
... to the historic originals, all Beretta Stampede models come equipped with fixed sights. (Fig. 1-D, 2-E) Therefore, all windage (left/right) and elevation (up/down your shooting hand on the target. Place your forearm and along the barrel. (Fig. 15) 3. Your revolver's barrel length and the load ...accuracy, trajectory (path of the bullet in flight) and point of the shooter, when firing any firearm. If necessary, use your Beretta Stampede single-action revolver, follow the steps below: ! WARNING: Do not touch the trigger until you look down your forearm there is an imaginary line ...
Beretta Stampede User Manual
Page 32
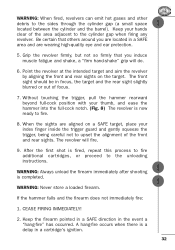
.... 6. A hang-fire occurs when there is fired, repeat this process to fire additional cartridges, or proceed to fire. 8. Point the revolver at the intended target and aim the revolver by aligning the front and rear sights on a SAFE target, place your thumb, and ease the hammer into the full-cock notch.... (Fig. 8) The revolver is completed. Keep the firearm pointed in a SAFE direction in a SAFE area and are aligned on the target. Keep your hands clear of focus. 7....
.... 6. A hang-fire occurs when there is fired, repeat this process to fire additional cartridges, or proceed to fire. 8. Point the revolver at the intended target and aim the revolver by aligning the front and rear sights on a SAFE target, place your thumb, and ease the hammer into the full-cock notch.... (Fig. 8) The revolver is completed. Keep the firearm pointed in a SAFE direction in a SAFE area and are aligned on the target. Keep your hands clear of focus. 7....