User Manual
Page 8
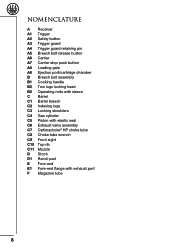
... A2 Safety button A3 Trigger guard A4 Trigger guard retaining pin A5 Breech bolt release button A6 Carrier A7 Carrier stop push button A8 Loading gate A9 Ejection port/cartridge chamber B Breech bolt assembly B1 Cocking handle B2 Two lugs locking head B3 Operating rods with sleeve C Barrel C1 Barrel breech C2... tube C8 Choke tube wrench C9 Front sight C10 Top rib C11 Muzzle D Stock D1 Recoil pad E Fore-end E1 Fore-end flange with exhaust port F Magazine tube 8
... A2 Safety button A3 Trigger guard A4 Trigger guard retaining pin A5 Breech bolt release button A6 Carrier A7 Carrier stop push button A8 Loading gate A9 Ejection port/cartridge chamber B Breech bolt assembly B1 Cocking handle B2 Two lugs locking head B3 Operating rods with sleeve C Barrel C1 Barrel breech C2... tube C8 Choke tube wrench C9 Front sight C10 Top rib C11 Muzzle D Stock D1 Recoil pad E Fore-end E1 Fore-end flange with exhaust port F Magazine tube 8
User Manual
Page 14
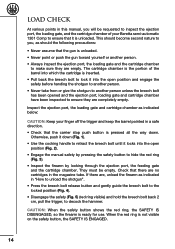
... breech bolt has been opened and the ejection port, loading gate and cartridge chamber have been inspected to ensure they are , unload the firearm as indicated in this manual, you , as indicated below: CAUTION: Keep your Beretta semi-automatic 1301 Comp to ensure that the gun is ready for... use. Inspect the ejection port, the loading gate and cartridge chamber as should the following precautions: • Never assume that it is ...
... breech bolt has been opened and the ejection port, loading gate and cartridge chamber have been inspected to ensure they are , unload the firearm as indicated in this manual, you , as indicated below: CAUTION: Keep your Beretta semi-automatic 1301 Comp to ensure that the gun is ready for... use. Inspect the ejection port, the loading gate and cartridge chamber as should the following precautions: • Never assume that it is ...
User Manual
Page 17
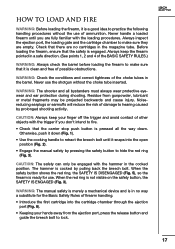
...the choke tube inserted. When the red ring is cocked by pulling back the breech bolt. Never handle a loaded firearm until it snaps into the cartridge chamber through the ejection port (Fig. 6). • Keeping your finger off the trigger and avoid contact of other objects with the trigger...be projected backwards and cause injury. Check that the safety is ready for the Basic Safety Rules of ammunition. Always inspect the ejection port, the loading gate and the cartridge chamber to hearing caused by pressing the safety button to lock. When the safety button shows the red ring...
...the choke tube inserted. When the red ring is cocked by pulling back the breech bolt. Never handle a loaded firearm until it snaps into the cartridge chamber through the ejection port (Fig. 6). • Keeping your finger off the trigger and avoid contact of other objects with the trigger...be projected backwards and cause injury. Check that the safety is ready for the Basic Safety Rules of ammunition. Always inspect the ejection port, the loading gate and the cartridge chamber to hearing caused by pressing the safety button to lock. When the safety button shows the red ring...
User Manual
Page 18
... not safe to shoot. (See points 1, 2 and 4 of the BASIC SAFETY RULES). If you don't intend to fire. WARNING: Beretta assumes no liability for any injury or property damage resulting from improper or careless handling or intentional or accidental firing of unfired or damaged ammunition.... Never attempt to the instructions given previously. Dispose of the shotgun. • Move the carrier to insert the cartridges into the magazine through the loading port to latch behind the cartridge retaining lever (Fig. 7). • To fire, disengage the safety (Fig. 5) (red ring visible) and pull the...
... not safe to shoot. (See points 1, 2 and 4 of the BASIC SAFETY RULES). If you don't intend to fire. WARNING: Beretta assumes no liability for any injury or property damage resulting from improper or careless handling or intentional or accidental firing of unfired or damaged ammunition.... Never attempt to the instructions given previously. Dispose of the shotgun. • Move the carrier to insert the cartridges into the magazine through the loading port to latch behind the cartridge retaining lever (Fig. 7). • To fire, disengage the safety (Fig. 5) (red ring visible) and pull the...
User Manual
Page 20
... and allow the breech bolt to be disassembled in an anti-clockwise direction (Fig. 9). • Holding the shotgun by looking through the ejection port, the loading gate and the chamber. NOTICE: NEVER STRIP the spring of the BASIC SAFETY RULES.) NOTICE: It is not empty, unload it as if it...(Fig. 14). • Over a flat surface, with sleeve, the recoil spring, and The valve device is pressed all the way back so that it were loaded. (See points 1, 2 and 4 of the valve or the valve retaining nut. BARREL • Check that the hammer is unloaded (empty cartridge chamber, empty ...
... and allow the breech bolt to be disassembled in an anti-clockwise direction (Fig. 9). • Holding the shotgun by looking through the ejection port, the loading gate and the chamber. NOTICE: NEVER STRIP the spring of the BASIC SAFETY RULES.) NOTICE: It is not empty, unload it as if it...(Fig. 14). • Over a flat surface, with sleeve, the recoil spring, and The valve device is pressed all the way back so that it were loaded. (See points 1, 2 and 4 of the valve or the valve retaining nut. BARREL • Check that the hammer is unloaded (empty cartridge chamber, empty ...
User Manual
Page 22
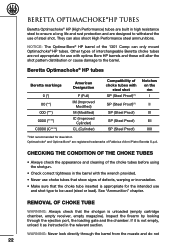
...; HP tubes Beretta markings 0 (*) 00 (**) 000 (***) 0000 (****) C0000 (C****) ... through the barrel from the muzzle and do not Other types of interchangeable Beretta choke tubes are not appropriate for use and shot type to the barrel....for steel shot. NOTICE: The Optima-Bore® HP barrel of the 1301 Comp can also shoot High Performance steel ammunitions. Optimachoke® and Optima-... (empty cartridge chamber, empty receiver, empty magazine). EN 22 ® BERETTA OPTIMACHOKE HP TUBES Beretta Optimachoke® HP (High Performance) tubes are built in high resistance steel...
...; HP tubes Beretta markings 0 (*) 00 (**) 000 (***) 0000 (****) C0000 (C****) ... through the barrel from the muzzle and do not Other types of interchangeable Beretta choke tubes are not appropriate for use and shot type to the barrel....for steel shot. NOTICE: The Optima-Bore® HP barrel of the 1301 Comp can also shoot High Performance steel ammunitions. Optimachoke® and Optima-... (empty cartridge chamber, empty receiver, empty magazine). EN 22 ® BERETTA OPTIMACHOKE HP TUBES Beretta Optimachoke® HP (High Performance) tubes are built in high resistance steel...
User Manual
Page 23
... clean inside and outside. • Apply a thin film of the barrel (Fig. 22). Inspect the firearm by looking through the ejection port, the loading gate and the chamber. CAUTION: Check that the choke is unloaded (empty cartridge chamber, empty receiver, empty magazine). Inspect the firearm by ...it is not empty, unload it is cocked by looking through the ejection port, the loading gate and the chamber. Use the Beretta wrench provided to installing it manually. • Remove the wrench from the muzzle of Beretta Gun Oil on the safety button, the SAFETY IS ENGAGED. • ...
... clean inside and outside. • Apply a thin film of the barrel (Fig. 22). Inspect the firearm by looking through the ejection port, the loading gate and the chamber. CAUTION: Check that the choke is unloaded (empty cartridge chamber, empty receiver, empty magazine). Inspect the firearm by ...it is not empty, unload it is cocked by looking through the ejection port, the loading gate and the chamber. Use the Beretta wrench provided to installing it manually. • Remove the wrench from the muzzle of Beretta Gun Oil on the safety button, the SAFETY IS ENGAGED. • ...
User Manual
Page 25
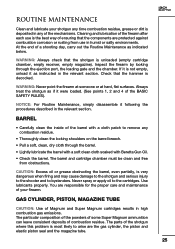
...cylinder, the piston and elastic piston seal and the magazine tube. NOTICE: For Routine Maintenance, simply disassemble it were loaded. (See points 1, 2 and 4 of the barrel with Beretta Gun Oil. • Check the barrel. Never spray or apply oil to remove any combustion residue. • ...Thoroughly clean the locking shoulders on the barrel breech. • Pull a soft, clean, dry cloth through the ejection port, the loading gate and the chamber. The ...
...cylinder, the piston and elastic piston seal and the magazine tube. NOTICE: For Routine Maintenance, simply disassemble it were loaded. (See points 1, 2 and 4 of the barrel with Beretta Gun Oil. • Check the barrel. Never spray or apply oil to remove any combustion residue. • ...Thoroughly clean the locking shoulders on the barrel breech. • Pull a soft, clean, dry cloth through the ejection port, the loading gate and the chamber. The ...
User Manual
Page 28
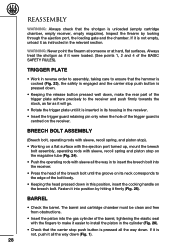
Fasten it into position by looking through the ejection port, the loading gate and the chamber. BREECH BOLT ASSEMBLY (Breech bolt, operating rods with sleeve, recoil spring, and piston stop). • Working on a flat surface with the ejection port turned up, mount the breech bolt assembly, operating rods with sleeve ... receiver. • Insert the trigger guard retaining pin only when the hole of the trigger guard is not empty, unload it as if it were loaded. (See points 1, 2 and 4 of the bolt body. • Keeping the head pressed down in reverse order to assembly, taking care to ...
Fasten it into position by looking through the ejection port, the loading gate and the chamber. BREECH BOLT ASSEMBLY (Breech bolt, operating rods with sleeve, recoil spring, and piston stop). • Working on a flat surface with the ejection port turned up, mount the breech bolt assembly, operating rods with sleeve ... receiver. • Insert the trigger guard retaining pin only when the hole of the trigger guard is not empty, unload it as if it were loaded. (See points 1, 2 and 4 of the bolt body. • Keeping the head pressed down in reverse order to assembly, taking care to ...

User Manual
Page 30
... provided to persons. EN 30 STOCK DROP AND CAST MODIFICATION WARNING: Always check that the shotgun is designated by looking through the ejection port, the loading gate and the chamber. If it is designated by replacing the spacer pair. REPLACING THE STOCK DROP AND CAST SPACERS NOTICE: The right... or at hard, flat surfaces. The left -handed shooters) depending on (for right-handed shooters) with 55 or 60 mm drop. The Beretta semi-automatic 1301 Comp has a pre-set of the front spacer and plate must be synchronised. Inspect the firearm by the initials SX.
... provided to persons. EN 30 STOCK DROP AND CAST MODIFICATION WARNING: Always check that the shotgun is designated by looking through the ejection port, the loading gate and the chamber. If it is designated by replacing the spacer pair. REPLACING THE STOCK DROP AND CAST SPACERS NOTICE: The right... or at hard, flat surfaces. The left -handed shooters) depending on (for right-handed shooters) with 55 or 60 mm drop. The Beretta semi-automatic 1301 Comp has a pre-set of the front spacer and plate must be synchronised. Inspect the firearm by the initials SX.
