
User Guide
Page 5
... Update 4-20 4.3.11 USB Charger 4-21 4.3.12 System Information 4-22 4.3.13 ASUS SSD Caching II 4-24 4.3.14 Audio configurations 4-26 4.3.15 ASUS Dr. Power Utility 4-27 Chapter 5: RAID support 5.1 RAID configurations 5-1 5.1.1 RAID definitions 5-1 5.1.2 Installing Serial ATA hard disks 5-2 5.1.3 Setting the RAID item in BIOS 5-2 5.1.4 Intel® Rapid Storage Technology Option ROM utility 5-3 5.2 Creating a RAID...
... Update 4-20 4.3.11 USB Charger 4-21 4.3.12 System Information 4-22 4.3.13 ASUS SSD Caching II 4-24 4.3.14 Audio configurations 4-26 4.3.15 ASUS Dr. Power Utility 4-27 Chapter 5: RAID support 5.1 RAID configurations 5-1 5.1.1 RAID definitions 5-1 5.1.2 Installing Serial ATA hard disks 5-2 5.1.3 Setting the RAID item in BIOS 5-2 5.1.4 Intel® Rapid Storage Technology Option ROM utility 5-3 5.2 Creating a RAID...

User Guide
Page 8
... documentation Your product package may have to perform when installing system components. • Chapter 3: BIOS setup This chapter tells how to change system settings through the BIOS Setup menus. It includes description of the standard package. ASUS websites The ASUS website provides updated information on the motherboard. • Chapter 2: Basic installation This chapter lists the...
... documentation Your product package may have to perform when installing system components. • Chapter 3: BIOS setup This chapter tells how to change system settings through the BIOS Setup menus. It includes description of the standard package. ASUS websites The ASUS website provides updated information on the motherboard. • Chapter 2: Basic installation This chapter lists the...

User Guide
Page 12
... 3 - ASUS Fan Xpert 2 - ASUS Fanless Design: Heat-sink solution ASUS EZ DIY - Tuner - ASUS CrashFree BIOS 3 - ASUS Q-LED (CPU, DRAM, VGA, Boot Device LED) - ASUS Q-DIMM - Z87-WS specifications summary ASUS unique features ASUS Dual Intelligent Processors 4 with 4-Way Optimization - 4-Way Optimization tuning key perfectly consolidates ASUS-exclusive DIGI+Power Control, TPU, EPU, and Fan Xpert 2 that quickly optimize the digital power setting...
... 3 - ASUS Fan Xpert 2 - ASUS Fanless Design: Heat-sink solution ASUS EZ DIY - Tuner - ASUS CrashFree BIOS 3 - ASUS Q-LED (CPU, DRAM, VGA, Boot Device LED) - ASUS Q-DIMM - Z87-WS specifications summary ASUS unique features ASUS Dual Intelligent Processors 4 with 4-Way Optimization - 4-Way Optimization tuning key perfectly consolidates ASUS-exclusive DIGI+Power Control, TPU, EPU, and Fan Xpert 2 that quickly optimize the digital power setting...

User Guide
Page 22
... DIMMs, and helping with more flexibility, convenience, and easy to view all your modified settings • F12 BIOS snapshot hotkey • F3 Shortcut for hard drives larger than the traditional BIOS versions. Combined with usability and aesthetics, the ASUS stylish heatsink will give you an extremely silent and cooling experience with its elegant appearance...
... DIMMs, and helping with more flexibility, convenience, and easy to view all your modified settings • F12 BIOS snapshot hotkey • F3 Shortcut for hard drives larger than the traditional BIOS versions. Combined with usability and aesthetics, the ASUS stylish heatsink will give you an extremely silent and cooling experience with its elegant appearance...

User Guide
Page 34
... compatibility tuning for successful boot. • Refer to section 1.2.8 Onboard LEDs for the system to the latest BIOS version from the ASUS website at www.asus.com. • If you turn off the system and reinstall the DIMM before using the MemOK! To stop... memory tuning, turn off the computer and replace DIMMs during POST reminding you that the BIOS has been restored to memory tuning requirements, the system automatically reboots when each timing set...
... compatibility tuning for successful boot. • Refer to section 1.2.8 Onboard LEDs for the system to the latest BIOS version from the ASUS website at www.asus.com. • If you turn off the system and reinstall the DIMM before using the MemOK! To stop... memory tuning, turn off the computer and replace DIMMs during POST reminding you that the BIOS has been restored to memory tuning requirements, the system automatically reboots when each timing set...

User Guide
Page 35
... ASUS Z87-WS 1-19 With DirectKey, you press the DirectKey button, your system will shut down. Ensure to save your data before using the power-on button to the BIOS Setup program with the press of a button. Press the DirectKey button again or the Power-on button to reboot and enter the BIOS directly...; Refer to press the key during boot-up. It also allows you reboot your system to go through POST (without entering the BIOS) when you to turn on and you can enter the BIOS anytime without having to section 3.8 Boot Menu for details about setting the DirectKey default function. 4.
... ASUS Z87-WS 1-19 With DirectKey, you press the DirectKey button, your system will shut down. Ensure to save your data before using the power-on button to the BIOS Setup program with the press of a button. Press the DirectKey button again or the Power-on button to reboot and enter the BIOS directly...; Refer to press the key during boot-up. It also allows you reboot your system to go through POST (without entering the BIOS) when you to turn on and you can enter the BIOS anytime without having to section 3.8 Boot Menu for details about setting the DirectKey default function. 4.

User Guide
Page 36
...switch under a Windows® OS environment, the TPU function will use the 4-Way Optimization and TPU feature in the AI Suite 3 application, adjust the BIOS setup program, or enable the TPU switch at the same time. However, the system will be activated after the next system bootup. • You ...may use the last setting you enable this switch when the system is powered off. • When the TPU switch is set to section 1.2.7 Onboard LEDs for enhanced performance. • When the TPU switch is enabled. Refer to...
...switch under a Windows® OS environment, the TPU function will use the 4-Way Optimization and TPU feature in the AI Suite 3 application, adjust the BIOS setup program, or enable the TPU switch at the same time. However, the system will be activated after the next system bootup. • You ...may use the last setting you enable this switch when the system is powered off. • When the TPU switch is set to section 1.2.7 Onboard LEDs for enhanced performance. • When the TPU switch is enabled. Refer to...
User Guide
Page 37
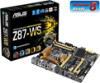
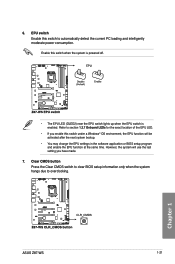
...; OS environment, the EPU function will be activated after the next system bootup. • You may change the EPU settings in the software application or BIOS setup program and enable the EPU function at the same time. Clear CMOS button Press the Clear CMOS switch to clear... BIOS setup information only when the system hangs due to section 1.2.7 Onboard LEDs for the exact location of the EPU LED. • If you have made. 7. Enable this switch to automatically detect the current PC loading and intelligently moderate power consumption. 6. Refer to overclocking. Chapter 1 ASUS Z87-WS ...
...; OS environment, the EPU function will be activated after the next system bootup. • You may change the EPU settings in the software application or BIOS setup program and enable the EPU function at the same time. Clear CMOS button Press the Clear CMOS switch to clear... BIOS setup information only when the system hangs due to section 1.2.7 Onboard LEDs for the exact location of the EPU LED. • If you have made. 7. Enable this switch to automatically detect the current PC loading and intelligently moderate power consumption. 6. Refer to overclocking. Chapter 1 ASUS Z87-WS ...

User Guide
Page 47
... [AHCI Mode] by default. Refer to section 3.6.3 SATA Configuration for details. • Before creating a RAID set, refer to section 5.1 RAID configurations or the manual bundled in the BIOS to [RAID Mode]. ASUS Z87-WS 1-31 Chapter 1 • These connectors are set the SATA Mode item in the motherboard support DVD. If you can create a RAID 0, 1, 5, and...
... [AHCI Mode] by default. Refer to section 3.6.3 SATA Configuration for details. • Before creating a RAID set, refer to section 5.1 RAID configurations or the manual bundled in the BIOS to [RAID Mode]. ASUS Z87-WS 1-31 Chapter 1 • These connectors are set the SATA Mode item in the motherboard support DVD. If you can create a RAID 0, 1, 5, and...

User Guide
Page 52
... audio capability. • If you want to connect a high-definition or an AC'97 front panel audio module to this connector, set the Front Panel Type item in the BIOS setup to this connector. • We recommend that supports either HD Audio or legacy AC`97 audio standard. Front panel audio connector...
... audio capability. • If you want to connect a high-definition or an AC'97 front panel audio module to this connector, set the Front Panel Type item in the BIOS setup to this connector. • We recommend that supports either HD Audio or legacy AC`97 audio standard. Front panel audio connector...

User Guide
Page 70
RGB: 180 MHz - • A plugged USB 3.0 device may run on xHCI or EHCI mode, depending on the operating system's setting. • DO NOT insert a different connector to the external SATA port. • We strongly recommend that you connect USB 3.0 devices to USB ... design of the Intel® 8 series chipset, all USB devices connected to wake up to three displays under a Windows® OS environment, two displays under BIOS, and one display under DOS. • The Intel® display architecture design supports the following maximum supported pixel clock rates (Pixel Clock = H total x ...
RGB: 180 MHz - • A plugged USB 3.0 device may run on xHCI or EHCI mode, depending on the operating system's setting. • DO NOT insert a different connector to the external SATA port. • We strongly recommend that you connect USB 3.0 devices to USB ... design of the Intel® 8 series chipset, all USB devices connected to wake up to three displays under a Windows® OS environment, two displays under BIOS, and one display under DOS. • The Intel® display architecture design supports the following maximum supported pixel clock rates (Pixel Clock = H total x ...

User Guide
Page 74
...to let the system enter the soft-off mode, depending on , hold down the key to enter the BIOS Setup. Chapter 2 2-18 Chapter 2: Basic installation At power on the BIOS setting. BIOS Beep One short beep One continuous beep followed by two short beeps then a pause (repeated) One continuous... beep followed by three short beeps One continuous beep followed by four short beeps Description VGA detected Quick boot set to put the system ...
...to let the system enter the soft-off mode, depending on , hold down the key to enter the BIOS Setup. Chapter 2 2-18 Chapter 2: Basic installation At power on the BIOS setting. BIOS Beep One short beep One continuous beep followed by two short beeps then a pause (repeated) One continuous... beep followed by three short beeps One continuous beep followed by four short beeps Description VGA detected Quick boot set to put the system ...
User Guide
Page 75
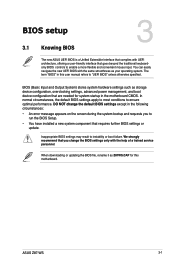
... configuration that are needed for this user manual refers to enable a more flexible and convenient mouse input. BIOS (Basic Input and Output System) stores system hardware settings such as your operating system. Inappropriate BIOS settings may result to ensure optimal performance. We strongly recommend that you change the default BIOS settings except in this motherboard. Chapter 3 ASUS Z87-WS 3-1
... configuration that are needed for this user manual refers to enable a more flexible and convenient mouse input. BIOS (Basic Input and Output System) stores system hardware settings such as your operating system. Inappropriate BIOS settings may result to ensure optimal performance. We strongly recommend that you change the default BIOS settings except in this motherboard. Chapter 3 ASUS Z87-WS 3-1

User Guide
Page 76
...first two options. • The BIOS setup screens shown in this option only if you failed to enter BIOS Setup using the BIOS Setup program. Entering BIOS Setup after POST To enter BIOS Setup after changing any BIOS setting, load the default settings to erase the RTC RAM via the... Clear CMOS button. • The BIOS setup program does not support the bluetooth ...
...first two options. • The BIOS setup screens shown in this option only if you failed to enter BIOS Setup using the BIOS Setup program. Entering BIOS Setup after POST To enter BIOS Setup after changing any BIOS setting, load the default settings to erase the RTC RAM via the... Clear CMOS button. • The BIOS setup program does not support the bluetooth ...

User Guide
Page 77
The default screen for the advanced BIOS settings. ASUS Z87-WS 3-3 To access the Advanced Mode, click Exit/Advanced Mode, then select Advanced Mode or press hot key for entering the BIOS setup program can be changed. Displays the CPU/motherboard temperature, CPU/5V/3.3V/12V voltage output, CPU/chassis/power fan speed Selects the display language...
The default screen for the advanced BIOS settings. ASUS Z87-WS 3-3 To access the Advanced Mode, click Exit/Advanced Mode, then select Advanced Mode or press hot key for entering the BIOS setup program can be changed. Displays the CPU/motherboard temperature, CPU/5V/3.3V/12V voltage output, CPU/chassis/power fan speed Selects the display language...

User Guide
Page 78
...end-users to the following main items: My Favorites Main Ai Tweaker Advanced For saving the frequently-used system settings and configuration. Refer to configure the BIOS settings. The figure below shows an example of the screen has the following sections for the detailed configurations. To ...Back button Menu bar General help Chapter 3 Menu items Submenu item Pop-up window Configuration fields Scroll bar Navigation keys Last modified settings Quick note Menu bar The menu bar on top of the Advanced Mode. 3.2.2 Advanced Mode The Advanced Mode provides advanced options ...
...end-users to the following main items: My Favorites Main Ai Tweaker Advanced For saving the frequently-used system settings and configuration. Refer to configure the BIOS settings. The figure below shows an example of the screen has the following sections for the detailed configurations. To ...Back button Menu bar General help Chapter 3 Menu items Submenu item Pop-up window Configuration fields Scroll bar Navigation keys Last modified settings Quick note Menu bar The menu bar on top of the Advanced Mode. 3.2.2 Advanced Mode The Advanced Mode provides advanced options ...

User Guide
Page 122
... items allow you to run ASUS EZ Flash 2. Chapter 3 The Setup Profile Status items show Not Installed if no profile is created. Label Allows you press , a confirmation message appears. For more details, refer to confirm your choice. When you to store or load multiple BIOS settings. Profile This item allows you... to key in a label of the setup profile. 3-48 Chapter 3: BIOS setup
... items allow you to run ASUS EZ Flash 2. Chapter 3 The Setup Profile Status items show Not Installed if no profile is created. Label Allows you press , a confirmation message appears. For more details, refer to confirm your choice. When you to store or load multiple BIOS settings. Profile This item allows you... to key in a label of the setup profile. 3-48 Chapter 3: BIOS setup

User Guide
Page 123
.... Load from Profile Allows you to load the previous BIOS settings saved in a profile number from the same memory/ CPU configuration and BIOS version. 3.9.3 ASUS SPD Information Allows you to the BIOS Flash, and create a profile. Chapter 3 ASUS Z87-WS 3-49 Save to Profile Allows you to save the current BIOS settings to view the DRAM SPD information. Key in...
.... Load from Profile Allows you to load the previous BIOS settings saved in a profile number from the same memory/ CPU configuration and BIOS version. 3.9.3 ASUS SPD Information Allows you to the BIOS Flash, and create a profile. Chapter 3 ASUS Z87-WS 3-49 Save to Profile Allows you to save the current BIOS settings to view the DRAM SPD information. Key in...

User Guide
Page 127
...cause system boot failure! Chapter 3 ASUS Z87-WS 3-53 See section 3.9 Exit Menu for the BIOS file. Recovering the BIOS To recover the BIOS: 1. When found, the utility reads the BIOS file and enters ASUS EZ Flash 2 automatically. 4. You can restore a corrupted BIOS file using FAT 32/16 on...recommend that contains the BIOS file. The utility automatically checks the devices for details. 3.11.3 ASUS CrashFree BIOS 3 The ASUS CrashFree BIOS 3 utility is an auto recovery tool that allows you to enter BIOS Setup to recover the BIOS setting. Turn on the ASUS official website. Insert...
...cause system boot failure! Chapter 3 ASUS Z87-WS 3-53 See section 3.9 Exit Menu for the BIOS file. Recovering the BIOS To recover the BIOS: 1. When found, the utility reads the BIOS file and enters ASUS EZ Flash 2 automatically. 4. You can restore a corrupted BIOS file using FAT 32/16 on...recommend that contains the BIOS file. The utility automatically checks the devices for details. 3.11.3 ASUS CrashFree BIOS 3 The ASUS CrashFree BIOS 3 utility is an auto recovery tool that allows you to enter BIOS Setup to recover the BIOS setting. Turn on the ASUS official website. Insert...

User Guide
Page 135
... may damage the CPU permanently, and setting a low voltage may lead to BIOS settings and will not be kept on actual usage. For system stability, all changes made in one interface: 4-Way Optimization, TPU, EPU, DIGI+ Power Control, and ... overclocking settings and manually load the profile after Windows starts. Use the Save Profile function to auto-detect the best settings based on the next system boot. Select an advanced power saving mode Click to save your fan during the tuning process. Refer to the CPU documentation before adjusting CPU voltage settings. ASUS Z87-WS 4-5 Chapter...
... may damage the CPU permanently, and setting a low voltage may lead to BIOS settings and will not be kept on actual usage. For system stability, all changes made in one interface: 4-Way Optimization, TPU, EPU, DIGI+ Power Control, and ... overclocking settings and manually load the profile after Windows starts. Use the Save Profile function to auto-detect the best settings based on the next system boot. Select an advanced power saving mode Click to save your fan during the tuning process. Refer to the CPU documentation before adjusting CPU voltage settings. ASUS Z87-WS 4-5 Chapter...
