
User Manual
Page 15
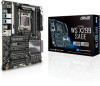
ASUS WS X299 SAGE 1-1 Chapter 1 Chapter 1: Product Introduction Product Introduction 1 1.1 Motherboard overview 1.1.1 Before you proceed Take note of the following precautions before you install motherboard components or change any ...
ASUS WS X299 SAGE 1-1 Chapter 1 Chapter 1: Product Introduction Product Introduction 1 1.1 Motherboard overview 1.1.1 Before you proceed Take note of the following precautions before you install motherboard components or change any ...

User Manual
Page 17
... header (5-pin TB_HEADER) Page 1-5 1-19 1-4 1-18 1-21 1-22 1-10 1-15 1-16 1-20 1-23 1-26 1-17 1-12 1-26 1-24 1-25 1-23 1-11 1-11 1-14 1-9 1-9 1-16 1-21 ASUS WS X299 SAGE 1-3
... header (5-pin TB_HEADER) Page 1-5 1-19 1-4 1-18 1-21 1-22 1-10 1-15 1-16 1-20 1-23 1-26 1-17 1-12 1-26 1-24 1-25 1-23 1-11 1-11 1-14 1-9 1-9 1-16 1-21 ASUS WS X299 SAGE 1-3

User Manual
Page 19
Chapter 1 1.1.4 System memory The motherboard comes with eight DDR4 (Double Data Rate 4) Dual Inline Memory Modules (DIMM) slots. DO NOT install a DDR, DDR2, or DDR3 memory module to the DDR4 slot. Recommended memory configurations Intel® Core™ X-series Processors (6-core or above) ASUS WS X299 SAGE 1-5 A DDR4 module is notched differently from a DDR, DDR2, or DDR3 module.
Chapter 1 1.1.4 System memory The motherboard comes with eight DDR4 (Double Data Rate 4) Dual Inline Memory Modules (DIMM) slots. DO NOT install a DDR, DDR2, or DDR3 memory module to the DDR4 slot. Recommended memory configurations Intel® Core™ X-series Processors (6-core or above) ASUS WS X299 SAGE 1-5 A DDR4 module is notched differently from a DDR, DDR2, or DDR3 module.

User Manual
Page 21
Failure to do so may cause you physical injury and damage motherboard components. Chapter 1 Slot No. 1 2 3 4 5 6 7 Slot Description PCIEX16_1 slot PCIEX16_2 slot (x0/x8 mode) PCIEX16_3 slot (x16/x8 mode) PCIEX16_4 slot (x0/x8 mode) PCIEX16_5 slot (x16/x8 mode) PCIEX16_6 slot (x0/x8 mode) PCIEX16_7 slot (x16/x8 mode) ASUS WS X299 SAGE 1-7 1.1.5 Expansion slots Unplug the power cord before adding or removing expansion cards.
Failure to do so may cause you physical injury and damage motherboard components. Chapter 1 Slot No. 1 2 3 4 5 6 7 Slot Description PCIEX16_1 slot PCIEX16_2 slot (x0/x8 mode) PCIEX16_3 slot (x16/x8 mode) PCIEX16_4 slot (x0/x8 mode) PCIEX16_5 slot (x16/x8 mode) PCIEX16_6 slot (x0/x8 mode) PCIEX16_7 slot (x16/x8 mode) ASUS WS X299 SAGE 1-7 1.1.5 Expansion slots Unplug the power cord before adding or removing expansion cards.

User Manual
Page 23
... overclockers and gamers who continually change settings to reboot the system. Power-on button The motherboard comes with a power-on a bare or open-case system. ASUS WS X299 SAGE 1-9 Chapter 1 1.1.6 Onboard buttons and switches Onboard buttons and switches allow you should shut down the system and unplug the power cable before removing or installing...
... overclockers and gamers who continually change settings to reboot the system. Power-on button The motherboard comes with a power-on a bare or open-case system. ASUS WS X299 SAGE 1-9 Chapter 1 1.1.6 Onboard buttons and switches Onboard buttons and switches allow you should shut down the system and unplug the power cable before removing or installing...

User Manual
Page 25
ASUS WS X299 SAGE 1-11 Chapter 1 4. Clear CMOS button (CLR_CMOS) Press this switch to overclock the installed DIMMs, allowing you to overclocking. 5. EZ XMP switch Enable this button to clear the BIOS setup information only when the systems hangs due to enhance the DIMM's speed and performance.
ASUS WS X299 SAGE 1-11 Chapter 1 4. Clear CMOS button (CLR_CMOS) Press this switch to overclock the installed DIMMs, allowing you to overclocking. 5. EZ XMP switch Enable this button to clear the BIOS setup information only when the systems hangs due to enhance the DIMM's speed and performance.

User Manual
Page 27
If an error is found, the critical component's LED stays lit up when you enable the EZ XMP switch. The actual cause may vary from case to case. 2. ASUS WS X299 SAGE 1-13 POST State LEDs The POST State LEDs provide the status of an error code as a starting point for troubleshooting. The POST State LEDs provide the most probable cause of these key components during POST (Power-On Self-Test): CPU, memory modules, VGA card, and hard disk drives. EZ XMP LED (XLED1) This LED lights up until the problem is solved. Chapter 1 1.1.8 Onboard LEDs 1.
If an error is found, the critical component's LED stays lit up when you enable the EZ XMP switch. The actual cause may vary from case to case. 2. ASUS WS X299 SAGE 1-13 POST State LEDs The POST State LEDs provide the status of an error code as a starting point for troubleshooting. The POST State LEDs provide the most probable cause of these key components during POST (Power-On Self-Test): CPU, memory modules, VGA card, and hard disk drives. EZ XMP LED (XLED1) This LED lights up until the problem is solved. Chapter 1 1.1.8 Onboard LEDs 1.

User Manual
Page 29
... Mode] by default. If you can create a RAID 0, 1, 5, and 10 configuration with the Intel® Rapid Storage Technology through the onboard Intel® X299 chipset. SATA 6G_56; ASUS WS X299 SAGE 1-15 SATA 6G_34; These connectors are set the SATA Mode item in the BIOS to SATA 6 Gb/s hard disk drives via SATA 6 Gb/s signal...
... Mode] by default. If you can create a RAID 0, 1, 5, and 10 configuration with the Intel® Rapid Storage Technology through the onboard Intel® X299 chipset. SATA 6G_56; ASUS WS X299 SAGE 1-15 SATA 6G_34; These connectors are set the SATA Mode item in the BIOS to SATA 6 Gb/s hard disk drives via SATA 6 Gb/s signal...

User Manual
Page 31
Chapter 1 4. With an installed USB 3.1 Gen 1 module, you to 5 Gb/s, faster charging time for additional USB 3.1 Gen 1 front or rear panel ports. ASUS WS X299 SAGE 1-17 The USB 3.1 Gen 1 module is purchased separately. The plugged USB 3.1 Gen 1 device may run on xHCI or EHCI mode depending on the operating system's ...
Chapter 1 4. With an installed USB 3.1 Gen 1 module, you to 5 Gb/s, faster charging time for additional USB 3.1 Gen 1 front or rear panel ports. ASUS WS X299 SAGE 1-17 The USB 3.1 Gen 1 module is purchased separately. The plugged USB 3.1 Gen 1 device may run on xHCI or EHCI mode depending on the operating system's ...

User Manual
Page 33
... 12V Specification 2.0 (or later version) and provides a minimum power of 350 W. • We recommend that you want to fit these connectors in only one orientation. ASUS WS X299 SAGE 1-19 ATX power connectors (24-pin EATXPWR; 8-pin EATX12V1-2; 6-pin EATX12V3) These connectors are designed to use a PSU with more high-end PCIe x16 cards...
... 12V Specification 2.0 (or later version) and provides a minimum power of 350 W. • We recommend that you want to fit these connectors in only one orientation. ASUS WS X299 SAGE 1-19 ATX power connectors (24-pin EATXPWR; 8-pin EATX12V1-2; 6-pin EATX12V3) These connectors are designed to use a PSU with more high-end PCIe x16 cards...

User Manual
Page 35
The U.2 connectors are only supported on Thunderbolt I/O card that supports Intel's Thunderbolt Technology, allowing you to connect up to six Thunderbolt-enabled devices and a DisplayPort-enabled display in a daisy-chain configuration. ASUS WS X299 SAGE 1-21 U.2 connector (U.2_1-2) This motherboard comes with U.2 connectors which support PCIe 3.0 x4 NVMe storage. 8. Thunderbolt header (5-pin TB_HEADER) This connector is for the add-on 44-Lane CPUs. Chapter 1 9.
The U.2 connectors are only supported on Thunderbolt I/O card that supports Intel's Thunderbolt Technology, allowing you to connect up to six Thunderbolt-enabled devices and a DisplayPort-enabled display in a daisy-chain configuration. ASUS WS X299 SAGE 1-21 U.2 connector (U.2_1-2) This motherboard comes with U.2 connectors which support PCIe 3.0 x4 NVMe storage. 8. Thunderbolt header (5-pin TB_HEADER) This connector is for the add-on 44-Lane CPUs. Chapter 1 9.

User Manual
Page 37
... the module to detect its temperature. The thermal sensor is for a serial (COM) port. Thermal sensor connector (2-pin T_SENSOR) This connector is purchased separately. 12. ASUS WS X299 SAGE 1-23
... the module to detect its temperature. The thermal sensor is for a serial (COM) port. Thermal sensor connector (2-pin T_SENSOR) This connector is purchased separately. 12. ASUS WS X299 SAGE 1-23

User Manual
Page 39
... that the ATX power supply is switched off or the power cord is for individually addressable RGB WS2812B LED strips or WS2812B based LED strips. ASUS WS X299 SAGE 1-25
... that the ATX power supply is switched off or the power cord is for individually addressable RGB WS2812B LED strips or WS2812B based LED strips. ASUS WS X299 SAGE 1-25

User Manual
Page 41
Place the motherboard into the chassis, ensuring that its rear I/O ports are for all models. 2.1.1 Motherboard installation 1. Install the ASUS Q-Shield to the chassis' rear I/O panel. Chapter 2 ASUS WS X299 SAGE 2-1 Chapter 2: Basic Installation Basic Installation 2.1 Building your PC system 2 The diagrams in this section are aligned to the chassis rear I/O panel. 2. The motherboard layout may vary with models, but the installation steps are the same for reference only.
Place the motherboard into the chassis, ensuring that its rear I/O ports are for all models. 2.1.1 Motherboard installation 1. Install the ASUS Q-Shield to the chassis' rear I/O panel. Chapter 2 ASUS WS X299 SAGE 2-1 Chapter 2: Basic Installation Basic Installation 2.1 Building your PC system 2 The diagrams in this section are aligned to the chassis rear I/O panel. 2. The motherboard layout may vary with models, but the installation steps are the same for reference only.

User Manual
Page 43
The plastic cap will pop up automatically once the CPU is in opening/ closing the double latch. 2.1.2 CPU installation Please note the order in place and the hatch properly sealed down. Chapter 2 ASUS WS X299 SAGE 2-3 Follow the instructions printed on the metal sealing hatch or the illustrations shown below in this manual.
The plastic cap will pop up automatically once the CPU is in opening/ closing the double latch. 2.1.2 CPU installation Please note the order in place and the hatch properly sealed down. Chapter 2 ASUS WS X299 SAGE 2-3 Follow the instructions printed on the metal sealing hatch or the illustrations shown below in this manual.

User Manual
Page 45
To install the CPU heatsink and fan assembly Chapter 2 ASUS WS X299 SAGE 2-5 2.1.3 CPU heatsink and fan assembly installation Apply the Thermal Interface Material to the CPU heatsink and CPU before you install the heatsink and fan, if necessary.
To install the CPU heatsink and fan assembly Chapter 2 ASUS WS X299 SAGE 2-5 2.1.3 CPU heatsink and fan assembly installation Apply the Thermal Interface Material to the CPU heatsink and CPU before you install the heatsink and fan, if necessary.

User Manual
Page 47
ASUS WS X299 SAGE 2-7 2.1.5 ATX power connection Chapter 2 OR AND • DO NOT connect the 6-pin power plug only, the motherboard may overheat under heavy usage. • Ensure to connect the 8-pin power plug, or connect both the 8-pin and 6-pin power plugs.
ASUS WS X299 SAGE 2-7 2.1.5 ATX power connection Chapter 2 OR AND • DO NOT connect the 6-pin power plug only, the motherboard may overheat under heavy usage. • Ensure to connect the 8-pin power plug, or connect both the 8-pin and 6-pin power plugs.

User Manual
Page 49
Chapter 2 2.1.7 Front I/O connector To install ASUS Q-Connector To install USB 3.1 Gen 2 connector USB 3.1 Gen 2 This connector will only fit in one orientation. Push the connector until it clicks into place. To install USB 3.1 Gen 1 connector To install front panel audio connector USB 3.1 Gen 1 AAFP ASUS WS X299 SAGE 2-9
Chapter 2 2.1.7 Front I/O connector To install ASUS Q-Connector To install USB 3.1 Gen 2 connector USB 3.1 Gen 2 This connector will only fit in one orientation. Push the connector until it clicks into place. To install USB 3.1 Gen 1 connector To install front panel audio connector USB 3.1 Gen 1 AAFP ASUS WS X299 SAGE 2-9

User Manual
Page 51
2.1.9 M.2 installation OR Chapter 2 Supported M.2 type varies per motherboard. ASUS WS X299 SAGE 2-11
2.1.9 M.2 installation OR Chapter 2 Supported M.2 type varies per motherboard. ASUS WS X299 SAGE 2-11

User Manual
Page 53
...™ button for three seconds to automatically update the BIOS. This may have risks. Visit https://www.asus.com/support/ and download the latest BIOS version for five seconds and turns into a solid light, this... FlashBack™ is damaged during the process and results to the system's failure to boot up, please contact your local ASUS Service Center. Shut down your USB storage device. 4. In case of the USB port that the BIOS updating process is...BIOS update utility BIOS FlashBack™ BIOS FlashBack™ allows you to use BIOS FlashBack™: 1. ASUS WS X299 SAGE 2-13
...™ button for three seconds to automatically update the BIOS. This may have risks. Visit https://www.asus.com/support/ and download the latest BIOS version for five seconds and turns into a solid light, this... FlashBack™ is damaged during the process and results to the system's failure to boot up, please contact your local ASUS Service Center. Shut down your USB storage device. 4. In case of the USB port that the BIOS updating process is...BIOS update utility BIOS FlashBack™ BIOS FlashBack™ allows you to use BIOS FlashBack™: 1. ASUS WS X299 SAGE 2-13


