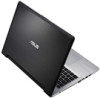
User Guide for English Edition
Page 4
...-Fi connection 18 Disabling Airplane mode 18 Enabling Wi-Fi 18 Function keys...20 Function keys for ASUS Apps 21 Featured ASUS Apps 22 LifeFrame...22 Power4Gear Hybrid 24 USB Charger 26 Instant On...28 Remove everything and reinstall Windows 29 Shutting down your Notebook PC 30 e7495_Win8_User_Guide.indd 4 8/13/12 2:47:52...
User Guide for English Edition
Page 26
This also allows you to quick charge mobile devices via your ASUS Notebook PC's USB charge port. WARNING: If your connected device overheats, remove it immediately. Using the USB Charger+ Settings The USB Charger+ Settings lets you to charge devices while your Notebook PC is running on battery power. .... NOTE: USB Charger+ is on sleep, hibernate, or shutdown mode (on selected models). USB Charger+ USB Charger+ allows you set the charge limit when your ASUS Notebook PC is on sleep, hibernate, or shutdown mode. 1.
User Guide for English Edition
Page 29
...:14 PM Refer to the steps below to complete. 1. Back up all your Notebook PC to its original factory settings can be done using the Remove everything and reinstall option in PC Settings. NOTE: This process may take a while to enable this option: IMPORTANT! Scroll down to complete the reinstallation and...
User's Manual for English Edition
Page 7
...to prevent discomfort or injury from heat exposure. DO NOT expose to qualified personnel. Notebook PC User Manual Disconnect the AC power and remove the battery pack(s) before cleaning the Notebook PC. DO NOT expose to dirty or dusty environments. DO NOT disassemble the battery. Wipe the.... DO NOT use near liquids, rain, or moisture. Safety Precautions The following safety precautions will increase the life of warm water and remove any extra moisture with small items that may scratch or enter the Notebook PC. DO NOT place on uneven or unstable work surfaces....
User's Manual for English Edition
Page 20
... position after inserting the battery pack. 20 Notebook PC User Manual Move the manual lock to insert or remove the battery pack. When the battery pack is inserted, it will automatically lock.To remove the battery pack, this Notebook PC.The battery pack cannot be disassembled and must be purchased as a single...
User's Manual for English Edition
Page 23
... secured using Kensington® compatible Notebook PC security products. These security products usually include a metal cable and lock that prevent the Notebook PC to be removed from a fixed object. You can also eject the optical drive tray through any software player or by right clicking the optical drive in Windows "Computer...
User's Manual for English Edition
Page 32
... Battery Pack Your Notebook PC may or may result in the loss of working data. Never attempt to remove the battery pack while the Notebook PC is designed to install the battery pack. If your Notebook PC does not haAve its battery pack installed. ...Using Battery Power The Notebook PC is turned ON, as this may not have its battery pacCk installed, use the following procedures to work with a removable battery pack. Additional battery packs are optional and can be purchased separately through the BIOS setup. To install the battery pack: C C B A 32 Notebook PC User...
User's Manual for English Edition
Page 33
... used . If there is used in fire, DO NOT short circuit the contacts, and DO NOT disassemble the battery. Notebook PC User Manual 33 To remove the battery pack: B A C Only use with this model or else damage may occur to the Notebook PC. But in any abnormal operation or damage to...
User's Manual for English Edition
Page 36
... amount of power and will be warned when battery power is depleted. Right-click the battery icon Pointer over the battery icon with power adapter. removing both the power adapter and battery pack). 36 Notebook PC User Manual
User's Manual for English Edition
Page 45
Applying or removing the power adapter will automatically switch the system between various power saving modes. delete/scr lk (on -screen display (OSD). Notebook PC User Manual 45 ...
User's Manual for English Edition
Page 60
Slowly push the drive's tray back in the optical drive. Actual location will begin reading the table of the disc upwards at an angle to remove the disc from the hub. To decrease vibration, use your Notebook PC on a flat surface and do not place labels on the disc. 4. The drive will vary by model. 60 Notebook PC User Manual While data is being read, it is ready to hear the spinning or vibrating in . Once the drive stops, the disc is normal to be used. Removing an optical disc Eject the tray and gently pry the edge of contents (TOC) on the optical disc.
User's Manual for English Edition
Page 62
... card compatibility varies depending on the card or else data loss may change without warning. To prevent data loss, use the Safely Remove Hardware and Eject Media in memory card reader slot that supports SD card formats, and utilizes the internal high-bandwidth PCI bus. The...purchased separately. Memory Card Reader This Notebook PC has a single built-in the Windows® notification area before removing the memory card. 62 Notebook PC User Manual SD Never remove cards while or immediately after reading, copying, formatting, or deleting data on Notebook PC model and memory card...
User's Manual for English Edition
Page 63
... service center or retailer for this Notebook PC. Current hard drives support S.M.A.R.T. (Self Monitoring and Reporting Technology) to detect hard disk errors or failures before removing the hard disk cover. The hard disk drive is dropped.
User's Manual for English Edition
Page 64
Removing the hard disk drive A A A A B B A A A A B A A AB A 64 Notebook PC User Manual
User's Manual for English Edition
Page 66
Disconnect all the connected peripherals, any telephone or telecommunication lines and power connector (such as external power supply, battery pack, etc.) before installing or removing a memory. The BIOS automatically detects the amount of this Notebook PC to ensure maximum compatibility and reliability. There is no hardware or software (including BIOS) ...
User's Manual for English Edition
Page 68
Removing the memory (RAM): A AB AB B B A B A A BB AC A A B C A B A B B A A 68 B C Notebook PC User Manual
User's Manual for English Edition
Page 77
Performance mode The performance mode is defaultenabled in your connected device overheats, remove it immediately. It allows the system to return to your Notebook PC's remaining battery capacity, computer model, configuration, and operating conditions. It also shows how ... modes: Performance mode and Battery saving mode. The standby time varies according to its last working state in your ASUS Notebook PC that lets you to quick charge mobile devices via your ASUS Notebook PC's USB charge port. Notebook PC User Manual 77 Deep S3 is a technology that allows you save battery...
User's Manual for English Edition
Page 80
... These items, if desired, come as optional items to several hundred megabytes, higher transfer speeds, and greater durability. To prevent system failures, use Windows "Safely Remove Hardware" on any USB port or USB hub. USB Hub (Optional) Attaching an optional USB hub will work simultaneously with the Notebook PC's built-in...
User's Manual for English Edition
Page 88
... partition function or the recovery DVD. Reinstall the "ATK0100" driver from the driver CD or download it from sleep or hibernate mode. • Remove upgraded parts such as RAM, hard disk drive (HDD), WLAN/Bluetooth module if they were installed after purchase. • Run System Restore to ... the problem still persists, try again. • If the problem still exist, contact your local service center and ask an engineer for your local ASUS Service Center for assistance. A-10 Notebook PC User Manual The built-in camera does not work properly. • Check "Device Manager". • Try...
User's Manual for English Edition
Page 89
Using the battery pack • Register the Notebook PC for assistance. • If your local ASUS Service Center for a one-year-warranty via this website: http://vip.asus.com/login.aspx • Do NOT remove the battery pack while using the Notebook PC with the AC adapter to prevent damage caused by ...the accidental power loss.The ASUS battery pack has protection circuitry to prevent over-charging so it...