User Guide
Page 7
... 4.3.8 ASUS EPU-6 Engine 4-27 4.3.9 ASUS TurboV 4-31 4.4 RAID configurations 4-33 4.4.1 RAID definitions 4-33 4.4.2 Installing Serial ATA hard disks 4-34 4.4.3 Setting the RAID item in BIOS 4-34 4.4.4 Intel® Matrix Storage Manager option ROM utility......... 4-35 4.5 Creating a RAID driver disk 4-40 4.5.1 Creating a RAID driver disk without entering the OS.... 4-40 4.5.2 Creating a RAID driver disk in Windows 4-40...
... 4.3.8 ASUS EPU-6 Engine 4-27 4.3.9 ASUS TurboV 4-31 4.4 RAID configurations 4-33 4.4.1 RAID definitions 4-33 4.4.2 Installing Serial ATA hard disks 4-34 4.4.3 Setting the RAID item in BIOS 4-34 4.4.4 Intel® Matrix Storage Manager option ROM utility......... 4-35 4.5 Creating a RAID driver disk 4-40 4.5.1 Creating a RAID driver disk without entering the OS.... 4-40 4.5.2 Creating a RAID driver disk in Windows 4-40...
User Guide
Page 71
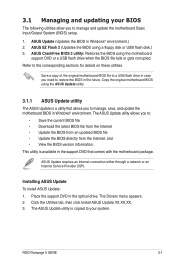
...in Windows® environment.) 2. Copy the original motherboard BIOS using the ASUS Update utility. 3.1.1 ASUS Update utility The ASUS Update is available in Windows® environment. This utility is a utility that comes with the motherboard package. The ASUS ...motherboard Basic Input/Output System (BIOS) setup. 1. ROG Rampage II GENE 3-1 The ASUS Update utility allows you need to restore the BIOS in case you to the corresponding sections for details on these utilities. ASUS CrashFree BIOS 3 utility: Restores the BIOS using a floppy disk or USB flash disk.) 3. The Drivers...
...in Windows® environment.) 2. Copy the original motherboard BIOS using the ASUS Update utility. 3.1.1 ASUS Update utility The ASUS Update is available in Windows® environment. This utility is a utility that comes with the motherboard package. The ASUS ...motherboard Basic Input/Output System (BIOS) setup. 1. ROG Rampage II GENE 3-1 The ASUS Update utility allows you need to restore the BIOS in case you to the corresponding sections for details on these utilities. ASUS CrashFree BIOS 3 utility: Restores the BIOS using a floppy disk or USB flash disk.) 3. The Drivers...

User Guide
Page 117
...asus.com) for reference only. The DVD automatically displays the Drivers menu if Autorun is NOT enabled in ��g�s�y��s�te��m�s��(�O��S�)�. ROG Rampage II GENE 4-1 Use the setup procedures presented in your computer. Click an icon to display support DVD/motherboard...file ASSETUP.EXE from the BIN folder. 4.1 Installing an operating system This motherboard supports Windows® X��P�/�6�4��-b��it�...
...asus.com) for reference only. The DVD automatically displays the Drivers menu if Autorun is NOT enabled in ��g�s�y��s�te��m�s��(�O��S�)�. ROG Rampage II GENE 4-1 Use the setup procedures presented in your computer. Click an icon to display support DVD/motherboard...file ASSETUP.EXE from the BIN folder. 4.1 Installing an operating system This motherboard supports Windows® X��P�/�6�4��-b��it�...
User Guide
Page 131
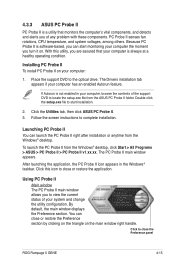
...Rampage II GENE 4-15 After launching the application, the PC Probe II icon appears in your computer, browse the contents of your system and change the utility configuration. Follow the screen instructions to the optical drive. You can launch the PC Probe II right after installation or anytime from the Windows® desktop. The Drivers... installation. Click to locate the setup.exe file from the Windows® desktop, click Start > All Programs > ASUS > PC Probe II > PC Probe II v1.xx.xx. 4.3.3 ASUS PC Probe II PC Probe II is a utility that your computer is always at a healthy...
...Rampage II GENE 4-15 After launching the application, the PC Probe II icon appears in your computer, browse the contents of your system and change the utility configuration. Follow the screen instructions to the optical drive. You can launch the PC Probe II right after installation or anytime from the Windows® desktop. The Drivers... installation. Click to locate the setup.exe file from the Windows® desktop, click Start > All Programs > ASUS > PC Probe II > PC Probe II v1.xx.xx. 4.3.3 ASUS PC Probe II PC Probe II is a utility that your computer is always at a healthy...

User Guide
Page 137
...65533;s�i�l�y�. Launching AI Suite You can launch AI Suite right after installation or anytime from the Windows® desktop, click Start > All Programs > ASUS > AI Suite > AI Suite v1.xx.xx. Installing AI Suite To install AI Suite on your computer has... The Drivers installation tab appears if your computer: 1. Click the Utilities tab, then click AI Suite. 3. To launch AI Suite from the Windows® desktop. The AI Suite main window appears. Click to restore to normal Click to launch EPU-6 Engine Click to launch TurboV ROG Rampage II GENE Click ...
...65533;s�i�l�y�. Launching AI Suite You can launch AI Suite right after installation or anytime from the Windows® desktop, click Start > All Programs > ASUS > AI Suite > AI Suite v1.xx.xx. Installing AI Suite To install AI Suite on your computer has... The Drivers installation tab appears if your computer: 1. Click the Utilities tab, then click AI Suite. 3. To launch AI Suite from the Windows® desktop. The AI Suite main window appears. Click to restore to normal Click to launch EPU-6 Engine Click to launch TurboV ROG Rampage II GENE Click ...

User Guide
Page 143
...To install 6 Engine on the Windows® notification area. Follow the screen instructions to current system status. Click Run Calibration and wait for a few seconds. ROG Rampage II GENE 4-27 Selecting Auto mode will appear, asking you to the optical drive. The Drivers installation tab appears if your ... to enhance system performance or save power. Then, the 6 Engine main menu appears. Click the Drivers tab and then click ASUS EPU-Six Engine. 3. 4.3.8 ASUS EPU-6 Engine ASUS EPU-6 Engine is an energy-efficient tool that you can also customize each mode by double-clicking...
...To install 6 Engine on the Windows® notification area. Follow the screen instructions to current system status. Click Run Calibration and wait for a few seconds. ROG Rampage II GENE 4-27 Selecting Auto mode will appear, asking you to the optical drive. The Drivers installation tab appears if your ... to enhance system performance or save power. Then, the 6 Engine main menu appears. Click the Drivers tab and then click ASUS EPU-Six Engine. 3. 4.3.8 ASUS EPU-6 Engine ASUS EPU-6 Engine is an energy-efficient tool that you can also customize each mode by double-clicking...

User Guide
Page 146
...: Adjusts fan speeds to other mode option. Or, you 've installed TweakIt driver from the bundled Support DVD. 4-30 Chapter 4: Software support Refer to enable the TweakIt function. Ensure that you may click the TweakIt icon on the Windows® notification area and click Unlock to the following table for the configuration...
...: Adjusts fan speeds to other mode option. Or, you 've installed TweakIt driver from the bundled Support DVD. 4-30 Chapter 4: Software support Refer to enable the TweakIt function. Ensure that you may click the TweakIt icon on the Windows® notification area and click Unlock to the following table for the configuration...

User Guide
Page 156
... drive. 3. Go to the Make disk menu, and then click Intel ICH10R 32/64 bit RAID Driver Disk to complete the process. 4.5.2 Creating a RAID driver disk in Windows® To create a RAID driver disk in a RAID set. Place the motherboard support DVD into the floppy drive then press . 8. Insert the support DVD into the floppy...
... drive. 3. Go to the Make disk menu, and then click Intel ICH10R 32/64 bit RAID Driver Disk to complete the process. 4.5.2 Creating a RAID driver disk in Windows® To create a RAID driver disk in a RAID set. Place the motherboard support DVD into the floppy drive then press . 8. Insert the support DVD into the floppy...

User Guide
Page 157
...select Intel(R) SATA RAID Controller (Desktop ICH10R). 4. Press , and then insert the floppy disk with RAID driver into the floppy disk drive. 3. Insert the floppy disk/USB device with RAID driver into the floppy disk drive/ USB port. 2. Follow the succeeding screen instructions to complete the installation. ... select the SCSI adapter to install, ensure that you to press the F6 key to install third-party SCSI or RAID driver. 2. ROG Rampage II GENE 4-41 To install the RAID driver in Windows® XP: 1. To install the RAID driver in Windows® Vista™: 1.
...select Intel(R) SATA RAID Controller (Desktop ICH10R). 4. Press , and then insert the floppy disk with RAID driver into the floppy disk drive. 3. Insert the floppy disk/USB device with RAID driver into the floppy disk drive/ USB port. 2. Follow the succeeding screen instructions to complete the installation. ... select the SCSI adapter to install, ensure that you to press the F6 key to install third-party SCSI or RAID driver. 2. ROG Rampage II GENE 4-41 To install the RAID driver in Windows® XP: 1. To install the RAID driver in Windows® Vista™: 1.

User Guide
Page 161
...computer. Turn off your current graphics card driver/s. 4. Close all existing graphics card drivers before installing ATI CrossFireX graphics cards to your system. For Windows Vista, select Uninstall. 5. 5.1 ATI® CrossFireX™ technology The motherboard supports the ATI® CrossFireX™ ...minimum power required by your system. For Windows XP, go to Control Panel > Add/Remove Programs. For Windows Vista, go to install multi-graphics processing units (GPU) graphics cards. For Windows XP, select Add/Remove. ROG Rampage II GENE 5-1 See page 2-37 for details. ...
...computer. Turn off your current graphics card driver/s. 4. Close all existing graphics card drivers before installing ATI CrossFireX graphics cards to your system. For Windows Vista, select Uninstall. 5. 5.1 ATI® CrossFireX™ technology The motherboard supports the ATI® CrossFireX™ ...minimum power required by your system. For Windows XP, go to Control Panel > Add/Remove Programs. For Windows Vista, go to install multi-graphics processing units (GPU) graphics cards. For Windows XP, select Add/Remove. ROG Rampage II GENE 5-1 See page 2-37 for details. ...

User Guide
Page 163
...; CrossFireX™ technology. Click Go to continue to the Catalyst Control Center Advanced View window. ROG Rampage II GENE 5-3 Right-click on the Windows® desktop and select Catalyst(TM) Control Center. Ensure that came with your graphics cards and the device drivers, enable the CrossFireX™ feature through the ATI Catalyst™ Control Center in...
...; CrossFireX™ technology. Click Go to continue to the Catalyst Control Center Advanced View window. ROG Rampage II GENE 5-3 Right-click on the Windows® desktop and select Catalyst(TM) Control Center. Ensure that came with your graphics cards and the device drivers, enable the CrossFireX™ feature through the ATI Catalyst™ Control Center in...

User Guide
Page 167
...SLI™ technology After installing your graphics cards and the device drivers, enable the SLI feature in step (A), select Personalize. The NVIDIA Control Panel window appears (See Step B5 on the empty space of the Windows® desktop and select NVIDIA Control Panel. Launching the NVIDIA Control... two methods. A. If you cannot see the NVIDIA Control Panel item in NVIDIA® Control Panel under the Windows® Vista™ operating system. 5.2.3 Installing the device drivers Refer to install the device drivers. ROG Rampage II GENE 5-7 Right click on page 5-9).
...SLI™ technology After installing your graphics cards and the device drivers, enable the SLI feature in step (A), select Personalize. The NVIDIA Control Panel window appears (See Step B5 on the empty space of the Windows® desktop and select NVIDIA Control Panel. Launching the NVIDIA Control... two methods. A. If you cannot see the NVIDIA Control Panel item in NVIDIA® Control Panel under the Windows® Vista™ operating system. 5.2.3 Installing the device drivers Refer to install the device drivers. ROG Rampage II GENE 5-7 Right click on page 5-9).


