Asus RS520A-E12-RS24U Support and Manuals
Get Help and Manuals for this Asus item
View All Support Options Below
Free Asus RS520A-E12-RS24U manuals!
Problems with Asus RS520A-E12-RS24U?
Ask a Question
Free Asus RS520A-E12-RS24U manuals!
Problems with Asus RS520A-E12-RS24U?
Ask a Question
Popular Asus RS520A-E12-RS24U Manual Pages
User Manual - Page 9

... how to change system settings through the BIOS Setup menus and describes the BIOS parameters. 6. Chapter 4: Motherboard Information This chapter gives information about the motherboard that you have to perform when installing or removing system components. 3. ix Chapter 6: Driver Installation This chapter provides instructions for installing the necessary drivers for system integrators, and...
User Manual - Page 10

... to help you must press the Enter or Return key.
++ If you complete a task. ASUS Control Center (ACC) user guide
This manual tells how to complete a task. Typography
Bold text
Indicates a menu or an item to complete a task. IMPORTANT: Instructions that you must type the command exactly as shown, then supply the required item...
User Manual - Page 12

... contents
Check your system package for the following items.
Model Name Chassis Motherboard Component
Accessories
Optional Items
RS520A-E12-RS24U
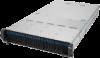
ASUS R2P-E 2U Rackmount Chassis
ASUS K14PA-U24 Server Board
24 x 2.5-inch Storage Device Trays or Dummy Trays 2 x 2.5-inch Storage Device Trays 4 x System Fans 1x AMD EPYC™ Support DVD 1 x CPU Heatsink 2 x AC Power Cable 1+1 Redundant 1200W...
User Manual - Page 13

1.2 Serial number label
The product's serial number contains 12 characters such as xxSxxxxxxxxx and printed on the sticker at the server's front cover. The correct serial number of the product is required if you need to request for support from the ASUS Technical Support team.
12 34 RESET
RS520A-E12-RS24U
xxSxxxxxxxxx
ASUS RS520A-E12 Series
1-3
User Manual - Page 14

...
RS520A-E12-RS24U
K14PA-U24 1 x Socket SP5 (LGA 6096) AMD EPYC™ 9004 series (up to 400W) System on Chip (SoC) 24 (12-channel per CPU, 24 DIMM per CPU) * May support to 22110)
Micro SD Card slot 1
Proprietary Slot 1 1 x PCIe x16 slot (Gen5 x8 link, for pike card only)
Proprietary Slot 2 -
1.3 System specifications
The ASUS RS520A-E12...
User Manual - Page 15

Model Name
Storage
SAS Controller
Storage Bay
Storage Bays
Backplane connectors
MB on-board connectors Default Cable
NVMe upgrade option
Networking VGA Graphic Front I/O Ports Rear I/O Ports
RS520A-E12-RS24U
Optional kits: ASUS...MCIO connectors Optional, in CPQ under the option "others" Support 24 x NVMe: 12 x NVMe cable Support 16 x NVMe: 8 x NVMe cable Support 12 x NVMe: 6 x NVMe cable 1 x ...
User Manual - Page 16

Model Name Switch/LED
RS520A-E12-RS24U
Front Switch/LED: 1 x Power Switch (w/LED) 1 x Reset Switch 1 x Location Switch (w/LED) 1 x HDD Access LED 1 x Message LED LAN 1-2 LED
Security Options
OS Support... (Q-Code) 1 x Power Switch w/LED 1 x Location Switch w/LED 1 x Message LED TPM-SPI Module (optional) PFR Module (optional) Please find the latest OS support from https://www.asus.com/ ASUS Control...
User Manual - Page 23

... Error Unsupported Function Invalid Service ID Invalid Address Out of Resource Error Timeout Data abort exception Prefetch abort exception Out of free SRAM to SVC stack base) SYSHUB mapping memory target type is incorrect Failed to invalid segment (should be 0x400_0000) No physical x86 cores were found on the next page)
ASUS RS520A-E12 Series
1-13 1.7.5 Q-Code...
User Manual - Page 41

...notch on the DIMM matches the DIMM slot key on the DIMM slot. Support the DIMM lightly with extra force. 2.4.3
Installing a DIMM
Ensure to unlock the DIMM.
3. Locked Retaining Clip
Always insert ... Remove the DIMM from the socket. Hold the DIMM by pressing the retaining clips outward.
2.
ASUS RS520A-E12 Series
2-13 DO NOT force a DIMM into place. The DIMM might get damaged when it ...
User Manual - Page 43

ASUS RS520A-E12 Series
2-15 Align the two (2) right notches on the right front panel.
2. 2.5.2 Installing the front bezel
1. Attach the right side of the front bezel to the notch holes on the front bezel to the right front panel.
User Manual - Page 45

ASUS RS520A-E12 Series
2-17 5.
Push the bezel release latch of the front bezel towards the left to lock the bezel.
User Manual - Page 62

... Controller
2
- Refer to the card. Turn on BIOS setup.
2. Install the software drivers for ISA or PCI devices.
2-34
Chapter 2: Hardware Information Refer to the BIOS Setup chapter for more information on the system and change the necessary BIOS settings, if any. 2.7.7 Configuring an expansion card
After installing the expansion card, configure it by adjusting the...
User Manual - Page 67

Install the storage devices into the supported bays. Connect the SLIMSAS cables ... MCIO7 on motherboard MCIO8 on motherboard HBA/RAID card HBA/RAID card
ASUS RS520A-E12 Series
2-39 Connect the MCIO cables to the HBA/RAID card and...to SLIMSAS
Connect to install storage devices.
Refer to section Storage Devices for reference only and may vary between models. • This configuration requires an...
User Manual - Page 133

... Pci enumeration for PCI Bridges after SMM locked. Configuration options: [Disabled] [Enabled]
ASUS RS520A-E12 Series
5-25 Configuration options: [Auto] [128 Bytes] [256 Bytes] [512 Bytes] [1024 Bytes] [2048 Bytes] [4096 Bytes]
PCI Express Link Register Settings
ASPM Support [Disabled]
Allows you to set Maximum Read Request Size of PCI Express Device or allow System BIOS...
User Manual - Page 137

...] [20 sec] [30 sec] [40 sec]
ASUS RS520A-E12 Series
5-29 Ensure to install the USB drivers to your system before disabling this item to simulate USB keyboard and mouse to select time-out value for USB devices on legacy operating systems (OS).
[Auto]
Automatically disables the Legacy USB support if USB devices are available only...
Asus RS520A-E12-RS24U Reviews
We have not received any reviews for Asus yet.