

User Manual
Page 6
... system 4-1 4.2 Support DVD information 4-1 4.2.1 Running the support DVD 4-1 4.2.2 Drivers menu 4-2 4.2.3 Utilities menu 4-3 4.2.4 Make disk menu 4-4 4.2.5 Manual menu 4-5 4.2.6 ASUS Contact information 4-5 4.2.7 Other information 4-6 4.3 Software information 4-8 4.3.1 ASUS MyLogo 2 4-8 4.3.2 AI NET2 4-10 4.3.3 ASUS PC Probe II 4-11 4.3.4 ASUS AI Suite 4-17 4.3.5 ASUS AI Nap 4-19 4.3.6 ASUS Fan Xpert 4-20 4.3.7 ASUS EPU-6 Engine 4-22 4.3.8 ASUS TurboV 4-26 4.3.9 SoundMAX® High Definition Audio utility...
... system 4-1 4.2 Support DVD information 4-1 4.2.1 Running the support DVD 4-1 4.2.2 Drivers menu 4-2 4.2.3 Utilities menu 4-3 4.2.4 Make disk menu 4-4 4.2.5 Manual menu 4-5 4.2.6 ASUS Contact information 4-5 4.2.7 Other information 4-6 4.3 Software information 4-8 4.3.1 ASUS MyLogo 2 4-8 4.3.2 AI NET2 4-10 4.3.3 ASUS PC Probe II 4-11 4.3.4 ASUS AI Suite 4-17 4.3.5 ASUS AI Nap 4-19 4.3.6 ASUS Fan Xpert 4-20 4.3.7 ASUS EPU-6 Engine 4-22 4.3.8 ASUS TurboV 4-26 4.3.9 SoundMAX® High Definition Audio utility...

User Manual
Page 7
... support 5.1 ATI® CrossFireX™ technology 5-1 5.1.1 Requirements 5-1 5.1.2 Before you begin 5-1 5.1.3 Installing two CrossFireX™ graphics cards 5-2 5.1.4 Installing three CrossFireX™ graphics cards 5-3 5.1.5 Installing the device drivers 5-4 5.1.6 Enabling the ATI® CrossFireX™ technology 5-4 5.2 NVIDIA® SLI™ technology 5-6 5.2.1 Requirements 5-6 5.2.2 Installing two SLI-ready graphics cards 5-6 5.2.3 Installing the device...
... support 5.1 ATI® CrossFireX™ technology 5-1 5.1.1 Requirements 5-1 5.1.2 Before you begin 5-1 5.1.3 Installing two CrossFireX™ graphics cards 5-2 5.1.4 Installing three CrossFireX™ graphics cards 5-3 5.1.5 Installing the device drivers 5-4 5.1.6 Enabling the ATI® CrossFireX™ technology 5-4 5.2 NVIDIA® SLI™ technology 5-6 5.2.1 Requirements 5-6 5.2.2 Installing two SLI-ready graphics cards 5-6 5.2.3 Installing the device...

User Manual
Page 15
xv P6TD Deluxe specifications summary Back Panel I/O Ports Internal I/O Connectors BIOS Features Manageability Support DVD Contents Form Factor 1 x PS/2 Keyboard / Mouse combo port 1 x S/PDIF Out (Coaxial + Optical) 1 x External ... switch 16 Mb AMI BIOS, PnP, DMI 2.0, WfM 2.0, SM BIOS 2.4, Multi-language BIOS WOL by PME, WOR by PME, Chassis Intrusion, PXE Drivers ASUS PC Probe II ASUS Update ASUS AI Suite Image-Editing Suite Anti-virus software (OEM version) ATX Form Factor, 12"x 9.6" (30.5cm x 24.4cm) *Specifications are subject to change without notice.
xv P6TD Deluxe specifications summary Back Panel I/O Ports Internal I/O Connectors BIOS Features Manageability Support DVD Contents Form Factor 1 x PS/2 Keyboard / Mouse combo port 1 x S/PDIF Out (Coaxial + Optical) 1 x External ... switch 16 Mb AMI BIOS, PnP, DMI 2.0, WfM 2.0, SM BIOS 2.4, Multi-language BIOS WOL by PME, WOR by PME, Chassis Intrusion, PXE Drivers ASUS PC Probe II ASUS Update ASUS AI Suite Image-Editing Suite Anti-virus software (OEM version) ATX Form Factor, 12"x 9.6" (30.5cm x 24.4cm) *Specifications are subject to change without notice.
User Manual
Page 48
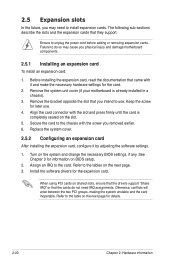
...3 for information on the next page for the expansion card. 2.5 Expansion slots In the future, you may cause you physical injury and damage motherboard components. 2.5.1 Installing an expansion card To install an expansion card: 1. Align the card connector with it by adjusting the software settings. 1. ...slot. 5. Failure to do not need to the tables on shared slots, ensure that the drivers support "Share IRQ" or that they support. Remove the system unit cover (if your motherboard is completely seated on the system and change the necessary BIOS settings, if any. Ensure to...
...3 for information on the next page for the expansion card. 2.5 Expansion slots In the future, you may cause you physical injury and damage motherboard components. 2.5.1 Installing an expansion card To install an expansion card: 1. Align the card connector with it by adjusting the software settings. 1. ...slot. 5. Failure to do not need to the tables on shared slots, ensure that the drivers support "Share IRQ" or that they support. Remove the system unit cover (if your motherboard is completely seated on the system and change the necessary BIOS settings, if any. Ensure to...

User Manual
Page 73
.... 3. Copy the original motherboard BIOS using the ASUS Update utility. 3.1.1 ASUS Update utility The ASUS Update is available in the future. ASUS Update (Updates the BIOS in the optical drive. The Drivers menu appears. 2. ASUS Update requires an Internet connection either through a network or an Internet Service Provider (ISP). Installing ASUS Update To install ASUS Update: 1. ASUS P6TD Deluxe 3-1 Refer to : •...
.... 3. Copy the original motherboard BIOS using the ASUS Update utility. 3.1.1 ASUS Update utility The ASUS Update is available in the future. ASUS Update (Updates the BIOS in the optical drive. The Drivers menu appears. 2. ASUS Update requires an Internet connection either through a network or an Internet Service Provider (ISP). Installing ASUS Update To install ASUS Update: 1. ASUS P6TD Deluxe 3-1 Refer to : •...

User Manual
Page 83
ASUS P6TD Deluxe 3-11 Configuration options: [Auto] [Disabled] [Enabled] 32Bit Data Transfer [Enabled] Enables or disables 32-bit data transfer. Select an item then press if you want ... [AHCI]. DMA Mode [Auto] Selects the DMA mode. Configuration options: [Disabled] [Enabled] 3.3.5 Storage Configuration The items in the system. The AHCI allows the onboard storage driver to enable advanced Serial ATA features that increases storage performance on random workloads by the Southbridge chip. Main BIOS SETUP UTILITY Storage Configuration SATA Configuraton...
ASUS P6TD Deluxe 3-11 Configuration options: [Auto] [Disabled] [Enabled] 32Bit Data Transfer [Enabled] Enables or disables 32-bit data transfer. Select an item then press if you want ... [AHCI]. DMA Mode [Auto] Selects the DMA mode. Configuration options: [Disabled] [Enabled] 3.3.5 Storage Configuration The items in the system. The AHCI allows the onboard storage driver to enable advanced Serial ATA features that increases storage performance on random workloads by the Southbridge chip. Main BIOS SETUP UTILITY Storage Configuration SATA Configuraton...

User Manual
Page 116
Chapter summary 4 4.1 Installing an operating system 4-1 4.2 Support DVD information 4-1 4.3 Software information 4-8 4.4 RAID configurations 4-40 4.5 Creating a RAID driver disk 4-47 ASUS P6TD Deluxe
Chapter summary 4 4.1 Installing an operating system 4-1 4.2 Support DVD information 4-1 4.3 Software information 4-8 4.4 RAID configurations 4-40 4.5 Creating a RAID driver disk 4-47 ASUS P6TD Deluxe

User Manual
Page 117
...® XP Service Pack2 or later versions before installing the drivers for reference only. The contents of the support DVD to avail all motherboard features. Double-click the ASSETUP.EXE to the optical drive. ASUS P6TD Deluxe 4-1 Click an icon to display support DVD/motherboard information Click an item to install If Autorun is enabled in...
...® XP Service Pack2 or later versions before installing the drivers for reference only. The contents of the support DVD to avail all motherboard features. Double-click the ASSETUP.EXE to the optical drive. ASUS P6TD Deluxe 4-1 Click an icon to display support DVD/motherboard information Click an item to install If Autorun is enabled in...

User Manual
Page 118
... the SoundMAX® AD2000B audio driver and application. record. ASUS InstAll - Install the necessary drivers to protect your PC from the latest online threats. Marvell 61xx SATA Driver Installs the Marvell® 61xx SATA driver. ASUS EPU-6 Engine Installs the ASUS EPU-6 Engine driver and utility. 4.2.2 Drivers menu The Drivers menu shows the available device drivers if the system detects installed...
... the SoundMAX® AD2000B audio driver and application. record. ASUS InstAll - Install the necessary drivers to protect your PC from the latest online threats. Marvell 61xx SATA Driver Installs the Marvell® 61xx SATA driver. ASUS EPU-6 Engine Installs the ASUS EPU-6 Engine driver and utility. 4.2.2 Drivers menu The Drivers menu shows the available device drivers if the system detects installed...

User Manual
Page 119
... 8 Installs the Adobe® Reader that the motherboard supports. Installation Wizard for Utilities Installs all of any detected problems. This utility helps you keep your computer in Portable Document Format (PDF). Marvell Yukon NCU Application Installs the Marvell® Yukon Network Configuration Utility application. ASUS P6TD Deluxe 4-3 4.2.3 Utilities menu The Utilities menu shows the...
... 8 Installs the Adobe® Reader that the motherboard supports. Installation Wizard for Utilities Installs all of any detected problems. This utility helps you keep your computer in Portable Document Format (PDF). Marvell Yukon NCU Application Installs the Marvell® Yukon Network Configuration Utility application. ASUS P6TD Deluxe 4-3 4.2.3 Utilities menu The Utilities menu shows the...

User Manual
Page 120
Intel ICH10R 32/64 bit XP_Vista AHCI/RAID Driver Allows you to create the Intel ICH10R or Marvell® 61xx driver disk. 4.2.4 Make disk menu The Make disk menu contains items to create an Intel ICH10R 32/64bit AHCI/RAID driver disk for 32/64 bit Windows XP/Vista. 4-4 Chapter 4: Software support
Intel ICH10R 32/64 bit XP_Vista AHCI/RAID Driver Allows you to create the Intel ICH10R or Marvell® 61xx driver disk. 4.2.4 Make disk menu The Make disk menu contains items to create an Intel ICH10R 32/64bit AHCI/RAID driver disk for 32/64 bit Windows XP/Vista. 4-4 Chapter 4: Software support

User Manual
Page 127
...the moment you to close or restore the Preference section by clicking on the triangle on the main window right handle. The Drivers installation tab appears if your computer, browse the contents of your system and change the utility configuration. After launching the application,...displays the Preference section. If Autorun is not enabled in the Windows® taskbar. Follow the screen instructions to close the Preference panel ASUS P6TD Deluxe 4-11 Launching PC Probe II You can start installation. 2. PC Probe II senses fan rotations, CPU temperature, and system voltages, among...
...the moment you to close or restore the Preference section by clicking on the triangle on the main window right handle. The Drivers installation tab appears if your computer, browse the contents of your system and change the utility configuration. After launching the application,...displays the Preference section. If Autorun is not enabled in the Windows® taskbar. Follow the screen instructions to close the Preference panel ASUS P6TD Deluxe 4-11 Launching PC Probe II You can start installation. 2. PC Probe II senses fan rotations, CPU temperature, and system voltages, among...

User Manual
Page 133
...main window appears. To launch AI Suite from the Windows® desktop. Press to restore to normal state Press to launch EPU-6 Engine ASUS P6TD Deluxe Press to launch AI Nap Press to launch Fan Xpert Press to the optical drive. Click the Utilities tab, then click AI Suite. 3.... feature. 2. Follow the screen instructions to close or restore the application. Click this icon to complete installation. 4.3.4 ASUS AI Suite ASUS AI Suite allows you to normal state. The Drivers installation tab appears if your computer: 1. Using AI Suite Click the EPU-6 Engine, AI Nap, or Fan Xpert...
...main window appears. To launch AI Suite from the Windows® desktop. Press to restore to normal state Press to launch EPU-6 Engine ASUS P6TD Deluxe Press to launch AI Nap Press to launch Fan Xpert Press to the optical drive. Click the Utilities tab, then click AI Suite. 3.... feature. 2. Follow the screen instructions to close or restore the application. Click this icon to complete installation. 4.3.4 ASUS AI Suite ASUS AI Suite allows you to normal state. The Drivers installation tab appears if your computer: 1. Using AI Suite Click the EPU-6 Engine, AI Nap, or Fan Xpert...

User Manual
Page 138
... also customize each mode by double-clicking the 6 Engine icon on your computer has an enabled Autorun feature. 2. Click the Drivers tab and then click ASUS EPU-6 Engine. 3. Launching 6 Engine Launch 6 Engine by configuring settings like CPU frequency, vCore Voltage, and Fan Control.... 6 Engine To install 6 Engine on the Windows® notification area. The Drivers installation tab appears if your computer: 1. Click Run Calibration and wait for a few seconds. 4.3.7 ASUS EPU-6 Engine ASUS EPU-6 Engine is an energy-efficient tool that you to current system status. ...
... also customize each mode by double-clicking the 6 Engine icon on your computer has an enabled Autorun feature. 2. Click the Drivers tab and then click ASUS EPU-6 Engine. 3. Launching 6 Engine Launch 6 Engine by configuring settings like CPU frequency, vCore Voltage, and Fan Control.... 6 Engine To install 6 Engine on the Windows® notification area. The Drivers installation tab appears if your computer: 1. Click Run Calibration and wait for a few seconds. 4.3.7 ASUS EPU-6 Engine ASUS EPU-6 Engine is an energy-efficient tool that you to current system status. ...

User Manual
Page 144
... High Definition Audio utility The ADI AD2000B High Definition Audio CODEC provides 8-channel audio capability through the SoundMAX® audio utility with the motherboard package to set the default audio output and input device in this tab. You can also set the default device 4-28 Chapter 4:... installed, you to deliver the ultimate audio experience on the taskbar. Follow the installation wizard to install the ADI AD2000B Audio Driver from the support DVD that comes with AudioESP™ software to adjust the individual volume of playback and recording devices. The software...
... High Definition Audio utility The ADI AD2000B High Definition Audio CODEC provides 8-channel audio capability through the SoundMAX® audio utility with the motherboard package to set the default audio output and input device in this tab. You can also set the default device 4-28 Chapter 4:... installed, you to deliver the ultimate audio experience on the taskbar. Follow the installation wizard to install the ADI AD2000B Audio Driver from the support DVD that comes with AudioESP™ software to adjust the individual volume of playback and recording devices. The software...

User Manual
Page 156
...If one drive to a second drive. With the RAID 10* configuration you have to create a RAID driver disk and load the RAID driver during OS installation. 4.4 RAID configurations The motherboard comes with the total capacity over 2TB can be of data from one drive fails, the disk array ...and three new drives for details. 4.4.1 RAID definitions RAID 0 (Data striping) optimizes two identical hard disk drives to section 4.5 Creating a RAID driver disk for this setup. You can also combine two RAID sets to get all applications to the surviving drive as a data disk only. •...
...If one drive to a second drive. With the RAID 10* configuration you have to create a RAID driver disk and load the RAID driver during OS installation. 4.4 RAID configurations The motherboard comes with the total capacity over 2TB can be of data from one drive fails, the disk array ...and three new drives for details. 4.4.1 RAID definitions RAID 0 (Data striping) optimizes two identical hard disk drives to section 4.5 Creating a RAID driver disk for this setup. You can also combine two RAID sets to get all applications to the surviving drive as a data disk only. •...

User Manual
Page 163
...the succeeding screen instructions to create a 32/64bit Intel ICH10R RAID driver disk. 7. Select USB floppy disk drive as the primary boot device. 4. 4.5 Creating a RAID driver disk A floppy disk with the RAID driver. • The motherboard does not provide a floppy drive connector. Set the optical drive as... 1. To work around this OS limitation, refer to avoid a computer virus infection. ASUS P6TD Deluxe 4-47 For Windows® Vista operating system, use a USB floppy disk drive when creating a SATA RAID driver disk. • Windows® XP may not recognize the USB floppy disk drive...
...the succeeding screen instructions to create a 32/64bit Intel ICH10R RAID driver disk. 7. Select USB floppy disk drive as the primary boot device. 4. 4.5 Creating a RAID driver disk A floppy disk with the RAID driver. • The motherboard does not provide a floppy drive connector. Set the optical drive as... 1. To work around this OS limitation, refer to avoid a computer virus infection. ASUS P6TD Deluxe 4-47 For Windows® Vista operating system, use a USB floppy disk drive when creating a SATA RAID driver disk. • Windows® XP may not recognize the USB floppy disk drive...

User Manual
Page 164
.... 2. During the OS installation, select Intel(R) SATA RAID Controller (Desktop ICH10R). 3. Press , and then insert the floppy disk with RAID driver into the USB floppy disk drive. 3. Follow the succeeding screen instructions to complete the installation. 4-48 Chapter 4: Software support Follow the succeeding... screen instructions to complete the installation. When prompted to select the SCSI adapter to install third-party SCSI or RAID driver. 2. During the OS installation, the system prompts you to press the F6 key to install, ensure that you select Intel(R) ...
.... 2. During the OS installation, select Intel(R) SATA RAID Controller (Desktop ICH10R). 3. Press , and then insert the floppy disk with RAID driver into the USB floppy disk drive. 3. Follow the succeeding screen instructions to complete the installation. 4-48 Chapter 4: Software support Follow the succeeding... screen instructions to complete the installation. When prompted to select the SCSI adapter to install third-party SCSI or RAID driver. 2. During the OS installation, the system prompts you to press the F6 key to install, ensure that you select Intel(R) ...

User Manual
Page 165
... a floppy disk during the OS installation. Select Device Manager. The Vendor ID (VID) and Product ID (PID) are displayed. 5. Click Details tab. ASUS P6TD Deluxe 4-49 The name of the RAID driver disk to locate the file txtsetup.oem. 6. 4.5.4 Using a USB floppy disk drive Due to OS limitation, Windows® XP may not recognize... the USB floppy disk drive when you to select the program for opening the oem file. Refer to the floppy disk containing the RAID driver. Browse the contents of the USB floppy disk drive varies with different vendors. 4.
... a floppy disk during the OS installation. Select Device Manager. The Vendor ID (VID) and Product ID (PID) are displayed. 5. Click Details tab. ASUS P6TD Deluxe 4-49 The name of the RAID driver disk to locate the file txtsetup.oem. 6. 4.5.4 Using a USB floppy disk drive Due to OS limitation, Windows® XP may not recognize... the USB floppy disk drive when you to select the program for opening the oem file. Refer to the floppy disk containing the RAID driver. Browse the contents of the USB floppy disk drive varies with different vendors. 4.

User Manual
Page 169
Close all existing graphics card drivers before installing ATI CrossFireX graphics cards to your system. For Windows Vista, select Uninstall. 5. ASUS P6TD Deluxe 5-1 See Chapter 2 for details. • We recommend that you install additional chassis fans for the latest certified graphics .../Remove Programs. For Windows Vista, go to Control Panel > Programs and Features. 3. 5.1 ATI® CrossFireX™ technology The motherboard supports the ATI® CrossFireX™ technology that allows you should have to uninstall all current applications. 2. To uninstall existing graphics card...
Close all existing graphics card drivers before installing ATI CrossFireX graphics cards to your system. For Windows Vista, select Uninstall. 5. ASUS P6TD Deluxe 5-1 See Chapter 2 for details. • We recommend that you install additional chassis fans for the latest certified graphics .../Remove Programs. For Windows Vista, go to Control Panel > Programs and Features. 3. 5.1 ATI® CrossFireX™ technology The motherboard supports the ATI® CrossFireX™ technology that allows you should have to uninstall all current applications. 2. To uninstall existing graphics card...


