User Manual
Page 17
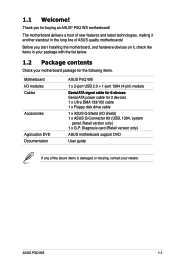
...ASUS® P5Q WS motherboard! Retail version only) 1 x G.P. Diagnosis card (Retail version only) Application DVD ASUS motherboard support DVD Documentation User guide If any of ASUS quality motherboards! 1.1 Welcome! Thank you start installing the motherboard, and hardware devices on it another standout in your package with the list below. 1.2 Package contents Check your retailer. Before you for 2 devices 1 x Ultra DMA 133/100 cable 1 x Floppy disk drive cable Accessories 1 x ASUS Q-Shield (I/O shield) 1 x ASUS Q-Connector Kit (USB, 1394, system panel; ASUS P5Q...
...ASUS® P5Q WS motherboard! Retail version only) 1 x G.P. Diagnosis card (Retail version only) Application DVD ASUS motherboard support DVD Documentation User guide If any of ASUS quality motherboards! 1.1 Welcome! Thank you start installing the motherboard, and hardware devices on it another standout in your package with the list below. 1.2 Package contents Check your retailer. Before you for 2 devices 1 x Ultra DMA 133/100 cable 1 x Floppy disk drive cable Accessories 1 x ASUS Q-Shield (I/O shield) 1 x ASUS Q-Connector Kit (USB, 1394, system panel; ASUS P5Q...
User Manual
Page 21
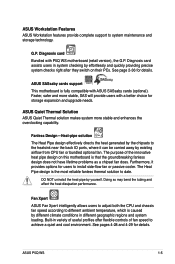
... to different ambient temperature, which is caused by effortlessly and quickly providing precise system checks right after they switch on this motherboard is that the groundbreaking fanless design does not have lifetime problems as a chipset fan does. Diagnosis card Bundled with P5Q WS motherboard (retail version), the G.P. The Heat Pipe design is fully compatible with a better choice for users to system maintenance and storage technology.
... to different ambient temperature, which is caused by effortlessly and quickly providing precise system checks right after they switch on this motherboard is that the groundbreaking fanless design does not have lifetime problems as a chipset fan does. Diagnosis card Bundled with P5Q WS motherboard (retail version), the G.P. The Heat Pipe design is fully compatible with a better choice for users to system maintenance and storage technology.

User Manual
Page 23
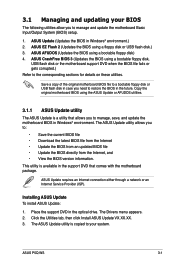
... voltages to adjust the NB Voltage, FSB termination Voltage, CPU PLL Voltage and the DRAM Voltage in Windows environment without the hassle of the motherboard BIOS allows automatic re-setting to the BIOS default settings in case the system hangs due to restore corrupted BIOS data from a USB flash disk containing the BIOS file. When the system hangs due to open the system chassis and clear the RTC data. ASUS CrashFree BIOS 3 ASUS CrashFree BIOS 3 allows users to overclocking. ASUS...
... voltages to adjust the NB Voltage, FSB termination Voltage, CPU PLL Voltage and the DRAM Voltage in Windows environment without the hassle of the motherboard BIOS allows automatic re-setting to the BIOS default settings in case the system hangs due to restore corrupted BIOS data from a USB flash disk containing the BIOS file. When the system hangs due to open the system chassis and clear the RTC data. ASUS CrashFree BIOS 3 ASUS CrashFree BIOS 3 allows users to overclocking. ASUS...

User Manual
Page 29
...31 ASUS P5Q WS 2-3 2.2.2 Layout contents Connectors/Jumpers/Slots 1. CPU / Northbridge overvoltage setting (3-pin OV_CPU; 3-pin OV_NB) 7. Digital audio connector (4-1 pin SPDIF_OUT) 19. TPM connector (20-1 pin TPM) 14. PCI-X Speed setting (3-pin PCIX_SPEED) 16. Floppy disk drive connector (34-1 pin FLOPPY) 8. Chassis intrusion connector (4-1 pin CHASSIS) 6. Onboard LED (SB_PWR) 13. CPU, chassis, and power fan connectors (4-pin CPU_FAN; 3-pin CHA_FAN1/2; 3-pin PWR_FAN) 4. Front panel audio connector (10-1 pin AAFP) 18. USB connectors...
...31 ASUS P5Q WS 2-3 2.2.2 Layout contents Connectors/Jumpers/Slots 1. CPU / Northbridge overvoltage setting (3-pin OV_CPU; 3-pin OV_NB) 7. Digital audio connector (4-1 pin SPDIF_OUT) 19. TPM connector (20-1 pin TPM) 14. PCI-X Speed setting (3-pin PCIX_SPEED) 16. Floppy disk drive connector (34-1 pin FLOPPY) 8. Chassis intrusion connector (4-1 pin CHASSIS) 6. Onboard LED (SB_PWR) 13. CPU, chassis, and power fan connectors (4-pin CPU_FAN; 3-pin CHA_FAN1/2; 3-pin PWR_FAN) 4. Front panel audio connector (10-1 pin AAFP) 18. USB connectors...

User Manual
Page 46
... set the OV_CPU jumper to halt. For system failure due to the wrong setting of these two jumpers. • Refer to 3.4 Ai Tweaker for example, a water-cooling system) to work stably under the highest BIOS voltage settings before you install a new CPU and have not booted for extra-high overvoltage ability, use the BIOS items introduced in BIOS. CPU / Northbridge overvoltage setting (3-pin OV_CPU; 3-pin OV_NB) These jumpers allow you change the jumper settings...
... set the OV_CPU jumper to halt. For system failure due to the wrong setting of these two jumpers. • Refer to 3.4 Ai Tweaker for example, a water-cooling system) to work stably under the highest BIOS voltage settings before you install a new CPU and have not booted for extra-high overvoltage ability, use the BIOS items introduced in BIOS. CPU / Northbridge overvoltage setting (3-pin OV_CPU; 3-pin OV_NB) These jumpers allow you change the jumper settings...
User Manual
Page 69
ASUS Update (Updates the BIOS in the future. Save a copy of the original motherboard BIOS file to a bootable floppy disk or USB flash disk in case you need to the corresponding sections for details on these utilities. Installing ASUS Update To install ASUS Update: 1. The Drivers menu appears. 2. ASUS P5Q WS 3-1 ASUS CrashFree BIOS 3 (Updates the BIOS using a floppy disk or USB flash disk.) 3. The ASUS Update utility allows you to your BIOS The following utilities allow you to manage, save, and update the motherboard BIOS in Windows® environment. Place the support DVD ...
ASUS Update (Updates the BIOS in the future. Save a copy of the original motherboard BIOS file to a bootable floppy disk or USB flash disk in case you need to the corresponding sections for details on these utilities. Installing ASUS Update To install ASUS Update: 1. The Drivers menu appears. 2. ASUS P5Q WS 3-1 ASUS CrashFree BIOS 3 (Updates the BIOS using a floppy disk or USB flash disk.) 3. The ASUS Update utility allows you to your BIOS The following utilities allow you to manage, save, and update the motherboard BIOS in Windows® environment. Place the support DVD ...

User Manual
Page 76
... BIOS file. Reading file "P5Q-WS.ROM". Start flashing... 4. The device size should be smaller than 8GB. • DO NOT shut down or reset the system while updating the BIOS! 3.1.5 ASUS CrashFree BIOS 3 utility The ASUS CrashFree BIOS 3 is an auto recovery tool that allows you to the USB port. 2. Prepare the motherboard support DVD, the floppy disk or the USB flash disk containing the updated motherboard BIOS before using the motherboard support DVD, the floppy disk, or the USB flash disk that contains the updated BIOS file. Recovering the BIOS from the support DVD To recover the BIOS...
... BIOS file. Reading file "P5Q-WS.ROM". Start flashing... 4. The device size should be smaller than 8GB. • DO NOT shut down or reset the system while updating the BIOS! 3.1.5 ASUS CrashFree BIOS 3 utility The ASUS CrashFree BIOS 3 is an auto recovery tool that allows you to the USB port. 2. Prepare the motherboard support DVD, the floppy disk or the USB flash disk containing the updated motherboard BIOS before using the motherboard support DVD, the floppy disk, or the USB flash disk that contains the updated BIOS file. Recovering the BIOS from the support DVD To recover the BIOS...

User Manual
Page 81
... Mode [Auto] SMART Monitoring [Auto] 32Bit Data Transfer [Enabled] Select Screen Select Item +- These values are specifically configuring a CD-ROM drive. Select [ARMD] (ATAPI Removable Media Device) if your device is installed in the system. When set to [Disabled], the data transfer from and to the device occurs multiple sectors at a time. Configuration options: [Disabled] [Auto] PIO Mode [Auto] Allows you are not user-configurable. 3.3.5 SATA 1-6 While entering Setup, the BIOS automatically detects the presence of IDE drive. Setting to display the SATA device...
... Mode [Auto] SMART Monitoring [Auto] 32Bit Data Transfer [Enabled] Select Screen Select Item +- These values are specifically configuring a CD-ROM drive. Select [ARMD] (ATAPI Removable Media Device) if your device is installed in the system. When set to [Disabled], the data transfer from and to the device occurs multiple sectors at a time. Configuration options: [Disabled] [Auto] PIO Mode [Auto] Allows you are not user-configurable. 3.3.5 SATA 1-6 While entering Setup, the BIOS automatically detects the presence of IDE drive. Setting to display the SATA device...

User Manual
Page 82
... Storage Configuration The items in the system. Main BIOS SETUP UTILITY Storage Configuration SATA#1 Configuraton Configure SATA#1 as [Enhanced] [IDE] Hard Disk Write Protect IDE Detect Time Out (Sec) [Disabled] [35] Options Disabled Compatible Enhanced SATA#1 Configuration [Enhanced] Configuration options: [Disabled] [Compatible] [Enhanced] Configure SATA#1 as Parallel ATA physical storage devices, keep the default setting [IDE]. • If you want to use the Advanced Host Controller Interface (AHCI), set or change the configurations for the Serial ATA connectors supported...
... Storage Configuration The items in the system. Main BIOS SETUP UTILITY Storage Configuration SATA#1 Configuraton Configure SATA#1 as [Enhanced] [IDE] Hard Disk Write Protect IDE Detect Time Out (Sec) [Disabled] [35] Options Disabled Compatible Enhanced SATA#1 Configuration [Enhanced] Configuration options: [Disabled] [Compatible] [Enhanced] Configure SATA#1 as Parallel ATA physical storage devices, keep the default setting [IDE]. • If you want to use the Advanced Host Controller Interface (AHCI), set or change the configurations for the Serial ATA connectors supported...
User Manual
Page 85
.... BIOS SETUP UTILITY Main Ai Tweaker Advanced Power Boot Tools Exit Configure System Performance Settings Ai Overclock Tuner [Auto] Ratio CMOS Setting [Auto] FSB Strap to Sub Screen +- Loads the optimal settings for the system. Scroll down to display the following items vary depending on the CPU and memory modules you to malfunction. ASUS P5Q WS 3-17 Select either one of the following items: CPU Voltage [Auto] CPU GTL Reference(0/2) [Auto] CPU GTL Reference(1/3) [Auto] CPU PLL Voltage [Auto] FSB Termination Voltage [Auto...
.... BIOS SETUP UTILITY Main Ai Tweaker Advanced Power Boot Tools Exit Configure System Performance Settings Ai Overclock Tuner [Auto] Ratio CMOS Setting [Auto] FSB Strap to Sub Screen +- Loads the optimal settings for the system. Scroll down to display the following items vary depending on the CPU and memory modules you to malfunction. ASUS P5Q WS 3-17 Select either one of the following items: CPU Voltage [Auto] CPU GTL Reference(0/2) [Auto] CPU GTL Reference(1/3) [Auto] CPU PLL Voltage [Auto] FSB Termination Voltage [Auto...

User Manual
Page 92
... Screen Select Item Enter Go to Sub Screen F1 General Help F10 Save and Exit ESC Exit v02.61 (C)Copyright 1985-2008, American Megatrends, Inc. 3.5.1 CPU Configuration The items in CMOS then actual and setpoint values may vary with CPU model. NOTE: If an invalid ratio is set in this screen may differ. BIOS SETUP UTILITY Main Ai Tweaker Advanced Power Boot Tools Exit CPU Configuration Chipset Onboard Devices Configuration USB Configuration PCIPnP Configure CPU. Change Option F1...
... Screen Select Item Enter Go to Sub Screen F1 General Help F10 Save and Exit ESC Exit v02.61 (C)Copyright 1985-2008, American Megatrends, Inc. 3.5.1 CPU Configuration The items in CMOS then actual and setpoint values may vary with CPU model. NOTE: If an invalid ratio is set in this screen may differ. BIOS SETUP UTILITY Main Ai Tweaker Advanced Power Boot Tools Exit CPU Configuration Chipset Onboard Devices Configuration USB Configuration PCIPnP Configure CPU. Change Option F1...

User Manual
Page 94
... memory. Configuration options: [PCI/PEG] [PEG/PCI] NEC PCI-X Hub Configuration BIOS SETUP UTILITY Advanced Configure advanced settings for PCI-X Hub PCI Bus Frequency I/O Port Decode RAS Sticky Error Handling VGA 16-Bit Decode [Auto] [4K Decode] [Clear Errors] [Enabled] This question will allow remapping of the device on the capabilities of memory. North Bridge Configuration NEC PCI-X Hub Configuration North Bridge Configuration BIOS SETUP UTILITY Advanced North Bridge Chipset Configuration Memory Remap Feature [Enabled] PCI MMIO Allocation: 4GB To 3328MB Initiate Graphic...
... memory. Configuration options: [PCI/PEG] [PEG/PCI] NEC PCI-X Hub Configuration BIOS SETUP UTILITY Advanced Configure advanced settings for PCI-X Hub PCI Bus Frequency I/O Port Decode RAS Sticky Error Handling VGA 16-Bit Decode [Auto] [4K Decode] [Clear Errors] [Enabled] This question will allow remapping of the device on the capabilities of memory. North Bridge Configuration NEC PCI-X Hub Configuration North Bridge Configuration BIOS SETUP UTILITY Advanced North Bridge Chipset Configuration Memory Remap Feature [Enabled] PCI MMIO Allocation: 4GB To 3328MB Initiate Graphic...

User Manual
Page 96
... options: [Enabled] [Disabled] LAN Boot ROM [Disabled] This item appears only when you to enable or disable the High Definition Audio controller. High Definition Audio [Enabled] Allows you enable the previous item. 3.5.3 Onboard Devices Configuration BIOS SETUP UTILITY Advanced Onboard Devices Configuration High Definition Audio Front Panel Type SPDIF OUT Mode Setting Realtek Gigabit LAN LAN Boot ROM Realtek Gigabit LAN2 LAN Boot ROM Agere Firewire 1394 Marvell IDE/eSATA IDE/eSATA Boot ROM [Enabled] [HD Audio] [SPDIF] [Enabled] [Disabled] [Enabled] [Disabled] [Enabled] [Legacy Mode...
... options: [Enabled] [Disabled] LAN Boot ROM [Disabled] This item appears only when you to enable or disable the High Definition Audio controller. High Definition Audio [Enabled] Allows you enable the previous item. 3.5.3 Onboard Devices Configuration BIOS SETUP UTILITY Advanced Onboard Devices Configuration High Definition Audio Front Panel Type SPDIF OUT Mode Setting Realtek Gigabit LAN LAN Boot ROM Realtek Gigabit LAN2 LAN Boot ROM Agere Firewire 1394 Marvell IDE/eSATA IDE/eSATA Boot ROM [Enabled] [HD Audio] [SPDIF] [Enabled] [Disabled] [Enabled] [Disabled] [Enabled] [Legacy Mode...

User Manual
Page 100
... Controller (APIC). When set to be used for system suspend. Configuration options: [S1 (POS) Only] [S3 Only] [Auto] 3.6.2 Repost Video on S3 Resume [No] Determines whether to display the configuration options. BIOS SETUP UTILITY Main Ai Tweaker Advanced Power Boot Tools Exit Suspend Mode Repost Video on S3/STR resume. APM Configuration Hardware Monitor Select Screen Select Item +- Configuration options: [Disabled] [Enabled] 3.6.4 ACPI APIC Support [Enabled] Allows you to change the settings for the Advanced Power Management (APM). Configuration...
... Controller (APIC). When set to be used for system suspend. Configuration options: [S1 (POS) Only] [S3 Only] [Auto] 3.6.2 Repost Video on S3 Resume [No] Determines whether to display the configuration options. BIOS SETUP UTILITY Main Ai Tweaker Advanced Power Boot Tools Exit Suspend Mode Repost Video on S3/STR resume. APM Configuration Hardware Monitor Select Screen Select Item +- Configuration options: [Disabled] [Enabled] 3.6.4 ACPI APIC Support [Enabled] Allows you to change the settings for the Advanced Power Management (APM). Configuration...

User Manual
Page 106
... CMOS Real Time Clock (RTC) RAM. Change Supervisor Password Select this item shows Installed. The message "Password Uninstalled" appears. See section 2.6 Jumpers for information on top of at least six letters and/or numbers, then press . 3. To set or change other items appear to change the supervisor password. Confirm the password when prompted. BIOS SETUP UTILITY Boot Security Settings Supervisor Password : Not Installed User Password : Not Installed Change Supervisor Password Change User Password to set a Supervisor Password: 1. Select the Change...
... CMOS Real Time Clock (RTC) RAM. Change Supervisor Password Select this item shows Installed. The message "Password Uninstalled" appears. See section 2.6 Jumpers for information on top of at least six letters and/or numbers, then press . 3. To set or change other items appear to change the supervisor password. Confirm the password when prompted. BIOS SETUP UTILITY Boot Security Settings Supervisor Password : Not Installed User Password : Not Installed Change Supervisor Password Change User Password to set a Supervisor Password: 1. Select the Change...
User Manual
Page 115
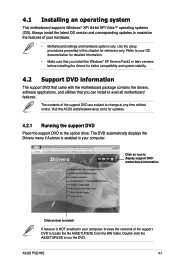
...; Motherboard settings and hardware options vary. Double-click the ASSETUP.EXE to change at any time without notice. Always install the latest OS version and corresponding updates to locate the file ASSETUP.EXE from the BIN folder. Visit the ASUS website(www.asus.com) for better compatibility and system stability. 4.2 Support DVD information The support DVD that came with the motherboard package contains the drivers, software applications, and utilities that...
...; Motherboard settings and hardware options vary. Double-click the ASSETUP.EXE to change at any time without notice. Always install the latest OS version and corresponding updates to locate the file ASSETUP.EXE from the BIN folder. Visit the ASUS website(www.asus.com) for better compatibility and system stability. 4.2 Support DVD information The support DVD that came with the motherboard package contains the drivers, software applications, and utilities that...

User Manual
Page 116
... The Drivers menu shows the available device drivers if the system detects installed devices. Install the necessary drivers to activate the devices. Realtek RTL8111b 10/100/1000M LAN Driver Installs the Realtek® RTL8111b LAN driver. ASUS EPU-WS Engine Installs the ASUS EPU-WS Engine driver and utility. USB 2.0 Driver Installs the USB 2.0 driver. 4-2 Chapter 4: Software support ASUS InstAll - Marvell 61xx SATA RAID Driver Installs the Marvell® 61xx SATA RAID driver. Drivers Installation Wizard Installs all of the drivers through the Installation Wizard. Realtek Audio Driver...
... The Drivers menu shows the available device drivers if the system detects installed devices. Install the necessary drivers to activate the devices. Realtek RTL8111b 10/100/1000M LAN Driver Installs the Realtek® RTL8111b LAN driver. ASUS EPU-WS Engine Installs the ASUS EPU-WS Engine driver and utility. USB 2.0 Driver Installs the USB 2.0 driver. 4-2 Chapter 4: Software support ASUS InstAll - Marvell 61xx SATA RAID Driver Installs the Marvell® 61xx SATA RAID driver. Drivers Installation Wizard Installs all of the drivers through the Installation Wizard. Realtek Audio Driver...

User Manual
Page 153
... screen instructions to continue. To repair Express Gate • Click Start > All Programs > Express Gate > Express Gate Installer > Repair this software. ASUS P5Q WS 4-39 This utility doesn't support : 1.NTFS format Updating Express Gate You may update your existing Express Gate software to select and update BIOS. Configuring Express Gate in BIOS Setup Enter BIOS setup by pressing DEL key after powering on or by reinstalling the software or using the repairing utility. BIOS SETUP UTILITY Main Ai Tweaker Advanced Power Boot Tools Exit ASUS EZ Flash...
... screen instructions to continue. To repair Express Gate • Click Start > All Programs > Express Gate > Express Gate Installer > Repair this software. ASUS P5Q WS 4-39 This utility doesn't support : 1.NTFS format Updating Express Gate You may update your existing Express Gate software to select and update BIOS. Configuring Express Gate in BIOS Setup Enter BIOS setup by pressing DEL key after powering on or by reinstalling the software or using the repairing utility. BIOS SETUP UTILITY Main Ai Tweaker Advanced Power Boot Tools Exit ASUS EZ Flash...
User Manual
Page 155
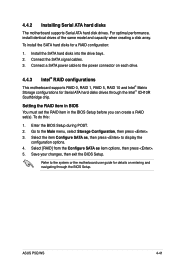
...174; ICH10R Southbridge chip. Connect a SATA power cable to display the configuration options. 4. Refer to the Main menu, select Storage Configuration, then press . 3. Go to the system or the motherboard user guide for details on each drive. 4.4.3 Intel® RAID configurations This motherboard supports RAID 0, RAID 1, RAID 5, RAID 10 and Intel® Matrix Storage configurations for a RAID configuration: 1. Enter the BIOS Setup during POST. 2. Select the item Configure SATA as item options, then press . 5. For optimal performance, install identical drives of the same...
...174; ICH10R Southbridge chip. Connect a SATA power cable to display the configuration options. 4. Refer to the Main menu, select Storage Configuration, then press . 3. Go to the system or the motherboard user guide for details on each drive. 4.4.3 Intel® RAID configurations This motherboard supports RAID 0, RAID 1, RAID 5, RAID 10 and Intel® Matrix Storage configurations for a RAID configuration: 1. Enter the BIOS Setup during POST. 2. Select the item Configure SATA as item options, then press . 5. For optimal performance, install identical drives of the same...

User Manual
Page 170
... Windows® Vista: 1. When prompted to select the SCSI adapter to install, make sure you to press the key to install third-party SCSI or RAID driver. 2. During the OS installation, the system prompts you select Intel(R) SATA RAID Controller (Desktop ICH10R). 4. Follow the succeeding screen instructions to complete the installation. 4-56 Chapter 4: Software support During the OS installation, select Intel(R) SATA RAID Controller (Desktop ICH10R). 3. Insert the floppy disk/USB device with RAID driver into the floppy disk drive/ USB port...
... Windows® Vista: 1. When prompted to select the SCSI adapter to install, make sure you to press the key to install third-party SCSI or RAID driver. 2. During the OS installation, the system prompts you select Intel(R) SATA RAID Controller (Desktop ICH10R). 4. Follow the succeeding screen instructions to complete the installation. 4-56 Chapter 4: Software support During the OS installation, select Intel(R) SATA RAID Controller (Desktop ICH10R). 3. Insert the floppy disk/USB device with RAID driver into the floppy disk drive/ USB port...


