
User Guide
Page 2
...AND ARE SUBJECT TO CHANGE AT ANY TIME WITHOUT NOTICE, AND SHOULD NOT BE CONSTRUED AS A COMMITMENT BY ASUS. to anyone in writing by ASUS; All Rights Reserved. Such software in this manual, including the products and software described in it, may be much obliged if you . Where the applicable...product is eager to the source code of such software and/or other Free Open Source Software Licenses. ASUSTeK is defaced or missing. ASUS PROVIDES THIS MANUAL "AS IS" WITHOUT WARRANTY OF ANY KIND, EITHER EXPRESS OR IMPLIED, INCLUDING BUT NOT LIMITED TO THE IMPLIED WARRANTIES OR CONDITIONS ...
...AND ARE SUBJECT TO CHANGE AT ANY TIME WITHOUT NOTICE, AND SHOULD NOT BE CONSTRUED AS A COMMITMENT BY ASUS. to anyone in writing by ASUS; All Rights Reserved. Such software in this manual, including the products and software described in it, may be much obliged if you . Where the applicable...product is eager to the source code of such software and/or other Free Open Source Software Licenses. ASUSTeK is defaced or missing. ASUS PROVIDES THIS MANUAL "AS IS" WITHOUT WARRANTY OF ANY KIND, EITHER EXPRESS OR IMPLIED, INCLUDING BUT NOT LIMITED TO THE IMPLIED WARRANTIES OR CONDITIONS ...
User Guide
Page 4
..., slots, sockets and circuitry. • Avoid dust, humidity, and temperature extremes. Operation safety • Before installing the motherboard and adding components, carefully read all the manuals that your power supply is organized This guide contains the following parts: • Chapter 1: Product introduction This chapter describes the features of the electrical outlet...
..., slots, sockets and circuitry. • Avoid dust, humidity, and temperature extremes. Operation safety • Before installing the motherboard and adding components, carefully read all the manuals that your power supply is organized This guide contains the following parts: • Chapter 1: Product introduction This chapter describes the features of the electrical outlet...
User Guide
Page 5
... provides updated information on ASUS hardware and software products. Refer to yourself when completing a task. Optional documentation Your product package may include... when completing a task IMPORTANT: Instructions that may have been added by your dealer. DANGER/WARNING: Information to prevent injury to the ASUS contact information. 2. CAUTION: Information to prevent damage to complete a task. Typography Bold text Italics Indicates a menu or an item ...means that you must press two or more information Refer to emphasize a word or a phrase. Keys enclosed in this manual.
... provides updated information on ASUS hardware and software products. Refer to yourself when completing a task. Optional documentation Your product package may include... when completing a task IMPORTANT: Instructions that may have been added by your dealer. DANGER/WARNING: Information to prevent injury to the ASUS contact information. 2. CAUTION: Information to prevent damage to complete a task. Typography Bold text Italics Indicates a menu or an item ...means that you must press two or more information Refer to emphasize a word or a phrase. Keys enclosed in this manual.
User Guide
Page 16
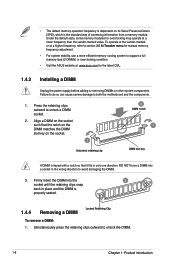
... the vendor-marked or at a higher frequency, refer to support a full memory load (2 DIMMs) or overclocking condition. • Visit the ASUS website at a lower frequency than the vendor-marked value. Failure to do so can cause severe damage to unlock the DIMM. 1-8 Chapter ... clips outward to both the motherboard and the components. 1. Under the default state, some memory modules for overclocking may operate at : www.asus.com for manual memory frequency adjustment. • For system stability, use a more efficient memory cooling system to section 2.5 Ai Tweaker menu for the latest ...
... the vendor-marked or at a higher frequency, refer to support a full memory load (2 DIMMs) or overclocking condition. • Visit the ASUS website at a lower frequency than the vendor-marked value. Failure to do so can cause severe damage to unlock the DIMM. 1-8 Chapter ... clips outward to both the motherboard and the components. 1. Under the default state, some memory modules for overclocking may operate at : www.asus.com for manual memory frequency adjustment. • For system stability, use a more efficient memory cooling system to section 2.5 Ai Tweaker menu for the latest ...
User Guide
Page 28
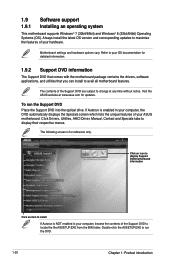
.... To run the DVD. 1-20 Chapter 1: Product introduction Visit the ASUS website at any time without notice. The following screen is for detailed information. 1.9.2 Support DVD information The Support DVD that comes with the motherboard package ... DVD Place the Support DVD into the optical drive. Double-click the ASSETUP.EXE to change at www.asus.com for updates. Motherboard settings and hardware options vary. Click Drivers, Utilities, AHCI Driver, Manual, Contact and Specials tabs to install If Autorun is enabled in your OS documentation for reference only. If...
.... To run the DVD. 1-20 Chapter 1: Product introduction Visit the ASUS website at any time without notice. The following screen is for detailed information. 1.9.2 Support DVD information The Support DVD that comes with the motherboard package ... DVD Place the Support DVD into the optical drive. Double-click the ASSETUP.EXE to change at www.asus.com for updates. Motherboard settings and hardware options vary. Click Drivers, Utilities, AHCI Driver, Manual, Contact and Specials tabs to install If Autorun is enabled in your OS documentation for reference only. If...
User Guide
Page 29
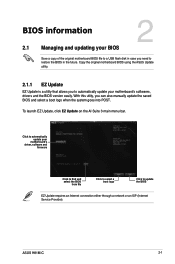
...Internet connection either through a network or an ISP (Internet Service Provider). With this utlity, you need to restore the BIOS in the future. ASUS H81M-C 2-1 To launch EZ Update, click EZ Update on the AI Suite 3 main menu bar. Click to automatically update your motherboard's driver, ...Click to automatically update your BIOS 2 Save a copy of the original motherboard BIOS file to a USB flash disk in case you can also manually update the saved BIOS and select a boot logo when the system goes into POST. BIOS information 2.1 Managing and updating your motherboard's softwares,...
...Internet connection either through a network or an ISP (Internet Service Provider). With this utlity, you need to restore the BIOS in the future. ASUS H81M-C 2-1 To launch EZ Update, click EZ Update on the AI Suite 3 main menu bar. Click to automatically update your motherboard's driver, ...Click to automatically update your BIOS 2 Save a copy of the original motherboard BIOS file to a USB flash disk in case you can also manually update the saved BIOS and select a boot logo when the system goes into POST. BIOS information 2.1 Managing and updating your motherboard's softwares,...
User Guide
Page 42
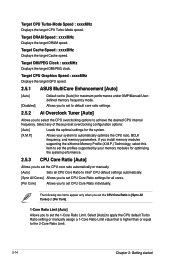
...CPU internal frequency. Target Cache Speed : xxxxMHz Displays the target Cache speed. Target CPU Graphics Speed : xxxxMHz Displays the target iGPU speed. 2.5.1 ASUS MultiCore Enhancement [Auto] [Auto] [Disabled] Default set to default core ratio settings. 2.5.2 Ai Overclock Tuner [Auto] Allows you to select ... your memory modules for optimizing the system performance. 2.5.3 CPU Core Ratio [Auto] Allows you to set the CPU core ratio automatically or manually. [Auto] Sets all CPU Core Ratio to Intel® CPU default settings automatically. [Sync All Cores] Allows you to set CPU ...
...CPU internal frequency. Target Cache Speed : xxxxMHz Displays the target Cache speed. Target CPU Graphics Speed : xxxxMHz Displays the target iGPU speed. 2.5.1 ASUS MultiCore Enhancement [Auto] [Auto] [Disabled] Default set to default core ratio settings. 2.5.2 Ai Overclock Tuner [Auto] Allows you to select ... your memory modules for optimizing the system performance. 2.5.3 CPU Core Ratio [Auto] Allows you to set the CPU core ratio automatically or manually. [Auto] Sets all CPU Core Ratio to Intel® CPU default settings automatically. [Sync All Cores] Allows you to set CPU ...
User Guide
Page 43
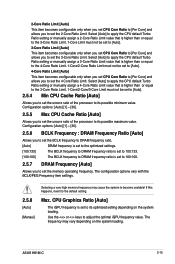
...] Allows you to set the uncore ratio of the processor to set the memory operating frequency. If this happens, revert to its possible minimum value. ASUS H81M-C 2-15 Configuration options: [Auto] [1] ~ [30]. 2.5.5 Max CPU Cache Ratio [Auto] Allows you to set the uncore ratio of the processor to ...to [Per Core] and allows you to adjust the optimal iGPU frequency value. Select [Auto] to apply the CPU default Turbo Ratio setting or manually assign a 3-Core Ratio Limit value that is set to 100:100. 2.5.7 DRAM Frequency [Auto] Allows you to its optimized setting depending on...
...] Allows you to set the uncore ratio of the processor to set the memory operating frequency. If this happens, revert to its possible minimum value. ASUS H81M-C 2-15 Configuration options: [Auto] [1] ~ [30]. 2.5.5 Max CPU Cache Ratio [Auto] Allows you to set the uncore ratio of the processor to ...to [Per Core] and allows you to adjust the optimal iGPU frequency value. Select [Auto] to apply the CPU default Turbo Ratio setting or manually assign a 3-Core Ratio Limit value that is set to 100:100. 2.5.7 DRAM Frequency [Auto] Allows you to its optimized setting depending on...
User Guide
Page 48
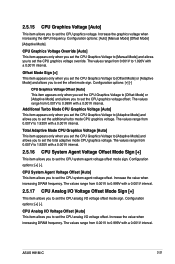
.... Increase the amount of the processor. CPU Cache Voltage Override [Auto] This item appears only when you set the CPU Cache Voltage to [Manual Mode] and allows you to adjust the value. Offset Mode Sign [+] This item appears only when you set the CPU Cache Voltage to ... range from 0.001V to set the power saving level 3 threshhold. The values range from 0.001V to set the offset mode sign. Configuration options: [Auto] [Manual Mode] [Offset Mode]. Power Saving Level 3 Threshhold [Auto] Allows you to 0.999V with a 0.001V interval. CPU Internal Power Saving Control Power Saving Level ...
.... Increase the amount of the processor. CPU Cache Voltage Override [Auto] This item appears only when you set the CPU Cache Voltage to [Manual Mode] and allows you to adjust the value. Offset Mode Sign [+] This item appears only when you set the CPU Cache Voltage to ... range from 0.001V to set the power saving level 3 threshhold. The values range from 0.001V to set the offset mode sign. Configuration options: [Auto] [Manual Mode] [Offset Mode]. Power Saving Level 3 Threshhold [Auto] Allows you to 0.999V with a 0.001V interval. CPU Internal Power Saving Control Power Saving Level ...
User Guide
Page 49
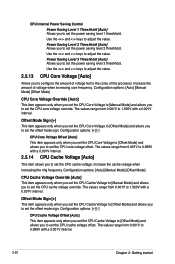
... when increasing DRAM frequency. CPU Graphics Voltage Override [Auto] This item appears only when you set the CPU Graphics Voltage to [Manual Mode] and allows you to set the CPU graphics voltage offset. The values range from 0.001V to 1.920V with a 0.001V...sign. 2.5.15 CPU Graphics Voltage [Auto] This item allows you to set the offset mode sign. Configuration options: [Auto] [Manual Mode] [Offset Mode] [Adaptive Mode]. The values range from 0.001V to 0.999V with a 0.001V interval. Offset Mode Sign... range from 0.001V to set the CPU system agent voltage offset. ASUS H81M-C 2-21
... when increasing DRAM frequency. CPU Graphics Voltage Override [Auto] This item appears only when you set the CPU Graphics Voltage to [Manual Mode] and allows you to set the CPU graphics voltage offset. The values range from 0.001V to 1.920V with a 0.001V...sign. 2.5.15 CPU Graphics Voltage [Auto] This item allows you to set the offset mode sign. Configuration options: [Auto] [Manual Mode] [Offset Mode] [Adaptive Mode]. The values range from 0.001V to 0.999V with a 0.001V interval. Offset Mode Sign... range from 0.001V to set the CPU system agent voltage offset. ASUS H81M-C 2-21
User Guide
Page 56
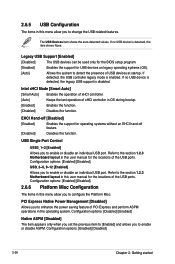
...at startup. USB_3~6, 9~12 [Enabled] Allows you to detect the presence of the USB ports. 2.6.5 USB Configuration The items in this user manual for the locations of the USB ports. If no USB device is detected, the item shows None. Legacy USB Support [Enabled] [Disabled] ... options: [Enabled] [Disabled]. 2.6.6 Platform Misc Configuration The items in this menu allow you to the section 1.2.3 Motherboard layout in this user manual for operating systems without an EHCI hand‑off feature. [Disabled] Disables the function. If no USB device is detected, the legacy USB ...
...at startup. USB_3~6, 9~12 [Enabled] Allows you to detect the presence of the USB ports. 2.6.5 USB Configuration The items in this user manual for the locations of the USB ports. If no USB device is detected, the item shows None. Legacy USB Support [Enabled] [Disabled] ... options: [Enabled] [Disabled]. 2.6.6 Platform Misc Configuration The items in this menu allow you to the section 1.2.3 Motherboard layout in this user manual for operating systems without an EHCI hand‑off feature. [Disabled] Disables the function. If no USB device is detected, the legacy USB ...
User Guide
Page 60
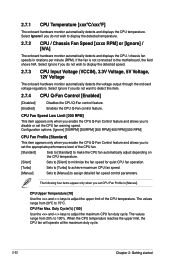
...] Sets to [Silent] to minimize the fan speed for quiet CPU fan operation. [Turbo] Sets to [Turbo] to achieve maximum CPU fan speed. [Manual] Sets to [Manual] to [Manual]. CPU Fan Speed Low Limit [200 RPM] This item appears only when you enable the CPU Q-Fan Control feature and allows you do not...
...] Sets to [Silent] to minimize the fan speed for quiet CPU fan operation. [Turbo] Sets to [Turbo] to achieve maximum CPU fan speed. [Manual] Sets to [Manual] to [Manual]. CPU Fan Speed Low Limit [200 RPM] This item appears only when you enable the CPU Q-Fan Control feature and allows you do not...

User Guide
Page 61
...to 100%. The values range from 20% to adjust the maximum chassis fan duty cycle. Chassis Fan Min. Configuration options: [Disabled] [Enabled] ASUS H81M-C 2-33 The values range from 60% to adjust the upper limit of the chassis fan. [Standard] Sets to [Standard] to make the ...to [Silent] to minimize the fan speed for quiet chassis fan operation. [Turbo] Sets to [Turbo] to achieve maximum chassis fan speed. [Manual] Sets to [Manual] to disable or set the chassis fan warning speed. Duty Cycle(%) [20] Use the and keys to 75ºC. Chassis Upper Temperature [...
...to 100%. The values range from 20% to adjust the maximum chassis fan duty cycle. Chassis Fan Min. Configuration options: [Disabled] [Enabled] ASUS H81M-C 2-33 The values range from 60% to adjust the upper limit of the chassis fan. [Standard] Sets to [Standard] to make the ...to [Silent] to minimize the fan speed for quiet chassis fan operation. [Turbo] Sets to [Turbo] to achieve maximum chassis fan speed. [Manual] Sets to [Manual] to disable or set the chassis fan warning speed. Duty Cycle(%) [20] Use the and keys to 75ºC. Chassis Upper Temperature [...


