
Service Guide
Page 4
This table shows the iBook G4 (14-inch Early 2004) configurations at initial product introduction: Configuration Education* Good* Display Size 12.1 inch 12.1 inch Video RAM 32 VRAM 32 VRAM Processor 800 MHz 800 MHz Optical Drive CD-ROM Combo (DVDROM/CD-RW) Hard Drive 30 GB 30 GB Memory 128 MB RAM 256... MB RAM Better 14.1 inch 32 VRAM 933 MHz Combo (DVDROM/CD-RW) 40 GB 256 MB RAM Best 14.1 inch 32 VRAM 1 GHz Combo (DVDROM/CD-RW) 60 GB 256 MB RAM * For servicing the 12.1-inch models, refer to the iBook G4 service manual. 3 - The...
This table shows the iBook G4 (14-inch Early 2004) configurations at initial product introduction: Configuration Education* Good* Display Size 12.1 inch 12.1 inch Video RAM 32 VRAM 32 VRAM Processor 800 MHz 800 MHz Optical Drive CD-ROM Combo (DVDROM/CD-RW) Hard Drive 30 GB 30 GB Memory 128 MB RAM 256... MB RAM Better 14.1 inch 32 VRAM 933 MHz Combo (DVDROM/CD-RW) 40 GB 256 MB RAM Best 14.1 inch 32 VRAM 1 GHz Combo (DVDROM/CD-RW) 60 GB 256 MB RAM * For servicing the 12.1-inch models, refer to the iBook G4 service manual. 3 - The...

Service Guide
Page 27
Part Location Preliminary Steps Before you begin, remove the following: • Battery • Keyboard and RAM shield (but do not disconnect the keyboard cable) • AirPort Extreme Card Memory Card iBook G4 (14-inch) Take Apart - 26 Only install memory cards that are approved for this computer. Tools The only tool required for this procedure is a small soft cloth (if an optional AirPort Extreme Card is installed). Memory Card Warning: Memory cards come in various specifications.
Part Location Preliminary Steps Before you begin, remove the following: • Battery • Keyboard and RAM shield (but do not disconnect the keyboard cable) • AirPort Extreme Card Memory Card iBook G4 (14-inch) Take Apart - 26 Only install memory cards that are approved for this computer. Tools The only tool required for this procedure is a small soft cloth (if an optional AirPort Extreme Card is installed). Memory Card Warning: Memory cards come in various specifications.

Service Guide
Page 28
Carefully spread the brackets away from the notches in the card until the card releases on both sides. 2. Pull the card up and out of the memory slot. 27 - iBook G4 (14-inch) Take Apart Memory Card Locate the installed memory card and brackets that secure the card on each side. 3. Procedure 1.
Carefully spread the brackets away from the notches in the card until the card releases on both sides. 2. Pull the card up and out of the memory slot. 27 - iBook G4 (14-inch) Take Apart Memory Card Locate the installed memory card and brackets that secure the card on each side. 3. Procedure 1.

Service Guide
Page 29
...is firmly seated. Pressing on nearby connectors or components can cause electrical damage. 6. Memory Card iBook G4 (14-inch) Take Apart - 28 Align the notch in the replacement memory card with the small tab in the memory slot. Gently push the top of the card down until it into the slot until the... brackets snap onto both sides of the memory card to the memory card only. Note: If ...
...is firmly seated. Pressing on nearby connectors or components can cause electrical damage. 6. Memory Card iBook G4 (14-inch) Take Apart - 28 Align the notch in the replacement memory card with the small tab in the memory slot. Gently push the top of the card down until it into the slot until the... brackets snap onto both sides of the memory card to the memory card only. Note: If ...

Service Guide
Page 50
• Memory • Bottom case • Bottom shield • DC-in the order shown. 49 - iBook G4 (14-inch) Take Apart Top Case With the computer on a soft cloth, remove the following screws: • Three 4.5-mm long screws with beveled heads at optical drive slot-load area • Three 3.5-mm long screws • Four 14.5-mm long screws • One 12-mm long screw Replacement Note: When replacing the screws, install them in board Procedure 1.
• Memory • Bottom case • Bottom shield • DC-in the order shown. 49 - iBook G4 (14-inch) Take Apart Top Case With the computer on a soft cloth, remove the following screws: • Three 4.5-mm long screws with beveled heads at optical drive slot-load area • Three 3.5-mm long screws • Four 14.5-mm long screws • One 12-mm long screw Replacement Note: When replacing the screws, install them in board Procedure 1.

Service Guide
Page 58
iBook G4 (14-inch) Take Apart Sleep Light Board Sleep Light Board Tools • Soft cloth • #0 Phillips screwdriver • Black stick (or other nonconductive nylon or plastic tool) Part Location Preliminary Steps Before you begin, remove the following: • Battery • Keyboard and RAM shield • AirPort Extreme Card • Memory card • Bottom case • Bottom shield • DC-in board • Top case 57 -
iBook G4 (14-inch) Take Apart Sleep Light Board Sleep Light Board Tools • Soft cloth • #0 Phillips screwdriver • Black stick (or other nonconductive nylon or plastic tool) Part Location Preliminary Steps Before you begin, remove the following: • Battery • Keyboard and RAM shield • AirPort Extreme Card • Memory card • Bottom case • Bottom shield • DC-in board • Top case 57 -
Service Guide
Page 61
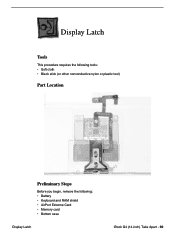
Display Latch Tools This procedure requires the following tools: • Soft cloth • Black stick (or other nonconductive nylon or plastic tool) Part Location Preliminary Steps Before you begin, remove the following: • Battery • Keyboard and RAM shield • AirPort Extreme Card • Memory card • Bottom case Display Latch iBook G4 (14-inch) Take Apart - 60
Display Latch Tools This procedure requires the following tools: • Soft cloth • Black stick (or other nonconductive nylon or plastic tool) Part Location Preliminary Steps Before you begin, remove the following: • Battery • Keyboard and RAM shield • AirPort Extreme Card • Memory card • Bottom case Display Latch iBook G4 (14-inch) Take Apart - 60

Service Guide
Page 66
With the computer on a soft cloth, remove the following Phillips screws: • Two 4.5-mm long screw • Thirteen 3-mm long screws 65 - iBook G4 (14-inch) Take Apart Top Shield • Memory card • Bottom case • Bottom shield • DC-in board • Top case Procedure 1.
With the computer on a soft cloth, remove the following Phillips screws: • Two 4.5-mm long screw • Thirteen 3-mm long screws 65 - iBook G4 (14-inch) Take Apart Top Shield • Memory card • Bottom case • Bottom shield • DC-in board • Top case Procedure 1.
Service Guide
Page 70
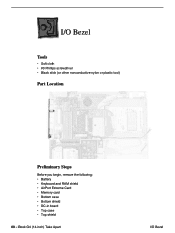
iBook G4 (14-inch) Take Apart I /O Bezel Tools • Soft cloth • #0 Phillips screwdriver • Black stick (or other nonconductive nylon or plastic tool) Part Location Preliminary Steps Before you begin, remove the following: • Battery • Keyboard and RAM shield • AirPort Extreme Card • Memory card • Bottom case • Bottom shield • DC-in board • Top case • Top shield 69 - I /O Bezel
iBook G4 (14-inch) Take Apart I /O Bezel Tools • Soft cloth • #0 Phillips screwdriver • Black stick (or other nonconductive nylon or plastic tool) Part Location Preliminary Steps Before you begin, remove the following: • Battery • Keyboard and RAM shield • AirPort Extreme Card • Memory card • Bottom case • Bottom shield • DC-in board • Top case • Top shield 69 - I /O Bezel

Service Guide
Page 73
RJ11 Modem Cable Tools • Soft cloth • Black stick (or other nonconductive nylon or plastic tool) Part Location Preliminary Steps Before you begin, remove the following: • Battery • Keyboard and RAM shield • AirPort Extreme Card • Memory card • Bottom case • Bottom shield • DC-in board • Top case • Top shield • I/O bezel RJ11 Modem Cable iBook G4 (14-inch) Take Apart - 72
RJ11 Modem Cable Tools • Soft cloth • Black stick (or other nonconductive nylon or plastic tool) Part Location Preliminary Steps Before you begin, remove the following: • Battery • Keyboard and RAM shield • AirPort Extreme Card • Memory card • Bottom case • Bottom shield • DC-in board • Top case • Top shield • I/O bezel RJ11 Modem Cable iBook G4 (14-inch) Take Apart - 72

Service Guide
Page 75
Part Location Preliminary Steps Before you remove from the computer, use a tray with divided compartments (such as a plastic ice cube tray). Hard Drive Tools • Soft cloth • #0 Phillips screwdriver • Black stick (or other nonconductive nylon or plastic tool) • Torx T8 screwdriver Note: To organize the screws you begin, remove the following: • Battery • Keyboard and RAM shield • AirPort Extreme Card • Memory card • Bottom case Hard Drive iBook G4 (14-inch) Take Apart - 74
Part Location Preliminary Steps Before you remove from the computer, use a tray with divided compartments (such as a plastic ice cube tray). Hard Drive Tools • Soft cloth • #0 Phillips screwdriver • Black stick (or other nonconductive nylon or plastic tool) • Torx T8 screwdriver Note: To organize the screws you begin, remove the following: • Battery • Keyboard and RAM shield • AirPort Extreme Card • Memory card • Bottom case Hard Drive iBook G4 (14-inch) Take Apart - 74

Service Guide
Page 80
Modem: iBook G4 (14-inch) Tools • Soft cloth • #0 Phillips screwdriver • Black stick (or other nonconductive nylon or plastic tool) Part Location Preliminary Steps Before you begin, remove the following: • Battery • Keyboard and RAM shield • AirPort Extreme Card • Memory card • Bottom case • Bottom shield • DC-in board • Top case • Top shield 79 - iBook G4 (14-inch) Take Apart Modem: iBook G4 (14-inch)
Modem: iBook G4 (14-inch) Tools • Soft cloth • #0 Phillips screwdriver • Black stick (or other nonconductive nylon or plastic tool) Part Location Preliminary Steps Before you begin, remove the following: • Battery • Keyboard and RAM shield • AirPort Extreme Card • Memory card • Bottom case • Bottom shield • DC-in board • Top case • Top shield 79 - iBook G4 (14-inch) Take Apart Modem: iBook G4 (14-inch)

Service Guide
Page 84
iBook G4 (14-inch) Take Apart Modem: iBook G4 (14-inch Early 2004) Modem: iBook G4 (14-inch Early 2004) Tools • Soft cloth • #0 Phillips screwdriver • Black stick (or other nonconductive nylon or plastic tool) Part Location Preliminary Steps Before you begin, remove the following: • Battery • Keyboard and RAM shield • AirPort Extreme Card • Memory card • Bottom case • Bottom shield • DC-in board 83 -
iBook G4 (14-inch) Take Apart Modem: iBook G4 (14-inch Early 2004) Modem: iBook G4 (14-inch Early 2004) Tools • Soft cloth • #0 Phillips screwdriver • Black stick (or other nonconductive nylon or plastic tool) Part Location Preliminary Steps Before you begin, remove the following: • Battery • Keyboard and RAM shield • AirPort Extreme Card • Memory card • Bottom case • Bottom shield • DC-in board 83 -

Service Guide
Page 88
iBook G4 (14-inch) Take Apart Bluetooth Part Location Preliminary Steps Before you remove from the computer, use a tray with divided compartments (such as a plastic ice cube tray). Bluetooth Tools • Soft cloth • #0 Phillips screwdriver • Black stick (or other nonconductive nylon or plastic tool) Note: To organize the screws you begin, remove the following: • Battery • Keyboard and RAM shield • AirPort Extreme Card • Memory card • Bottom case • Bottom shield 87 -
iBook G4 (14-inch) Take Apart Bluetooth Part Location Preliminary Steps Before you remove from the computer, use a tray with divided compartments (such as a plastic ice cube tray). Bluetooth Tools • Soft cloth • #0 Phillips screwdriver • Black stick (or other nonconductive nylon or plastic tool) Note: To organize the screws you begin, remove the following: • Battery • Keyboard and RAM shield • AirPort Extreme Card • Memory card • Bottom case • Bottom shield 87 -

Service Guide
Page 91
Optical Drive iBook G4 (14-inch) Take Apart - 90 Move the Bluetooth antenna board aside. Preliminary Steps Before you begin, remove the following: • Battery • Keyboard and RAM shield • AirPort Extreme Card • Memory • Bottom case • Bottom shield • DC-in board • Top case • Top shield Procedure 1. With the computer on a soft cloth, peel up any tape on top of the optical drive. 2. Note: You do not need to remove the Bluetooth board.
Optical Drive iBook G4 (14-inch) Take Apart - 90 Move the Bluetooth antenna board aside. Preliminary Steps Before you begin, remove the following: • Battery • Keyboard and RAM shield • AirPort Extreme Card • Memory • Bottom case • Bottom shield • DC-in board • Top case • Top shield Procedure 1. With the computer on a soft cloth, peel up any tape on top of the optical drive. 2. Note: You do not need to remove the Bluetooth board.

Service Guide
Page 101
Preliminary Steps Before you begin, remove the following: • Battery • Keyboard and RAM shield • AirPort Extreme Card • Memory card • Bottom case • Bottom shield • DC-in board • Top case • Top shield • Modem Display Module iBook G4 (14-inch) Take Apart - 100
Preliminary Steps Before you begin, remove the following: • Battery • Keyboard and RAM shield • AirPort Extreme Card • Memory card • Bottom case • Bottom shield • DC-in board • Top case • Top shield • Modem Display Module iBook G4 (14-inch) Take Apart - 100

Service Guide
Page 107
Vent Cover Tools • Soft cloth • #0 Phillips screwdriver Part Location Vent Cover Preliminary Steps Before you begin, remove the following: • Battery • Keyboard and RAM shield • AirPort Extreme Card • Memory card • Bottom case • Bottom shield • DC-in board • Top case • Top shield • Modem • Display iBook G4 (14-inch) Take Apart - 106
Vent Cover Tools • Soft cloth • #0 Phillips screwdriver Part Location Vent Cover Preliminary Steps Before you begin, remove the following: • Battery • Keyboard and RAM shield • AirPort Extreme Card • Memory card • Bottom case • Bottom shield • DC-in board • Top case • Top shield • Modem • Display iBook G4 (14-inch) Take Apart - 106

Service Guide
Page 109
Heatsink: iBook G4 (14-inch) Tools • Soft cloth • #0 Phillips screwdriver • Black stick (or other nonconductive nylon or plastic tool) • 2.0 hex nut driver or needlenose pliers Part Location Preliminary Steps Before you begin, remove the following: • Battery • Keyboard and RAM shield • AirPort Extreme Card • Memory card • Bottom case • Bottom shield • DC-in board • Top case • Top shield Heatsink: iBook G4 (14-inch) iBook G4 (14-inch) Take Apart - 108
Heatsink: iBook G4 (14-inch) Tools • Soft cloth • #0 Phillips screwdriver • Black stick (or other nonconductive nylon or plastic tool) • 2.0 hex nut driver or needlenose pliers Part Location Preliminary Steps Before you begin, remove the following: • Battery • Keyboard and RAM shield • AirPort Extreme Card • Memory card • Bottom case • Bottom shield • DC-in board • Top case • Top shield Heatsink: iBook G4 (14-inch) iBook G4 (14-inch) Take Apart - 108

Service Guide
Page 115
Heatsink: iBook G4 (14-inch Early 2004) Tools • Soft cloth • #0 Phillips screwdriver • Black stick (or other nonconductive nylon or plastic tool) • 2.0 hex nut driver or needlenose pliers Part Location Preliminary Steps Before you begin, remove the following: • Battery • Keyboard and RAM shield • AirPort Extreme Card • Memory card Heatsink: iBook G4 (14-inch Early 2004) iBook G4 (14-inch) Take Apart - 114
Heatsink: iBook G4 (14-inch Early 2004) Tools • Soft cloth • #0 Phillips screwdriver • Black stick (or other nonconductive nylon or plastic tool) • 2.0 hex nut driver or needlenose pliers Part Location Preliminary Steps Before you begin, remove the following: • Battery • Keyboard and RAM shield • AirPort Extreme Card • Memory card Heatsink: iBook G4 (14-inch Early 2004) iBook G4 (14-inch) Take Apart - 114

Service Guide
Page 121
Fan: iBook G4 (14-inch) Tools • Soft cloth • #0 Phillips screwdriver • Black stick (or other nonconductive nylon or plastic tool) Part Location Preliminary Steps Before you begin, remove the following: • Battery • Keyboard and RAM shield • AirPort Extreme Card • Memory card • Bottom case • Bottom shield • DC-in board • Top case • Top shield • Display • Heatsink Fan: iBook G4 (14-inch) iBook G4 (14-inch) Take Apart - 120
Fan: iBook G4 (14-inch) Tools • Soft cloth • #0 Phillips screwdriver • Black stick (or other nonconductive nylon or plastic tool) Part Location Preliminary Steps Before you begin, remove the following: • Battery • Keyboard and RAM shield • AirPort Extreme Card • Memory card • Bottom case • Bottom shield • DC-in board • Top case • Top shield • Display • Heatsink Fan: iBook G4 (14-inch) iBook G4 (14-inch) Take Apart - 120