Owners Manual
Page 3
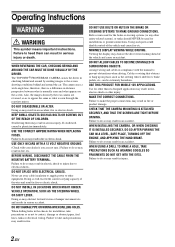
... CAMERA MOUNTING IS ATTACHED SECURELY, AND THAT THE SCREWS ARE TIGHT BEFORE DRIVING. USE ONLY IN CARS WITH A 12 VOLT NEGATIVE GROUND. (Check with the manual to other than its designed application may result in fire, electric shock or other safety-related system), or tanks should NEVER be extremely hazardous. The...
... CAMERA MOUNTING IS ATTACHED SECURELY, AND THAT THE SCREWS ARE TIGHT BEFORE DRIVING. USE ONLY IN CARS WITH A 12 VOLT NEGATIVE GROUND. (Check with the manual to other than its designed application may result in fire, electric shock or other safety-related system), or tanks should NEVER be extremely hazardous. The...
Owners Manual
Page 6
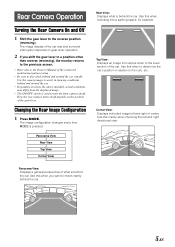
... the unit is behind the car. Top View: Displays an image from the displayed image. • The ON/OFF switch is used to the Owner's Manual of what is installed, actual conditions may differ from above down to the curb, etc. Use the camera image to assist in relation to the...
... the unit is behind the car. Top View: Displays an image from the displayed image. • The ON/OFF switch is used to the Owner's Manual of what is installed, actual conditions may differ from above down to the curb, etc. Use the camera image to assist in relation to the...
Owners Manual
Page 15
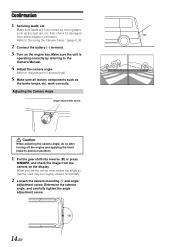
... view, adjust the angle so that the road may be roughly viewed horizontally. 2 Loosen the camera mounting 3 and angle adjustment screw. Refer to the Owner's Manual. 4 Adjust the camera angle. Refer to avoid an accident. 1 Put the gear shift into reverse (R) or press ON/OFF, and check the image from sharp...
... view, adjust the angle so that the road may be roughly viewed horizontally. 2 Loosen the camera mounting 3 and angle adjustment screw. Refer to the Owner's Manual. 4 Adjust the camera angle. Refer to avoid an accident. 1 Put the gear shift into reverse (R) or press ON/OFF, and check the image from sharp...